
[The above words are pictures of text, below is the actual text if you need to copy a paragraph or two]
FREEHAND AND PRACTICAL DESIGN
1. What is Freehand Drawing?
Freehand Drawing is done with the free hand. The hand should not only be unassisted by ruler, compass; etc., but: it should have plenty of room to move in any direction with perfect freedom. Tracing is not freehand drawing.
2. Position.
Seek to sit in a comfortable position. Keep the body fairly straight, but slightly inclined forward, so that the eyes are at the proper distance from the work to enable it to be seen to the greatest advantage. Give any support necessary with the left hand. Many recommend keeping the paper always in the same position—squarely in front. As a rule, we believe this is best. The paper may be turned to draw certain curves, so that the hand may form the centre. To prove the correctness of the work, it is a good plan sometimes to view the drawing with the paper in a different position.
3. Eye and Hand.
The eye, especially in drawing, plays a very important part in directing the movement of the hand. Hence it is of the greatest importance that the eye as well as the hand be well trained. The eye (a) to judge distance, (b) to distinguish form, (c) to see proportion, and the hand to obey promptly and accurately. Training the eye should precede training the hand, but at the same time we should strive persistently to train both to act in unison. During the whole of a course in drawing, we strongly recommend constant practice such as we have outlined.
4. Practice.
The following exercises are for the purpose of acquiring facility—the power to make the hand obey. You ought to learn to draw as you learn to write—to a certain extent automat'cally. We do not mean to say that you should be able to perform perfectly all the exercises here given before going any further. We merely submit them as sort of dumb-bell exercise to be taken frequently, in order to keep the hand and eye in proper condition.
Straight Lines.
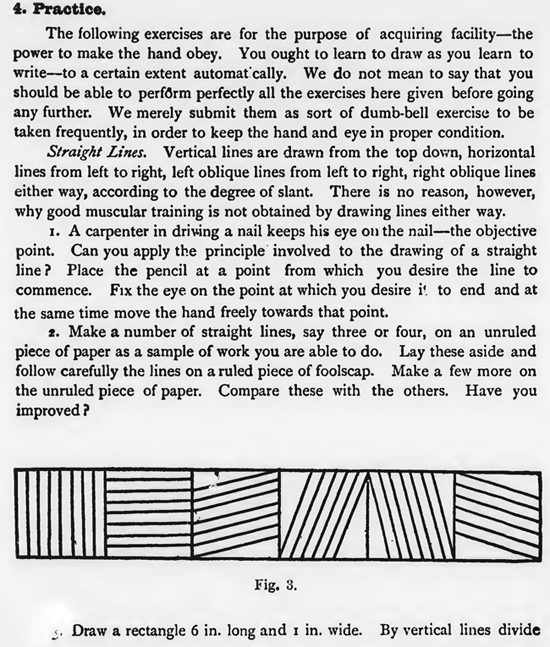
Vertical lines are drawn from the top down, horizontal lines from left to right, left oblique lines from left to right, right oblique lines either way, according to the degree of slant. There is no reason, however, why good muscular training is not obtained by drawing lines either way.
1. A carpenter in driving a nail keeps his eye on the nail—the objective point. Can you apply the principle involved to the drawing of a straight line ? Place the pencil at a point from which you desire the line to commence. Fix the eye on the point at which you desire it to end and at the same time move the hand freely towards that point.
2. Make a number of straight lines, say three or four, on an unruled piece of paper as a sample of work you are able to do. Lay these aside and follow carefully the lines on a ruled piece of foolscap. Make a few more on the unruled piece of paper. Compare these with the others. Have you improved?
Draw a rectangle 6 in. long and r in. wide. By vertical lines divide it into six squares. Fill the squares with parallel, vertical, horizontal and oblique lines.
Circles.
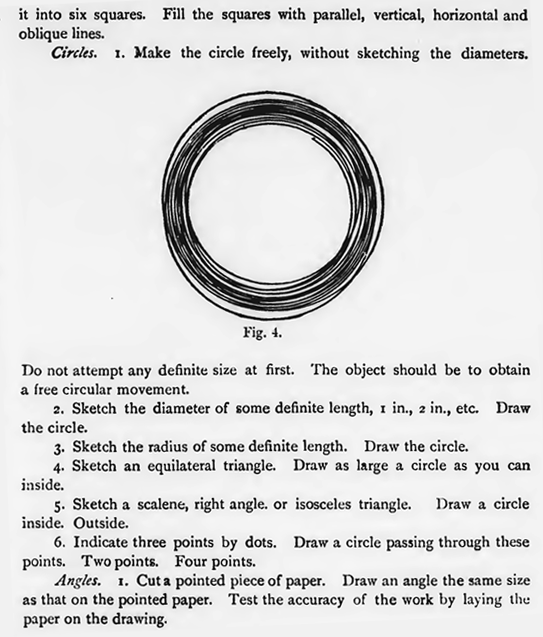
1. Make the circle freely, without sketching the diameters.
Do not attempt any definite size at first. The object should be to obtain a free circular movement.
2. Sketch the diameter of some definite length, i in., 2 in., etc. Draw the circle.
3. Sketch the radius of some definite length. Draw the circle.
4. Sketch an equilateral triangle. Draw as large a circle as you can inside.
5. Sketch a scalene, right angle. or isosceles triangle. Draw a circle
inside. Outside.
6. Indicate three points by dots. Draw a circle passing through these points. Two points. Four points.
Angles.
1. Cut a pointed piece of paper. Draw an angle the same size as that on the pointed paper. Test the accuracy of the work by laying the paper on the drawing.
2. Bend a piece of wire to form an angle. Draw an angle of the same size. Test the accuracy of the work as before. Change the size and try again.
Measuring.
It is not only good training but it is very necessary that you be able to measure accurately. Not only definite measurements as an inch, an inch and a half, etc., but proportionate measurements as well. Ruler and compass should be used only to test the accuracy of the work.
1. Draw a straight line 2 in. long, 3 in., 4 in., etc.
2. Draw a curve the ends of which are 2 in. apart, 3 in., 4% in., etc.
3. Draw a straight line of any length. A few inches from it draw
another line of the same length. Half as long. Twice as long.
4. Draw a vertical line. Draw a horizontal line of the same length. Half as long. Twice as long.
5. Draw an oblique line. Draw another in some other position the same length. Half as long. One and a half times as long.
6. Draw a square with sides vertical. Oblique.
7. Draw a right angle triangle in different positions.
8. Draw an angle. Draw another angle in some other position of the same size. Twice as large. Half as large.
9. Draw a rectangle twice as long as it is wide.
10). Draw two lines of different lengths. Draw a rectangle having its sides equal to these lines.
11)Draw two lines of unequal length. Draw a rectangle having its sides one-half as long as the lines drawn.
12. Draw a line. Bisect it. Use this point as centre and draw a circle.
13. Draw a circle. Draw another circle the diameter of which is one-half of the diameter of the first circle.
14. Draw a rectangle on the black-board about two feet by three feet. Draw a rectangle on paper the sides of which are in proportion to tb: sides of the rectangle on the board.
15. Make two dots a short distance apart. Draw a line the length of which is the same as the distance between the dots.
STICKS AND ANGLES
16. Draw a line. Divide it into two equal parts. Three. Four. Five.
17. Draw a line. Examine it carefully. Cover it with a piece of paper. Draw from memory a line the same length. Half as long. Twice as long.
18. Draw a rectangle. From memory draw another the same size.
19. Draw a rectangle. Draw another of different size but having proportionate sides.
20. Draw a rectangle. Draw a straight line the same length as the diagonal of the rectangle.
Sticks and Angles.
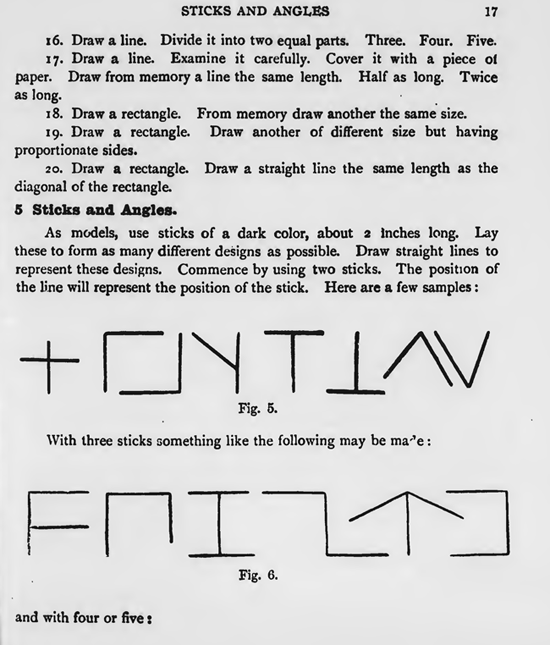
As models, use sticks of a dark color, about 2 Inches long. Lay these to form as many different designs as possible. Draw straight lines to represent these designs. Commence by using two sticks. The position of the line will represent the position of the stick. Here are a few samples :
With three sticks something like the following may be made :
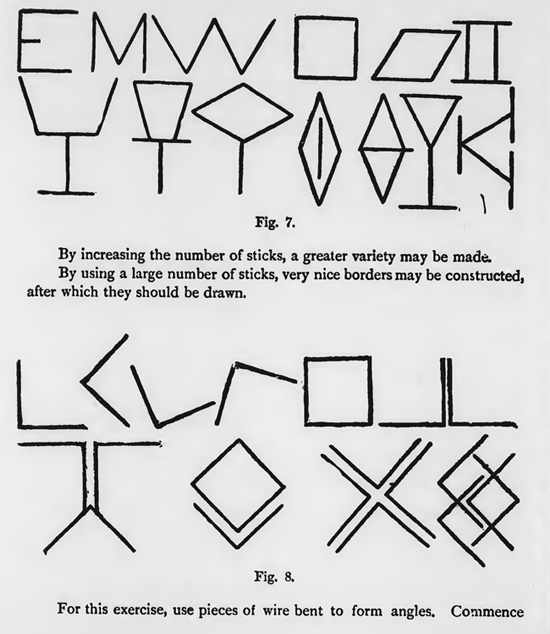
and with four or five :
By increasing the number of sticks, a greater variety may be made.
By using a large number of sticks, very nice borders may be constructed, after which they should be drawn.
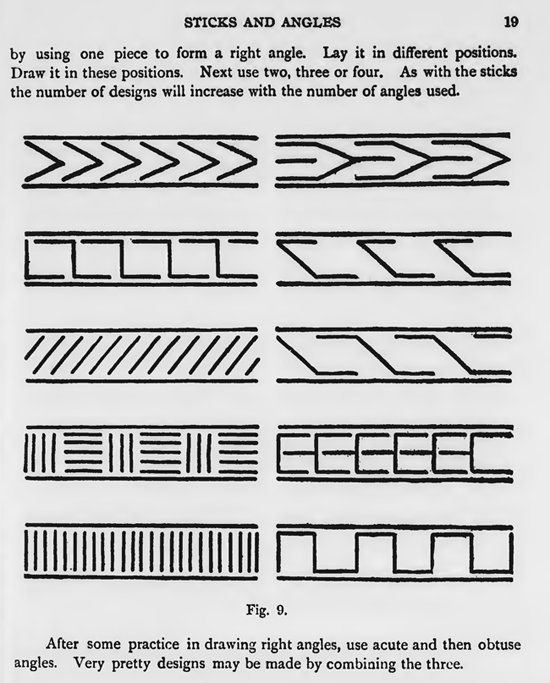
For this exercise, use pieces of wire bent to form angles. Commence by using one piece to form a right angle. Lay it in different positions. Draw it in these positions. Next use two, three or four. As with the sticks the number of designs will increase with the number of angles used.
After some practice in drawing right angles, use acute and then obtuse angles. Very pretty designs may be made by combining the three.
There are advantages in drawing from models in this way. The designs are more easily made, and only those which are pleasing may be drawn.
|


