
Home > Directory Home > Drawing Lessons > How to Improve Your Drawings > Shadows > Shading by Blending
BLENDING & SHADING TECHNIQUES TO ADD TONES GRADUALLY: How to Shade Drawings with the Following Lessons and Tutorials to Blend.
|


|
You Might Also Like Our Tutorial Pages for Drawing Light and Shadows ... Adding Tones and Values to Drawings
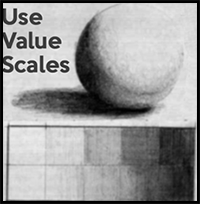
Value Scale Exercises and How to Use Value Scales to Improve Your Drawings
Today we are going to work on mastering values and tones in your drawings. This is just one of the many things that you will need to learn in order to become a master drawer/artist. Tones/values occur in nearly every part of a drawing that you will create. Learning how to create the perfect value for each spot on the drawing is what will turn your artwork into a masterpiece. But before you learn how to master tones/values in your drawings, you will have to work on your craft, which means, ughh, drawing exercises. Sorry. Techniques for Adding Shadows to Your Drawings
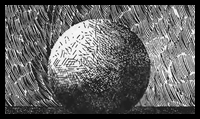
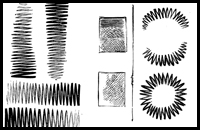
Adding Shadows to your artwork is an art in iteself. This drawing tutorial will help you learn how to shade your drawings with crosshatching, parallel lines, blending and directions of lines. Drawing Lights and Shadows with Variety of Lines
Shadows & Lights by Drawing Lines with Hatching & Crosshatching Shading Lessons & Tutorials for Beginners Drawing Lesson : How to Shade Pencil Drawings with Blending (Scroll Down)
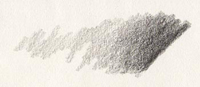
Some people like the texture of the paper showing through, but I find you get the best shading results by blending. A blending stick is a small tube of tightly rolled paper that lets you smooth out pencil shading. Basic Pencil Shading : Getting Started Blending
After the line drawing is done, it's always gratifying to add realistic shading to it. Shading makes the subject look three dimensional and solid. Here's an easy technique with instructions and a practice lesson to help you learn it.
Some people have asked me how I go about detailed pencil shading. Sadly there is at least a decade of knowledge that I posses that would take weeks to unfold into a tutorial. So I made a quick basic pencil shading reference for those who want to begin tightening up their skills...this chart includes blending and smudging. To some this might be too basic, but bear with me. :) Drawing Lesson : How to Shade Pencil Drawings By Miranda Aschenbrenner
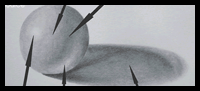
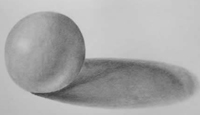
You will notice that these values blend into each other smoothly, which communicates to us the shape of the object. The only time you will see a hard edge is when there is a cast shadow, otherwise the tones change gradually. The closer the cast shadow is to the object, the darker it will be, fading as it moves farther away. How to Use Colored Pencils Blending Techniques
Colored pencils are not just for kids; professional artists use these as a serious medium. Practice Drawing and Shading with Pencil
This is an old lesson from a textbook for using pencils to add shadow to drawings. The pencil is in addition very useful for sketching purposes, has a wide range of tone and technique, and has a capacity for quick work that no other medium possesses. Shading : Traditional-Drawing Tutorial
For this shading tutorial we will explain several different techniques on how to shade. Proper shading is important in drawing realistically. Good shading textures and tonal flow can add a lot to a drawing. Shading and Blending : Traditional-Drawing Tutorial
This brilliant tutorial is all about shading and blending, so let start and get lot of tips and amazing techniques. How to Shade Effectively - Now, in earlier art classes, (like in high school) a lot of shading and blending of your pencil sketches is done with a tool called a stump. At least, that's what it was called then. Generally made of paper or something of the like, it's often difficult to create a soft blend. A piece of regular tissue (without additives like lotion or aloe) rolled corner to corner makes a great blending tool.
You Might Also Like Our Tutorial Pages for Drawing Light and Shadows ... Adding Tones and Values to Drawings |


Privacy Policy ..... Contact Us