
Home >Directory of Drawing Lessons > How to Improve Your Drawings > How to Draw What You See > How the Appearance of Objects Change in Relation to the Artist / Viewer
The Appearance of Objects Change in Relation to the Viewer & the Artist : Learn How to Draw Objects, Figures, and Subjects with These Artists' Techniques
|


|
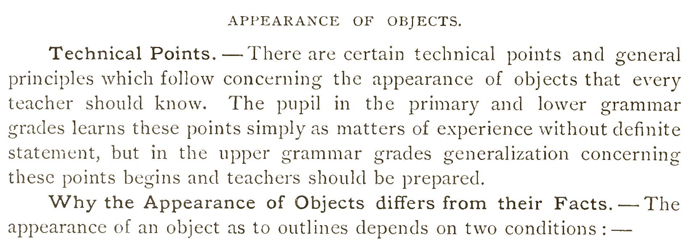
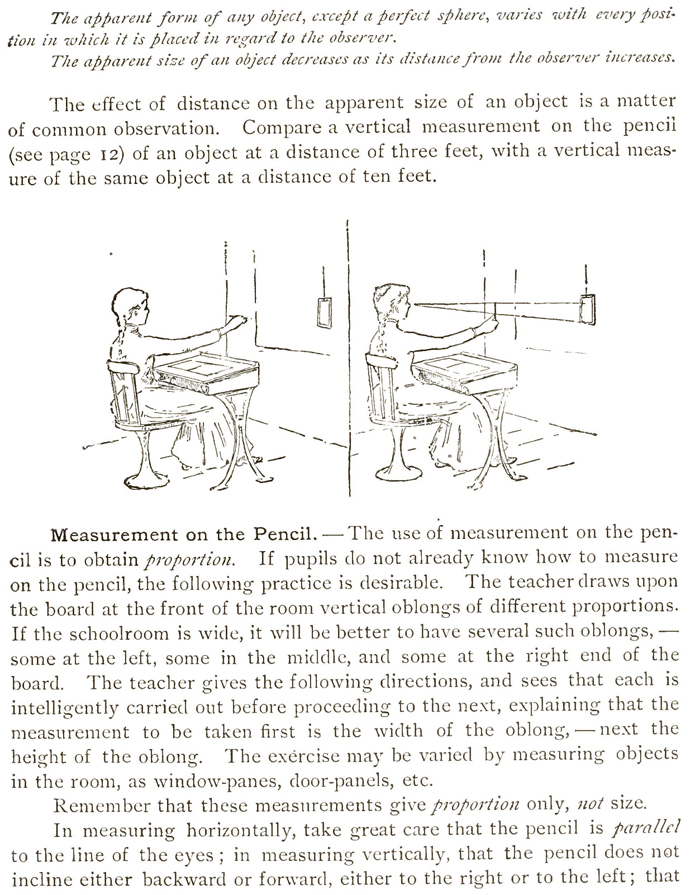
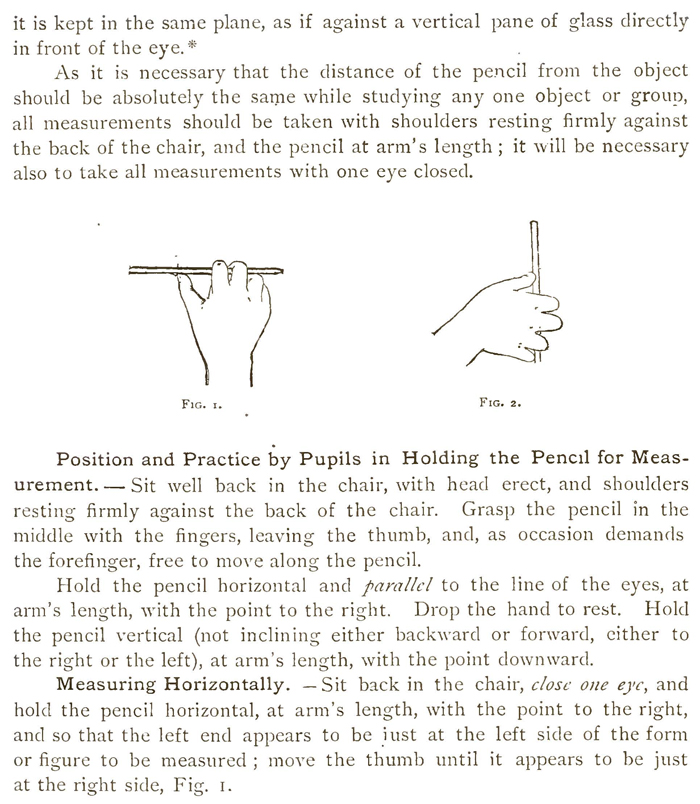
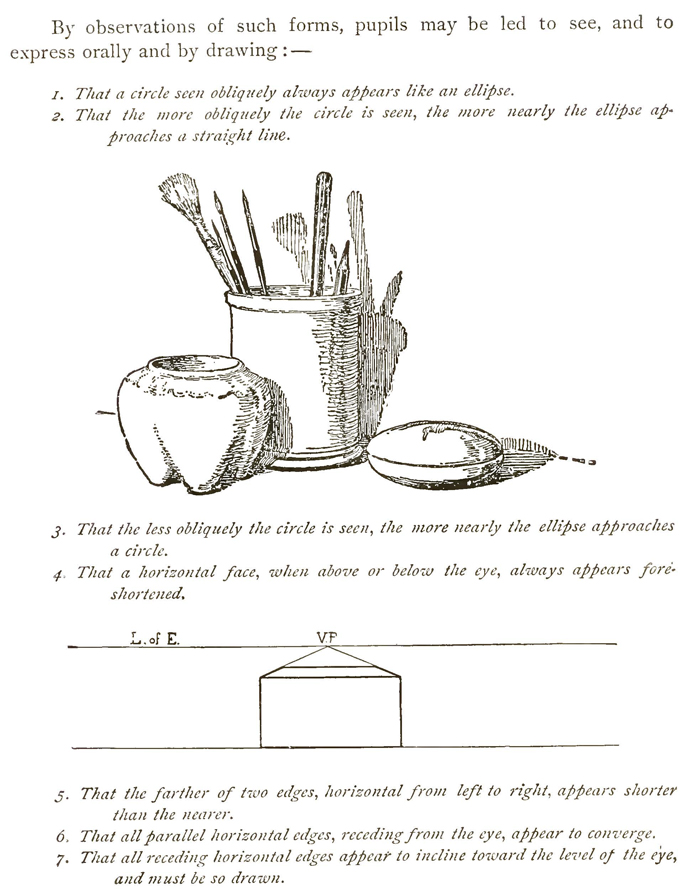
The text above is made up of images, to copy some text, it is below. APPEARANCE OF OBJECTS.Technical Points.There are certain technical points and general principles which follow concerning the appearance of objects that every teacher should know. The pupil in the primary and lower grammar grades learns these points simply as matters of experience without definite statement, but in the upper grammar grades generalization concerning these points begins and teachers should be prepared. Why the Appearance of Objects differs from their Facts.The appearance of an object as to outlines depends on two conditions :—The effect of distance on the apparent size of an object is a matter of common observation. Compare a vertical measurement on the pencil (see page 12) of an object at a distance of three feet, with a vertical measure of the same object at a distance of ten feet. Measurement on the Pencil.The use of measurement on the pencil is to obtain proportion. If pupils do not already know how to measure on the pencil, the following practice is desirable. The teacher draws upon the board at the front of the room vertical oblongs of different proportions. If the schoolroom is wide, it will be better to have several such oblongs, —some at the left, some in the middle, and some at the right end of the board. The teacher gives the following directions, and sees that each is intelligently carried out before proceeding to the next, explaining that the measurement to be taken first is the width of the oblong, —next the height of the oblong. The exorcise may be varied by measuring objects in the room, as window-panes, door-panels, etc. Remember that these measurements give proportion only, not size. In measuring horizontally, take great care that the pencil is parallel to the line of the eyes ; in measuring vertically, that the pencil does not incline either backward or forward, either to the right or to the left that it is kept in the same plane, as if against a vertical pane of glass directly in front of the eye.* Position and Practice by Pupils in Holding the Pencil for Measurement.Sit well back in the chair, with head erect, and shoulders resting firmly against the back of the chair. Grasp the pencil in the middle with the fingers, leaving the thumb, and, as occasion demands the forefinger, free to move along the pencil. Hold the pencil horizontal and parallel to the line of the eyes, at arm's length, with the point to the right. Drop the hand to rest. Hold the pencil vertical (not inclining either backward or forward, either to the right or the left), at arm's length, with the point downward. Measuring Horizontally.Sit back in the chair, close one eye, and hold the pencil horizontal, at arm's length, with the point to the right, and so that the left end appears to be lust at the left side of the form or figure to be measured ; move the thumb until it appears to he just at the right side, Fig. 1. Measuring Vertically.Hold the pencil vertical, at arm's length, with the point downward, at such a height that the upper end of the pencil appears to be exactly on a line with the upper side of the form or figure to be measured ; move the thumb up or down the pencil until the thumb appears to be on a line with the lower side of the form or figure, Fig. 2. Comparing Two Measurements.Remember always to take the same position (back in the chair, pencil at arm's length) for any two measurements that you wish to compare ; and that the measurements give proportion only, not size. Take the shorter measurement on the 'Pencil, keep it by holding the thumb fired; turn the pencil and compare this measurement with the longer, by seeing how many times the shorter measurement can be repeated in the longer. Decide carefully upon the proportion between the two measurements. As a preliminary to the exercises in Representation, this practice can be given in measurement on the pencil. It is not intended, however, that in the early exercises the objects shall be studied by measurement on the pencil, as it is desired to lead the pupils to see approximately the appearance of objects without this aid. It would be well to call for judgment by the eye first, then measurement on the pencil. And even when measurements on the pencil are made, it must be remembered that they are of assistance only in determining general proportion. It is almost impossible to secure absolutely correct measurements by such means ; the eye must always be the final test. Study of Direction of Edges.In order to study the direction of a horizontal edge, hold a pencil horizontal and parallel to the line of the eyes, at arm's length with the point to the right. Raise or lower the pencil as the edge to be observed may be higher or lower ; but keep it always horizontal and parallel to the line of the eyes. Compare the direction of the edge observed with that of the pencil. The observation, by this means, of the upper edge of a door or of a window-blind, open and shut, brings out admirably the difference in apparent direction. General Principles.Nearly all the principles in this subject can be gained from the study of the appearance of type forms, the simplest geometric solids. These type forms may be broadly classified as, By observations of such forms, pupils may be led to see, and to express orally and by drawing : — 1. That a circle seen obliquely always appears like an ellipse. |

Privacy Policy ...... Contact Us