
Home >Directory of Drawing Lessons > Drawing Objects & Things > Geometric Shapes > Planes > How to Draw Square and Rectangular Planes
DRAWING SQUARE AND RECTANGULAR PLANES with the following Drawing Lesson
|


|
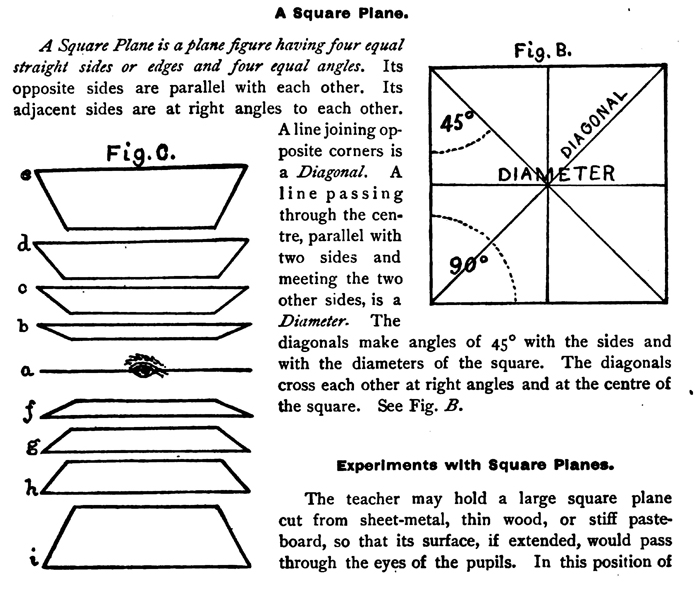
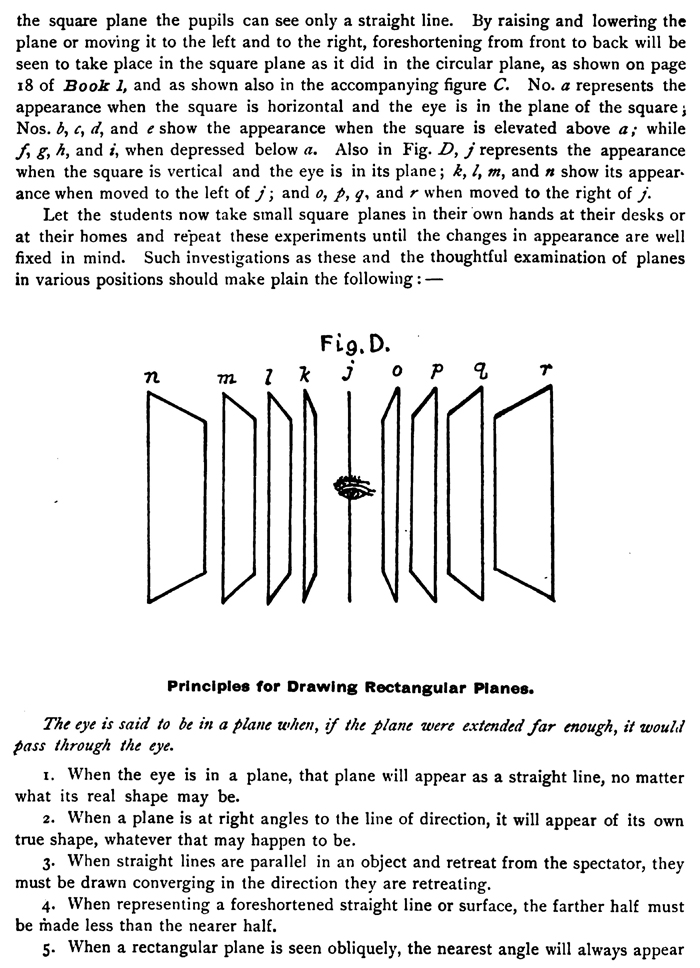
[The Text Above is Saves as Images, if you need to copy some text, it is below] Drawing Square PlanesA Square Plane is a plane figure having four equal straight sides or edges and four equal angles. Its opposite sides are parallel with each other. Its adjacent sides are at right angles to each other. A line joining opposite corners is a Diagonal. A line passing through the center, parallel with two sides and meeting the two other sides, is a Diameter. The diagonals make angles of 45° with the sides and with the diameters of the square. The diagonals cross each other at right angles and at the center of the square. See Fig. B. Experiments with Drawing Square Planes. The teacher may hold a large square plane cut from sheet-metal, thin wood, or stiff pasteboard, so that its surface, if extended, would pass through the eyes of the pupils. In this position of Let the students now take small square planes in their own hands at their desks or at their homes and repeat these experiments until the changes in appearance are well fixed in mind. Such investigations as these and the thoughtful examination of planes in various positions should make plain the following :— Principles for Drawing Rectangular Planes.The eye is said to be in a plane when, if the plane were extended far enough, it would pass through the eye. 1. When the eye is in a plane, that plane will appear as a straight line, no matter what its real shape may be. 2. When a plane is at right angles to the line of direction, it will appear of its own true shape, whatever that may happen to be. 3. When straight lines are parallel in an object and retreat from the spectator, they must be drawn converging in the direction they are retreating. 4. When representing a foreshortened straight line or surface, the farther half must be made less than the nearer half. 5. When a rectangular plane is seen obliquely, the nearest angle will always appear
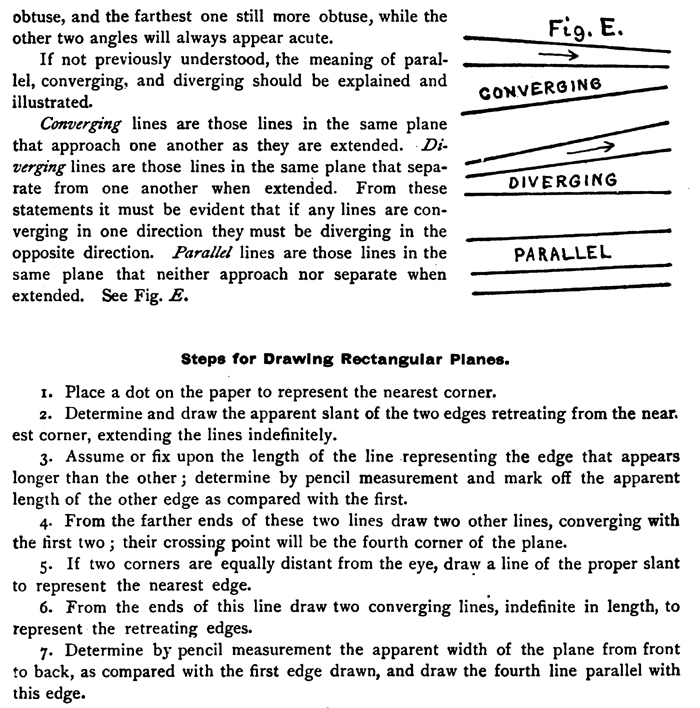
obtuse, and the farthest one still more obtuse, while the other two angles will always appear acute. Fig. E. Converging lines are those lines in the same plane that approach one another as they are extended. Diverging lines are those lines in the same plane that separate from one another when extended. From these statements it must be evident that if any lines are converging in one direction they must be diverging in the opposite direction. Parallel lines are those lines in the same plane that neither approach nor separate when extended. See Fig. E. Steps for Drawing Rectangular Planes.1. Place a dot on the paper to represent the nearest corner. 2. Determine and draw the apparent slant of the two edges retreating from the near. est corner, extending the lines indefinitely. 3. Assume or fix upon the length of the line representing the edge that appears longer than the other ; determine by pencil measurement and mark off the apparent length of the other edge as compared with the first. 4. From the farther ends of these two lines draw two other lines, converging with the first two ; their crossing point will be the fourth corner of the plane. 5. If two corners are equally distant from the eye, draw a line of the proper slant to represent the nearest edge. 6. From the ends of this line draw two converging lines, indefinite in length, to represent the retreating edges. 7. Determine by pencil measurement the apparent width of the plane from front to back, as compared with the first edge drawn, and draw the fourth line parallel with this edge.
|
Privacy Policy ..... Contact Us