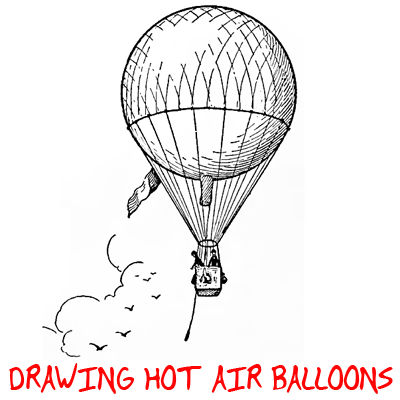
Hot Air Balloons are so beautiful and graceful to watch. If hot air balloon drawing is what you want to do, then you have come to the right place. I have put together a step-by-step tutorial that will help you figure out how to draw hot air balloons by using simple shapes to build up their forms. This is an easy tutorial that even young kids can draw. Even some really younger children and preschoolers might be able to draw a hot air balloon if you stand by to help with the instructions. Enjoy!
Hot Air Balloon Drawing : How to Draw Hot Air Balloons with Easy Step by Step Lesson
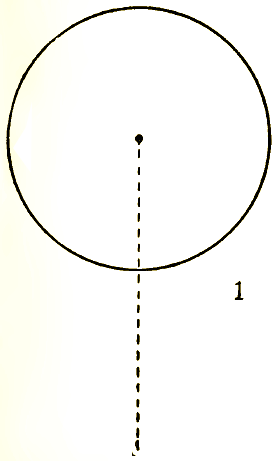
First, draw a circle. Find the middle of the circle. From that point, draw a line down from the center (as shown above).
Now draw a square and an oval at the bottom of the line that you just drew.
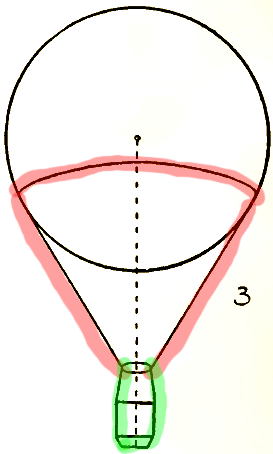
Now draw a cone line shape, starting a little below the center dot and ending at the oval you drew in a previous step (the cone is highlighted in red). In green, you can see that you need to connect the oval to the square and then to the bottom of the line that you drew (so that it sort of looks like an oval).
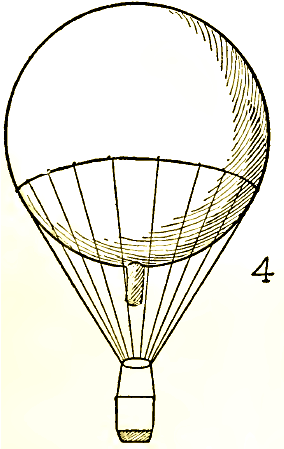
Now this might look complicated but it is actually quite simple. Just draw 8 lines from the top oval to the bottom oval. Since the bottom oval is quite a bit smaller, it will make the cool affect that you see above. Also shade in the bottom rectangle (as you see above). A great way to shade it is to make a bunch of diagonal lines (as was done above).
Also erase the line that we drew in step 1. Draw a cylinder type shape at the bottom of the balloon (circle shape). Then draw curved dashed lines all along the right side of the balloon and cylinder as we did above. This is for shading. It looks cool, doesn’t it?
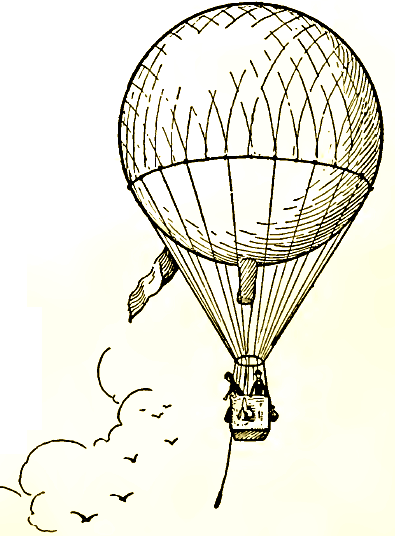
Basically, the structure of the hot air balloon is finished now, you can copy our finished drawing below or you can design your balloon the way that you want now.
Now lets finish up the balloon with some of your own personal touches. You don’t have to do what we did above, this is your own balloon drawing. To make the crisscross net just make a curved line to the left and to the right from about 16 points along the middle curved line.
Technorati Tags: hot air balloon drawing, drawing hot air balloons, draw hot air balloons, how to draw hot air balloons, draw hot air balloons step by step, how to draw, drawing for kids, easy drawing, drawing tutorials
Today I'll show you how to draw Rick from the Rick and Morty cartoon tv…
Today I'll show you how to draw Morty from the Rick and Morty cartoon tv…
Today I'll show you how to draw the spunky little rabbit, Kuromi, from My Melody…
Today I'll show you how to draw this cute "bean duck" that I found on…
Today I'll show you how to draw Sosuke and Ponyo in a bubble (chibi /kawaii…
Today I'll show you how to draw a Boo from Super Mario Bros in Kawaii…
View Comments
Very nice but the step 4 I couldn't understand ???
This tutorial is from an old book from over 100 years ago so it is a little tough. I suggest ignoring all the little lines on the balloon ... those are just for shading. Instead, just look at the lines drawn down from the balloon to the basket. Each of these lines is slanted a bit...the lines on the right side are slanted towards the right and the lines on the left are slanted towards the left.
hey this was easy people it was kinda fun it was helpful cuz i wanna be in a compition and draw a hot air ballon even though there are many more chocies bye peace out people
that was hardish
awesome balloon
this is awesome i learned how to do this hot air balloon in less time than i thought!!!! : )
This hot air balloon is sooooooooo!!! dificult naaaaaaaaaa!!!!! just a joke
thats a nice hot air ballon