For the Fall, Halloween season, lets draw a cartoon mummy in the following drawing lesson. Kids and teens will enjoy drawing their very own Mummy figure with easy to follow tutorial steps…with illustrations to demonstrate each step.
You Might Also Like Our Other Halloween Drawing Tutorials
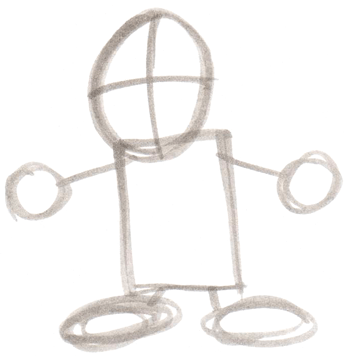
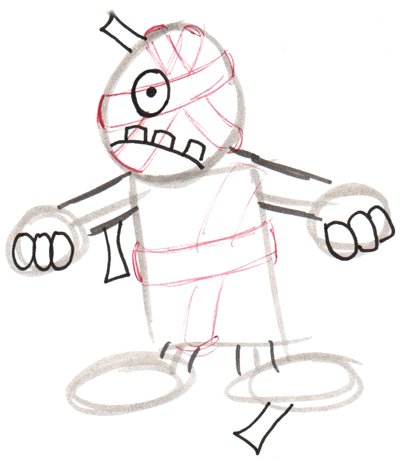
First, lightly sketch out the basic shapes that make up the mummy, as seen above (such as a rectangle for the body, sticks for arms and legs, ovals for feet, circles for hands, and an oval head.
Also lightly draw guidelines through the center of the head to help you figure out where the facial features should be placed.
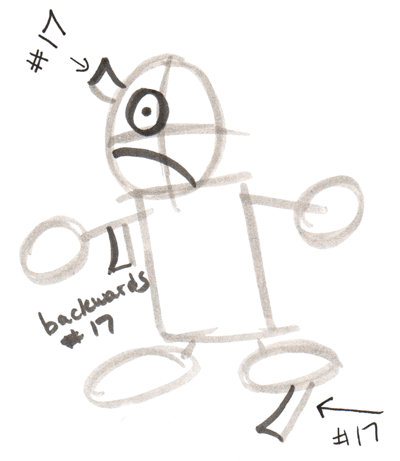
Start drawing bandages in the locations above….I drew each bandage in 2 different colors to show you that they look like the number 17. Also draw an eye as a circle with a dot in the center. Also draw a downwards curved line below the eye for the mummy’s mouth.
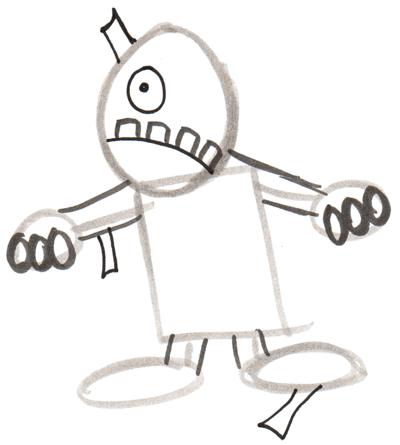
Draw 3 ovals on each hand for fingers…draw 2 lines over each stick arm and leg to add the forms. Draw a few rectangles above the mouth for teeth.
Now start drawing bandages all over the body as curved rectangles, as pictured above. When they intersect…choose which one is on top and then erase the lines from the lower bandage(s). You can choose the put the eye above or below the bandages….same goes for the mouth.
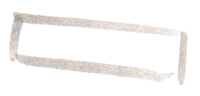
Lets focus on how to make a bandage hanging out the side of the mummy. First lightly sketch out a rectangle.
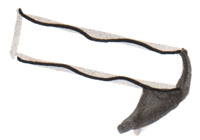
Draw a sideways letter ‘v’ on the lower right of the rectangle.
Now draw squiggly lines on top of the rectangle.
Shadow in the letter ‘v’.
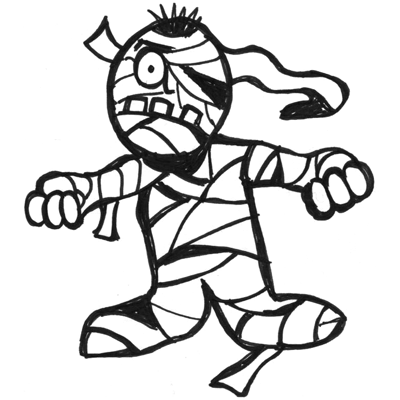
Now just complete your mummy by putting in your own details…such as hair coming out of different bandages…darkening lines and erasing ones that you don’t need. I hope that you had fun coming up with a Halloween, cartoon Mummy figure.
First, lightly sketch out the basic shapes that make up the mummy, as seen above (such as a rectangle for the body, sticks for arms and legs, ovals for feet, circles for hands, and an oval head.
Also lightly draw guidelines through the center of the head to help you figure out where the facial features should be placed.
Start drawing bandages in the locations above….I drew each bandage in 2 different colors to show you that they look like the number 17. Also draw an eye as a circle with a dot in the center. Also draw a downwards curved line below the eye for the mummy’s mouth.
Draw 3 ovals on each hand for fingers…draw 2 lines over each stick arm and leg to add the forms. Draw a few rectangles above the mouth for teeth.
Now start drawing bandages all over the body as curved rectangles, as pictured above. When they intersect…choose which one is on top and then erase the lines from the lower bandage(s).
You Might Also Like Our Other Halloween Drawing Tutorials
Technorati Tags: mummies, mummy, drawing mummies, draw mummies, cartoon mummies, cartooning mummy, draw cartoon mummy, how to draw mummies , drawing lessons, drawing tutorials, halloween, halloween drawing, drawing for kids, cartooning, cartooning for kids
Today I'll show you how to draw Rick from the Rick and Morty cartoon tv…
Today I'll show you how to draw Morty from the Rick and Morty cartoon tv…
Today I'll show you how to draw the spunky little rabbit, Kuromi, from My Melody…
Today I'll show you how to draw this cute "bean duck" that I found on…
Today I'll show you how to draw Sosuke and Ponyo in a bubble (chibi /kawaii…
Today I'll show you how to draw a Boo from Super Mario Bros in Kawaii…
View Comments
i hate this eather this is a bad example or i suck a drawing