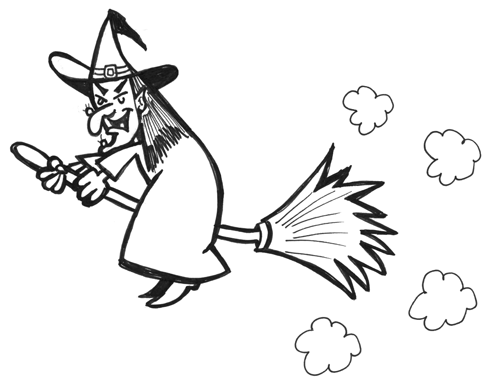
Witches are popular this time of year…Halloween is coming up in October. Learn how to draw this cartoon witches, with the following easy steps. Learn how to draw this character by following the drawing lesson that includes easy step by step illustrations for kids, teens, adults, etc. Have fun.
You Might Also Like Our Other Halloween Drawing Tutorials
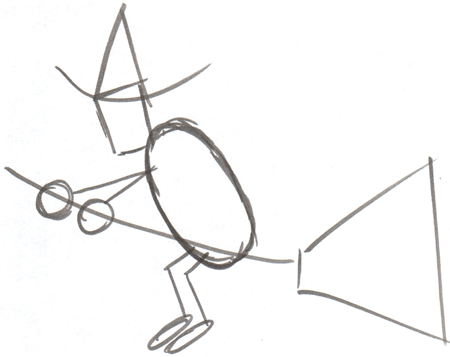
Firstly, start drawing the witch by lightly sketching the basic shapes that make up her form….such as an oval for the body, a square for the face, a triangle for the hat, etc.
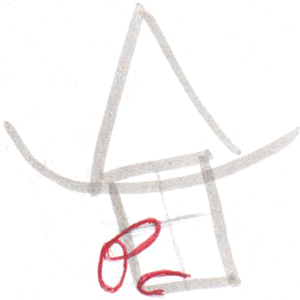
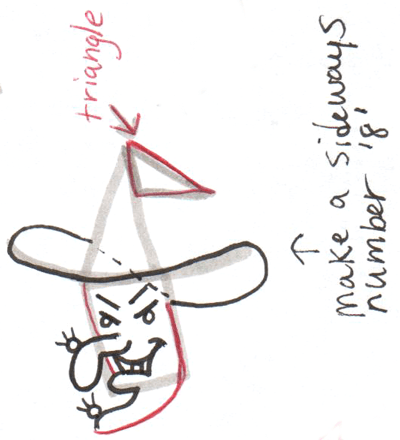
Now, lets focus on the witch’s face / head. Notice that the face is square….put a light guideline vertically and horizontally through her face…this will help you figure out where to put her facial features. Lightly sketch 2 ovals for the witch’s nose…as pictured above. Also draw a sideways letter ‘J’ for the lower lip.
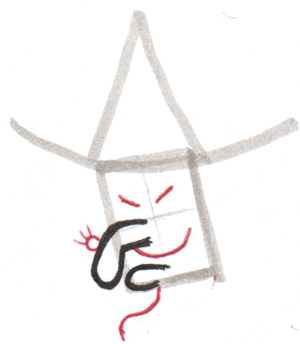
Now just outline the ovals that you drew for the nose…you don’t need the inside of that shape anymore (as pictured above). Draw a wart on the nose by drawing a little circle with 3 lines coming out of it (for hairs). Start drawing the witch’s chin by drawing a curve that looks like an upside down, backwards letter ‘s’. Draw a smile under the nose…and draw the tops of each eye with 2 lines that would look like a ‘v’ if they met in the center.
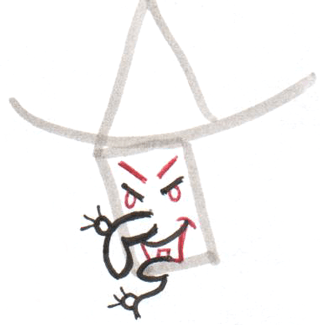
Now draw 2 lines for the eyebrows that look just like the lines that you drew in the last step. Draw a wart on the chin. Draw an oval in each eye. Also draw a curve at the end of the smile…and draw 2 lines coming down from the smile towards the bottom lip. Also draw a square for a tooth.
Draw a sideways figure ‘8’ for the hat brim shape. Also draw a triangle at the end of it, where it bends over…. finish the right side of the witch’s face with a letter ‘J’ like shape…also draw in the line on the left side of the face.
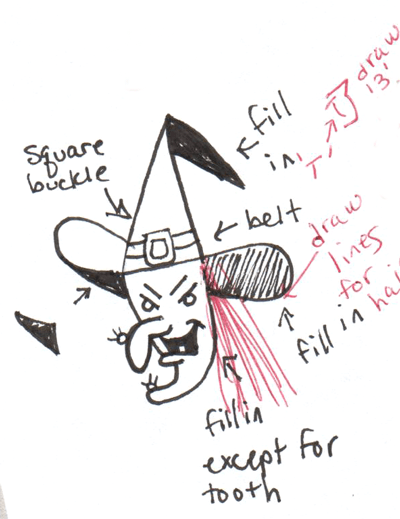
Draw lines for the hair. Also fill in the mouth, except for the tooth…also fill in the bottom parts of the witch’s hat. Draw a square for the buckle…and draw a line going through it for the belt.
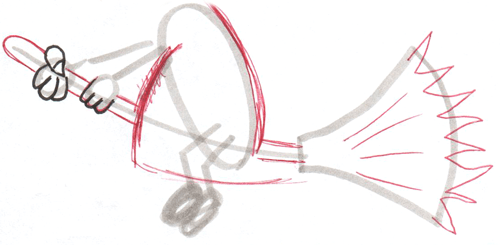
Draw 3 ovals for the top hand’s fingers…also draw another oval for the thumb…with a triangle at the end for the pointy, witch nail. Draw a backwards number ‘3’ with an extra hump for the bottom hand’s fingers. Also refine the shape of the broom by drawing 2 inwards lines.
Draw the dress shape by drawing an upside down number ’17’ shape. Draw a sideways letter ‘u’ for the top of the broomstick…also draw the rest of the handle. Draw zig-zaggy, letter ‘M’ shape at the bottom of the broom.
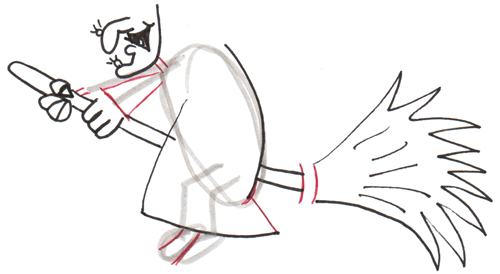
Draw 2 curved lines at the bottom of the handle. Draw the top of the shoes. Draw a sideways letter ‘T’ at the back, bottom of the dress. Draw the neck and the arm….and draw the front sleeve.
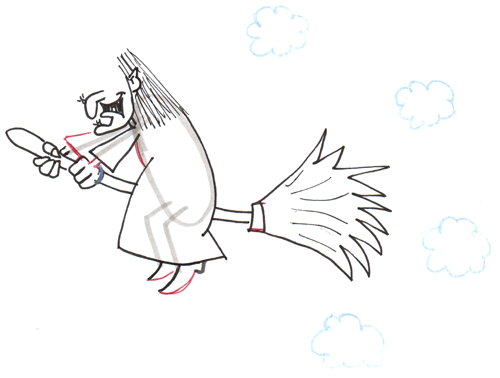
Draw some clouds with squiggly lines. draw curved lines at the bottom of the shoe….and finish the back sleeve.
You Might Also Like Our Other Halloween Drawing Tutorials
Technorati Tags: witch, witches, drawing witches, draw witches, cartoon witch, cartooning witch, draw cartoon witch, how to draw witches, drawing lessons, drawing tutorials, halloween, halloween drawing, drawing for kids, cartooning, cartooning for kids
Today, I'll show you how to draw a cartoon girl pointing at herself with step-by-step…
Today, I'll show you how to draw a crying cute little cartoon guy who is…
Today, I'll show you how to draw an adorably super-cute cartoon owl on a witch's…
Today I will show you how to draw a super cute baby-version of Winnie The…
Today I'll show you how to draw the famous Pusheen cat from social media, such…
Today I'll show you how to draw this super cute chibi version of Deadpool from…
View Comments
Super easy and fun to do with the instructions. Thank you!
U stupid! Typin up thank you for learning me
It's thank you for teaching me boy!
i like it
realy cool, thanks for learinig me this :)
This is really good for halloween! I really enjoyed drawing this! But I also found it hard but with alot of consentration I did it!
It was okai ! But maybe a little too hard to do ! Maybe you could do an ametuer one !