Page : 1 2
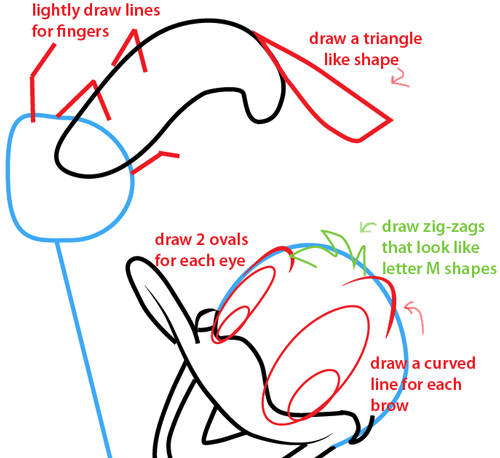
Lightly draw lines for the fingers and draw a triangle like shape for the top of his hat. Draw two ovals for each eye, zig-zags that look like letter ‘M’ shapes, and draw a curved line for each brow.
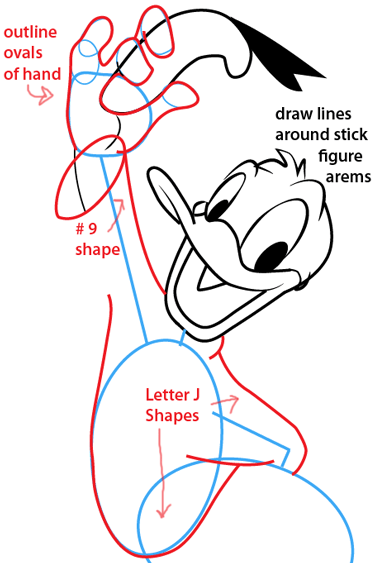
Draw ovals and backwards letter ‘D’ shapes for the fingers. Then draw two curved lines to begin his sleeve.
Outline the ovals of the hand and raw a number ‘9’ shape for his sleeve. Draw a letter ‘J’ shapes for the outline for his shirt.
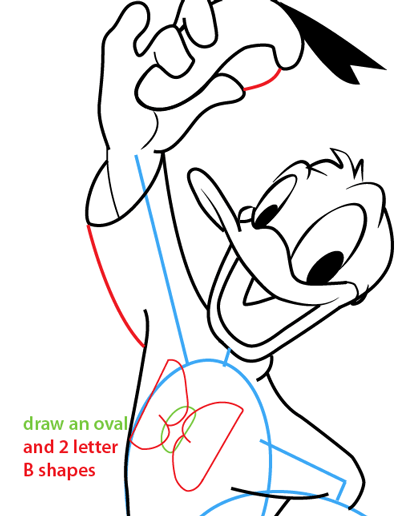
Draw a curved line to finish his hat. Then draw an oval and two letter ‘B’ shapes for hid bow.
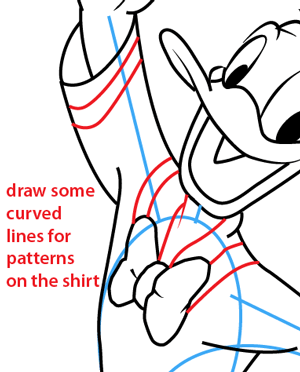
Draw some curved lines for the patterns on the shirt.
Draw lines around the stick figure legs to add mass. Draw curvish lines at the end of both feet. Then draw a letter ‘J’ shape at the top of his right foot and then draw his tail using a letter ‘M’ shape and a letter ‘J’ shape.
I hope that this tutorial helped you to draw Disney’s Donald Duck and that you had a lot of fun 🙂
You Might Enjoy Our Other Disney Characters Tutorials.
Technorati Tags: how to draw Donald Duck, how to draw a duck, how to draw Donald, drawing Donald Duck, Disney, Walt Disney, Walt Disney Productions, drawing cartoon, characters, Donald, Donald Duck, Ducks, Drawing Ducks, drawing characters
Page : 1 2
Page: 1 2
Today I'll show you how to draw a super cute Vault Boy from Fallout. Vault…
Today I'll show you how to draw a cute chibi / kawaii bunny rabbit named…
Today I will show you how to draw a Banana Duck from the plush Peach…
Today I'll show you how to draw a cute cartoon monster that is super easy…
Today I'll show you how to draw an adorable kawaii-style dumpster fire with the following…
Today I'll show you how to draw a cute cartoon alien in his UFO. This…
View Comments
I can’t seem to get the eyes right.great tutorial though, easy to understand by explaining with simple letters and shapes.
I can't seem to get the eyes right.great tutorial though, easy to understand by explaining with simple letters and shapes.