We have been taught the principles of perspective, and we are familiar with the fact that objects do not appear as they really are. We know, for instance, that in angular perspective, vertical edges appear vertical, while the horizontal edges appear to converge, slanting up or down as the case may be. We also know that the top and bottom edges of a Japanese lantern appear elliptical when foreshortened, and that the nearer edges of the ellipses curve upward or downward, accordingly as they are seen above or below the eye level.
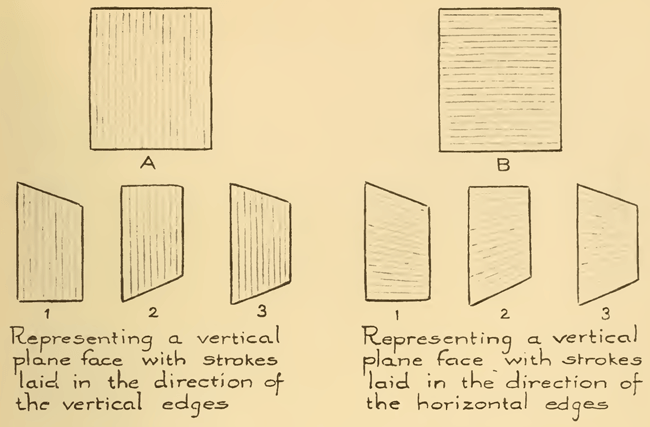
All this has a direct bearing on the subject in hand, as will be seen by referring to the diagrams shown below. The light lines indicate the direction of the pencil strokes. In representing a vertical rectangular plane, the strokes may be laid vertically, as in A, or horizontally, as in B.
In the above picture, figures 1, 2 and 3 show the same face foreshortened; the vertical edges still appear vertical, but the receding edges converge. If in representing these foreshortened faces, the strokes are laid parallel with the vertical edges, their direction remains unchanged (A1, A2, A3). If the strokes are laid parallel with the horizontal edges, their direction must change, according to their location above or below the eye level; that is, they must converge as do the edges of the face (B1, B2, B3).
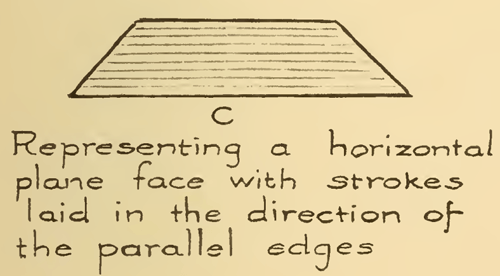
In representing a horizontal rectangular plane face, the strokes may be laid in the direction of one or the other set of its parallel edges. Here again the principles of perspective must be observed. The direction of the strokes is determined by the apparent direction of the chosen set of edges. If these edges are parallel, as in C (above), the strokes should be drawn parallel.
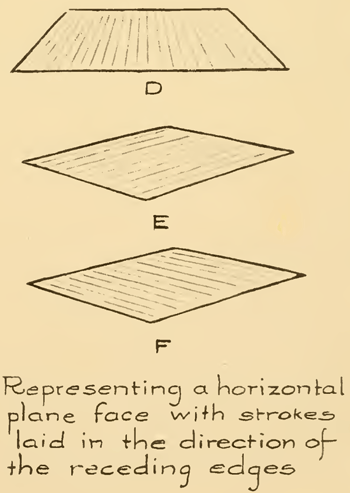
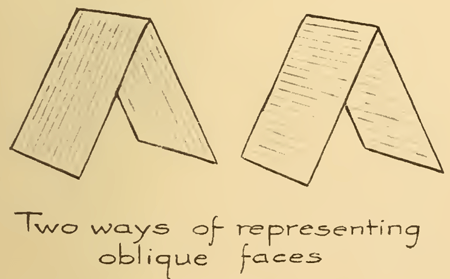
If they are convergent, as in D, E and F, then the strokes must also converge. What is true of vertical and horizontal faces is also true of oblique faces.
In the above picture, you can see the 2 different ways you can use your pencil strokes to represent oblique faces.
It will thus be seen that a fair knowledge of the fundamental principles of perspective is essential to success in pencil sketching.
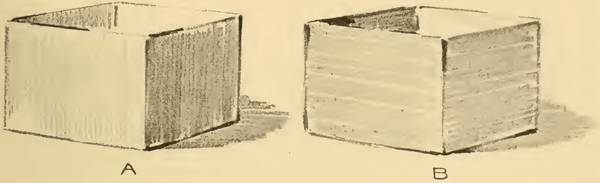
In the above illustration, you will see two sketches of the same box. In A the strokes are laid in the direction of the vertical edges, while in B they were laid in the direction of the horizontal edges. The question may be asked: “Which of the two is the more truthful rendering?” To this the answer would be: “It all depends.” Broadly speaking, the direction of the strokes is determined by the direction of the planes, or the contour of the form. A vertical plane would naturally suggest vertical strokes; a horizontal plane would suggest horizontal strokes and an oblique plane oblique strokes. There are other things, however, such as surface appearance and surface texture, which may determine the direction of the strokes. This will be considered later.
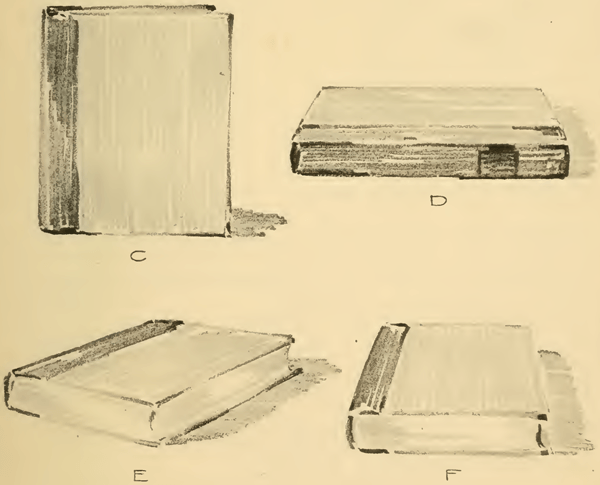
Sketches C, D, E and F (above) show a book in various positions. In C the cover, being a vertical plane face, was rendered with vertical strokes; in D the cover was expressed with strokes laid horizontally and running parallel; while in E and F the strokes converge as do the edges of the book.
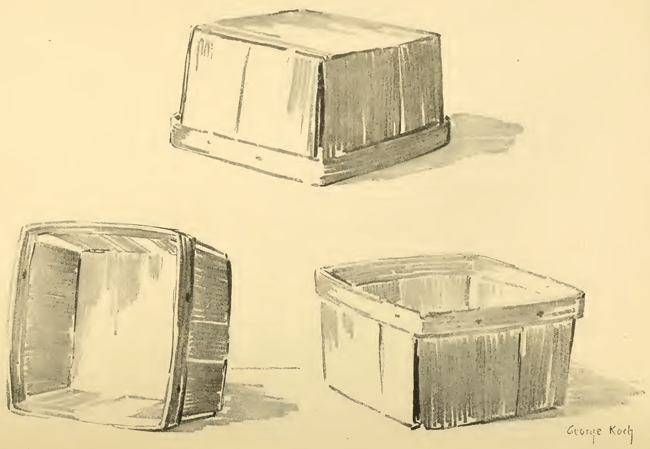
Above are several sketches may be made of a strawberry basket in various positions.
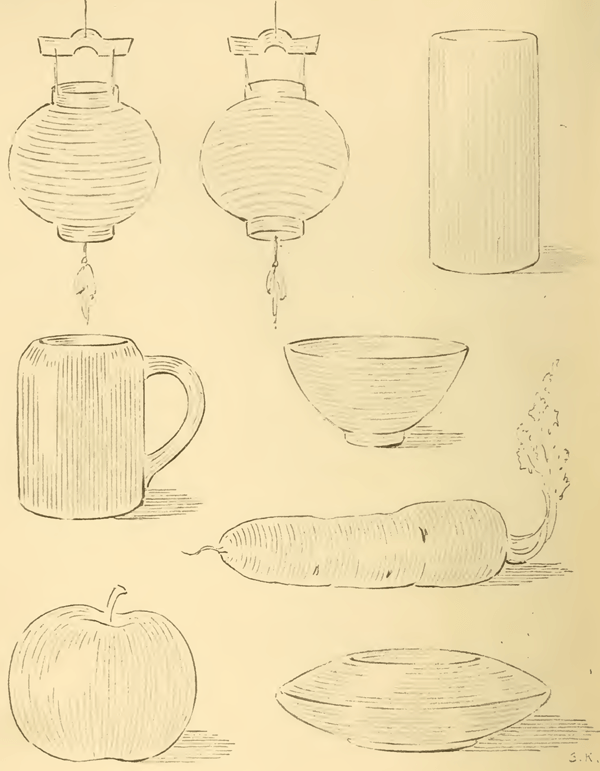
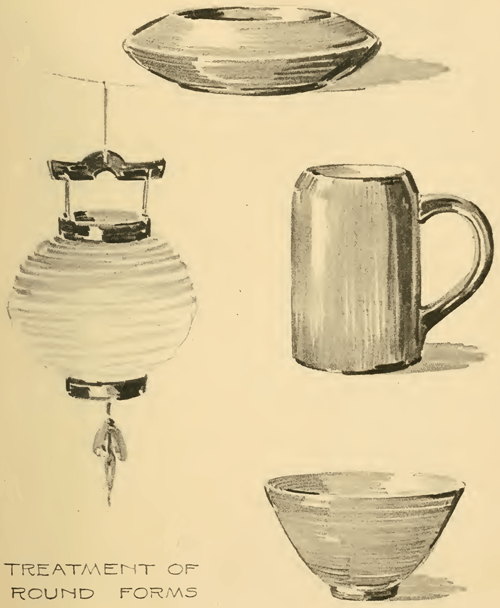
The treatment of round objects is shown by a number of illustrations (above), with the direction of the pencil strokes being indicated by lines. The strokes may be laid either vertically or horizontally, depending largely on the shape of the object. Objects that are low and broad may be rendered with strokes laid in a horizontal direction, while for tall objects vertical strokes may be used to better advantage. If the strokes are laid horizontally, they must follow the contour of the form; that is, they must curve with the form. If the object is seen below the eye level, as in the case of the first Japanese lantern above, for example, the strokes should curve downward, as do the nearer edges of the ellipses; if seen above the eye level, as in the second lantern, they would curve upward. Calling to mind our perspective principles on the appearance of foreshortened circles, we understand what determines the curvature of these strokes.
Upright cylindrical forms, such as the mug and the spill may be treated in the way indicated, using vertical strokes and depending entirely on the light and shade to suggest roundness.
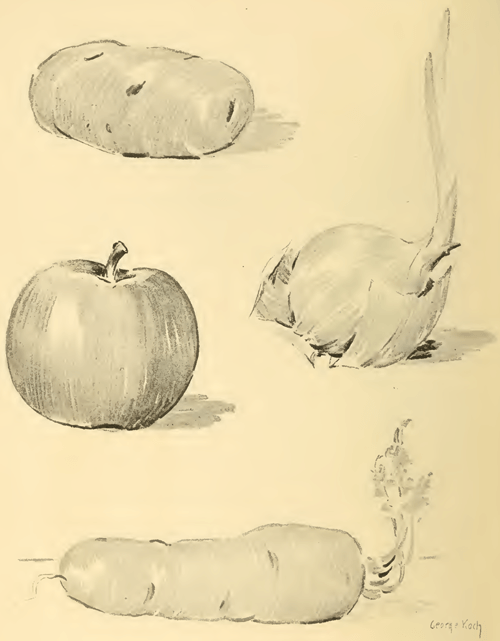
The apple is an example of another method of treatment. Although spherical in form, like the lantern, it was rendered with up and down strokes, curving outward more and more as they approach the contour, those at the center being practically straight.
Above you can see how some of these objects look as you work on them a bit longer to add more details.
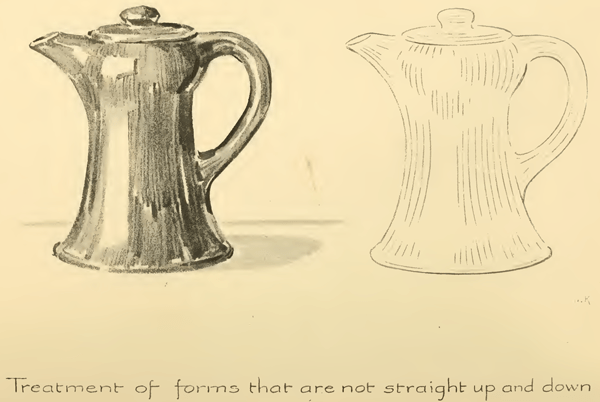
The sketches of the vase (above) is an example of the treatment of forms that are not straight up and down.
And the coffee pot (above) is another example of the treatment of forms that are not straight up and down. In such cases up and down strokes may be used, curving more or less as may be necessary to express the form. The accompanying diagrams show clearly the direction and curvature of the pencil strokes.
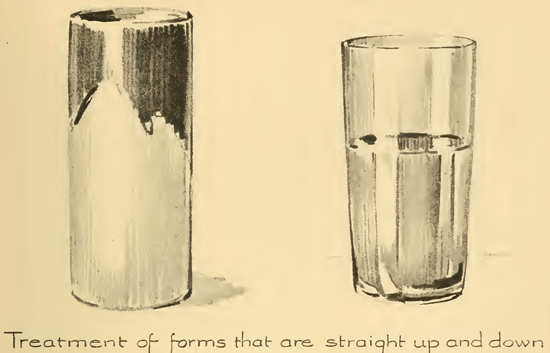
And again, here is another example of the treatment of forms that are straight up and down.
I hope this tutorial helped you with the directions of your pencil strokes!!
Technorati Tags: pencil drawing, drawing in pencil, pencil strokes, direction of pencil strokes, direction of strokes, pencil techniques, drawing techniques, drawing tutorials, pencil drawing tutorials
Today I'll show you how to draw Rick from the Rick and Morty cartoon tv…
Today I'll show you how to draw Morty from the Rick and Morty cartoon tv…
Today I'll show you how to draw the spunky little rabbit, Kuromi, from My Melody…
Today I'll show you how to draw this cute "bean duck" that I found on…
Today I'll show you how to draw Sosuke and Ponyo in a bubble (chibi /kawaii…
Today I'll show you how to draw a Boo from Super Mario Bros in Kawaii…
View Comments
I’m concentrating on blending with my pencils. I think I need to learn these principles before I go back to water colouring. I love to sketch but find blending difficult. Your teaching has helped me immensely. Thank you so much. I’m 89 years old and started art during Covid.
This has been soooo informative I am in my early 60’s and just now taking the time to draw. No talent however I am enjoying “the pure mindfulness”/ focus, distraction of it all.
Thank-you for these important practise exercises
thanx for the tips!