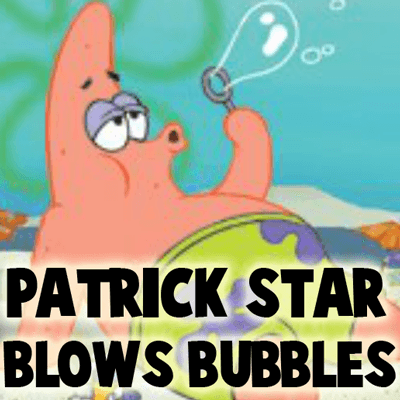
Patrick Star is Spongebob Squarepants’ best friend. He isn’t very smart, but he knows how to have a lot of fun. In this picture, Patrick Star is leisurely blowing bubbles. I will show you how to draw Patrick with simple shapes and many illustrated steps. If you want a simple, step by step tutorial, you’ve found it.
Here are our previous Spongebob Squarepants tutorials.
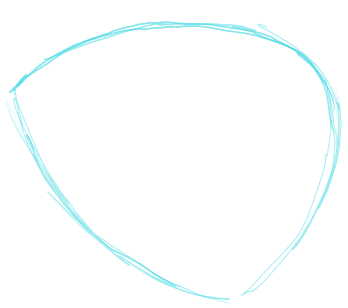
Lightly draw a sideways, capital letter ‘D’ shape….it also is a half-circle shape.
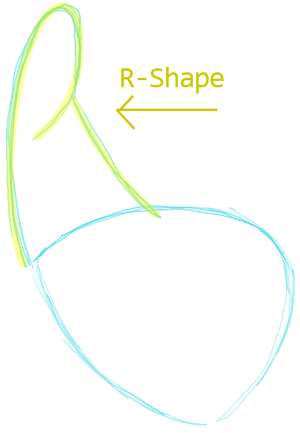
Lightly draw a curved, capital letter ‘R’ on top of the last shape.
[ad#draw]
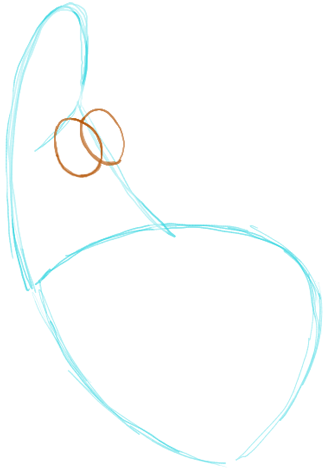
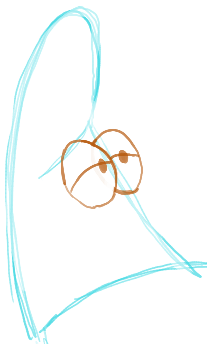
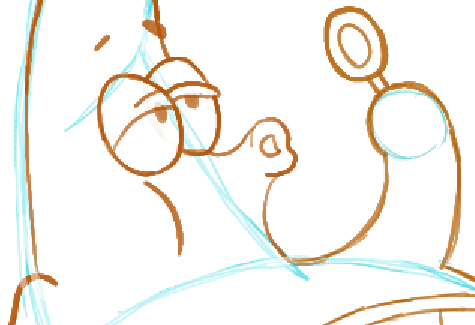
Next, draw 2 ovals, side by side. They look like a sideways number ‘8’ shape.
Draw 2 dots for pupils. Then draw curved lines for lids on top of them.
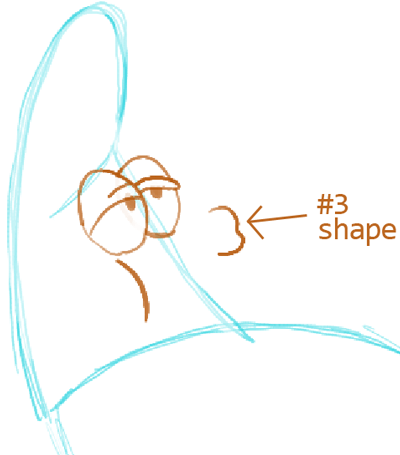
Draw a curved line on top of each lid. Draw a curved line for the cheek. Then draw a #3-like shape to the right of the eyes.
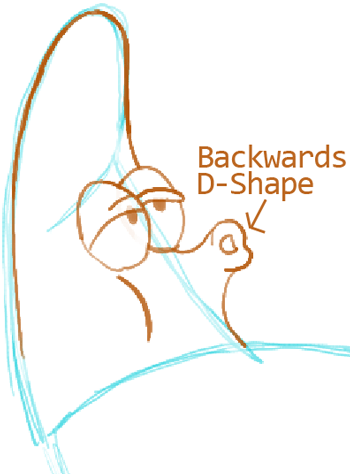
Draw a backwards, capital letter ‘D’ shape, to the left of the #3 shape you just draw. Then connect the #3 shape to the right eye with a curved line. Also draw a curved line below the #3 shape. Also draw the top of Patrick’s head…using the guidelines from step #2 to help you draw it.
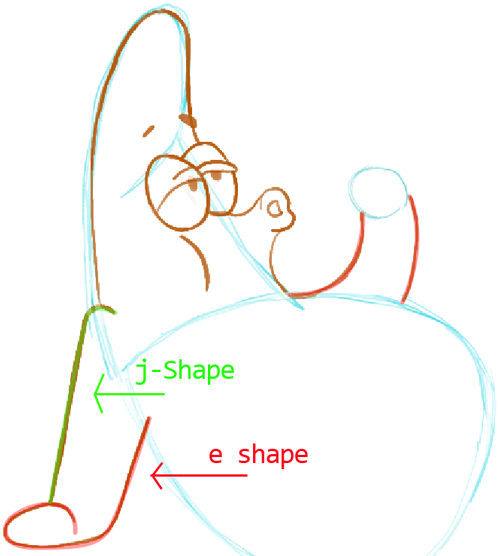
Now lets draw the left arm. Draw an upside down letter ‘J’ shape for the shoulder. Then draw a sideways, lowercase letter ‘3’ shape for the hand. Lightly draw an oval for the right hand and then connect it to the body with 2 curved lines. Also draw eye brows.
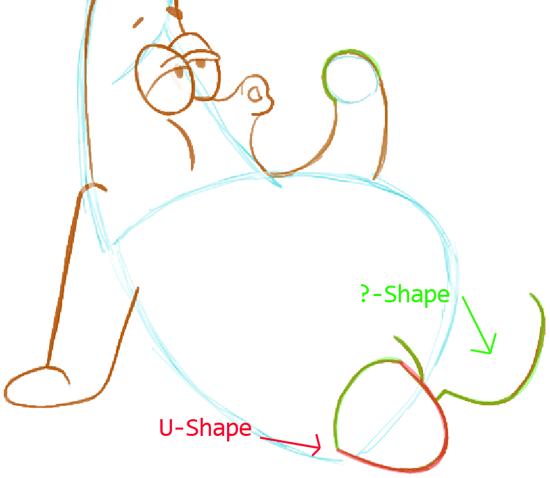
Finish drawing the right hand by using the oval from the last step as a guide. For the left foot, draw a letter ‘U’ shape. Close it up with a curved line. Then draw a sideways ? shape…this is the pants for the right foot that you are drawing.
Draw the right foot in the same way that you drew the left foot…draw a letter ‘U’ shape and close it with a slightly curved line.
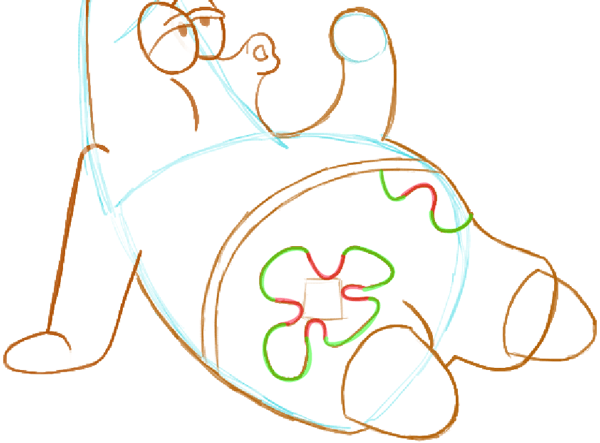
Draw the waist band on Patrick’s shorts with 2 curved lines. The design on Patrick’s shorts is semi-complicated, but don’t stress over it much. It is basically a clover shape, but a little different. Lightly draw a square. Then draw 4 letter ‘U’ shapes around the square (I have them highlighted in red). Then draw letter ‘C’ like shapes to connect the letter ‘U’s together (I have them highlighted in green). For the design on the right…it basically looks like a backwards number ‘3’ shape.
Now draw the bubble wand. Draw 2 ovals (like a Cherrio or a doughnut) and then 2 lines for the stick.
Now draw the bubble by lightly drawing an oval shape…and lightly drawing curved lines connecting the oval to the bubble wand. Lightly draw 3 ovals inside the bubble. Lightly draw curved lines to connect the 2 ovals on the right. Then erase the lines that you don’t need.
There you go…you drew Patrick Star. Erase any lines that you don’t need and darken the lines that are important. I hope that you had fun.
Here are our previous Spongebob Squarepants tutorials.
Technorati Tags: Patrick Star, How to Draw Patrick Star, Patrick from Spongebob Squarepants, How to draw patrick from spongebob, spongebob squarepants
Today, I'll show you how to draw a cartoon girl pointing at herself with step-by-step…
Today, I'll show you how to draw a crying cute little cartoon guy who is…
Today, I'll show you how to draw an adorably super-cute cartoon owl on a witch's…
Today I will show you how to draw a super cute baby-version of Winnie The…
Today I'll show you how to draw the famous Pusheen cat from social media, such…
Today I'll show you how to draw this super cute chibi version of Deadpool from…
View Comments
Ahhh patrick My bestfriend he's the best so is squid
🥰