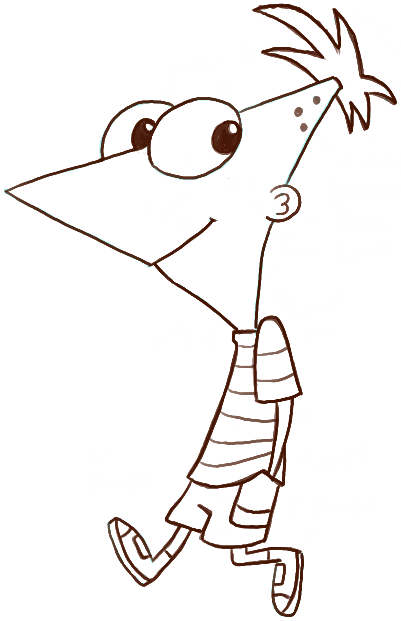
Phineas and Ferb is a very popular Disney cartoon show that is very popular in my house and it might be popular in your house too. Today I am going to show you how to draw Phineas walking along with his hands in his pocket. It isn’t too hard to draw, if you follow our illustrated instructions below. Have fun.
You Might Also Be Interested in Our Other Phineas and Ferb Drawing Tutorials
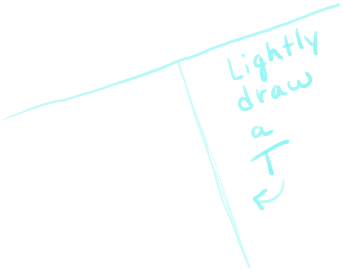
Start off by lightly drawing a capital letter ‘T’ shape.
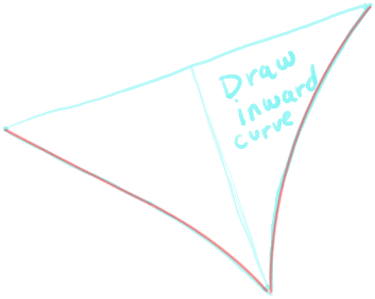
Next draw 2 curved lines from the bottom of the letter ‘T’ to the top.
– Use the center line as a guideline to help you place facial features.
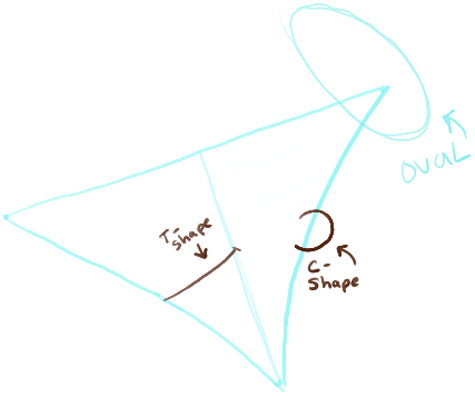
– Draw a sideways letter ‘T’ shape for Phineas’ mouth.
– Draw a backwards letter ‘C’ shape for Phineas’ ear.
– Lightly draw an oval at the upper right side of Phineas’ head. This will be a guidelines for placing his hair.
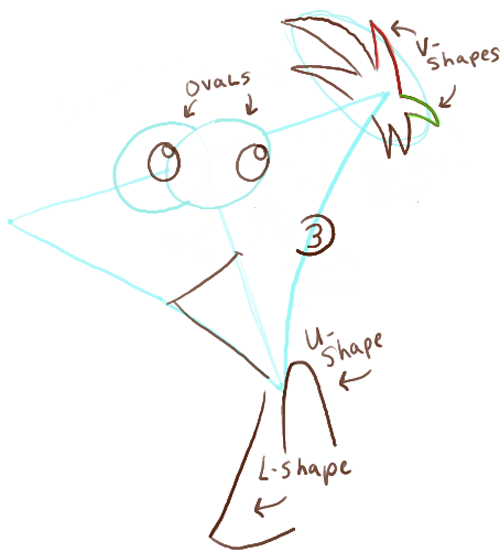
– Draw 2 ovals for eyes.
– Draw a #3 shape inside the ear.
– Change the chin line a bit (as seen in red).
– Use the oval hair guideline to place the individual hairs. Draw letter ‘W’ shaped hairs around the oval. I know that the hair on the top is a little wiggly…that is because my drawing tablet doesn’t work at the very top…sorry.
– To finish off the hairs, draw 2 letter ‘V’ shaped hairs.
– Draw 2 ovals inside each eye.
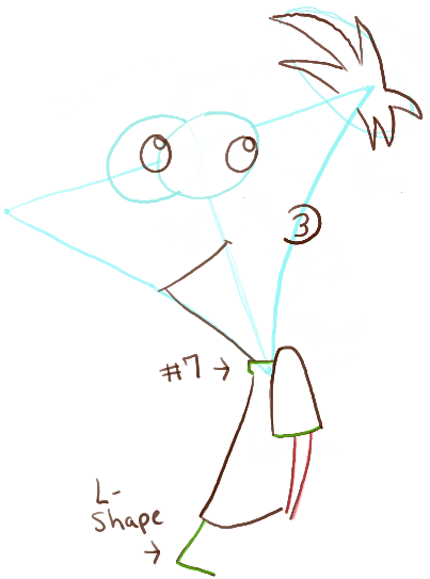
– Draw an upside down letter ‘U’ shape for the shoulder.
– Draw a letter ‘L’ shape for the front of Phineas’ shirt.
– Draw a sideways #7 shape for the top of the shirt.
– Draw a letter ‘L’ shape for the top-left side of his shorts.
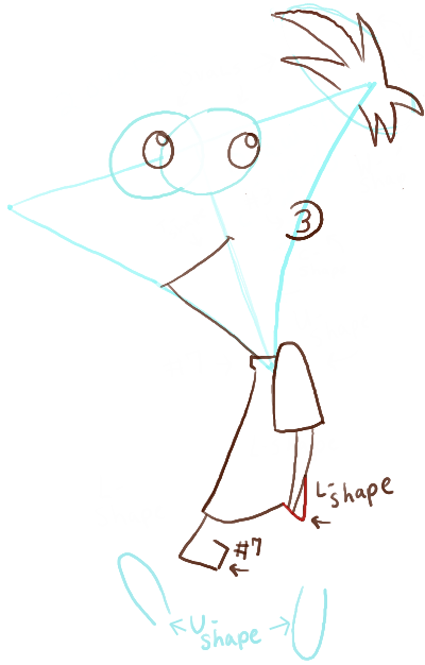
– Draw the bottom of the right sleeve. Also draw 2 lines (mine are in red) for the arm.
– Draw an ‘L’ shape for the right side of the shirt.
– Draw a #7 shape on the shorts.
– Draw 2 letter ‘U’ shapes for parts of Phineas’ shoes.
– Draw another letter ‘L’ shape for the right side of Phineas’ shorts.
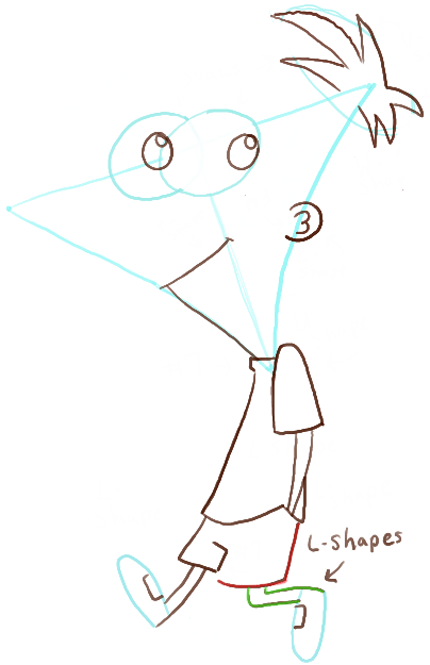
– Draw 2 letter ‘L’ shapes to make up Phineas’ bent back leg.
– Draw 2 half-rectangles inside each shoe.
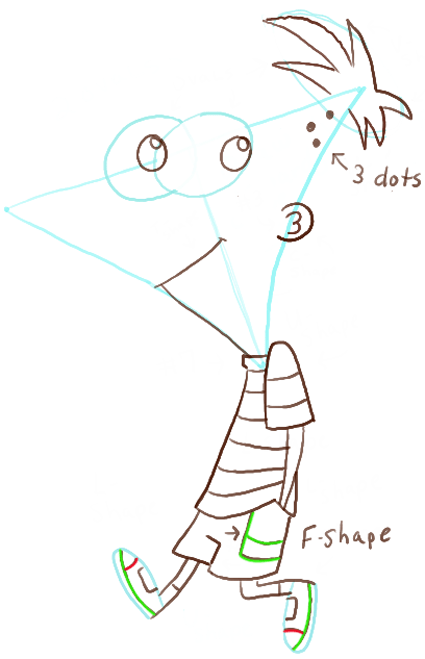
– Draw 3 dots at the top of Phineas’ head.
– Draw an upside down letter ‘F’ shape for Phineas’ pocket.
– Draw 2 curved lines in each shoe and another line on each leg for the sock.
– Draw some stripes on Phineas’ shirt.
Now you just need to tidy p the picture by erasing any guidelines (they were blue in this tutorial) and darken the lines that we kept. You can also colorize Phineas if you would like. I hope that you had a lot of fun and that your Phineas came out great!
You Might Also Be Interested in Our Other Phineas and Ferb Drawing Tutorials
Technorati Tags: Phineas, Phineas and Ferb, how to draw Phineas, drawing phineas, phineas walking, draw phineas
Today I'll show you how to draw Rick from the Rick and Morty cartoon tv…
Today I'll show you how to draw Morty from the Rick and Morty cartoon tv…
Today I'll show you how to draw the spunky little rabbit, Kuromi, from My Melody…
Today I'll show you how to draw this cute "bean duck" that I found on…
Today I'll show you how to draw Sosuke and Ponyo in a bubble (chibi /kawaii…
Today I'll show you how to draw a Boo from Super Mario Bros in Kawaii…