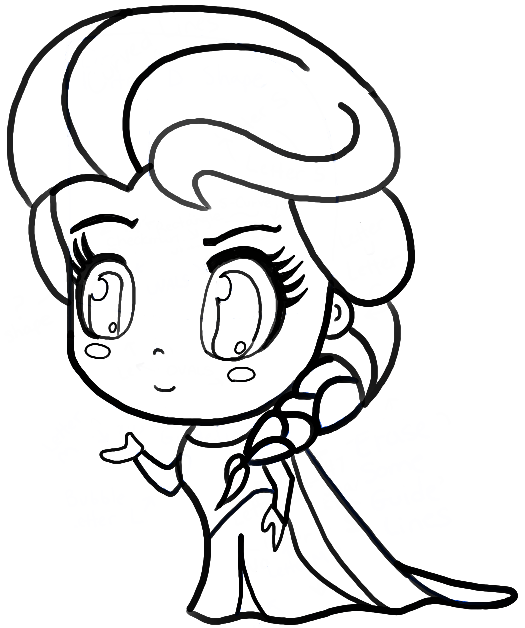
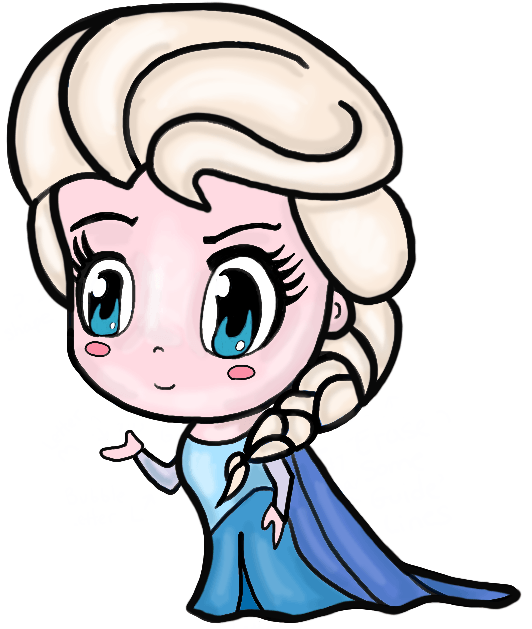
If you love Elsa from Frozen, you might like drawing a chibi version of Elsa. This is a cuter, baby-like version of Elsa that is adorable and much easier to draw. I will guide you to drawing chibi Elsa with easy-to-follow, step by step instructions using simple geometric shapes, alphabet letters, and numbers. Have Fun!
You Might Also Enjoy Our Other Frozen Drawing Lessons
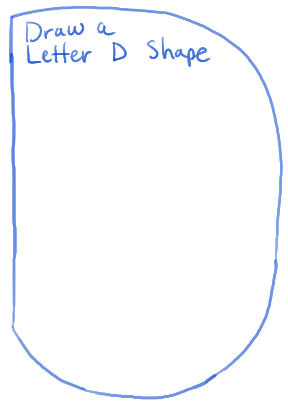
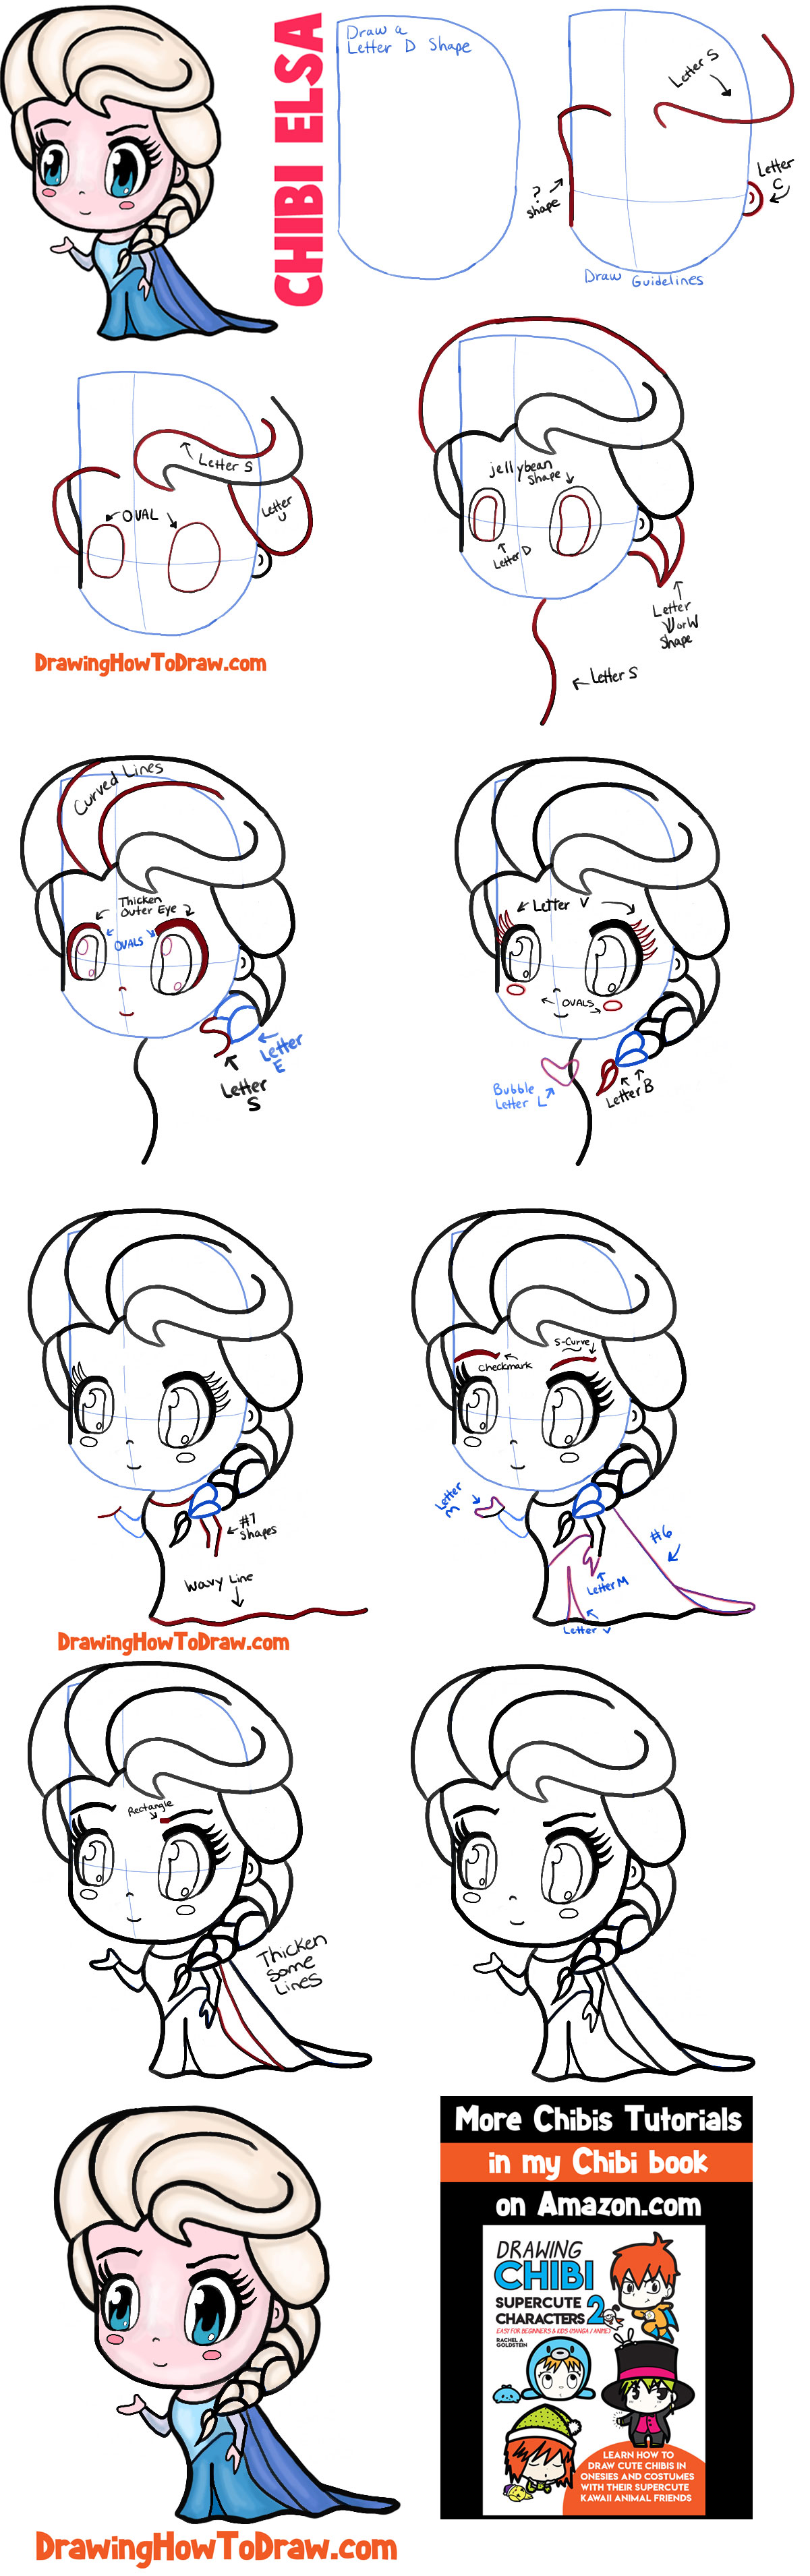
Draw a letter ‘D’ shape.
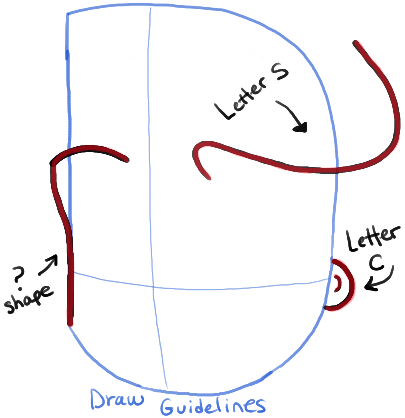
– Lightly draw guidelines thru the letter ‘D’ shape.
– Draw a ?- like shape on the left side of the face.
– Draw a letter ‘c’ shaped ear on the right side.
– Draw a sideways letter ‘s’ shape for the hair at the top of the head.
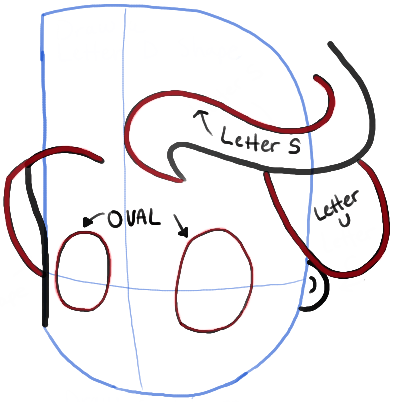
– Draw another letter ‘s’ shape at the top of the hair.
– Draw a letter ‘c’ shape at the left side of the head and a letter ‘u’ shape at the right side of the head.
– Draw ovals for eyes…using the guidelines to help you place them.
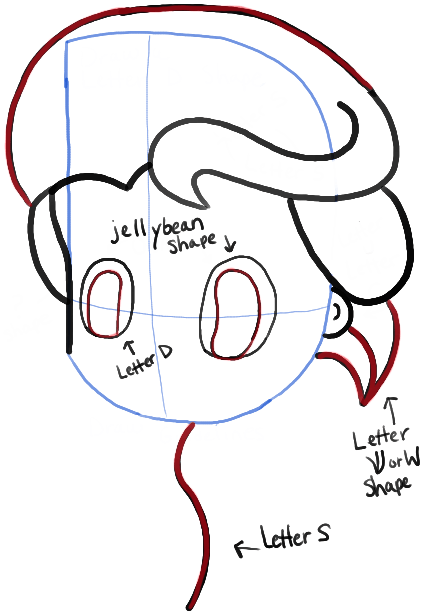
– Draw a curved line at the top of the head.
– Draw jellybean shapes within the eyes.
– Draw a letter ‘s’ shape for the left side of the body.
– Draw a letter ‘w’ shape at the right side of the head.
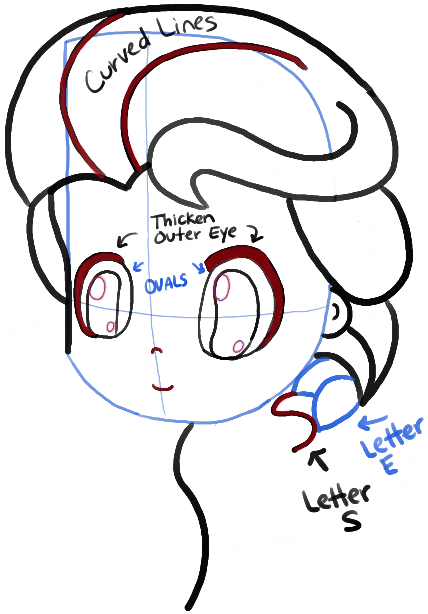
– Draw curved lines in the hair.
– Thicken the outer eyes.
– Draw oval highlights inside the eyes.
– Draw curved lines for nose and mouth.
– Draw a letter ‘E’ shape and a letter ‘S’ shape in the braid.
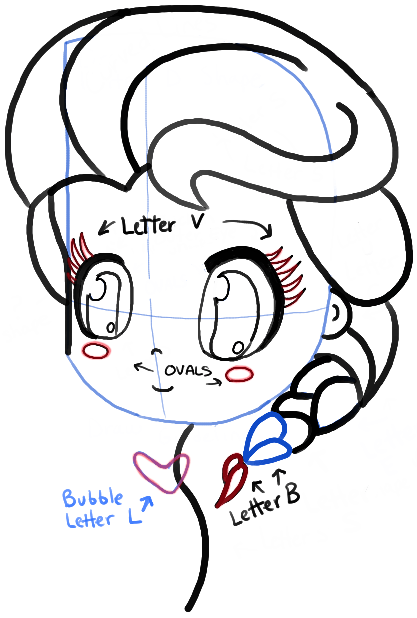
– Draw letter ‘v’ shaped eye lashes.
– Draw ovals for cheeks.
– Draw a bubble letter ‘L’ arm.
– Draw 2 letter ‘B’-like shapes in the braid.
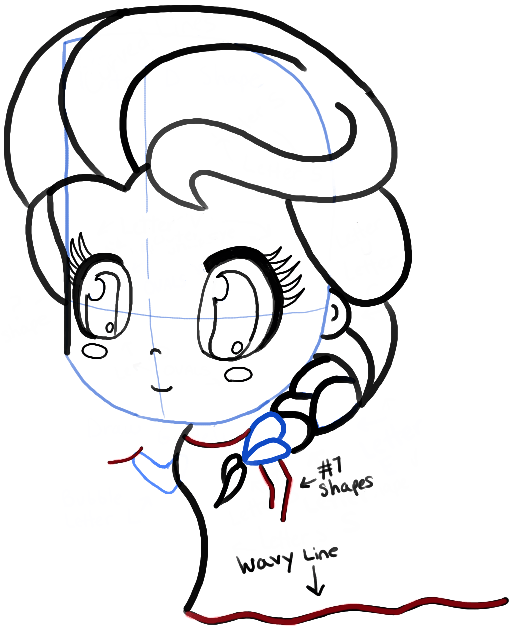
– Draw a curved line for the left hand.
– Draw a curved line for the collar.
– Draw two #7-like shapes for the right arm.
– Draw a wavy line at the bottom of the figure.
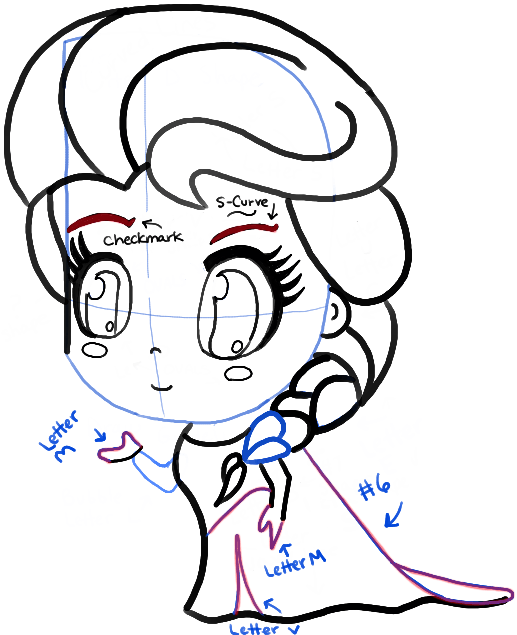
– Draw a checkmark-like shape for the left eye brow. Draw a letter-s-curve for the right eye brow.
– Draw a letter ‘m’ like shape for both hands.
– Draw an upside down letter ‘v’ shape for the wrinkle in the front of the dress.
– Draw a letter ‘j’ shaped curve in the middle of the dress.
– Draw a #6-like shape on the right-side of the figure.
– Draw a rectangle on the left side of the right eye brow.
– Draw two curved lines in the dress.
– Thicken and darken the lines that need work.
– Erase the guidelines and any lines that aren’t needed any more.
Colorize Chibi Elsa if you want to. I hope that your Elsa turned out great and that you had fun! Come back for more tutorials soon!
You Might Also Enjoy Our Other Frozen Drawing Lessons
Technorati Tags: chibi elsa, chibi elsa from frozen, elsa, elsa from frozen, frozen, disneys frozen, chibis
Today I'll show you how to draw Rick from the Rick and Morty cartoon tv…
Today I'll show you how to draw Morty from the Rick and Morty cartoon tv…
Today I'll show you how to draw the spunky little rabbit, Kuromi, from My Melody…
Today I'll show you how to draw this cute "bean duck" that I found on…
Today I'll show you how to draw Sosuke and Ponyo in a bubble (chibi /kawaii…
Today I'll show you how to draw a Boo from Super Mario Bros in Kawaii…
View Comments
I absolutely loved this tutorial. A lot of times when I am drawing I have a hard time referring shapes to letters and numbers. This made me look at things easier. I just loved it so much! Thank you for making me realize that there is much more to drawing than the naked eye can see.
Thanks for the tutorial, this is great!
Amazing.....liked it
beautiful and amazing
its really beautiful and also easy to draw
its very nice to see
This is cute, I guess, but also kinda hard for those people who have no sense of size.
OMG SOOOOOOOOOOO GOOD
Thank you!
nice drawing and so cute !!
That is so cute and it is so easy to draw. please do more chibi!!!