Minecraft is a very popular game that has overtaken my kids lives and I never see them anymore (just kidding). It is such a popular game that it is hard to find a child who doesn’t know exactly what it is. Today I will show you how to draw the Minecraft Logo with easy to follow steps. By the end of this tutorial, you will be drawing the Minecraft logo with ease. Find out how below.
You Might Also Enjoy Our Other Minecraft Drawing Lessons
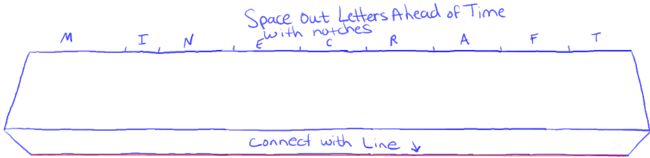
– Lightly draw a rectangle. If you want to make it the width of a piece of paper (the long way). You can make the rectangle a little less than the width of the paper (11 inches) and the height of the rectangle about 2 inches (about 1 and 14/16th inches).
– Then draw 2 lines pointing inwards…as seen in the picture above.
– Then draw a line along the bottom of the shape.
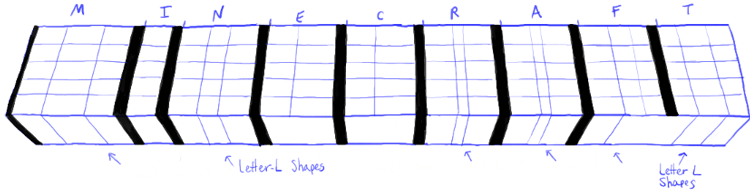
– Then draw notches to space out the letters ahead of time. The ‘M’ has the biggest space and ‘I’ has the smallest.
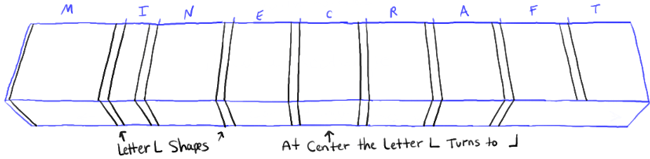
– Draw a line down from each notch. Then draw another line to the left of each notch (as seen above).
– Then draw lines on the bottom portion of the rectangle…as seen above. You will notice that it looks like letter ‘L’ shapes. Notice that the ‘L’ shapes are pointing to the right on the left and towards the left on the right side. In the middle is almost straight down.
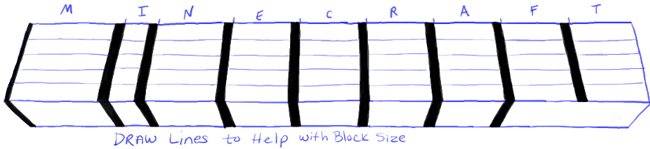
– Fill in the lines you just made.
– Lightly draw lines across the rectangle to help with the block size in future steps.
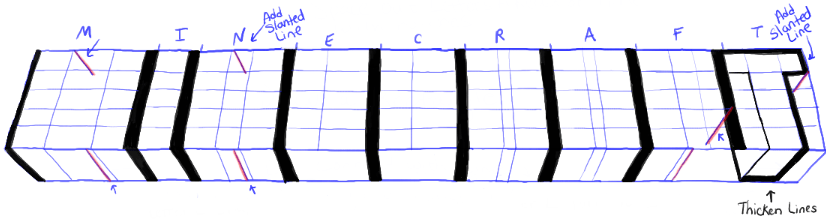
– Draw lines down and on the underside as well to make letter ‘L’ shapes again.
– Draw a few angled lines.
– Draw the letter ‘T’ shape using the lines that you made in previous steps. Also thicken some of these lines.
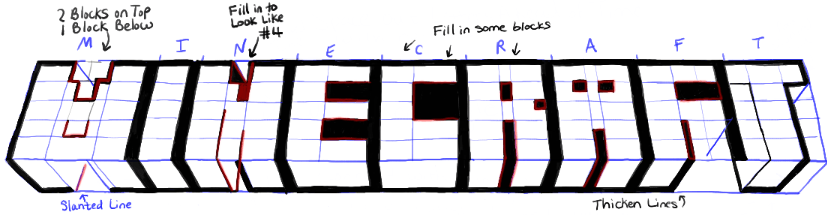
– Use some of the grid lines to help you draw out the basic shapes of letters. Fill in those blocks.
– Draw a few basic shapes, such as a #2-like shape , as well as a letter ‘L’ and ‘Y’ shape, and a letter ‘S’ curve. Draw a few triangle like shapes.
– On the bottom of the letter ‘M’ shape, draw a bubble letter ‘P’ shape.
– Draw another #’2-like shape on the letter ‘M’.
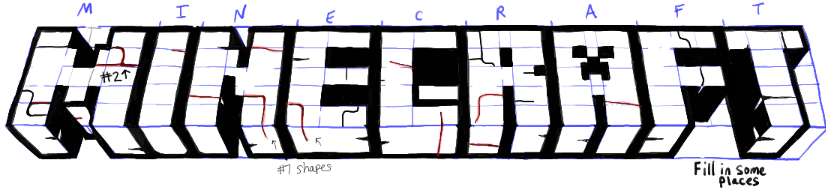
– Draw a few #7-like shapes.
– Draw some cracks and fill in some black spaces.
This is what the Minecraft logo should look like before you had some gradient grays as seen in the next picture.
And this is what the finished Minecraft logo should look like. Color grays up from the bottom to the top where it is a lighter shade of gray. I hope that you had fun and that this tutorial helped you.
You Might Also Enjoy Our Other Minecraft Drawing Lessons
Technorati Tags: minecraft logo, how to draw minecraft logo, draw minecraft logo, minecraft
Today I'll show you how to draw Rick from the Rick and Morty cartoon tv…
Today I'll show you how to draw Morty from the Rick and Morty cartoon tv…
Today I'll show you how to draw the spunky little rabbit, Kuromi, from My Melody…
Today I'll show you how to draw this cute "bean duck" that I found on…
Today I'll show you how to draw Sosuke and Ponyo in a bubble (chibi /kawaii…
Today I'll show you how to draw a Boo from Super Mario Bros in Kawaii…
View Comments
Mine was great, thanks! This is a great website, easy, descriptive how to's!
I recommend this for sure
Mine came out awesome! I love this website.
i like this websit
Mine came out awesome!!
This isn't good that much
Mine kind of failed
cool thanks!!!!