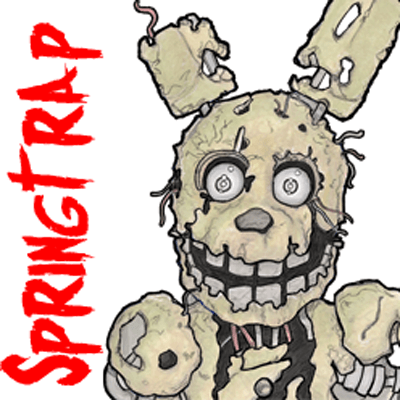
Learn how to draw Springtrap from Five Nights at Freddy’s 3 with the following step by step guide. This is an advanced drawing tutorial and it might be a bit tough for some of you. I have tried to make it as easy as I could. Try it out below.
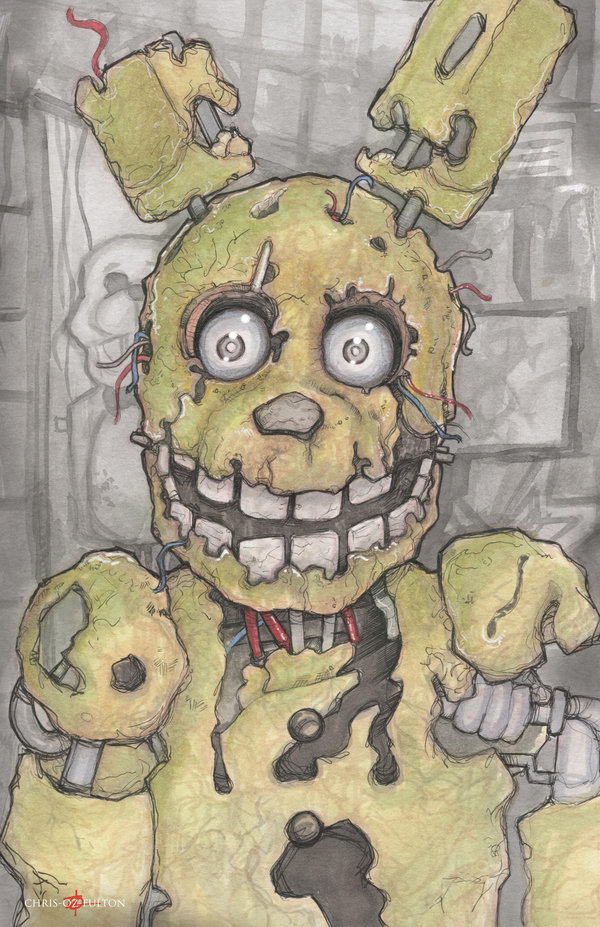
The original artwork that I used as a source came from ChrisOzFulton. Check out Chris’ artwork here.
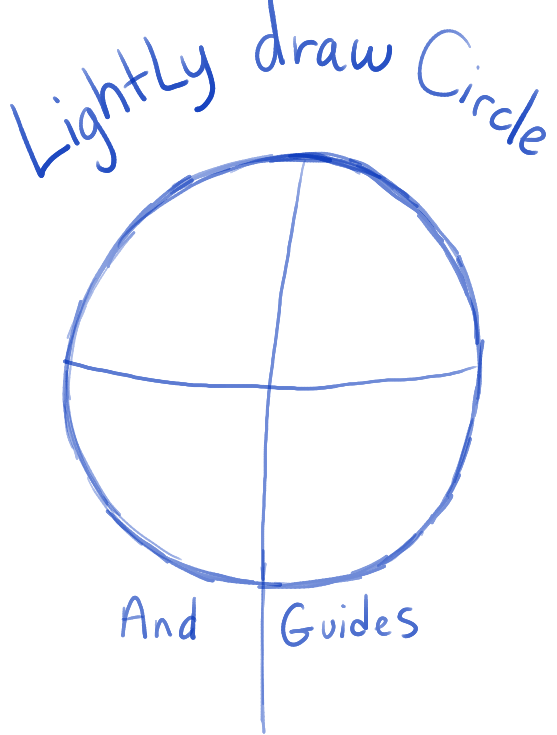
– Draw a circle.
– Then draw guidelines thru the face.
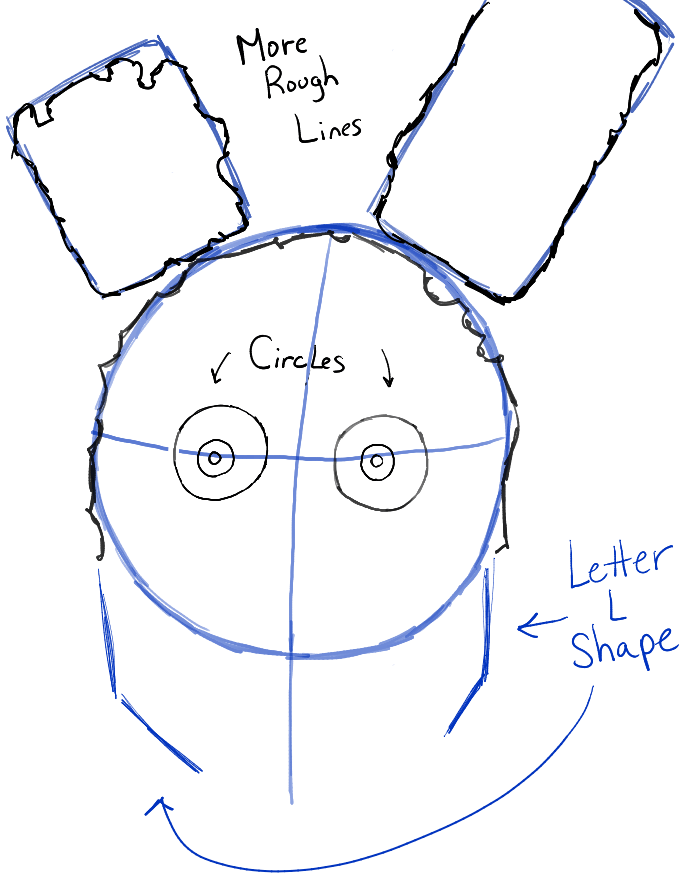
– Lightly draw rounded rectangles as guides for the ears.
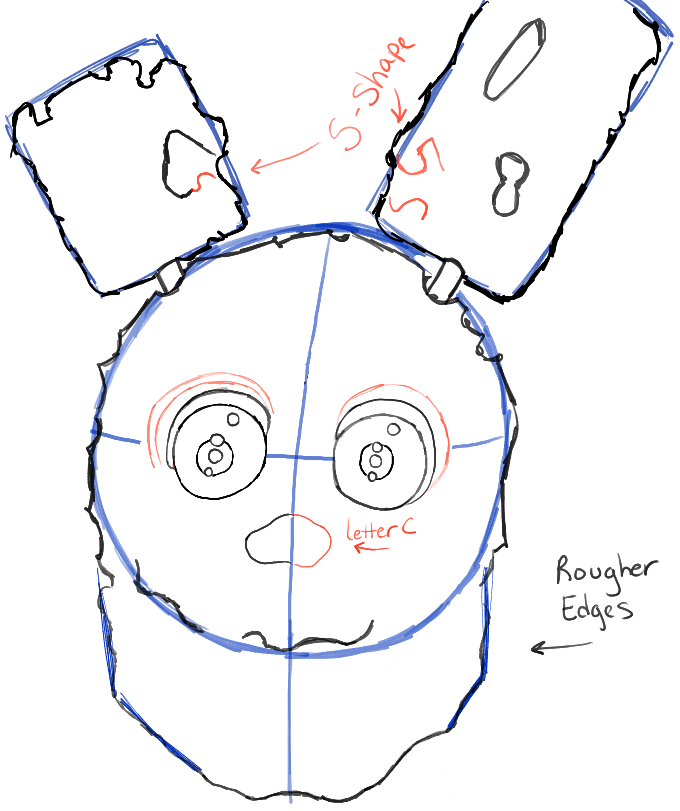
– Draw rough edges around the guide circle that you drew in the last step.
– Draw circles for eyes.
– Lightly draw letter ‘L’-shaped guidelines for the jaw-guidelines.
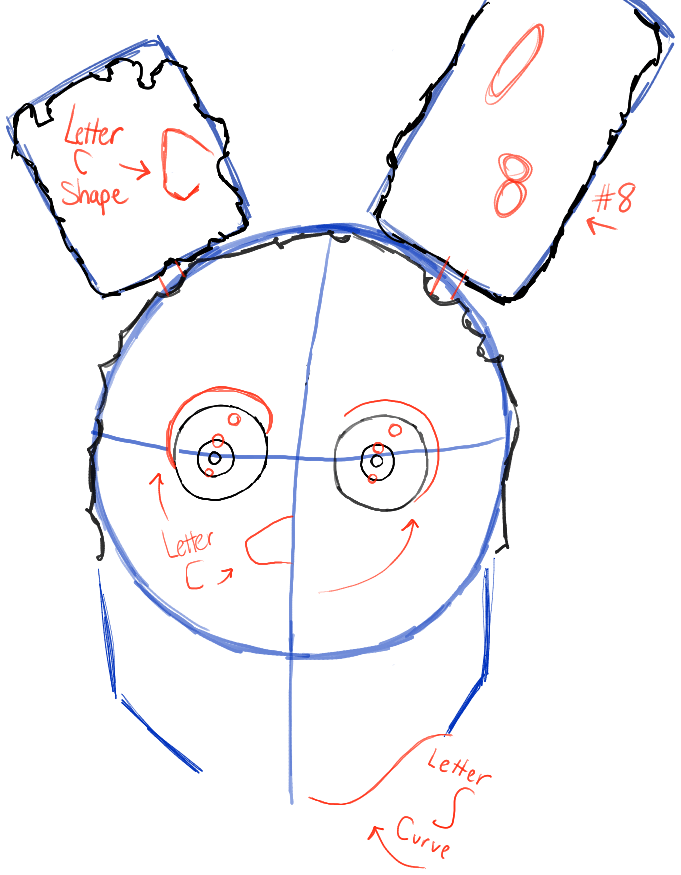
– Draw circles inside the eyes.
– Draw rough edges around the ear, rectangle guidelines.
– Draw letter ‘C’-like shape on the left ear.
– Draw an oval and a #8-like shape on the right ear.
– Draw details in and around the eyes.
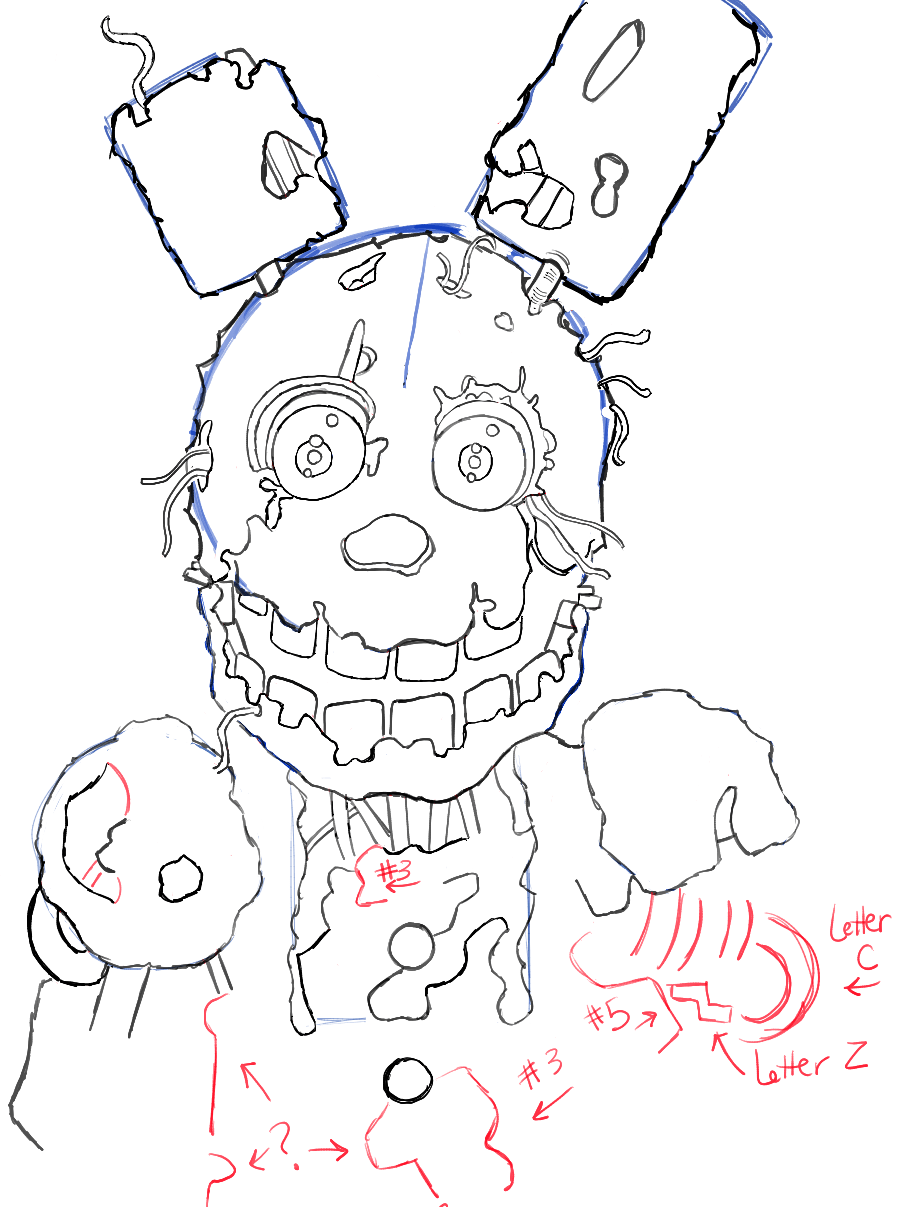
– Draw letter ‘S’-like shape on the right side of the jaw.
– Draw #5 and letter ‘S’-like shapes on the ear.
– Draw curved lines around eyes.
– Draw letter ‘C’ like shape for the right side of the nose.
– Draw rougher edges around the chin.
Step 6
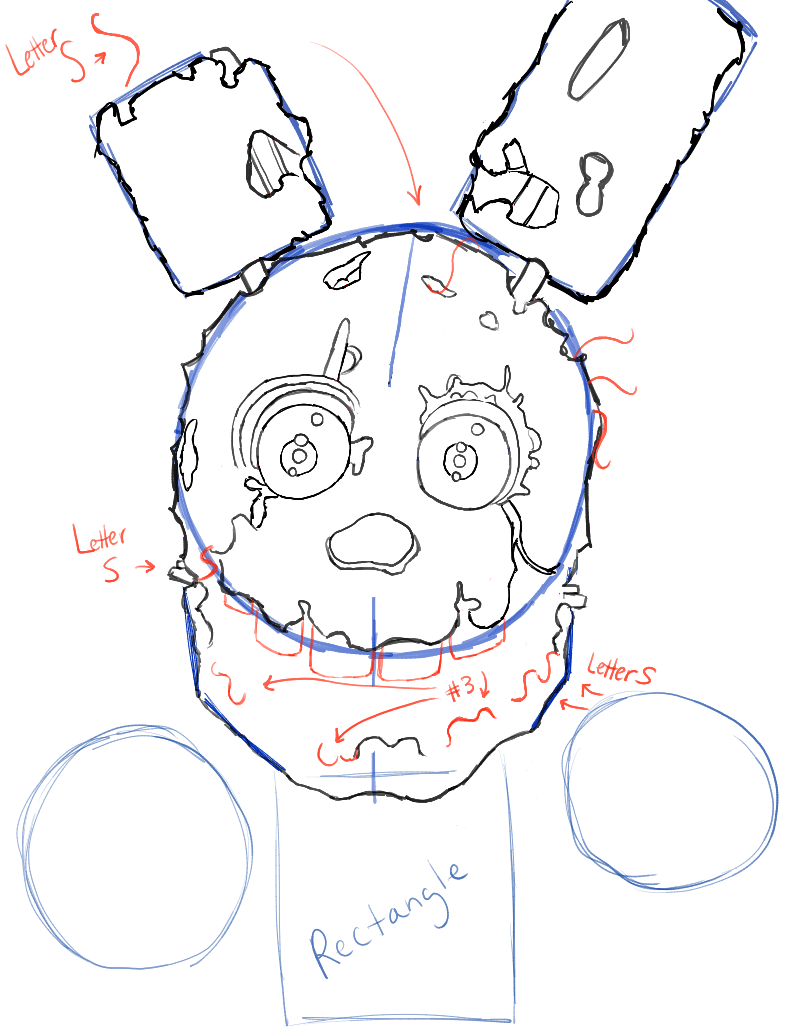
– Draw a few basic shapes all around the face.
– Draw #3-like shapes all around the jaw.
– Draw oval-ish shapes around the face.
– Draw a ?-like shape under the left eye.
– Draw a few details on the right ear.
– Draw a #5-like shape under the right ear.
– Draw a few letter ‘S’ shapes around the face.
– Draw rectangle-ish shapes for teeth.
– Draw #3-like and ‘S’-like shapes around the jaw.
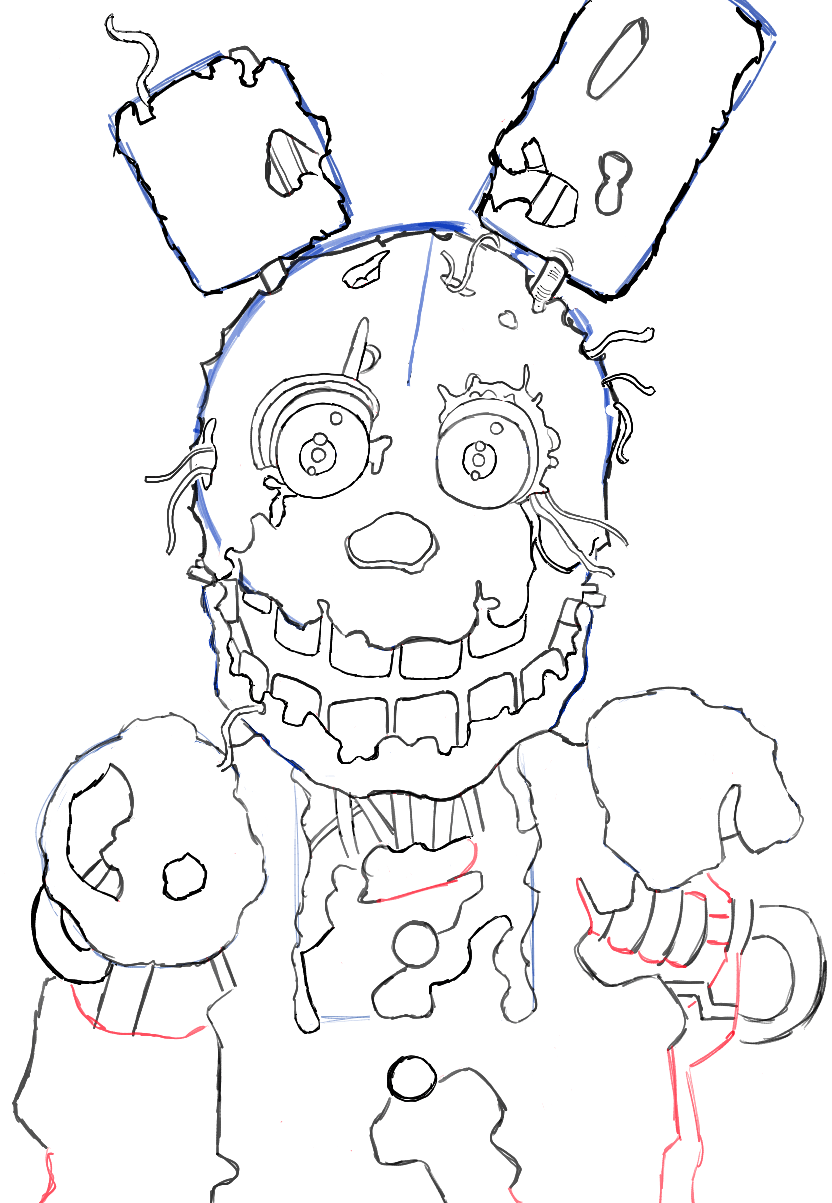
– Draw circle and rectangle guidelines below the face.
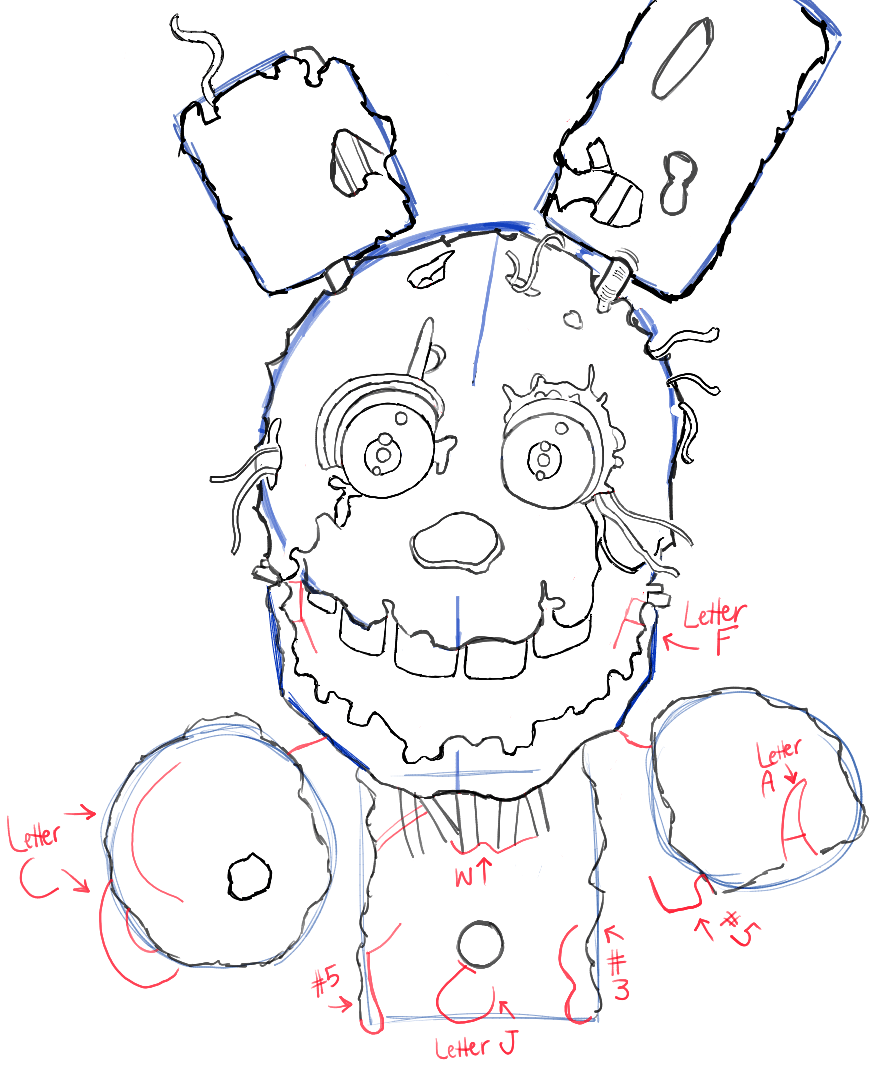
– Draw curvy lines coming out of the holes in the face.
– Draw more details on the lower jaw area.
– Draw circles in the chest and left arm.
– Draw some lines on top of the chest.
– Draw rough edges around the blue guidelines.
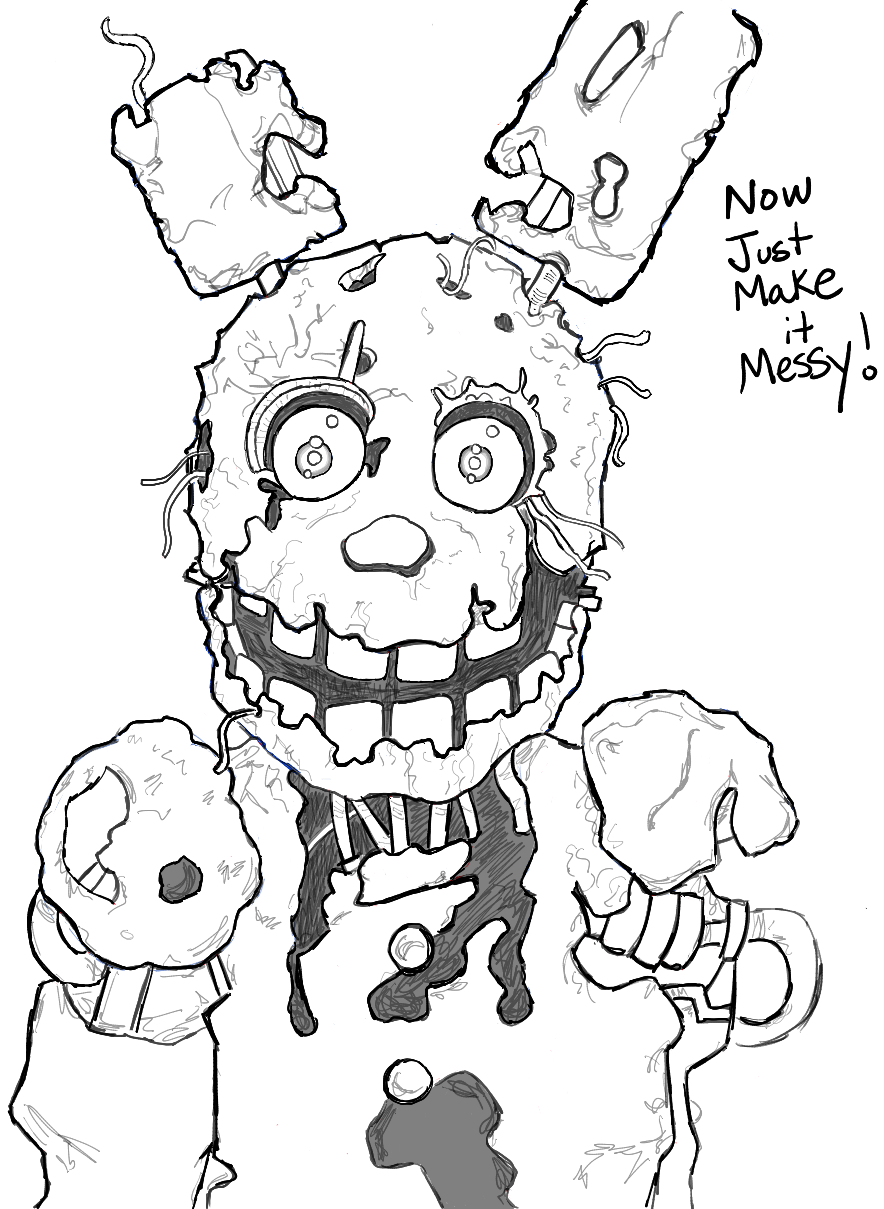
– Draw letter ‘F’-like shapes in the mouth.
– Add details to the chest and arms.
– Draw in teeth.
– Add more details to chest and arms.
– Continue to add in the details.
– All of these lines can be drawn with basic shapes that you draw every day, such as the ?, #3, #5, etc.
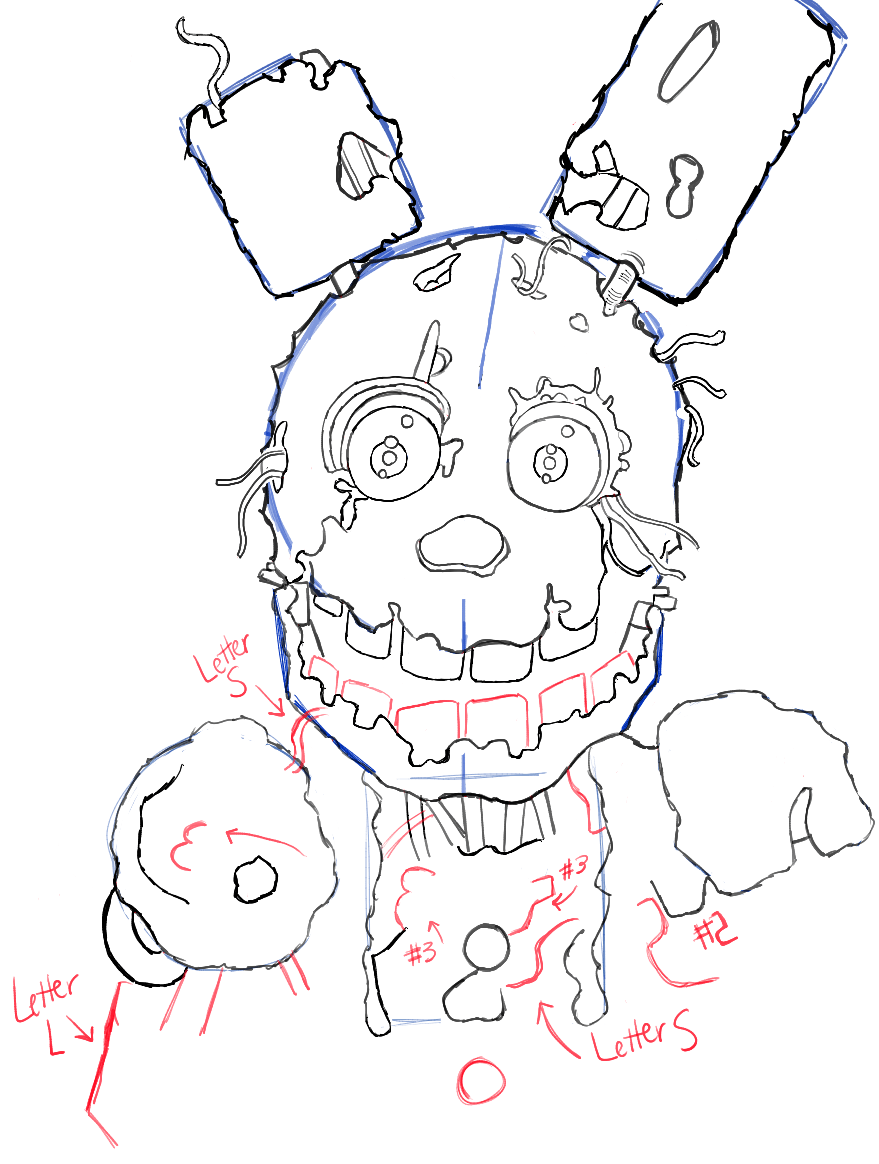
– Now we just add a few remaining lines.
– Now erase guide lines. Darken lines. Fill in some blackened areas.
– Now just add squiggly, messy lines, as seen above.
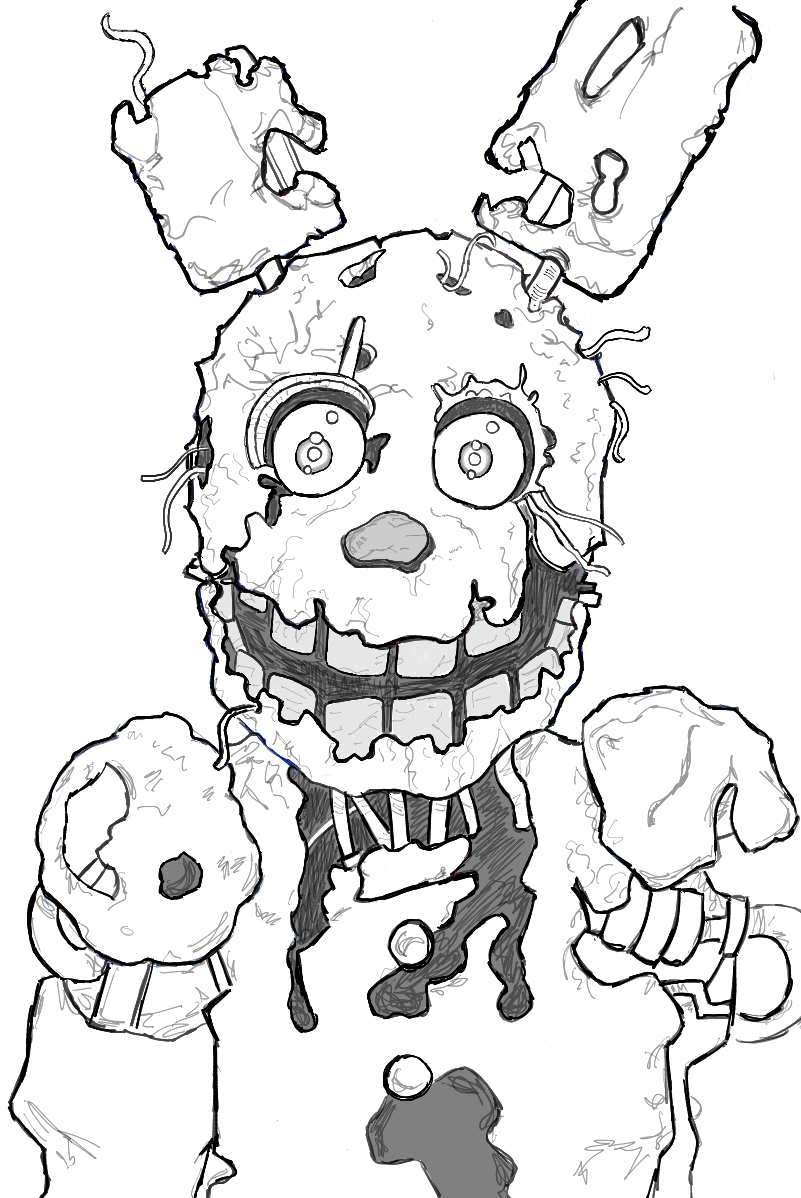
– Finish up your drawing. You can add color if you want to.
The original artwork that I used as a source came from ChrisOzFulton over at DeviantArt.com. Check out his artwork here.
Technorati Tags: how to draw Springtrap, drawing Springtrap, Springtrap, Springtrap from Five Nights at Freddys
Today I'll show you how to draw Rick from the Rick and Morty cartoon tv…
Today I'll show you how to draw Morty from the Rick and Morty cartoon tv…
Today I'll show you how to draw the spunky little rabbit, Kuromi, from My Melody…
Today I'll show you how to draw this cute "bean duck" that I found on…
Today I'll show you how to draw Sosuke and Ponyo in a bubble (chibi /kawaii…
Today I'll show you how to draw a Boo from Super Mario Bros in Kawaii…