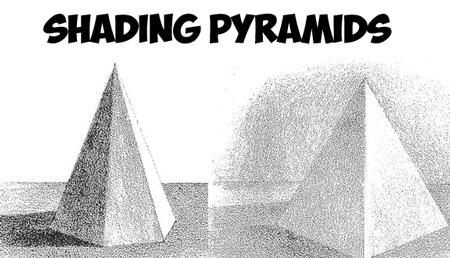
In this drawing tutorial, you will learn how to add shadows and graduated shading to pyramids – both Square and Hexagonal Pyramids. In pyramids, we find no longer perpendicular but sloping faces ; and in this consists the only important difference between the two classes of figures.
Place a square pyramid, as in Step 1 below, with the light falling from above and from the right. The sides turned to the light will, of course, be brighter than the others. As the shaded sides slope from the ground-plane, the reflected light will have less effect upon their upper portions than it would upon the corresponding parts of perpendicular faces. Hence, when pyramids stand with their axes upright, the portions in shade near the apex will show little gradation.
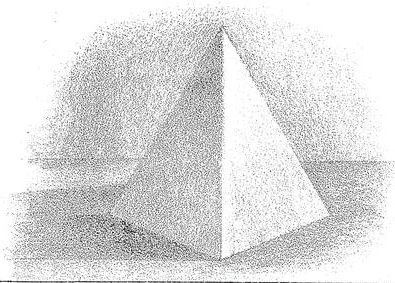
Shade evenly the cast-shadow, background, and ground-plane.
Shade the dark face of the pyramid of a depth equal to its lightest portion, comparing this tone carefully with the cast-shadow and the back- ground.
A gradation of shadow is seen from the right edge of the shade. The portion near the apex will appear especially dark, as there is little reflection to lighten the tone.
The lighter side shows a similar gradation, so that the brightest portion of the figure will be along the edge nearest the spectator ; for this brightness is heightened by contrast with the darker side. Lay on this gradation lightly. It should be noticed how bright the apex appears by contrast.
Darken the shadow next the pyramid and along its front edge, and the back- ground near the light face. The lowest edge of the darker side receives little reflected light, and should be slightly shaded.
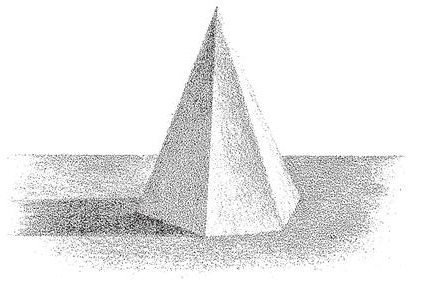
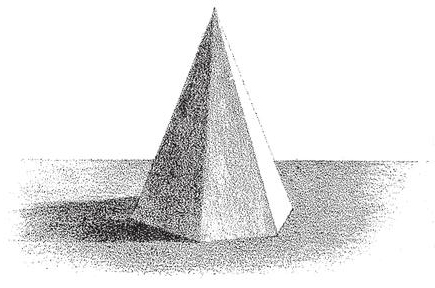
Place an hexagonal pyramid that the light may fall from the right, and that three faces may be seen from the front. In this case, for the sake of variety of practice, the solid is shown without a background. It may be necessary to outline lightly some of the extreme edges, especially that of the lightest side. The shading of the lightest and darkest faces will be exactly similar to that of the square pyramid. The middle face is intermediate in tone, but its gradations fall from right to left, as on the other two faces.
Shade the cast-shadow, ground-plane, and the two faces in shade all of an even tint, equal to their lightest portion.
Step 2
Add gradations to the shaded faces, keeping the darker edges clear.
Gradate the cast-shadow and the lowest edge of the darkest side. The corresponding part of the intermediate face receives reflection, and should not be darkened. The ground-plane abutting on the lightest face may also be slightly shaded.
Technorati Tags: shading pyramids, pyramids, shadows, shading, how to shade pyramids
Today I'll show you how to draw Rick from the Rick and Morty cartoon tv…
Today I'll show you how to draw Morty from the Rick and Morty cartoon tv…
Today I'll show you how to draw the spunky little rabbit, Kuromi, from My Melody…
Today I'll show you how to draw this cute "bean duck" that I found on…
Today I'll show you how to draw Sosuke and Ponyo in a bubble (chibi /kawaii…
Today I'll show you how to draw a Boo from Super Mario Bros in Kawaii…