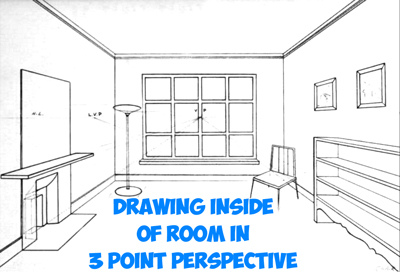
Today we will show you how to draw the inside of a room, with furniture, using 3 Point Perspective Techniques. If you want a more detailed guide to perspective, we have a few of them here. Without using perspective, the drawing of the interior of a room will look fake and cartoony, you need basic knowledge of perspective to draw this 3-dimensional room interior.
You Might Also Like Our Other Perspective Drawing Tutorials
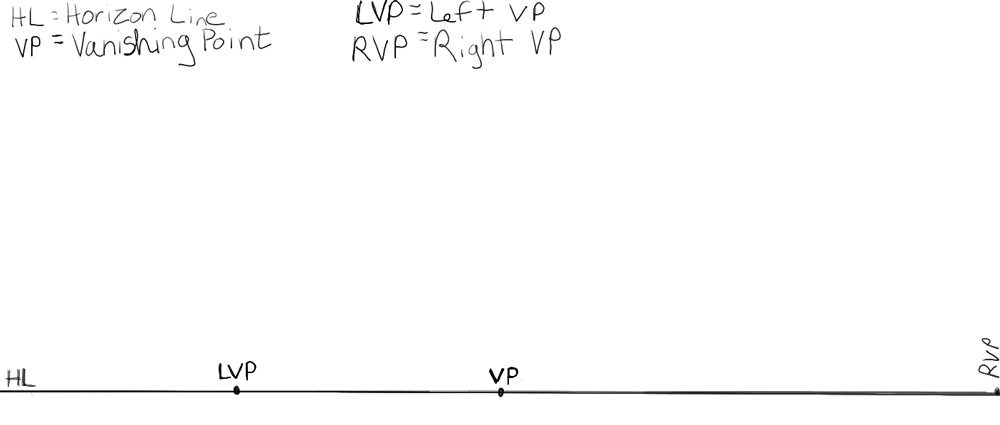
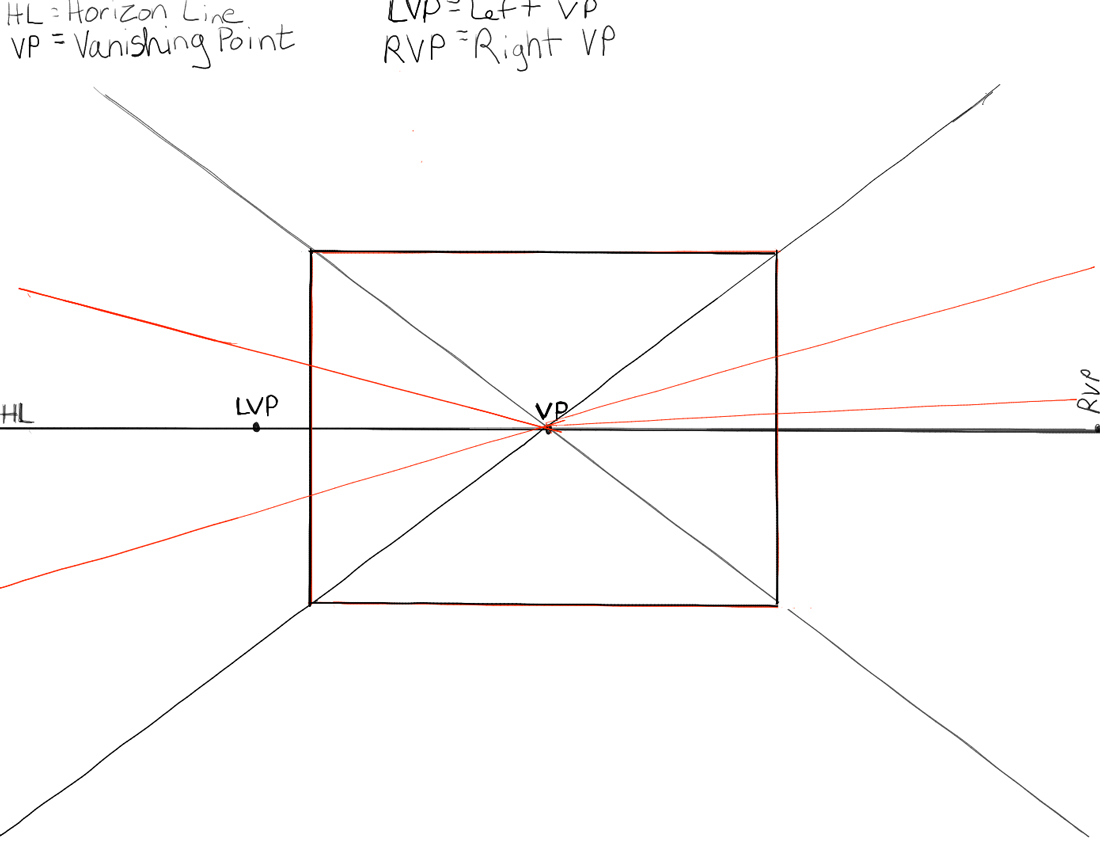
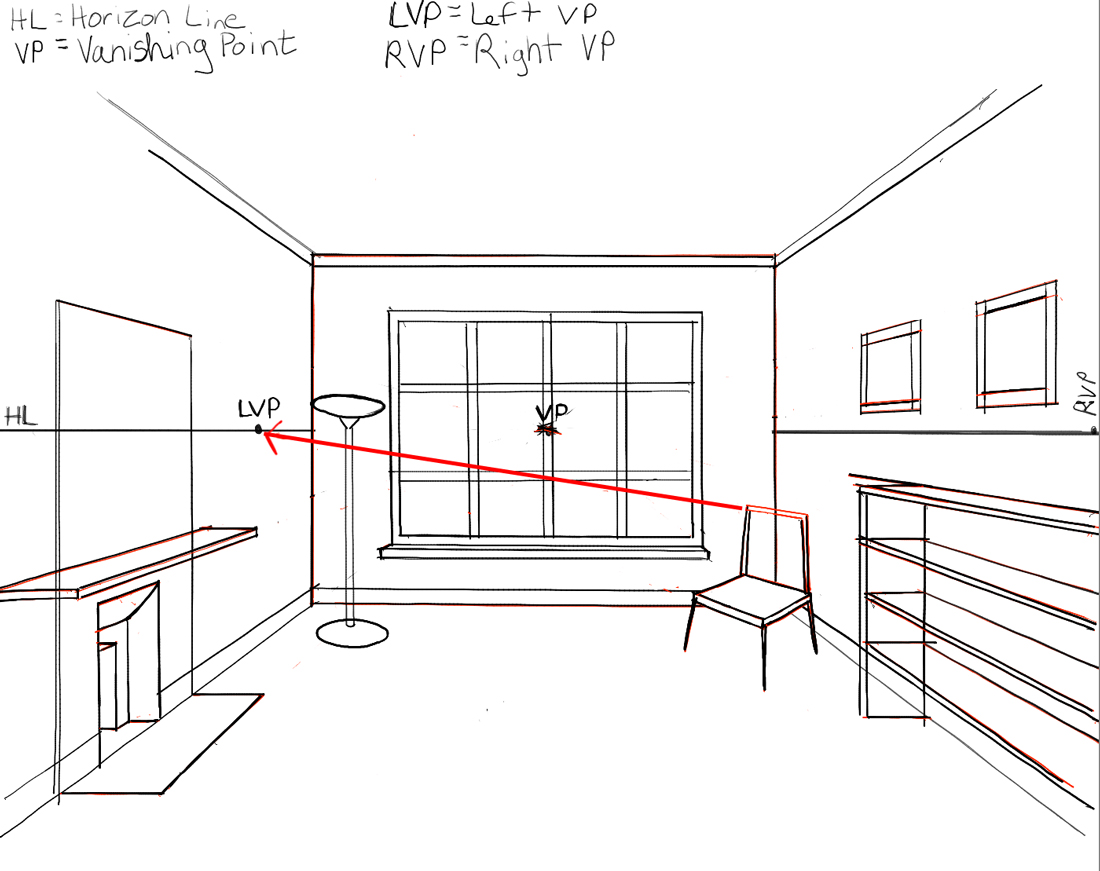
Find the middle of a piece of paper. Use a ruler to draw a line through the center of the page. This will be your Horizon Line (HL). In the middle of that line draw a dot…this will be your Vanishing Point (VP). On the right side of the line draw a dot and this will be your Right Vanishing Point (RVP). In the center of the left-side of your horizon line draw a dot…this will be your Left Vanishing Point (LVP).
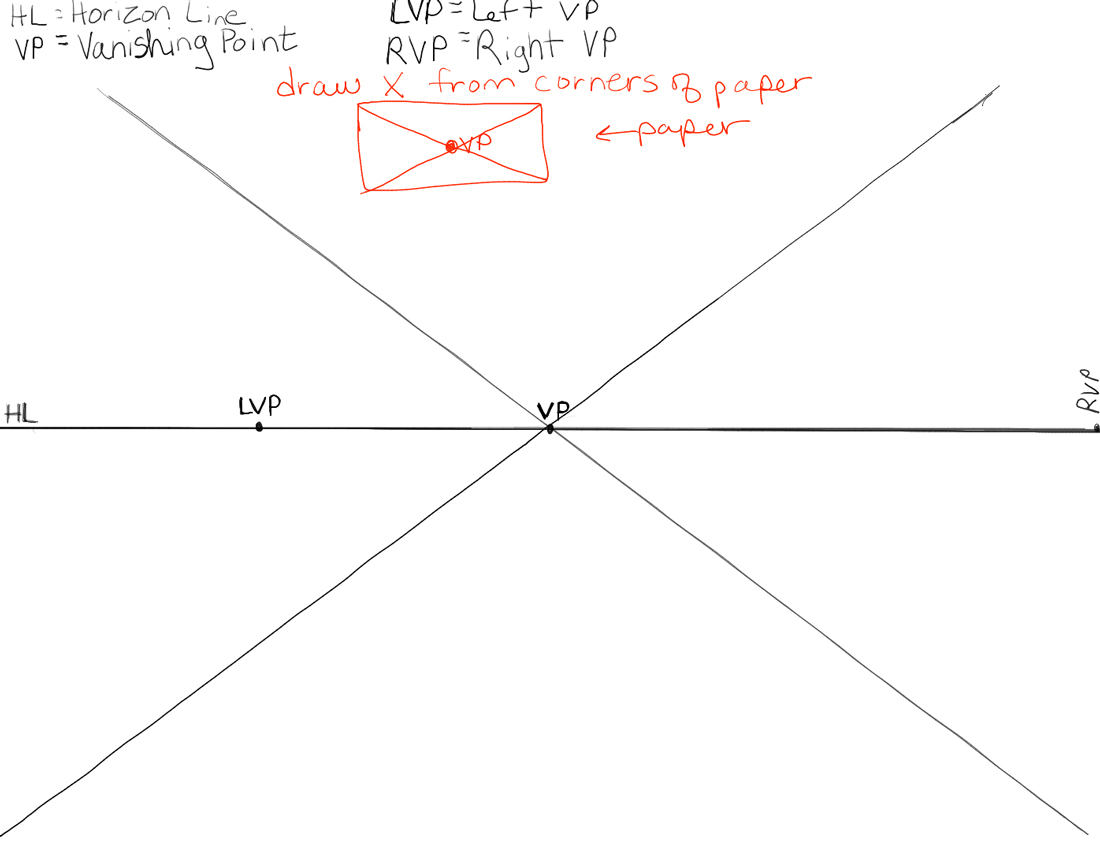
Draw an X through the Vanishing Point to each corner of the paper…like this (the red part of the drawing shows you what I mean).
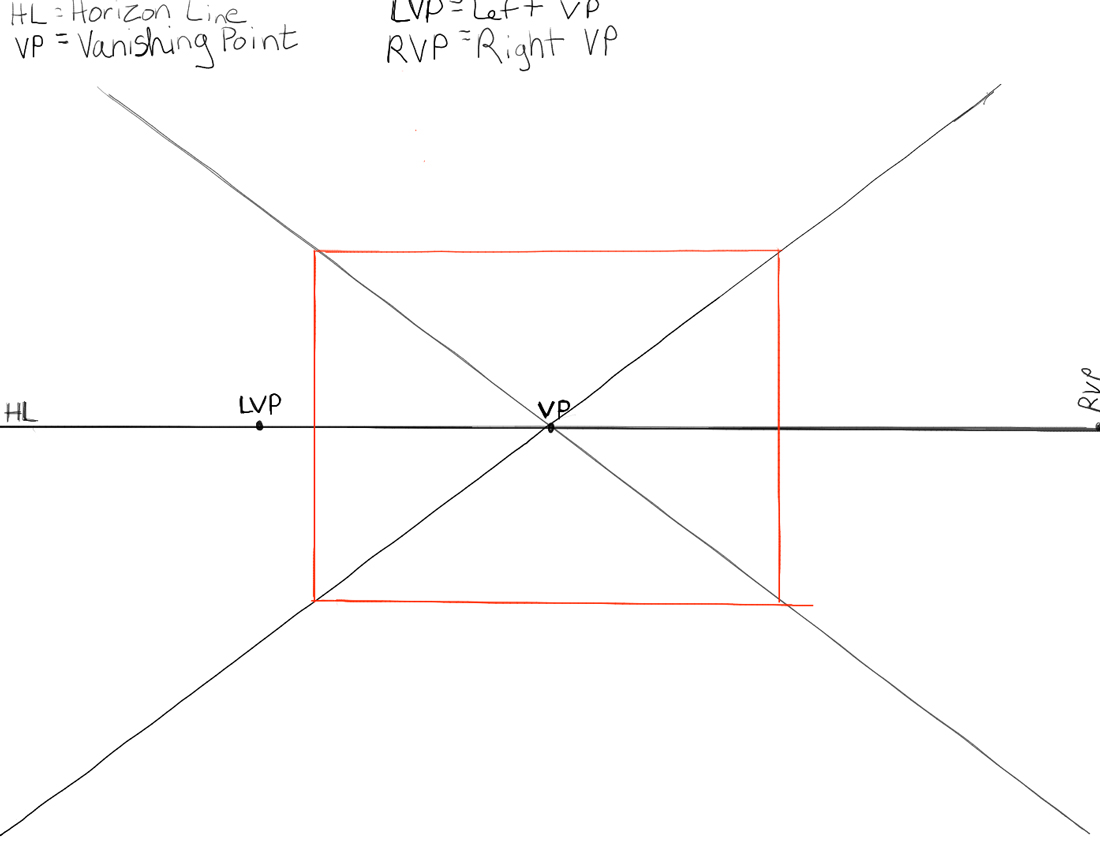
Draw a rectangle, like I did above.
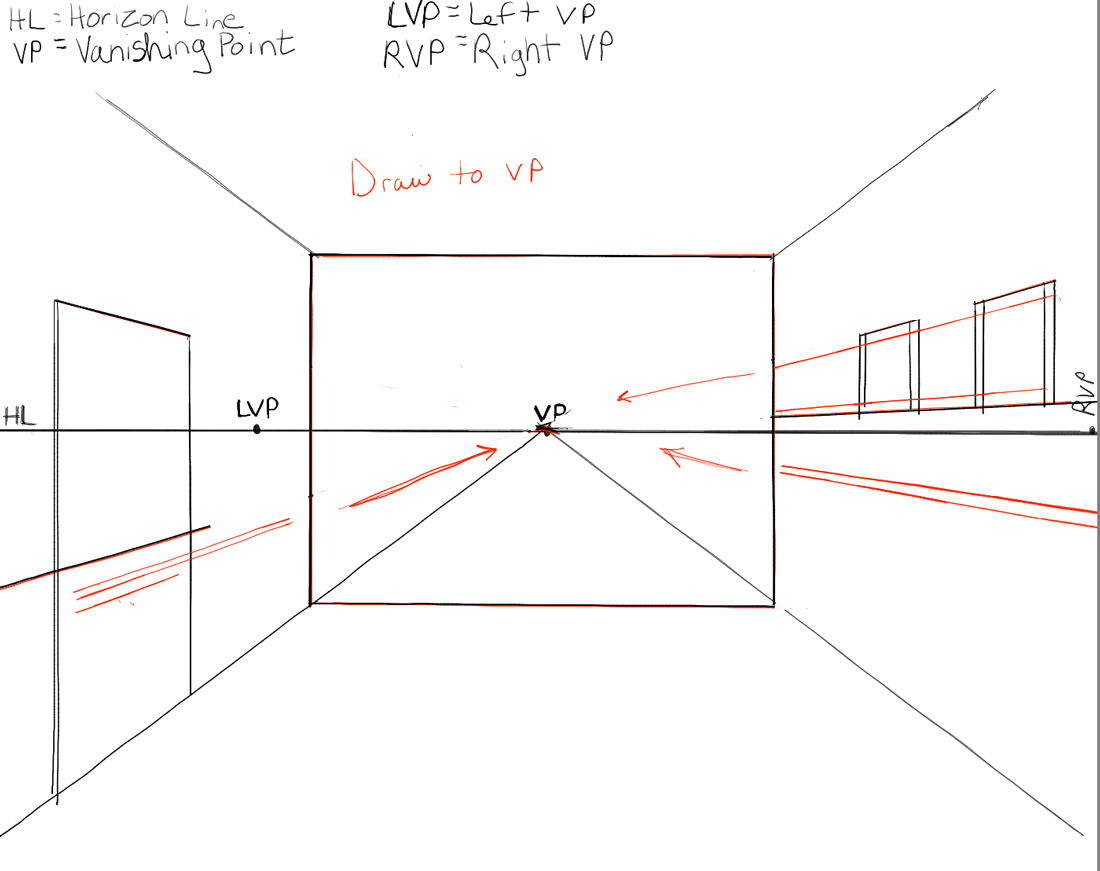
Draw a line from the vanishing point to the places I show above (it doesn’t have to be exactly like mine, of course).
Use your ruler to draw vertical lines, as I did above.
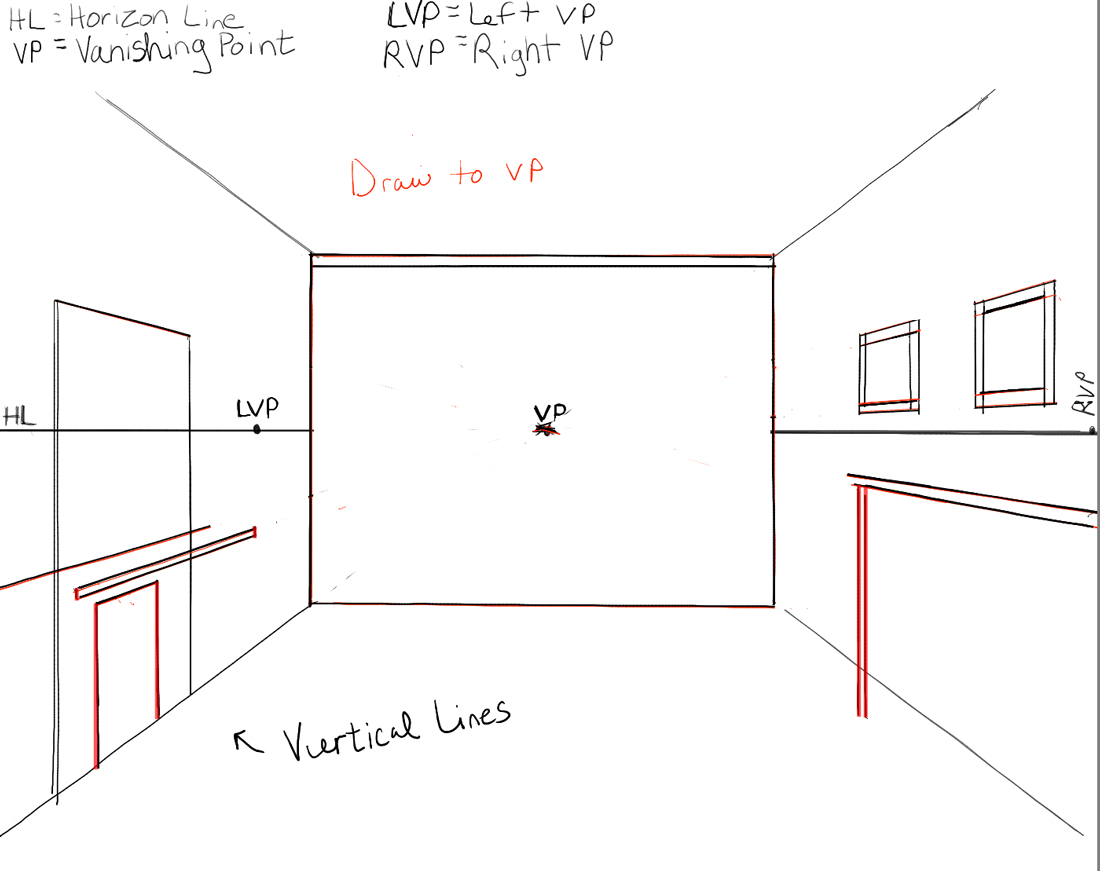
Draw lines from the vanishing point to the places that I show above.
Draw vertical lines up to the lines you drew in the last step.
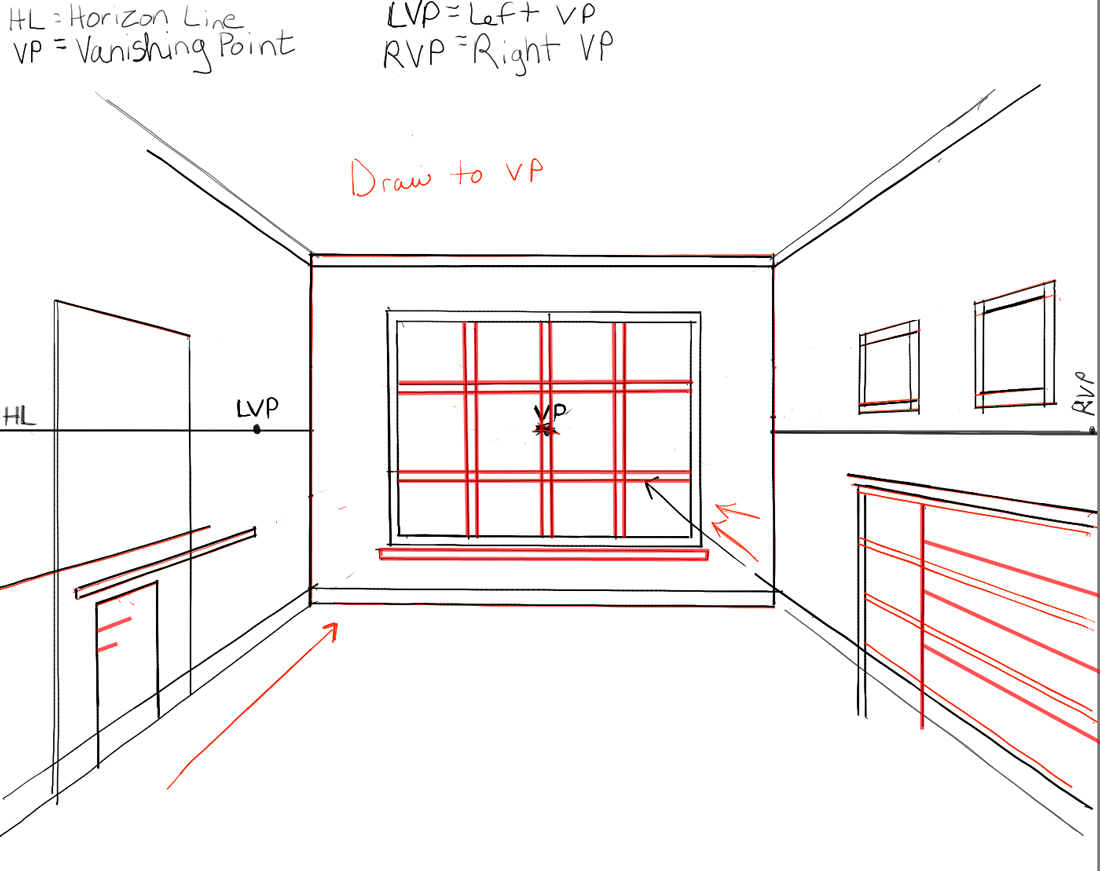
Draw double-lines rectangle in the center of the back wall – this will be the window. Then draw a lines below it. Then go ahead and draw lines towards the vanishing point, as I did above.
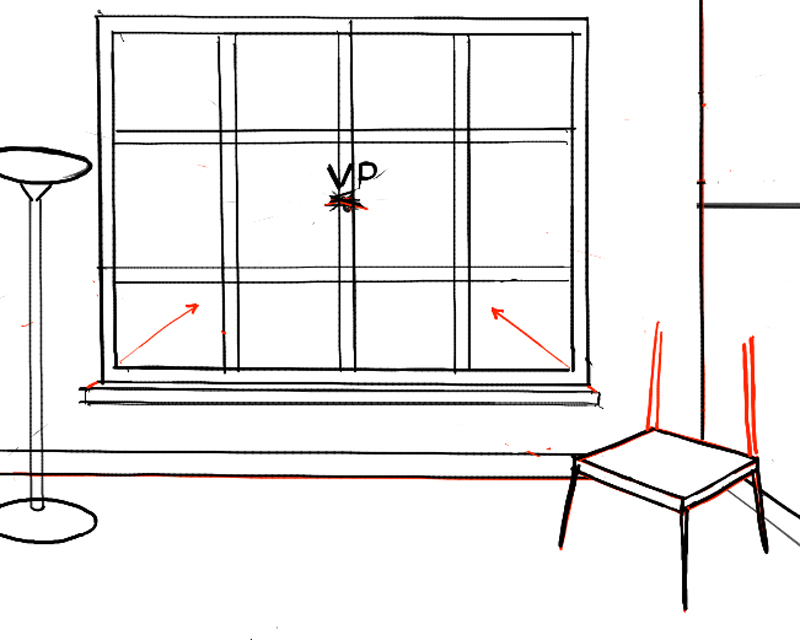
Draw horizontal and vertical lines in the window. Then go ahead and draw some lines towards the vanishing point.
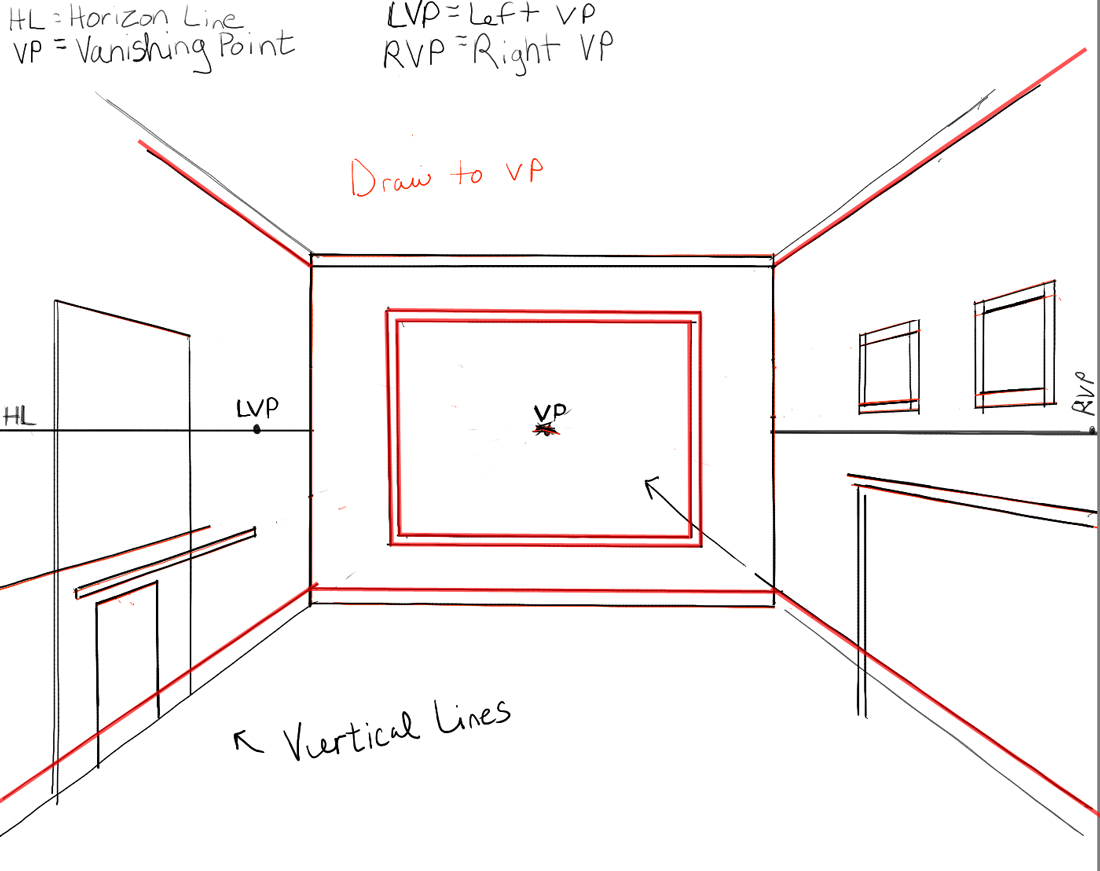
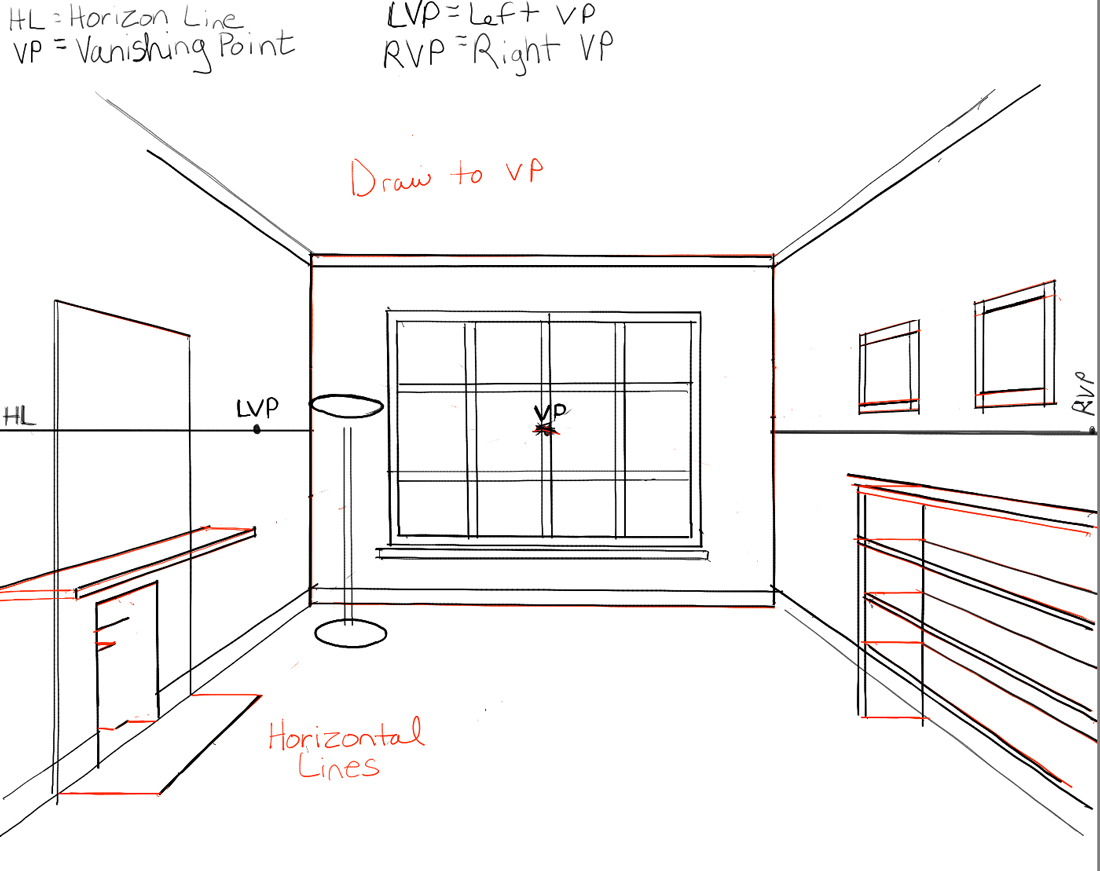
Now connect items you drew with some horizontal lines.
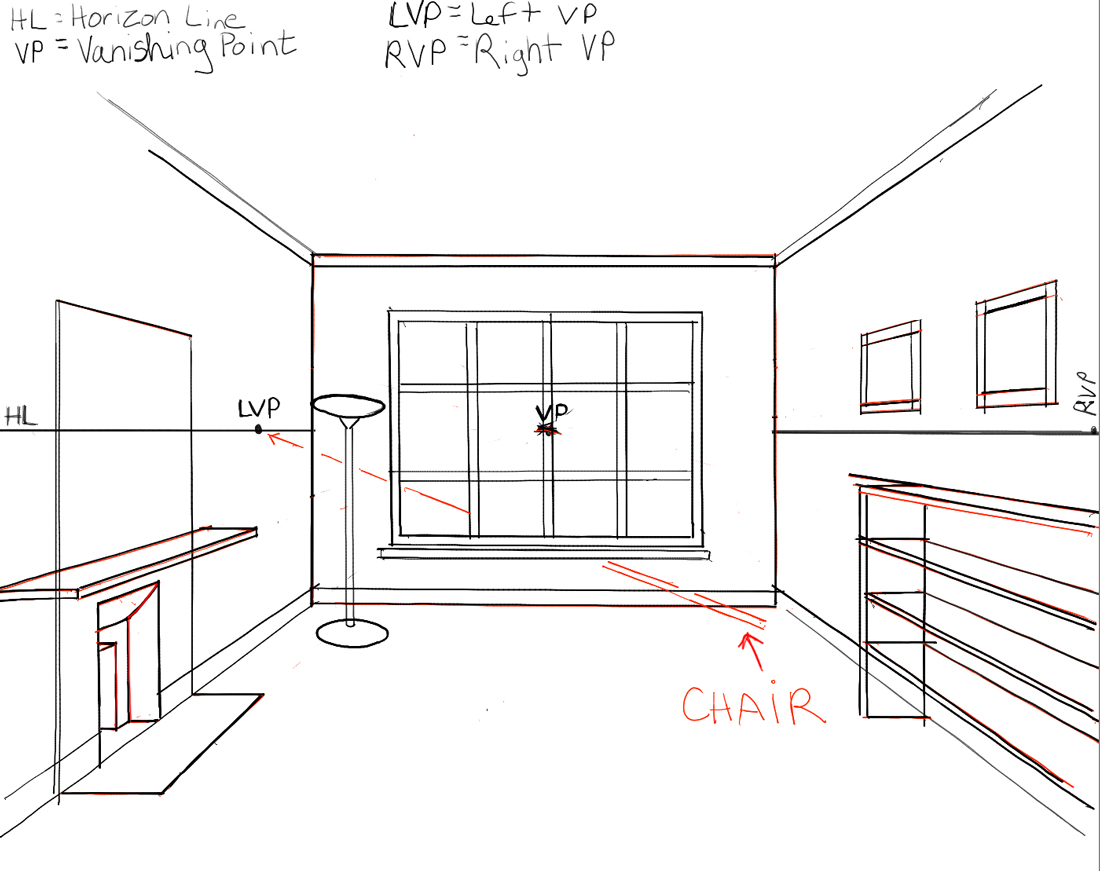
Draw 2 vertical lines in the fireplace…and then draw one curved line as well. We will now begin drawing the chair. Draw lines towards the Left-Vanishing-Point(LVP). Draw it where you want, but here it is drawn in front of the window.
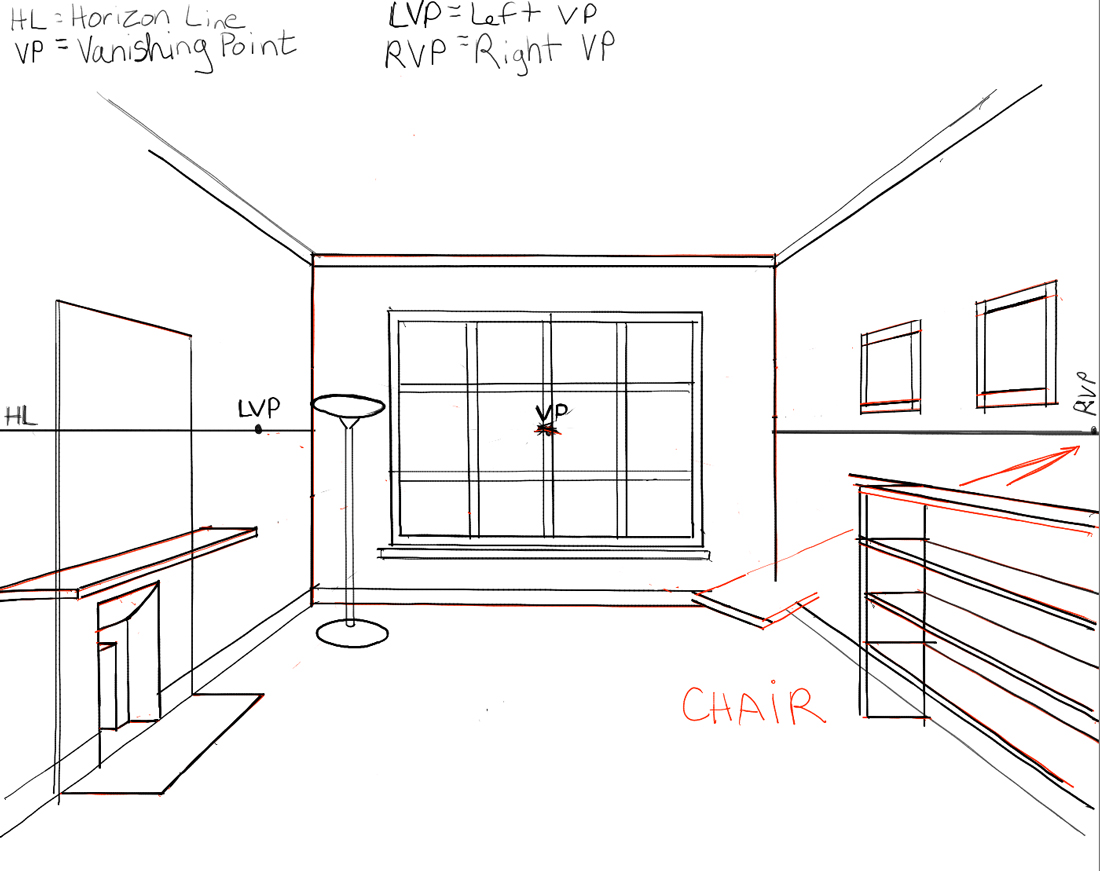
Now draw lines, on the chair, towards the Right-Vanishing-Point(RVP).
Draw a line over to the Left-Vanishing-Point and also draw vertical lines on the seat to connect it all. Draw the legs of the chair.
I realized that I forgot to draw the lines towards the center vanishing point, on the window sill..so did it now. Then draw lines for the back of the chair.
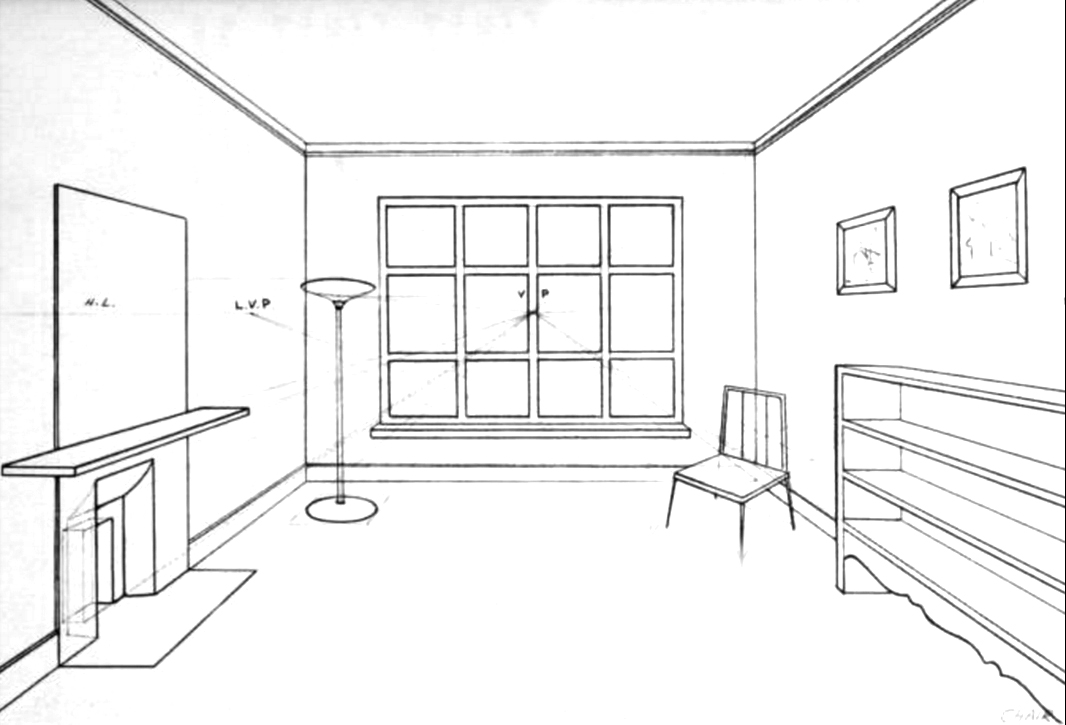
To finish the back of the chair, draw lines over to the Left-Vanishing-Point (LVP). You are now done with the structure of the room.
Here is the finished drawing of the room…still rough, but you can see that the perspective is correct.
You Might Also Like Our Other Perspective Drawing Tutorials
Here are More Perspective Drawing Tutorials
Technorati Tags: inside of room, room interior, how to draw a room, how to draw inside of room, drawing inside of room, perspective, 3 point perspective, three point perspective, drawing a room with perspective
Today I'll show you how to draw Rick from the Rick and Morty cartoon tv…
Today I'll show you how to draw Morty from the Rick and Morty cartoon tv…
Today I'll show you how to draw the spunky little rabbit, Kuromi, from My Melody…
Today I'll show you how to draw this cute "bean duck" that I found on…
Today I'll show you how to draw Sosuke and Ponyo in a bubble (chibi /kawaii…
Today I'll show you how to draw a Boo from Super Mario Bros in Kawaii…
View Comments
This is one point perspective
This is one point perspective, not three point.
Very nicely explained. Even I could draw it as a beginner...amazing!!!