Here is a basic guide to using geometric shapes, such as the cube, cylinder, sphere, pyramid, and cone to draw things you see in every day life.
BASIC FORMS: In drawing we are concerned with six basic qualities of an object: Line, shape, form, tone. texture, and color. While it is true that in nature we observe objects in contrasts of tones of light and dark-yet drawing in line is the first step we shall take in learning to draw. Line is thought of as having the single dimension of length; shape is concerned with two dimensions – length and width; form is three dimensional and concerns itself with length, width, and depth; tone refers to the qualities of the lightness and darkness of an object — usually interpreted in lone values of grays; texture deals with the smoothness, roughness or feel of an object; lastly, color principally concerns itself with the hue of an object.
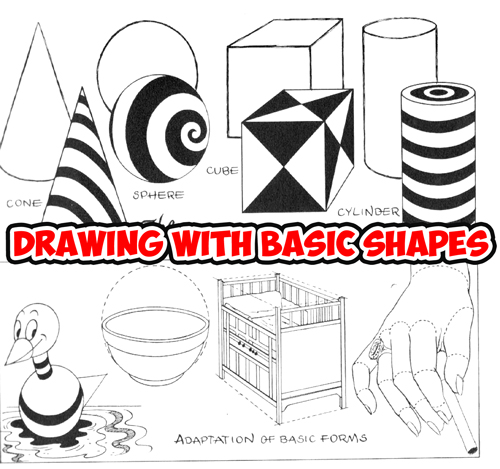
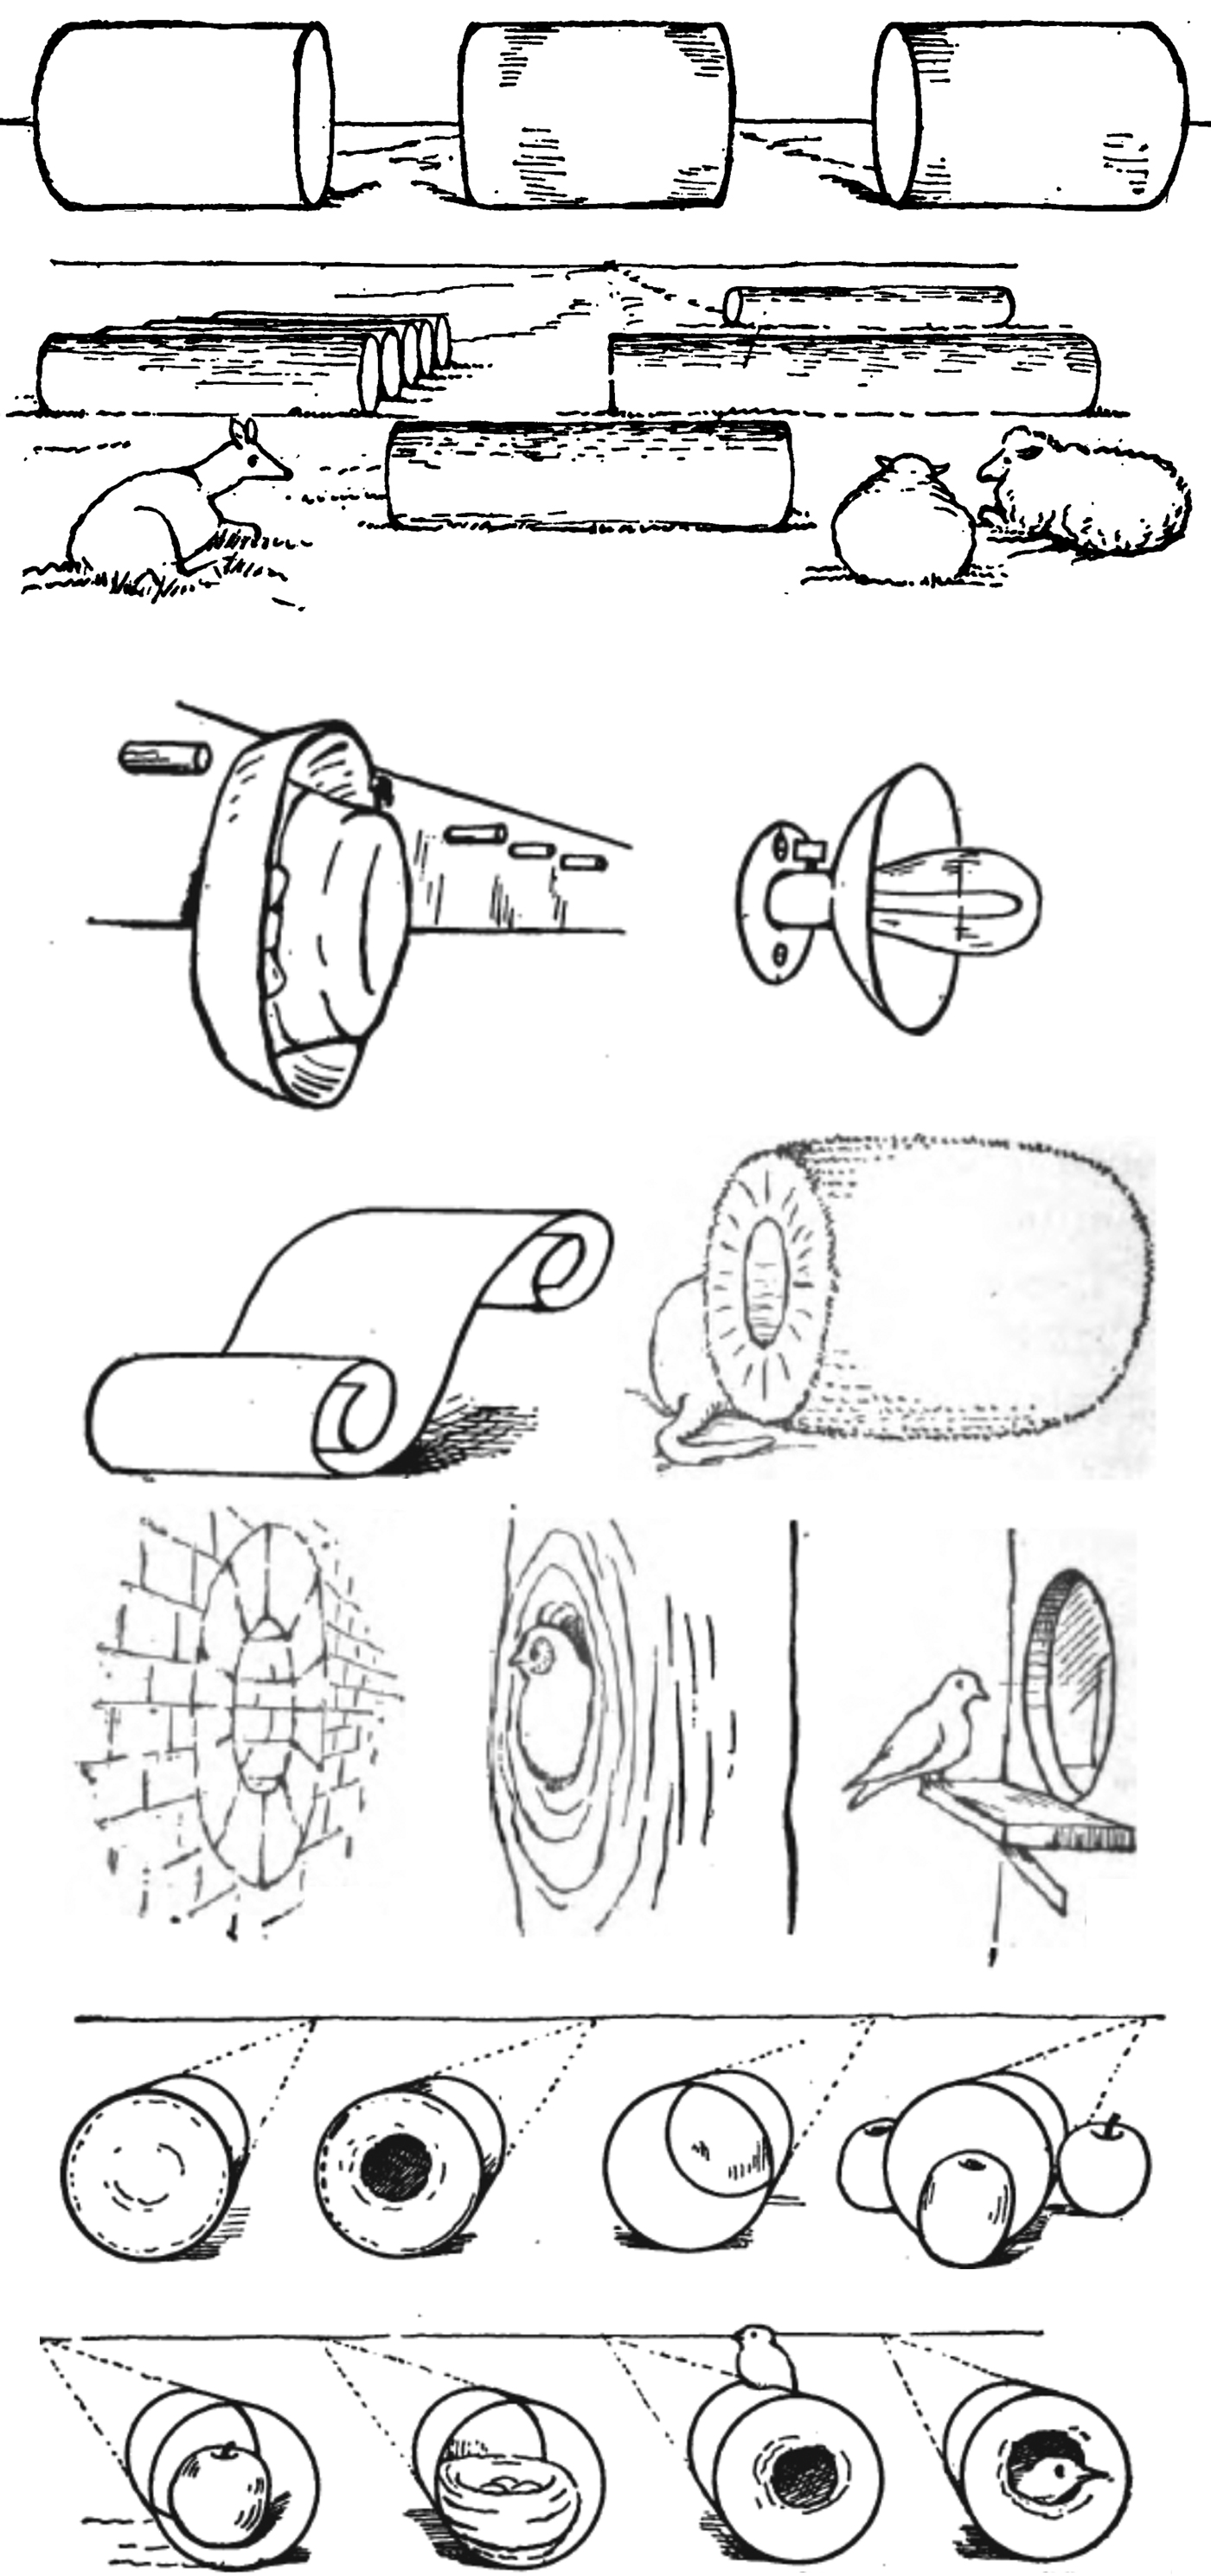
We have in art a concept that generally pre-supposes that most objects in nature can be seen in terms of the 4 basic forms: cone, sphere, cube, and cylinder. In drawing, the artist sees these forms, or their variations, in his objects, With this observance his work is made easier.
In the above illustration, these basic forms are so designed as to emphasize a feeling of depth and 3rd dimension. The sketches in the lower portion of the picture illustrate how these basic forms are applied in nature.
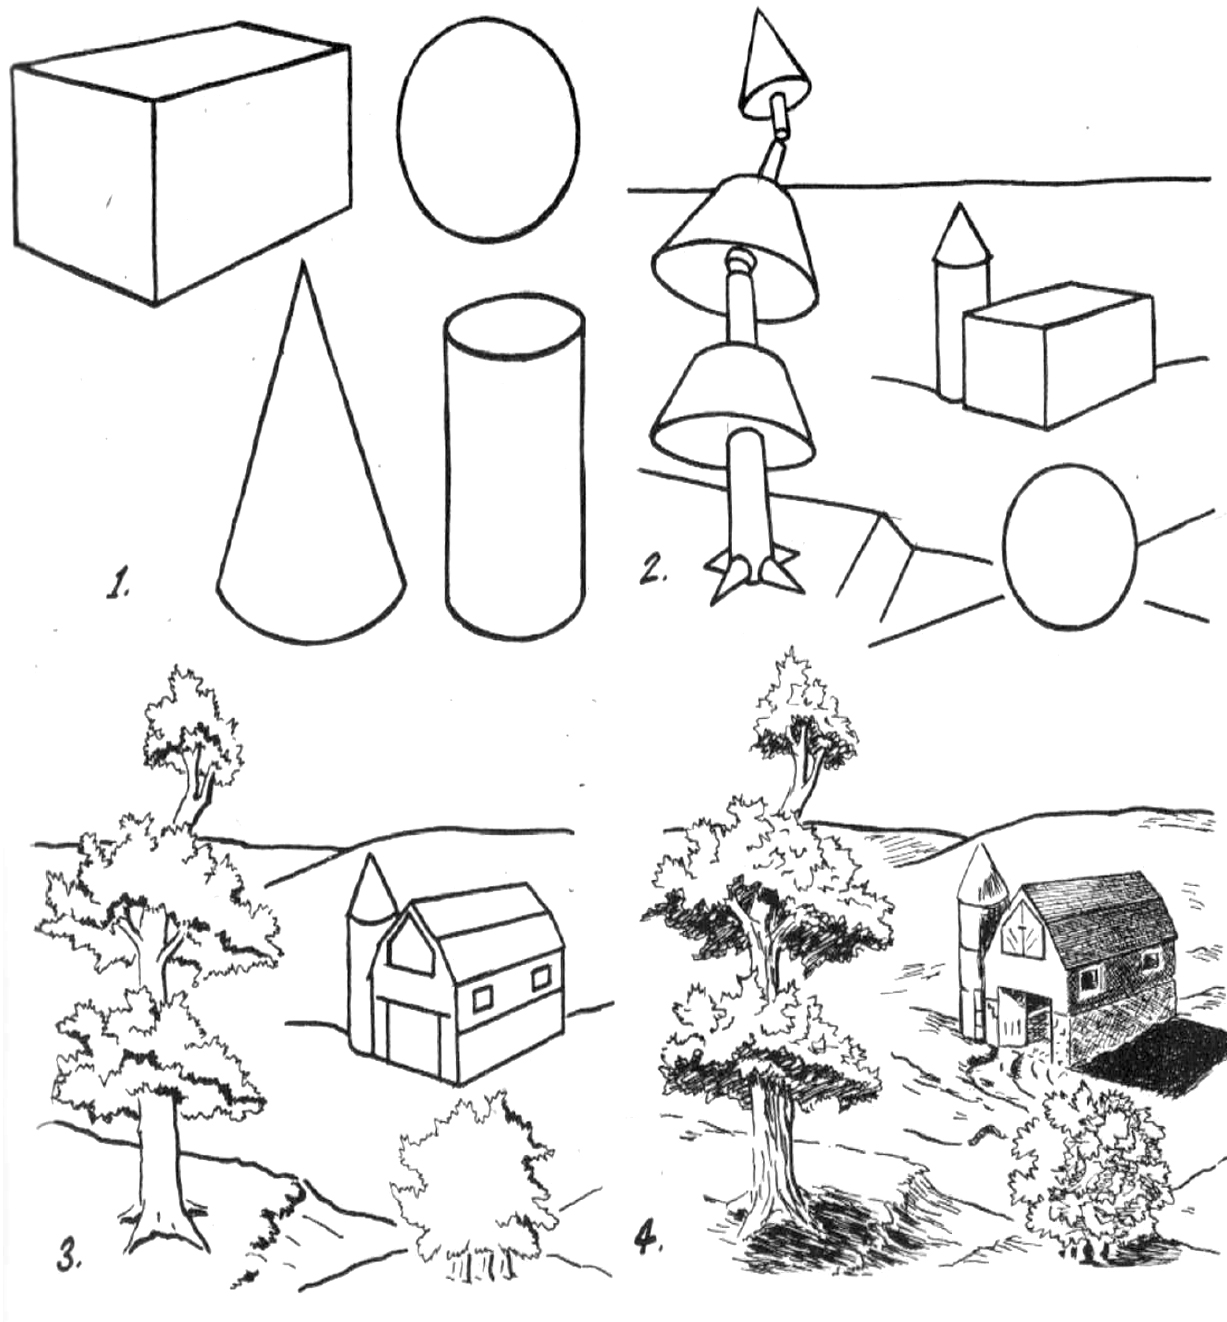
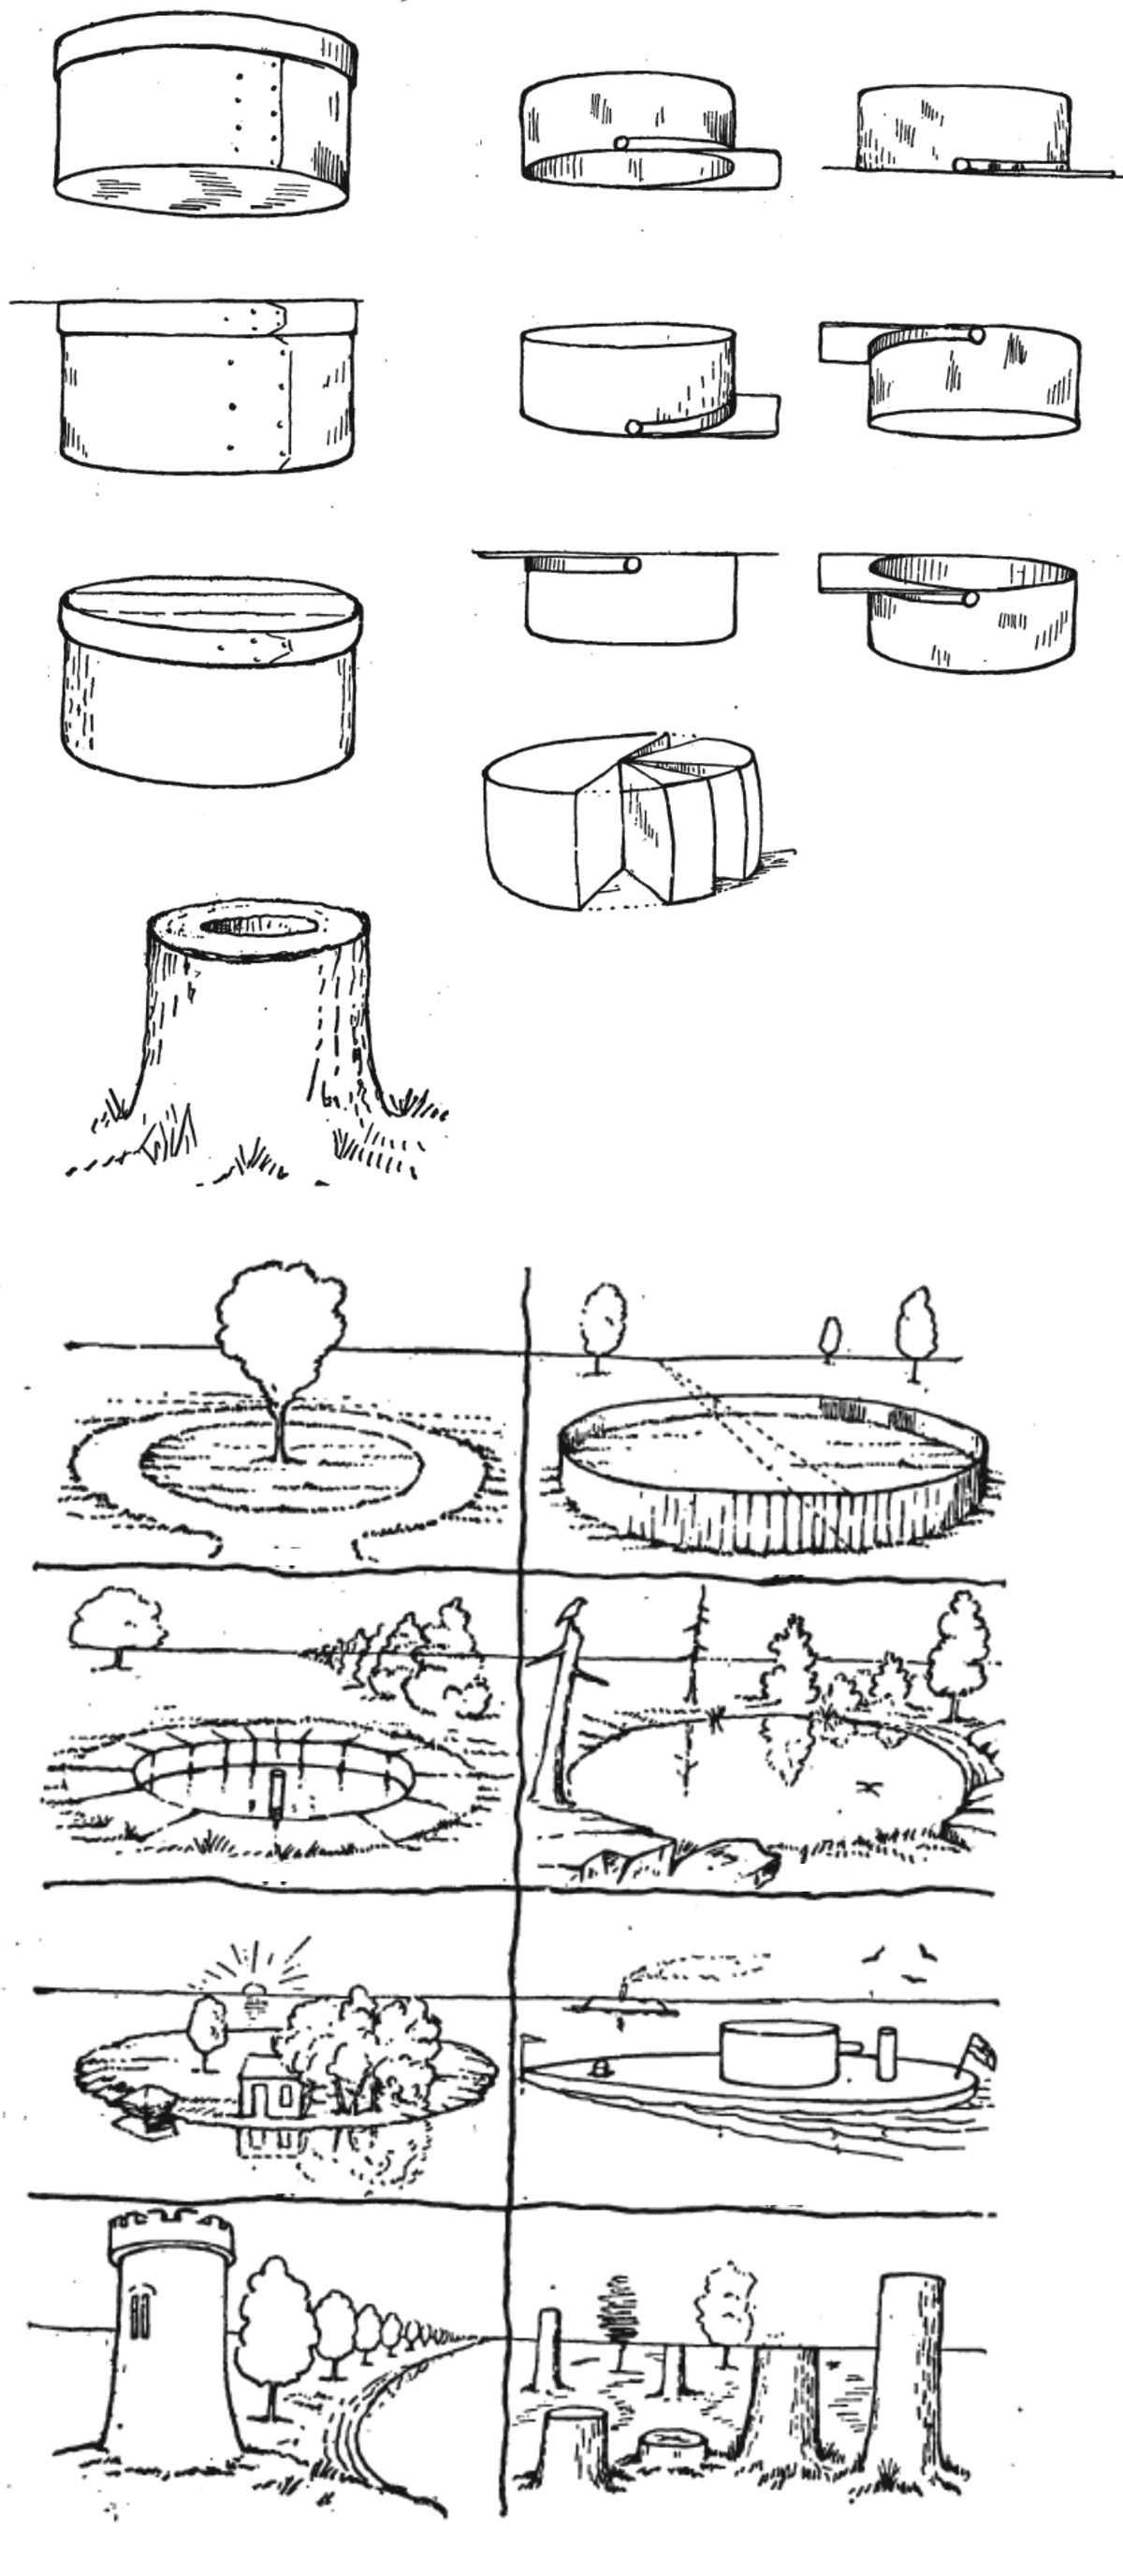
BASIC FORMS: Continuing with the study of form, here illustrated is how the principles of the four basic forms-the cone, sphere, cube, and cylinder-may be applied in the creation of a simple picture.
In Figure 1, the four basic forms are drawn only in line. It should be observed that the rectangular box shown, is not a true cube. but a variation of this basic form. A cube is “a solid object having equal square sides.”
Figure 2 demonstrates the first step in laying out our scene. The four basic forms are used as a basis for constructing the skeletons of the tree, silo, barn, and shrub.
Moving on to Figure 3, we start to add foliage to the basic forms of the tree and shrub. The cone-shaped roof is added to the cylinder-shaped silo-and the roof and detail added to the barn. Usually, in creating a picture, the
dominant object, which is the center of interest, is established first-adding the horizon line and background detail lastly.
Lastly, in Figure 4, the picture is simply rendered. When you have completed your study of this picture, have fun and challenge your imagination by creating a different picture of your own-incorporating into it the four basic forms.
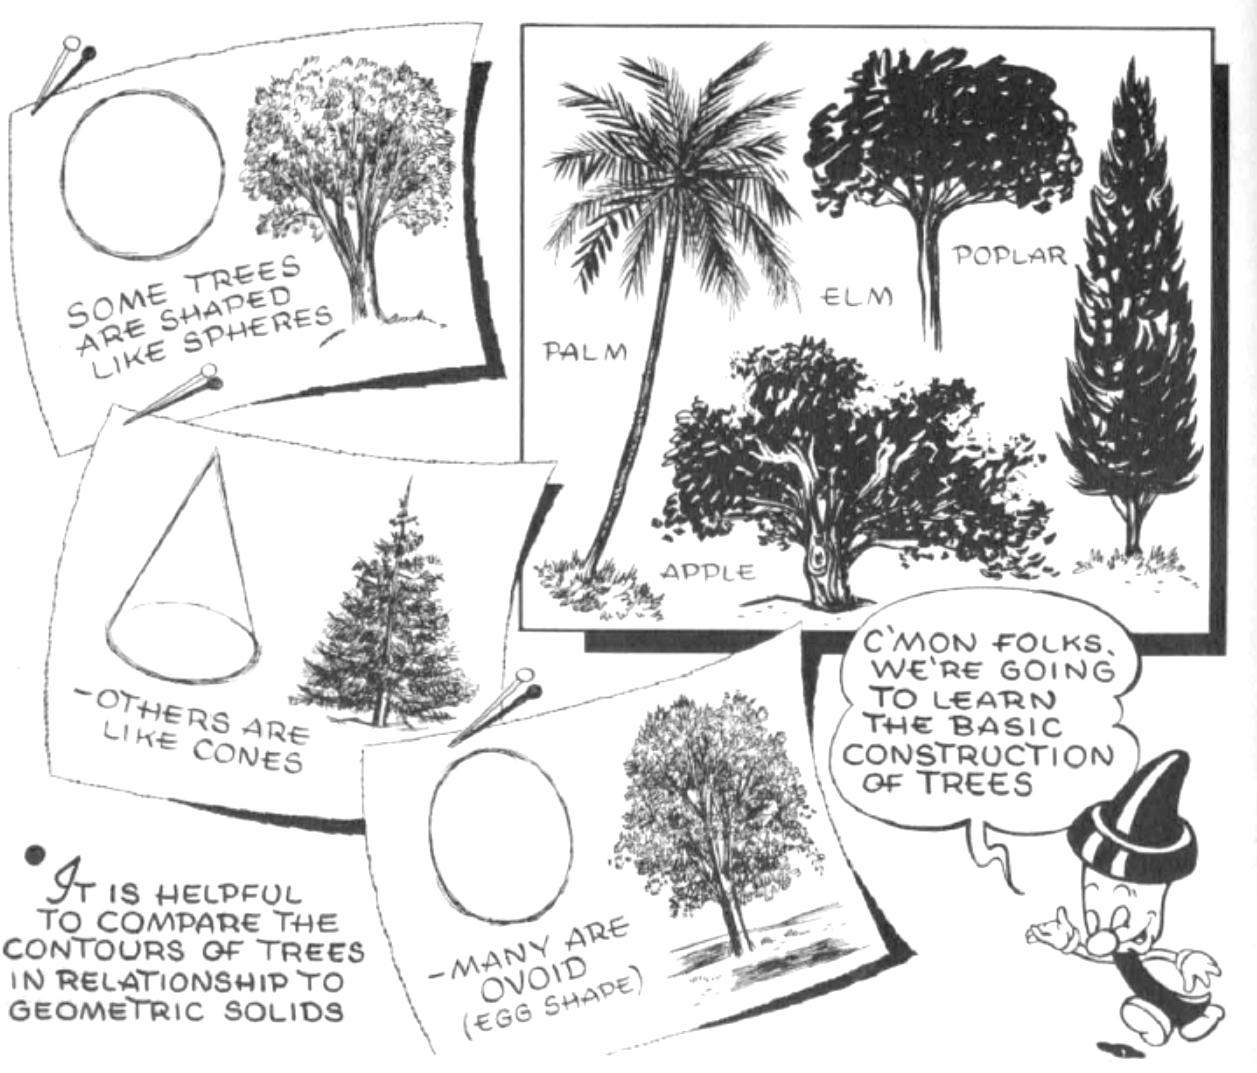
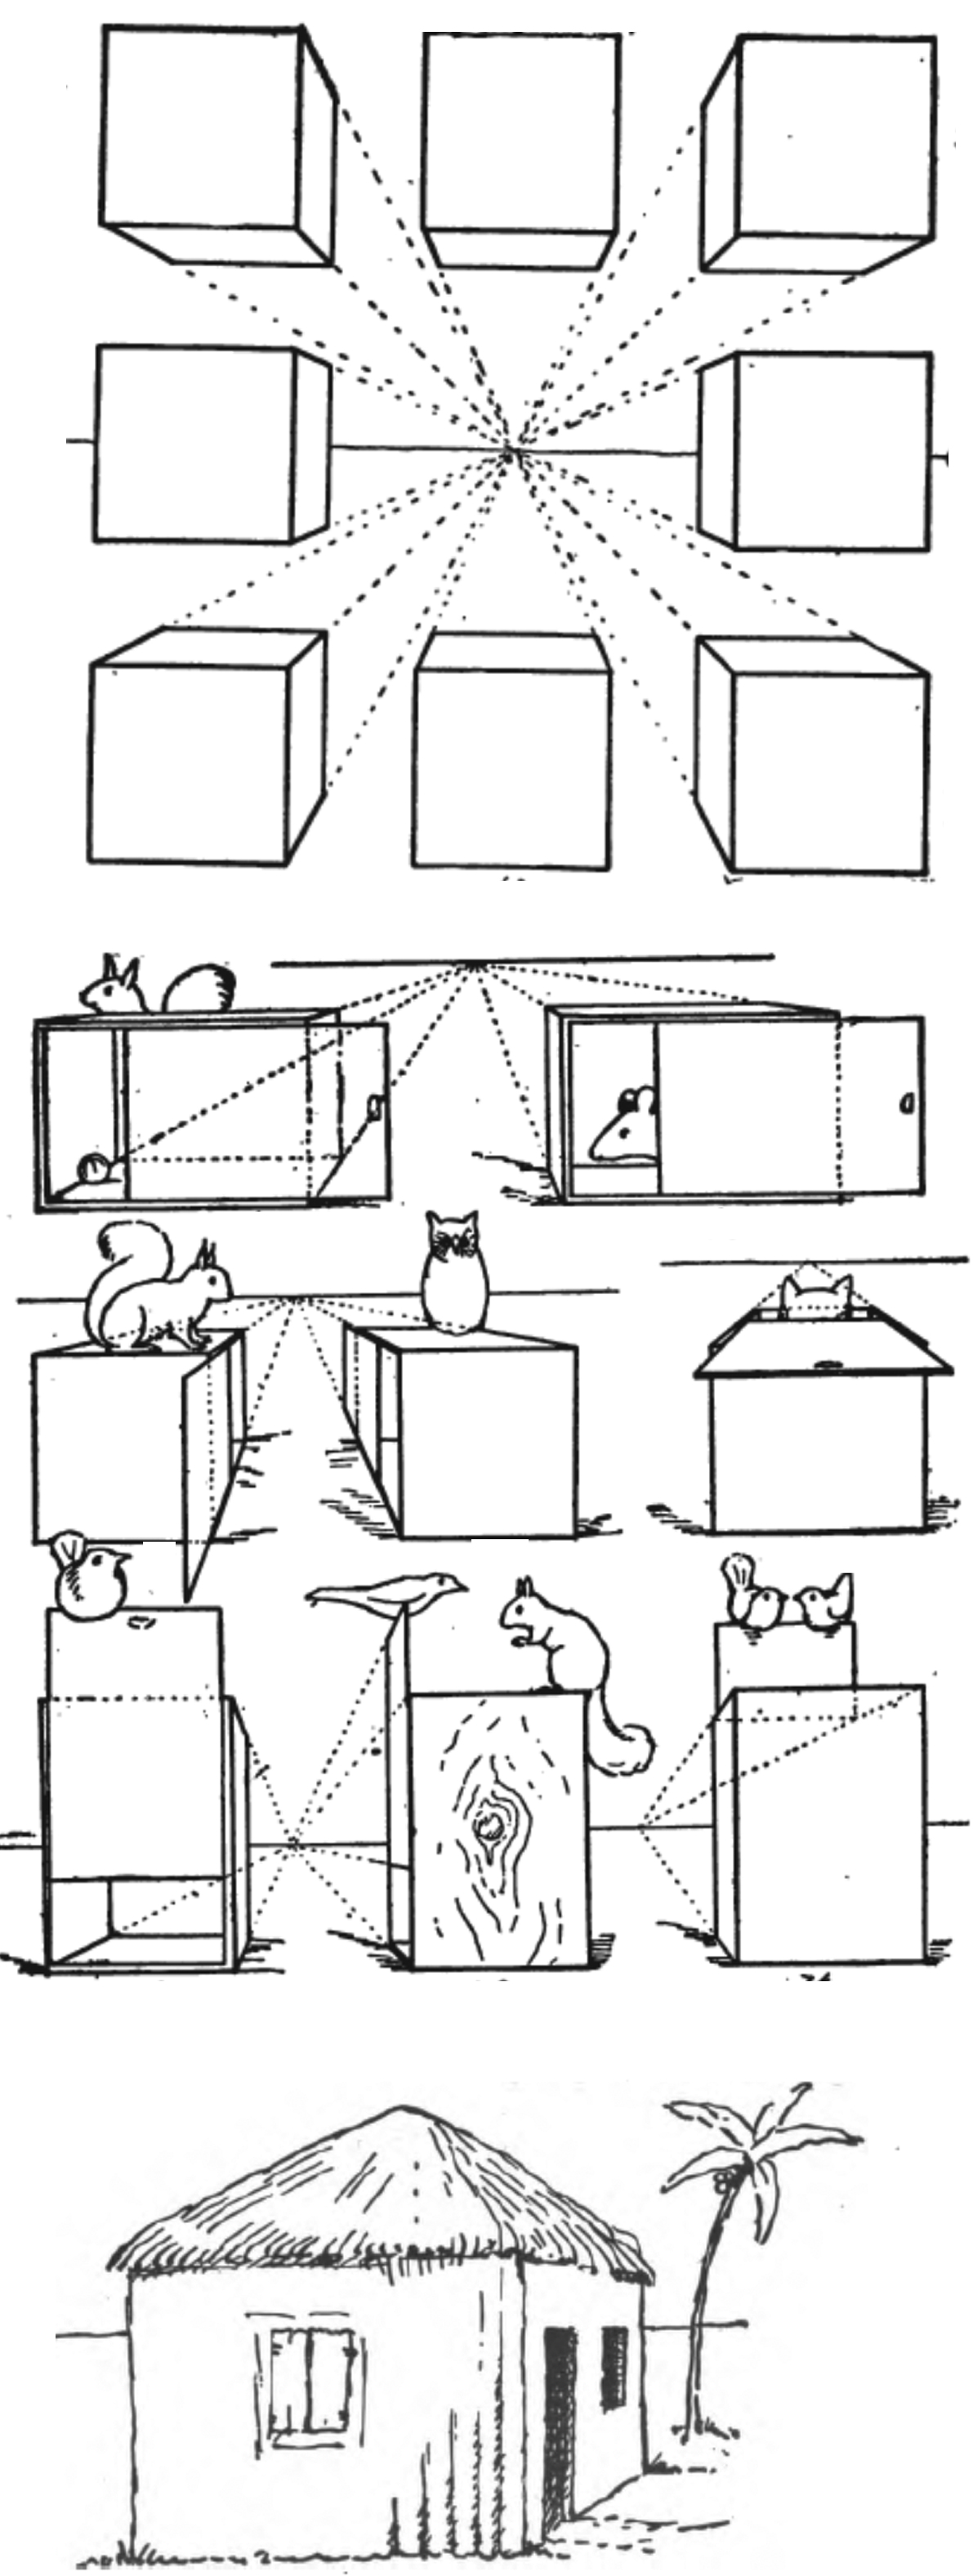
TREES (BASIC CONTOURS): An artist must discipline himself to be observant. Through experience. he learns to see in objects which are unfamiliar to him, related shapes which are familial to him. Through this interrelating and comparison of forms, drawing problems become more simplified. Observe, in the above illustration, the comparison of the various tree shapes to that of geometric solids. Note that in the upper right-hand panel is shown the silhouettes of a number of trees. The character of a tree may be determined by its silhouette.
As was stated, sketching from actual nature provides the easiest method of tree study. However, knowledge can be increased through drawing from photographs and the reading of the many excellent technical books
on the subject. As a further aid to your progress, study the works of the great artists on their manner of tree drawing.
When sketching outdoors, a student will at first find it easier to draw a tree which is at a distance, rather than one which is near. This procedure simplifies many of the problems of detail, lighting, etc. Before starting to draw, analyze the shape and proportions of the tree. Determine the light source and its shadow areas. Study carefully the contour and character of the subject.
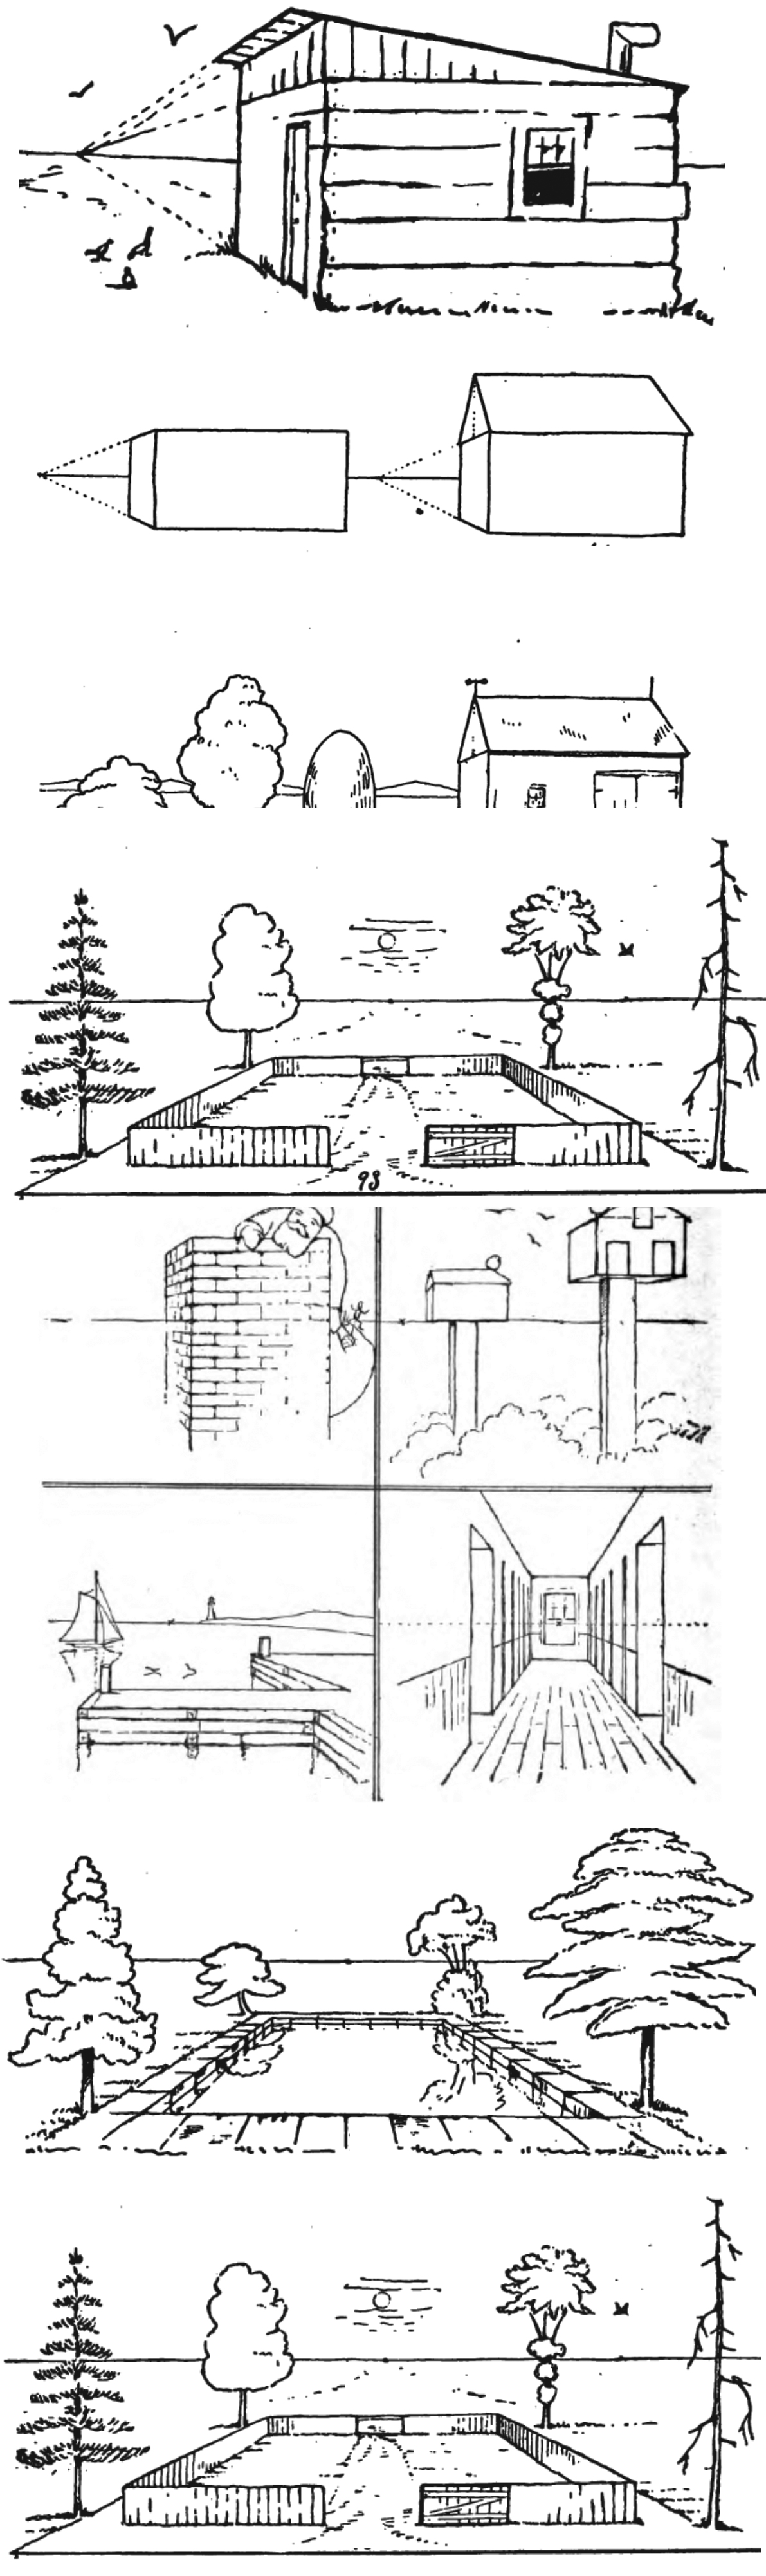
TREES (PLANES AND LIGHTING): When studying a tree determine its tone value in relationship to its background. Ask yourself whether the subject is darker or lighter than the mass behind it. On a clear day, if the sun is not too bright, the tree may show only one phase of tone against a lighter single-tone background. This is particularly true if the tree is at a distance. Sometimes, the tree will appear lighter than the background.
Observe in the lower left-hand corner of the above illustration that the various foliage masses have been divided into simple oval shapes. This basic construction will serve as a framework in drawing the foliage of your tree.
Continue to find subjects to draw and try to sketch them out using basic geometric shapes. The basic shapes should help you visualize the lines that you need to draw in your drawing.
Technorati Tags: draw what you see, drawing what you see, easy way to draw, simple way to draw, easiest way to draw, geometric shapes, cone, cylinder, cube, sphere, pyramid
Today I'll show you how to draw Rick from the Rick and Morty cartoon tv…
Today I'll show you how to draw Morty from the Rick and Morty cartoon tv…
Today I'll show you how to draw the spunky little rabbit, Kuromi, from My Melody…
Today I'll show you how to draw this cute "bean duck" that I found on…
Today I'll show you how to draw Sosuke and Ponyo in a bubble (chibi /kawaii…
Today I'll show you how to draw a Boo from Super Mario Bros in Kawaii…
View Comments
Verry nice
Verry nice
Verry nice
Verry nice
Verry nice
Verry nice
awesome awesome