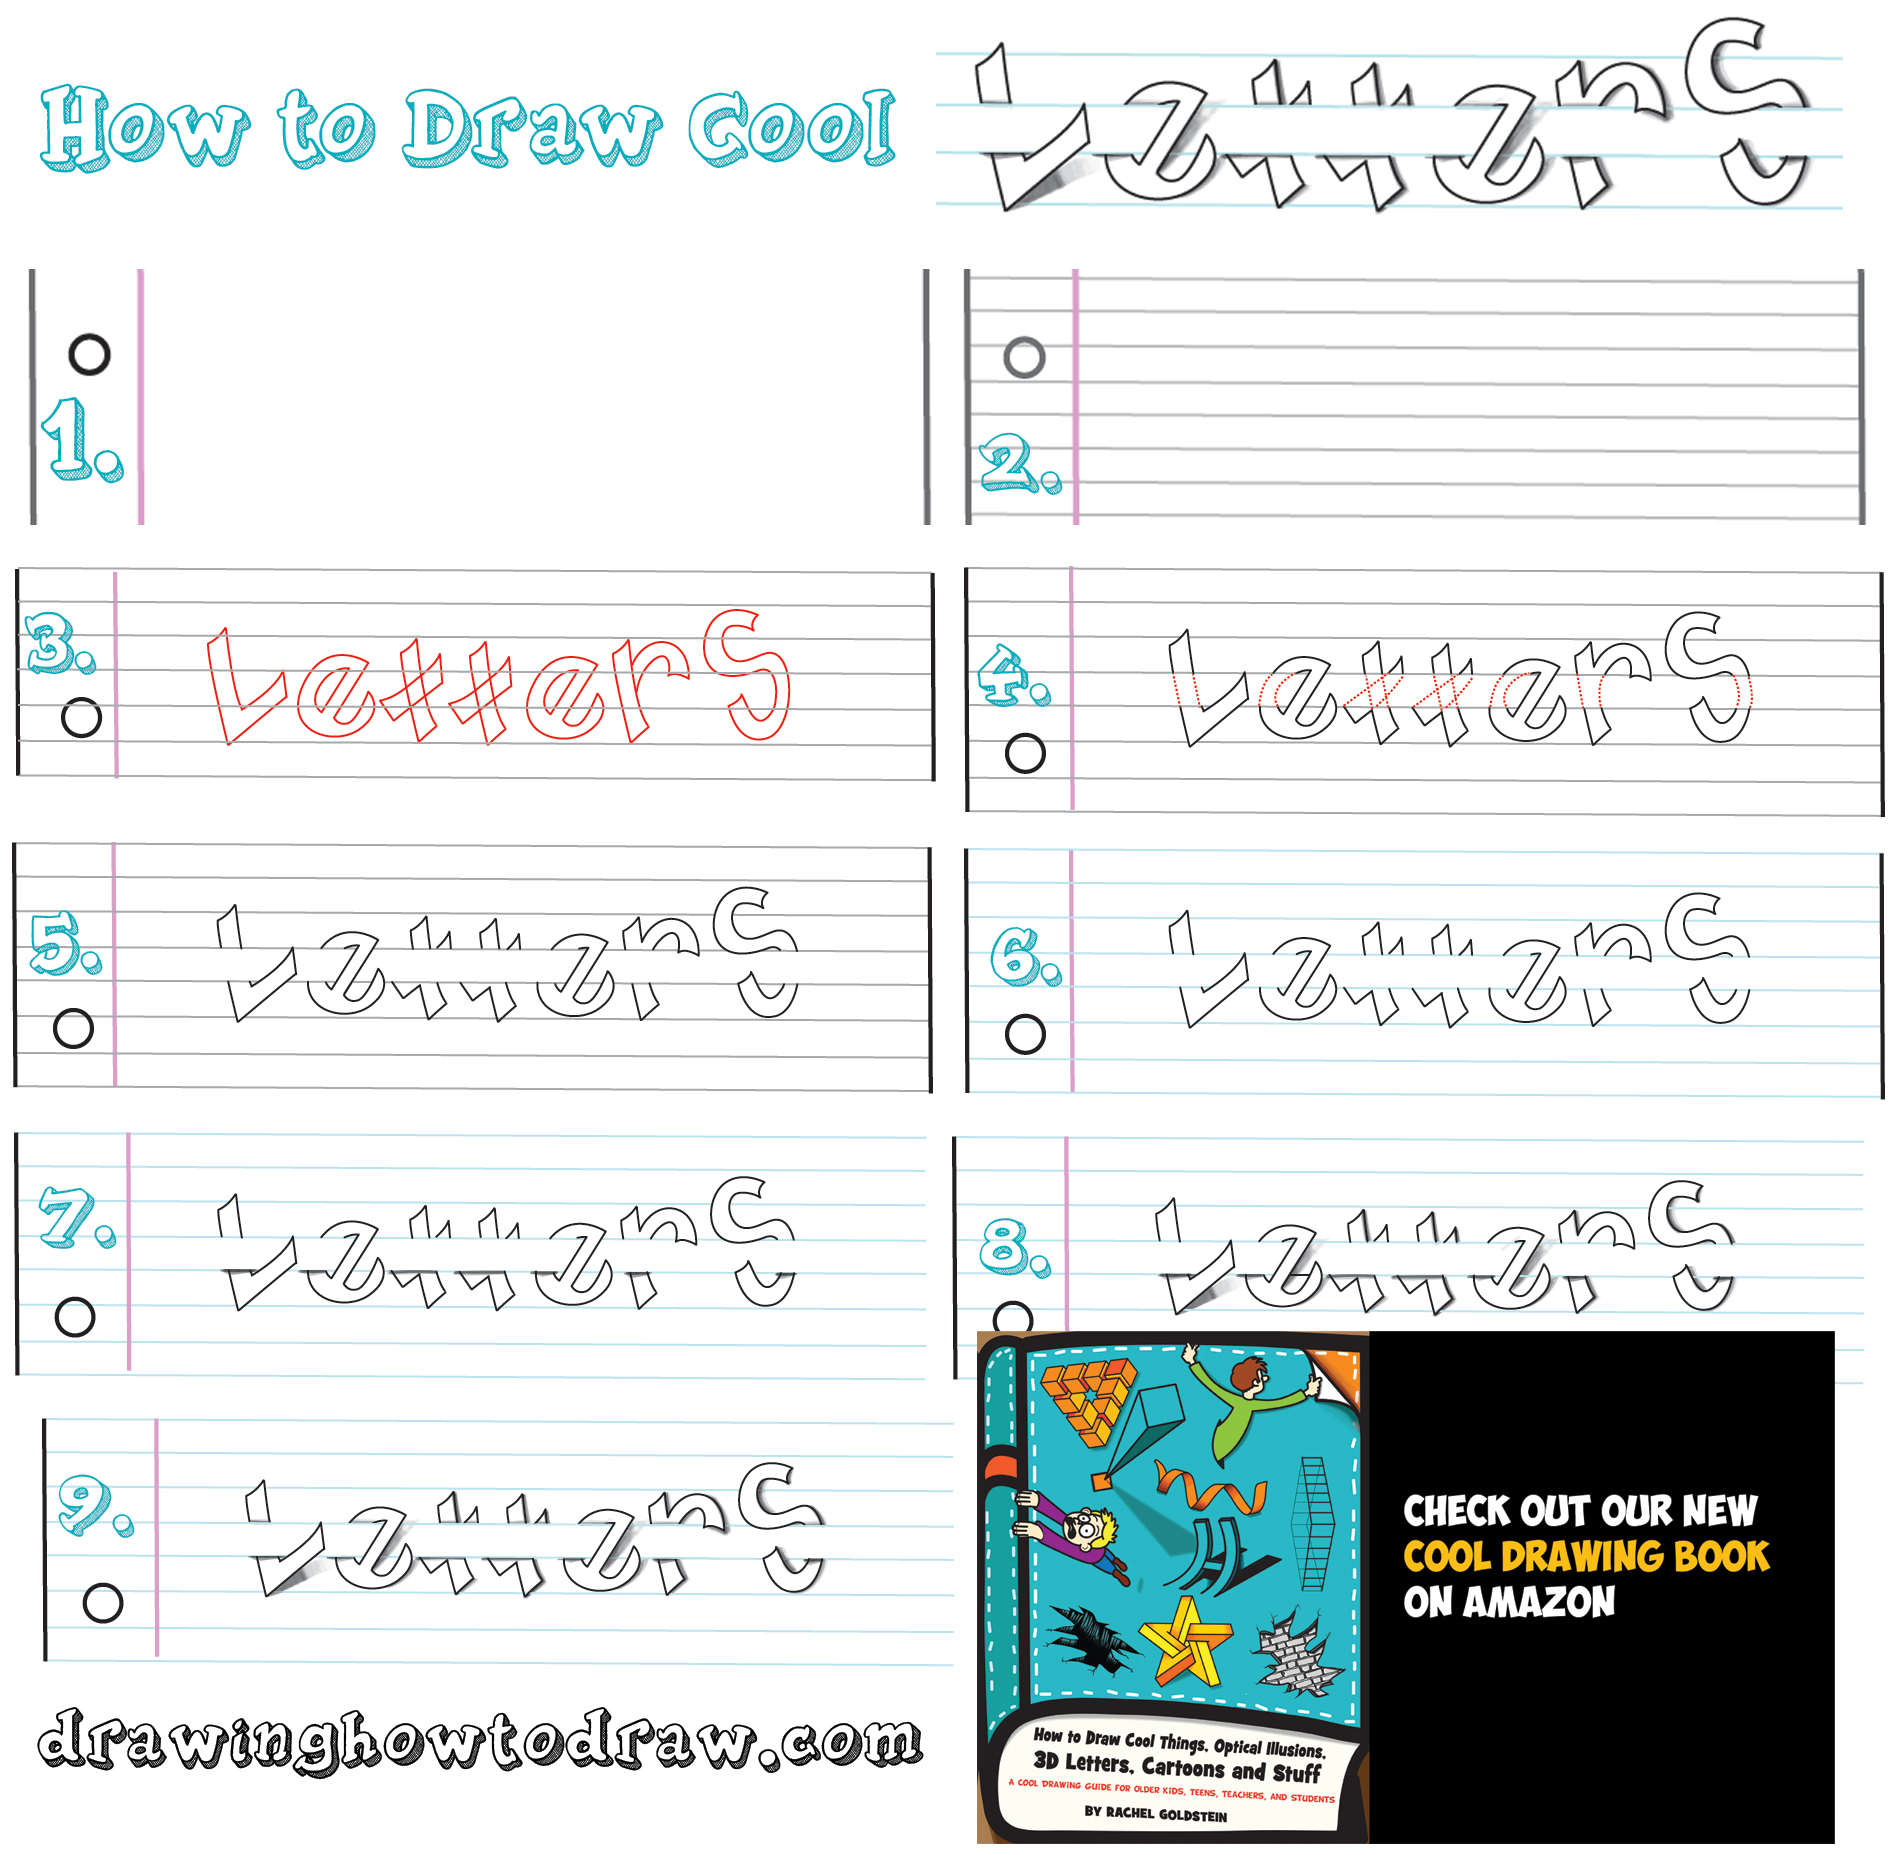
Today I will show you how to draw these cool 3-dimensional letters that seem to be going around, under, and over notebook paper. This is a cool and fun doodling idea for when you are bored. The following simple step by step drawing instructions / lesson will guide you through the steps of drawing these cool letters. Have fun!
You Might Be Interested in Our Other Cool Lettering Tutorials
You Might Also Like Our Other Cool Drawing Lessons
How to Draw Cool 3D Letters Wrapped Around, Over, and Under Notebook Paper Lines – Easy Steps Drawing Tutorial for Kids
Written-Out Step by Step Drawing Instructions
(Step 1) Draw a circle and a pink vertical line.
(Step 2) Lightly draw horizontal pencil lines (don’t make these lines blue yet as we will need to erase parts of these lines later.
(Step 3) Sketch out some letters that are on a slight angle.
(Step 4) Erase where I have made red dotted lines.
(Step 5) This is what your letters should look like now.
(Step 6) Ignore this step – it is the same as 5 (a mistake on my part).
(Step 7) Draw some shading under the one line in the center…this is where the paper is pushed up a bit for the letters to slide under.
(Step 8) Draw some shadows on the right side of the letters.
(Step 9) Draw some shadow on top of the center line as well.
You Might Be Interested in Our Other Cool Lettering Tutorials
You Might Also Like Our Other Cool Drawing Lessons
Technorati Tags: lettering, cool lettering, notebook paper, notebook paper illusion, notebook paper effect, how to draw cool letters, how to draw letters, how to draw 3d letters, 3d letters


when i’m teach this3D letter drawing,i’ll be drawing nice
i want to learn drawing 3D letter