Today I’ll show you how to draw a super cute Chibi Naruto. Naruto is a fierce teenage ninja drawn in a manga style. I have turned Naruto into a cuter (kawaii) chibi version. It is super easy to draw, as I have broken it down into 30+ steps. I got the idea from this adorable Funko Naruto figure on Amazon. I hope that you enjoy it. Happy Drawing!
(Step 1) Draw an upside down “?”-like shape. Don’t draw the blue dot.
(Step 2) Draw a curved line for the bottom of his face.
(Step 3) Draw a backwards “?”-like shape for his ear and neck.
(Step 4) Lightly draw guide lines through the face. These will be erased later on and are only there to guide you. Draw a backwards “S”-like shape in his ear.
(Step 5) Draw a letter “C”-like shape for one of the eyes and a curved line for the other.
(Step 6) Finish up the outlines of the eyes.
(Step 7) Draw an oval in each eye.
(Step 8) Draw another oval in each eye. Don’t draw the blue dotted line. Draw a sideways “V” shape for his nose.
(Step 9) Draw check-marks for eye brows.
(Step 10) Draw 2 curved lines for his head band.
(Step 11) Draw a rectangle with rounded corners. Draw a #9-like shape. Don’t draw the blue, dotted lines.
(Step 12) Continue the curve of the #9 to form a spiral.
(Step 13) Draw 4 circles. Draw a sideways “V” and a line on the spiral.
(Step 14) Draw a curved line on both sides of the head band. Also draw a “W” and a “V” for hair.
(Step 15) Draw 3 “V” shapes.
(Step 16) Draw 2 sideways “M” shapes…again, for hair.
(Step 17) Draw a “M” shape and 2 lines.
(Step 18) Draw another “M” and another curved lines.
(Step 19) Draw a curved and a straight line.
(Step 20) Draw some curved lines…for the mouth and the ends of the straps of the head band.
(Step 21) Draw 2 “C”-like shapes for fists.
(Step 22) Draw a sideways “J” shape on the first fist and a “C”-like shape on the 2nd fist.
(Step 23) Draw a sideways #3 shape on the first fist. Also draw lines.
(Step 24) Draw 2 sideways “J” shapes and a line.
(Step 25) Draw an angled line.
(Step 26) Draw a curved line for the bottom of the shirt.
(Step 27) Draw 3 lines for legs.
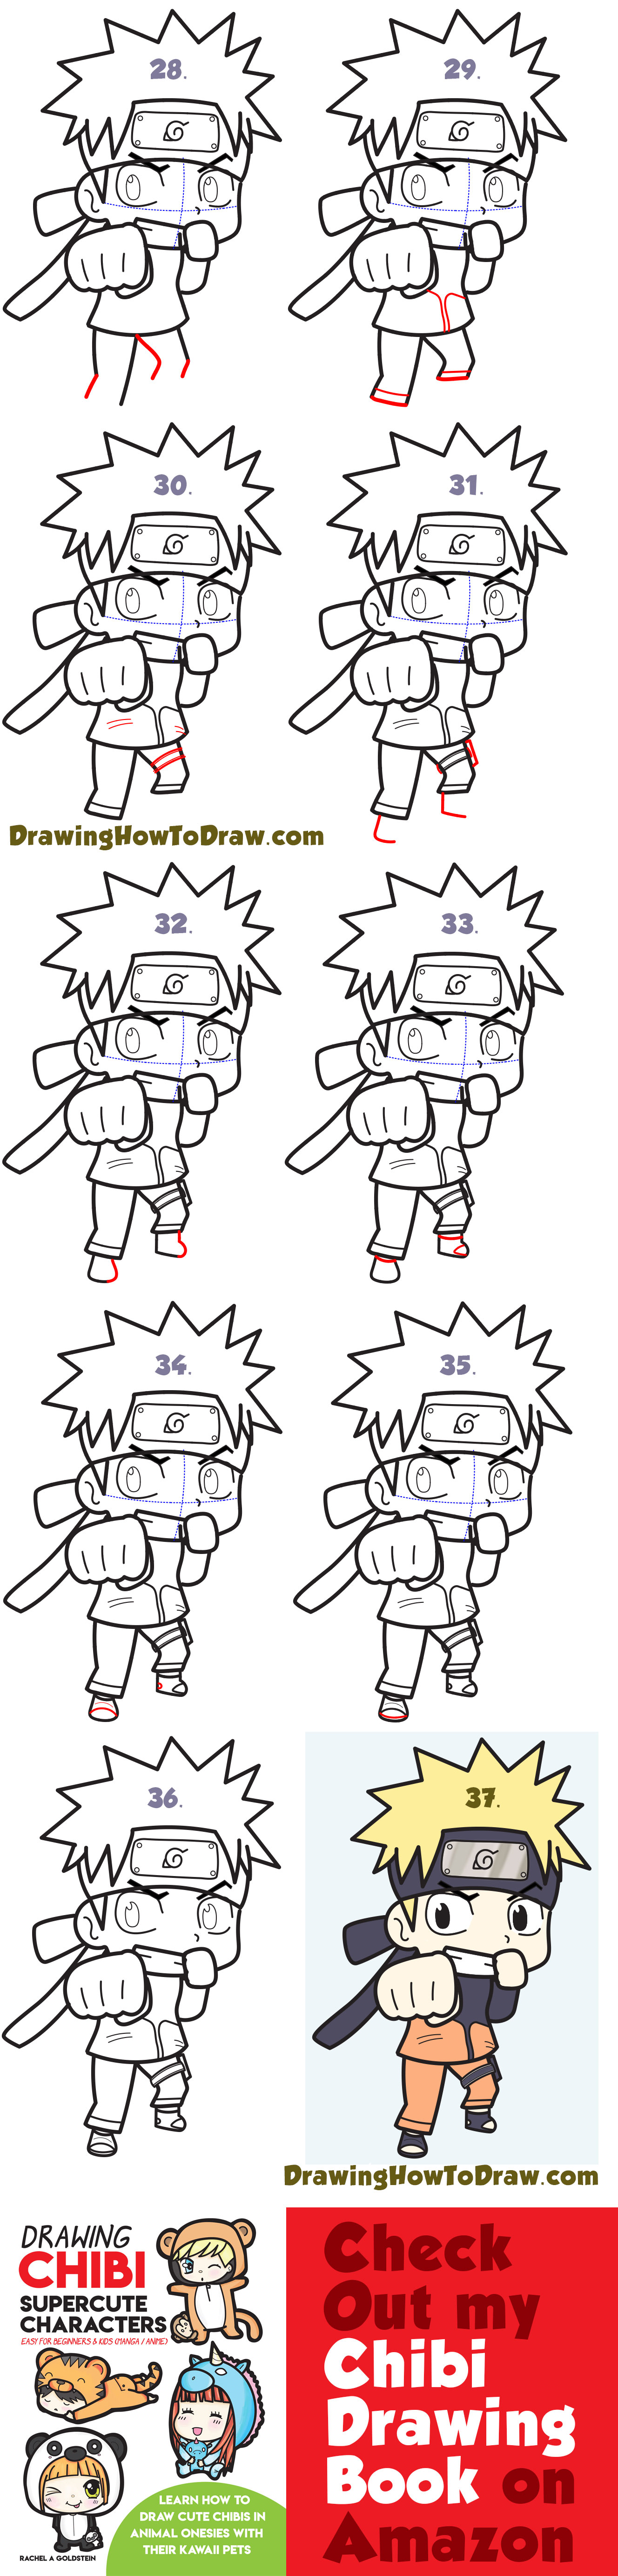
(Step 28) Draw 2 lines and a sideways “L” shape on the legs.
(Step 29) Draw 2 lines at the bottom of each leg. Draw #7-like shapes on the coat.
(Step 30) Draw a bunch of curved lines.
(Step 31) Draw 2 “L” shapes for feet. Draw 2 curved lines on the ends of the thigh strap. Draw a partial rectangle too.
(Step 32) Draw an upside down “J” and “?” shape.
(Step 33) Draw 2 curved lines and a sideways “V” shape.
(Step 34) Draw 2 curved lines and a sideways “U” shape.
(Step 35) Draw a curved line.
(Step 36) Erase un-needed lines.
(Step 37) Color him in.
Technorati Tags: naruto, how to draw naruto, chibi, kawaii, cute, super cute, chibi naruto
If you want all the steps in one picture, you can find it below
Today I'll show you how to draw Rick from the Rick and Morty cartoon tv…
Today I'll show you how to draw Morty from the Rick and Morty cartoon tv…
Today I'll show you how to draw the spunky little rabbit, Kuromi, from My Melody…
Today I'll show you how to draw this cute "bean duck" that I found on…
Today I'll show you how to draw Sosuke and Ponyo in a bubble (chibi /kawaii…
Today I'll show you how to draw a Boo from Super Mario Bros in Kawaii…
View Comments
i love this drawing
hi i just want to say this naruto drawing is one of the best so far! plus i can draw it so well one of the first times
im proud so happppppy!!!
I'm so happy about that! Thanks!
I did it! Naruto is AWESOME!!!!!!!!!!!!!!!!!!!!!!!!!!