Today I’ll show you how to draw an adorable Chibi-style girl with a long flowing braid. This little Chibi girl has big beautiful Chibi-style eyes and a cute little dress. I know that you will enjoy learn how to draw here. I have broken down the lesson into many simple-to-follow steps. Have fun! Happy Drawing!
We will start drawing the girl by using guide lines (lines that are drawn to guide you but will be erased later on)
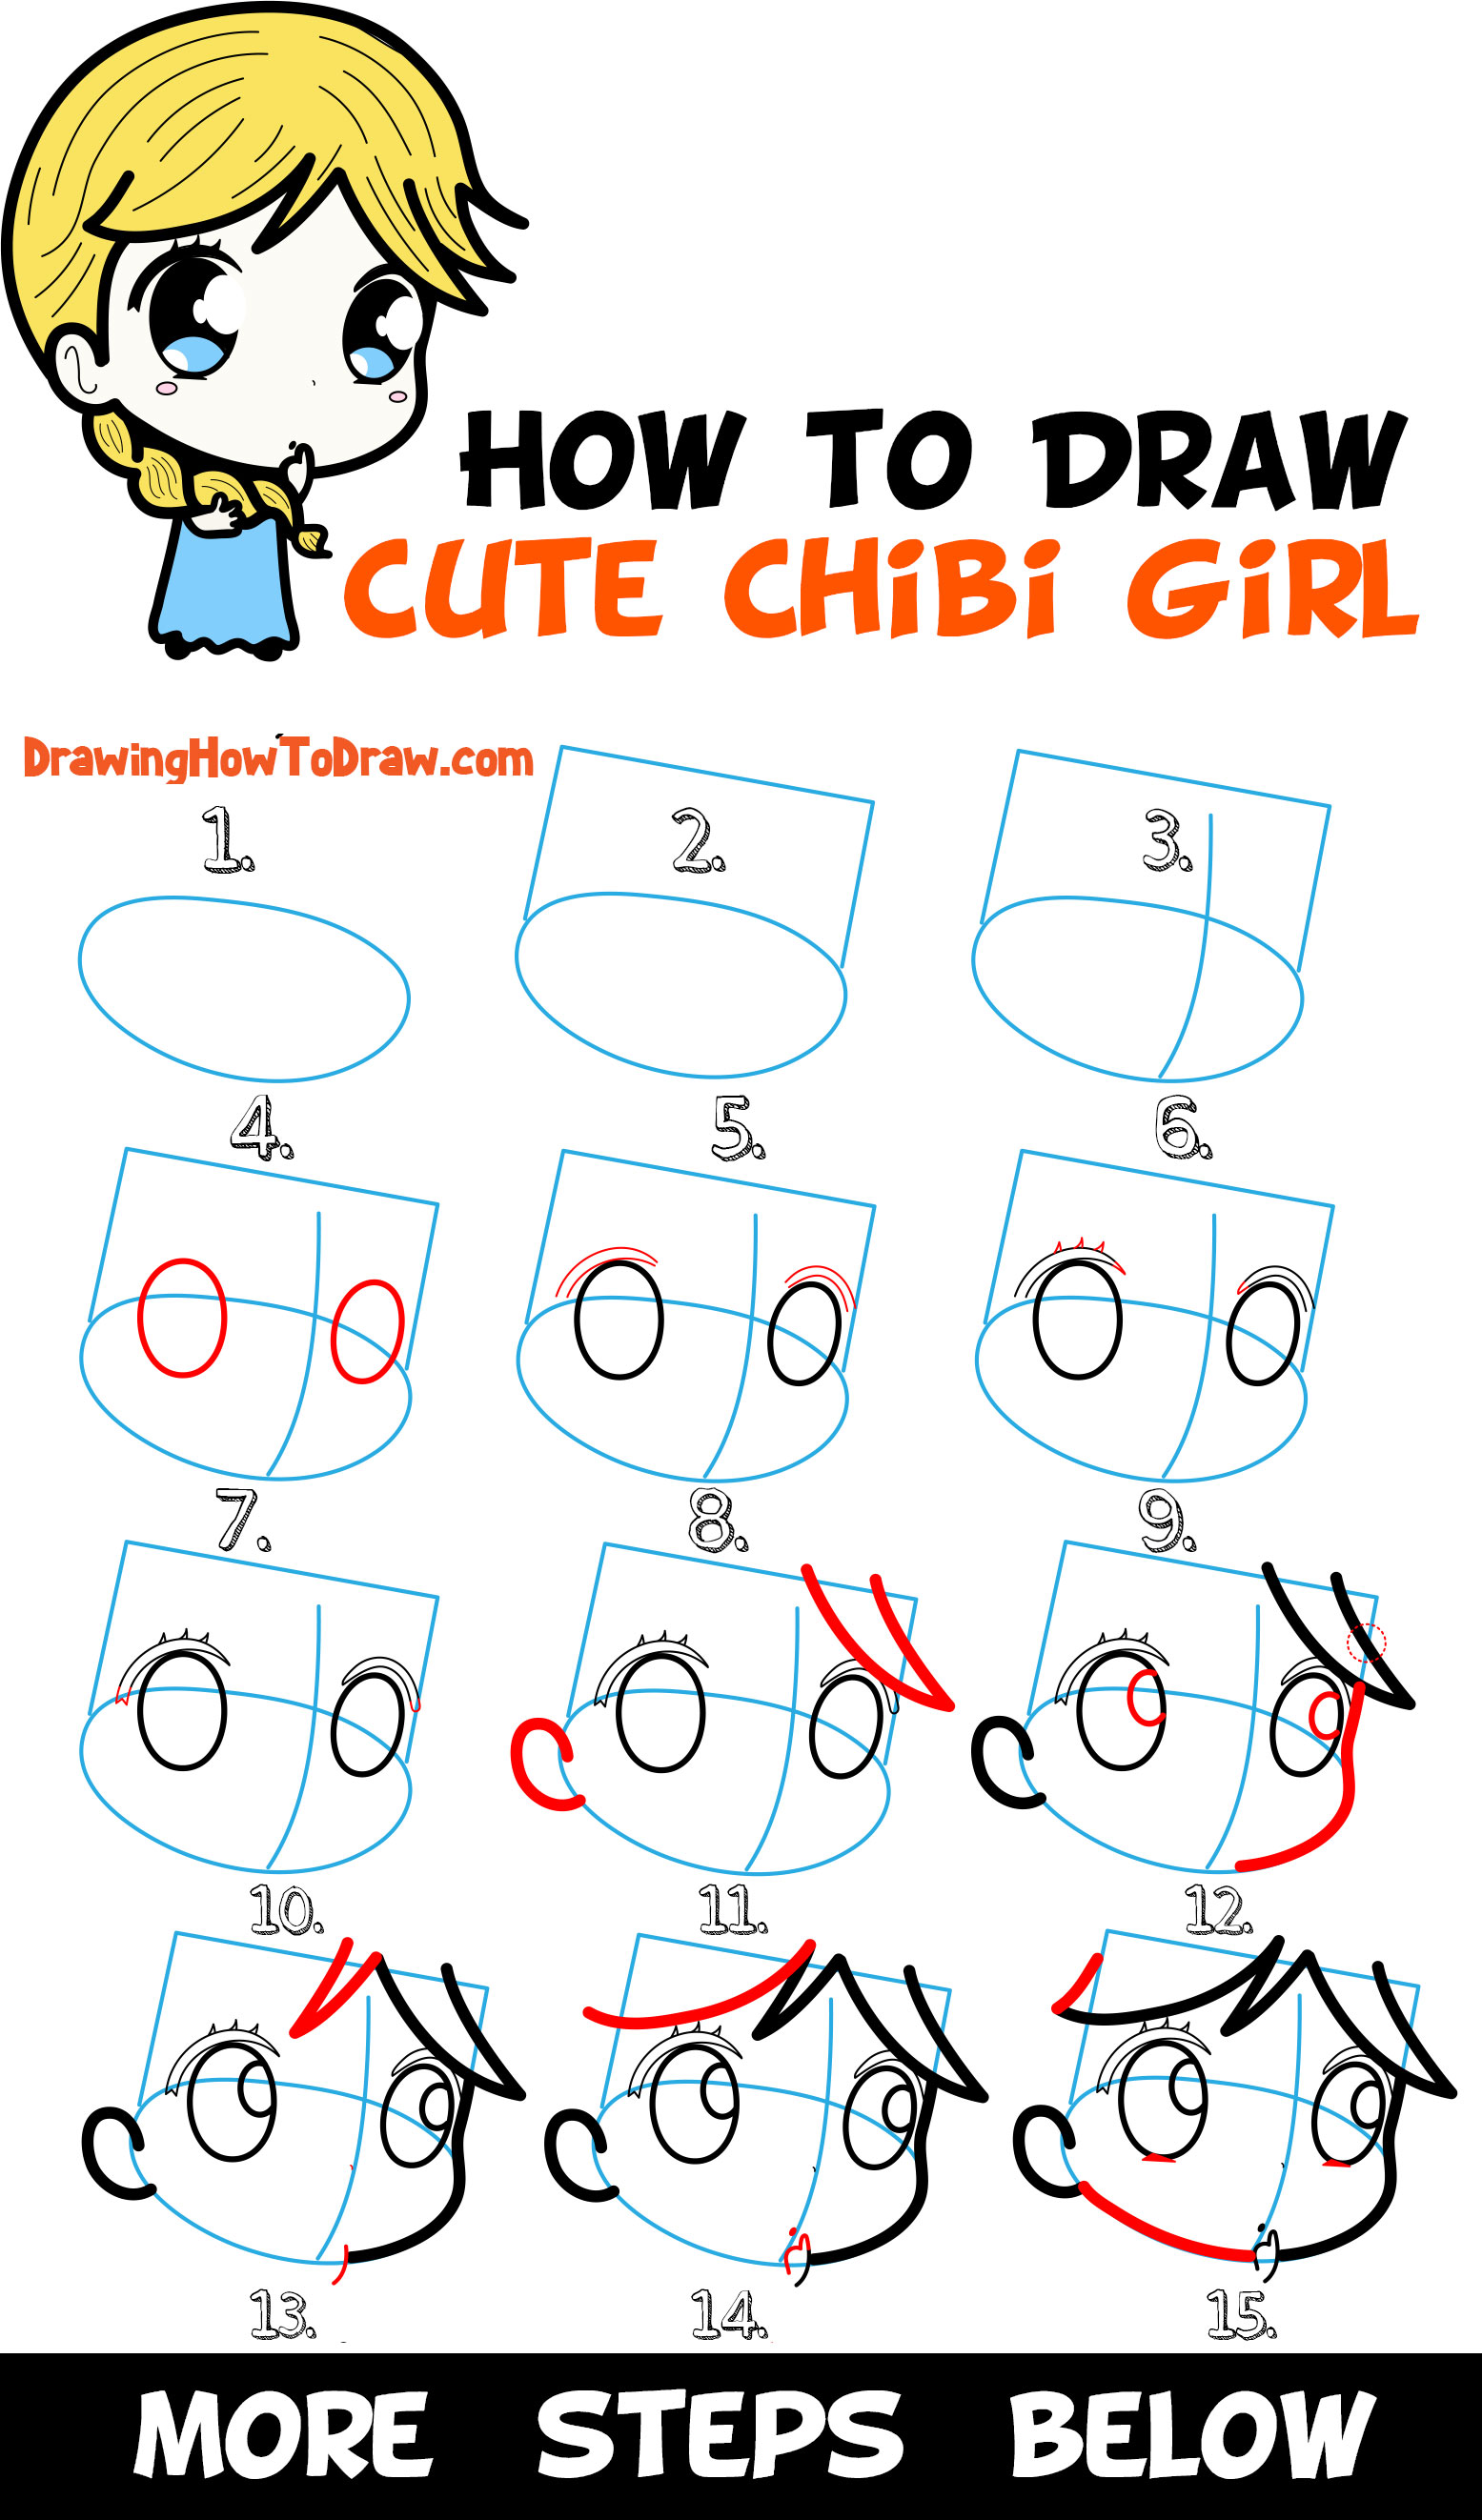
(Step 1) Lightly draw an oval shape. This line will be erased later.
(Step 2) Draw a rectangle at the top of the oval. This line will be erased later.
(Step 3) Lightly draw a guide thru the face. This line will be erased later.
(Step 4) Draw ovals for eyes…use the guide lines to help you figure out where to place them.
(Step 5) Draw 2 curved lines over each eye.
(Step 6) Draw Some “V”-like shapes.
(Step 7) Draw a “W”-like shape on the left eye and a sideways “U” shape on the right eye.
(Step 8) Draw a “C” and “V”-like shape.
(Step 9) Draw an upside down “?”-like shape (don’t draw the dot). Draw partial ovals…one in each eye.
(Step 10) Draw a curved line for the nose and on the bottom of the face. Draw a “V” shape for bangs.
(Step 11) Draw a curved line on the hair. Draw an oval for the mouth. Draw a sideways #3-like shape to form a hand.
(Step 12) Draw a line on the hair. Draw wide triangles under the eyes. Draw a curved line for the bottom of the face.
(Step 13) Draw a curved line on the side of the face. Draw a backwards “Z” shape on the hair.
(Step 14) Draw a partial “C” shape for the hair. Draw a curved line and an oval in each eye.
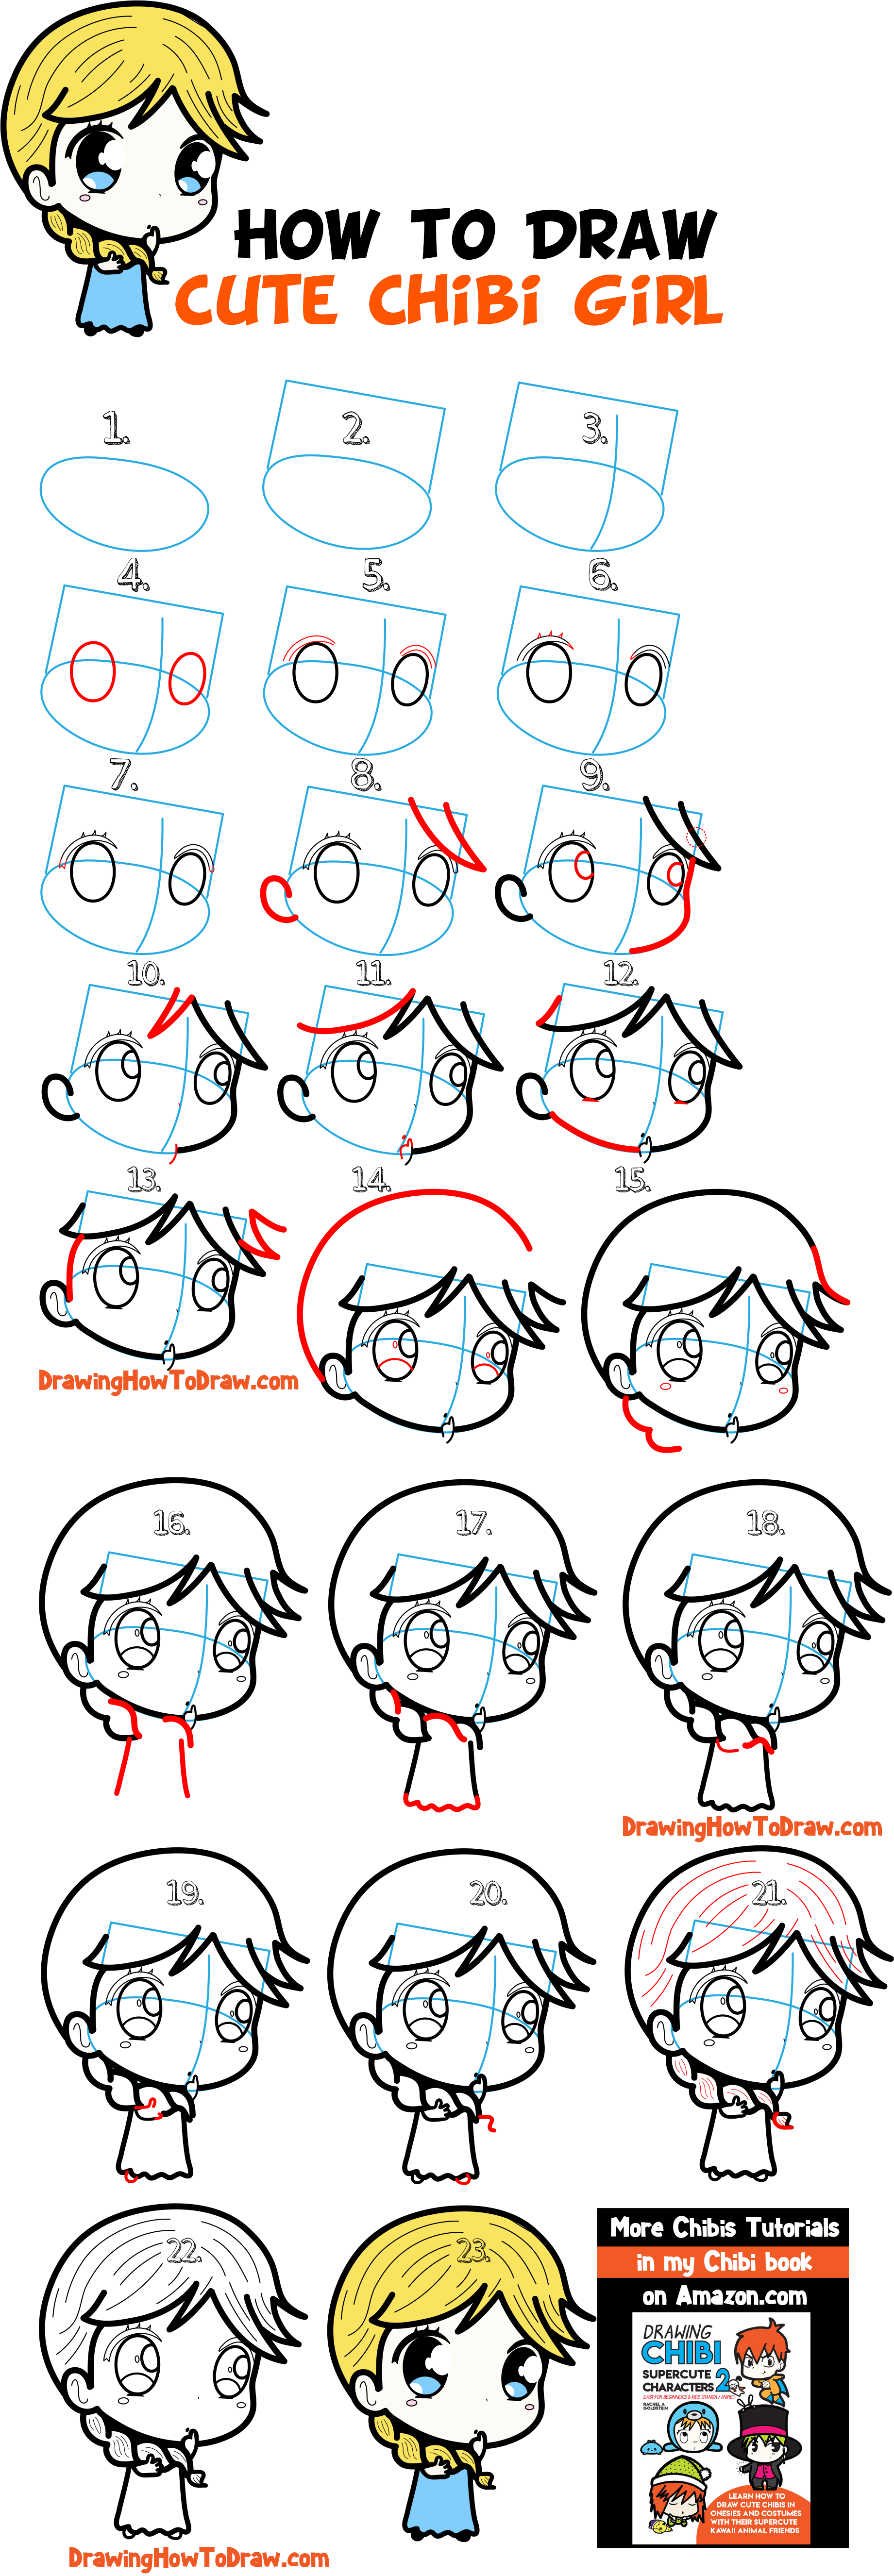
(Step 15) Draw a backwards #3-like shape for the start of her braid. Draw an oval under each eye. Draw a curved line to finish off the bangs.
(Step 16) Draw 2 lines for the sides of the dress. Draw a “?”-like curve. Also draw a curved line (these are parts of her braid).
(Step 17) Draw another sideways “?”-like curve, as well as another curved line (for the braid). Draw a wiggly line at the bottom of her dress.
(Step 18) Continue adding to the braid.
(Step 19) Draw a sideways “?”-like shape for part of her hand. Also draw a sideways “J” shape. Draw a curved line for one of her feet.
(Step 20) Draw a #3 shape on her hand. Draw a backwards letter “S” shape for the end of her braid. Draw a “U” shape for her right foot.
(Step 21) Draw a sideways “J” shape to finish off her braid. Draw lines inside the hair.
(Step 22) Erase un-needed lines.
(Step 23) Color her in.
Technorati Tags: chibi girl, how to draw a chibi, how to draw a chibi girl, drawing chibis, supercute, chibi
Today I'll show you how to draw Rick from the Rick and Morty cartoon tv…
Today I'll show you how to draw Morty from the Rick and Morty cartoon tv…
Today I'll show you how to draw the spunky little rabbit, Kuromi, from My Melody…
Today I'll show you how to draw this cute "bean duck" that I found on…
Today I'll show you how to draw Sosuke and Ponyo in a bubble (chibi /kawaii…
Today I'll show you how to draw a Boo from Super Mario Bros in Kawaii…