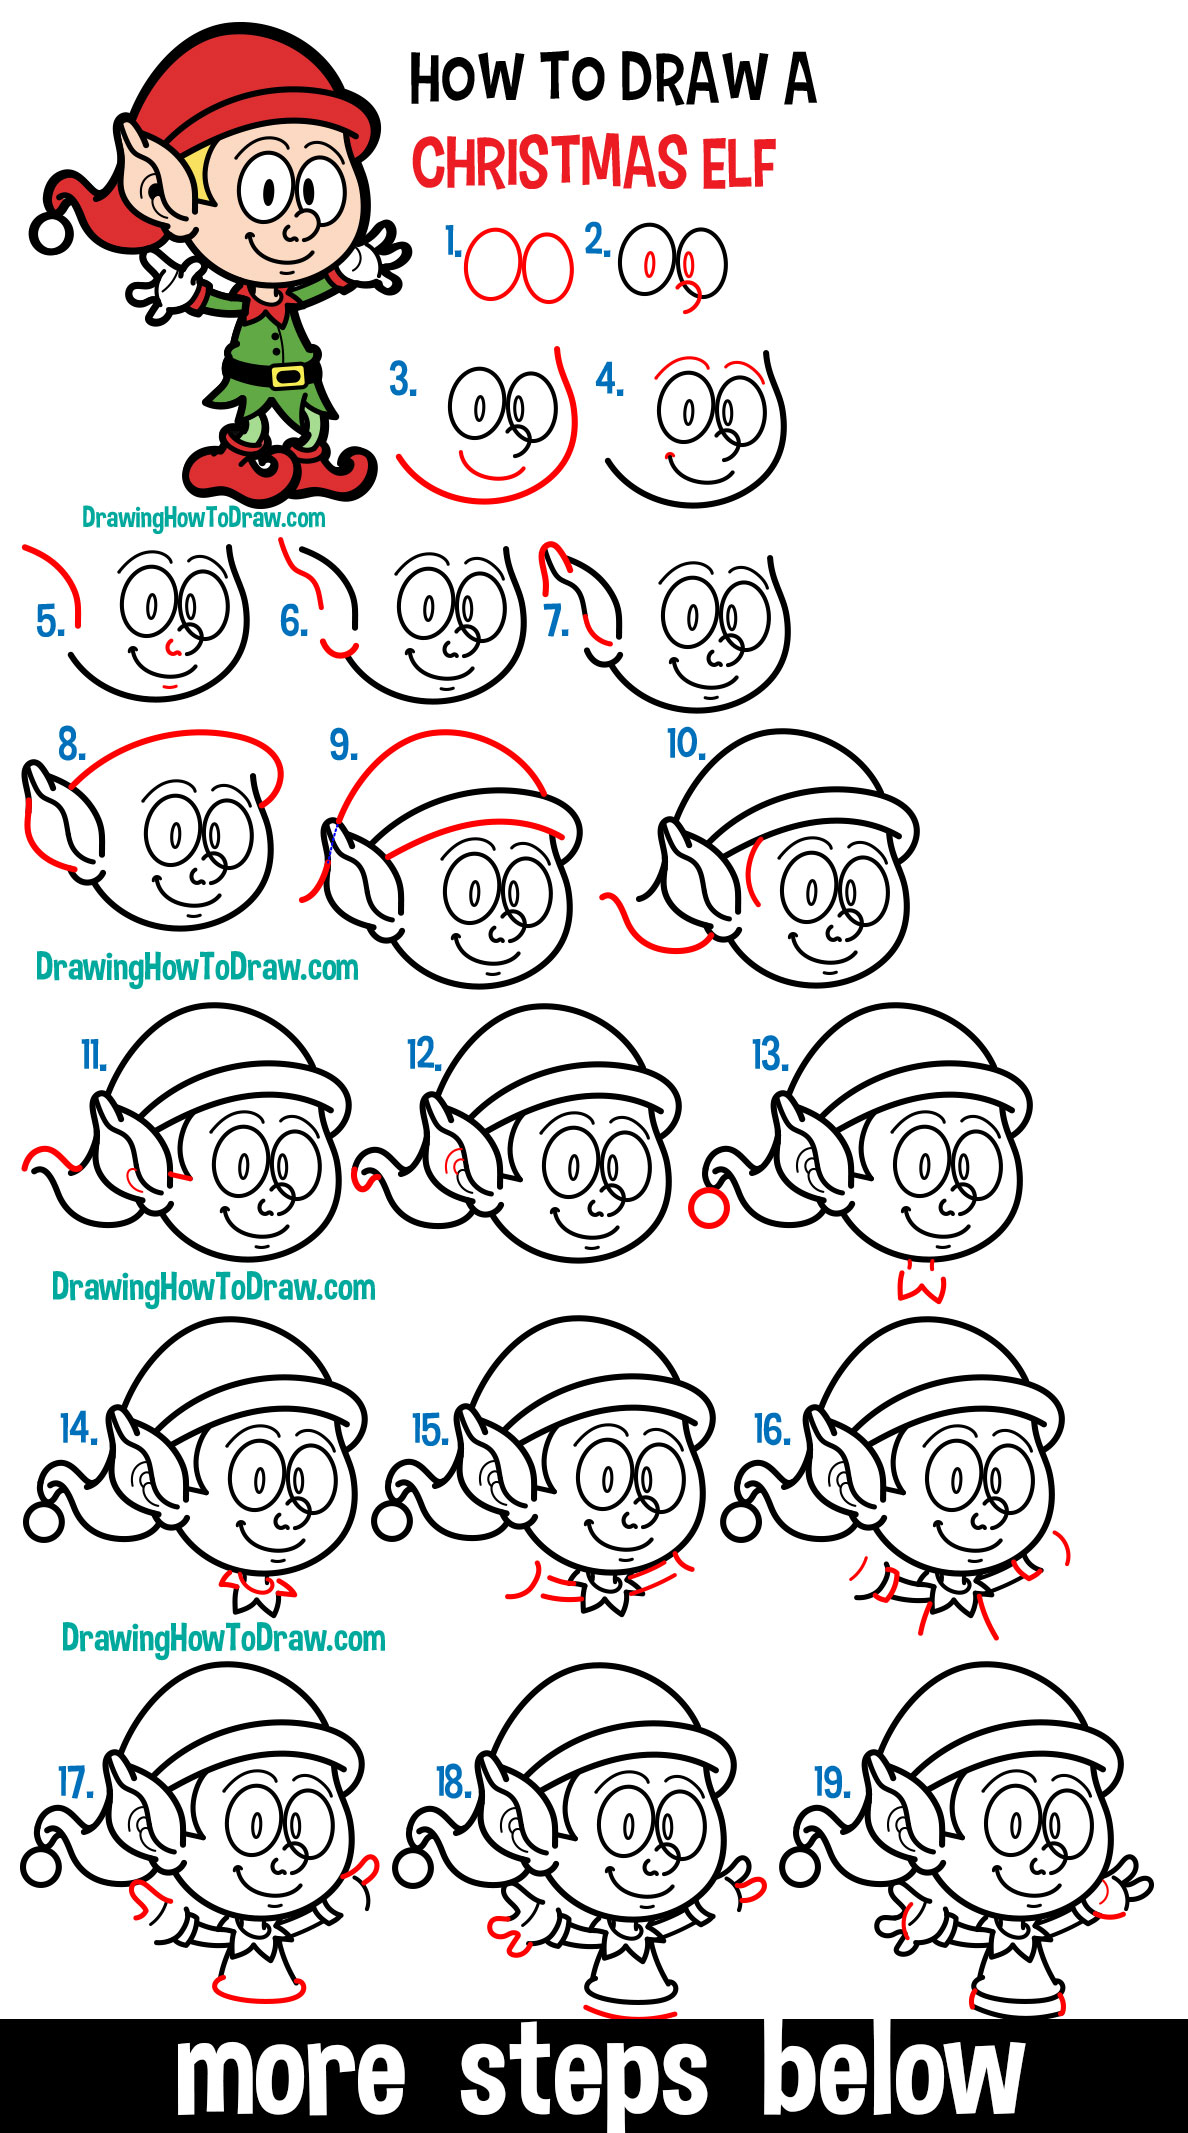
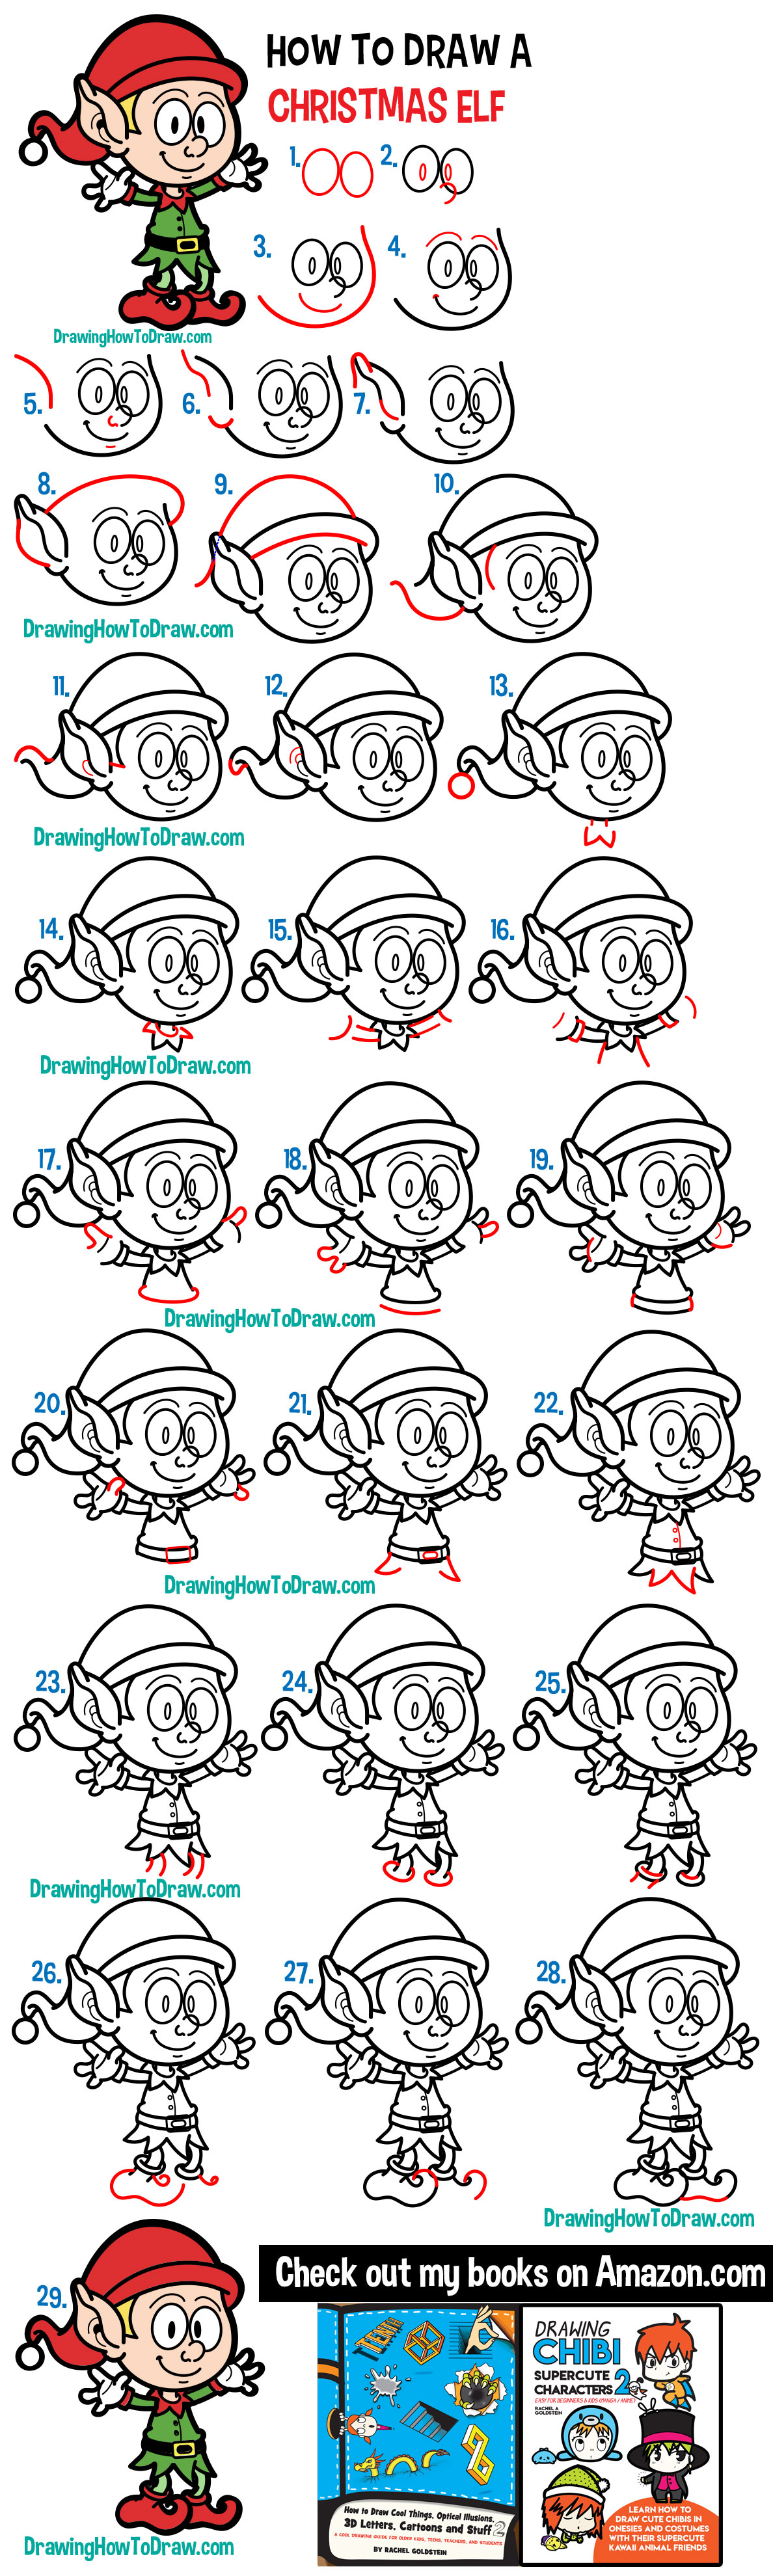
Today I’ll show you how to draw one of Santa’s elves in cartoon style. I have broken this lesson down into almost 30 steps to make sure you are able to follow along. This is a great tutorial to work on as it nears Christmas day. Happy Drawing!
(Step 1) Draw 2 ovals, side by side. It looks like a sideways #8 shape.
(Step 2) Draw an oval in each eye. Draw a backwards “C” shape for the nose.
(Step 3) Draw a curved line for the mouth. Draw a curved line that bends a bit at the top…as if it is going to turn into an upside down “?” shape.
(Step 4) Draw some curved lines.
(Step 5) Draw some more curved lines. Draw a backwards “?”-like shape for part of the nose.
(Step 6) Draw an “S”-like shape and a curved line, for part of the elf’s ear.
(Step 7) Draw a curved line and a backwards “?”-like shape on the ear.
(Step 8) Draw 2 curved lines.
(Step 9) Draw a sideways “?”-like shape. Don’t draw the dotted lines part. Draw a curved line on the elf’s cap.
(Step 10) Draw a backwards “S”-like shape and a curved line.
(Step 11) Draw a sideways “?”-like shape for the end of the cap. Draw a “C” shape in the ear. Draw a line for his sideburn.
(Step 12) Draw a sideways “?”-like shape for the very end of the cap. Draw 2 curved lines in the ear.
(Step 13) Draw a circle at the end of the cap. Draw 2 lines and a “W” shape for the neck and collar.
(Step 14) Draw a sideways “C” and 2 sideways “V” shapes.
(Step 15) Draw 2 lines for each arm. Draw a curved line for the start of each hand.
(Step 16) Draw a few curved lines. Draw partial rectangles for the sleeves.
(Step 17) Draw a “?”-like shape on the left hand. Draw a sideways “U” like shape on the right hand. Draw a sideways “C” shape on the waist.
(Step 18) Draw a backwards #3-like shape on the left hand, a sideways “U” shape on the right hand, and a curved line on the waist.
(Step 19) Draw some curved lines.
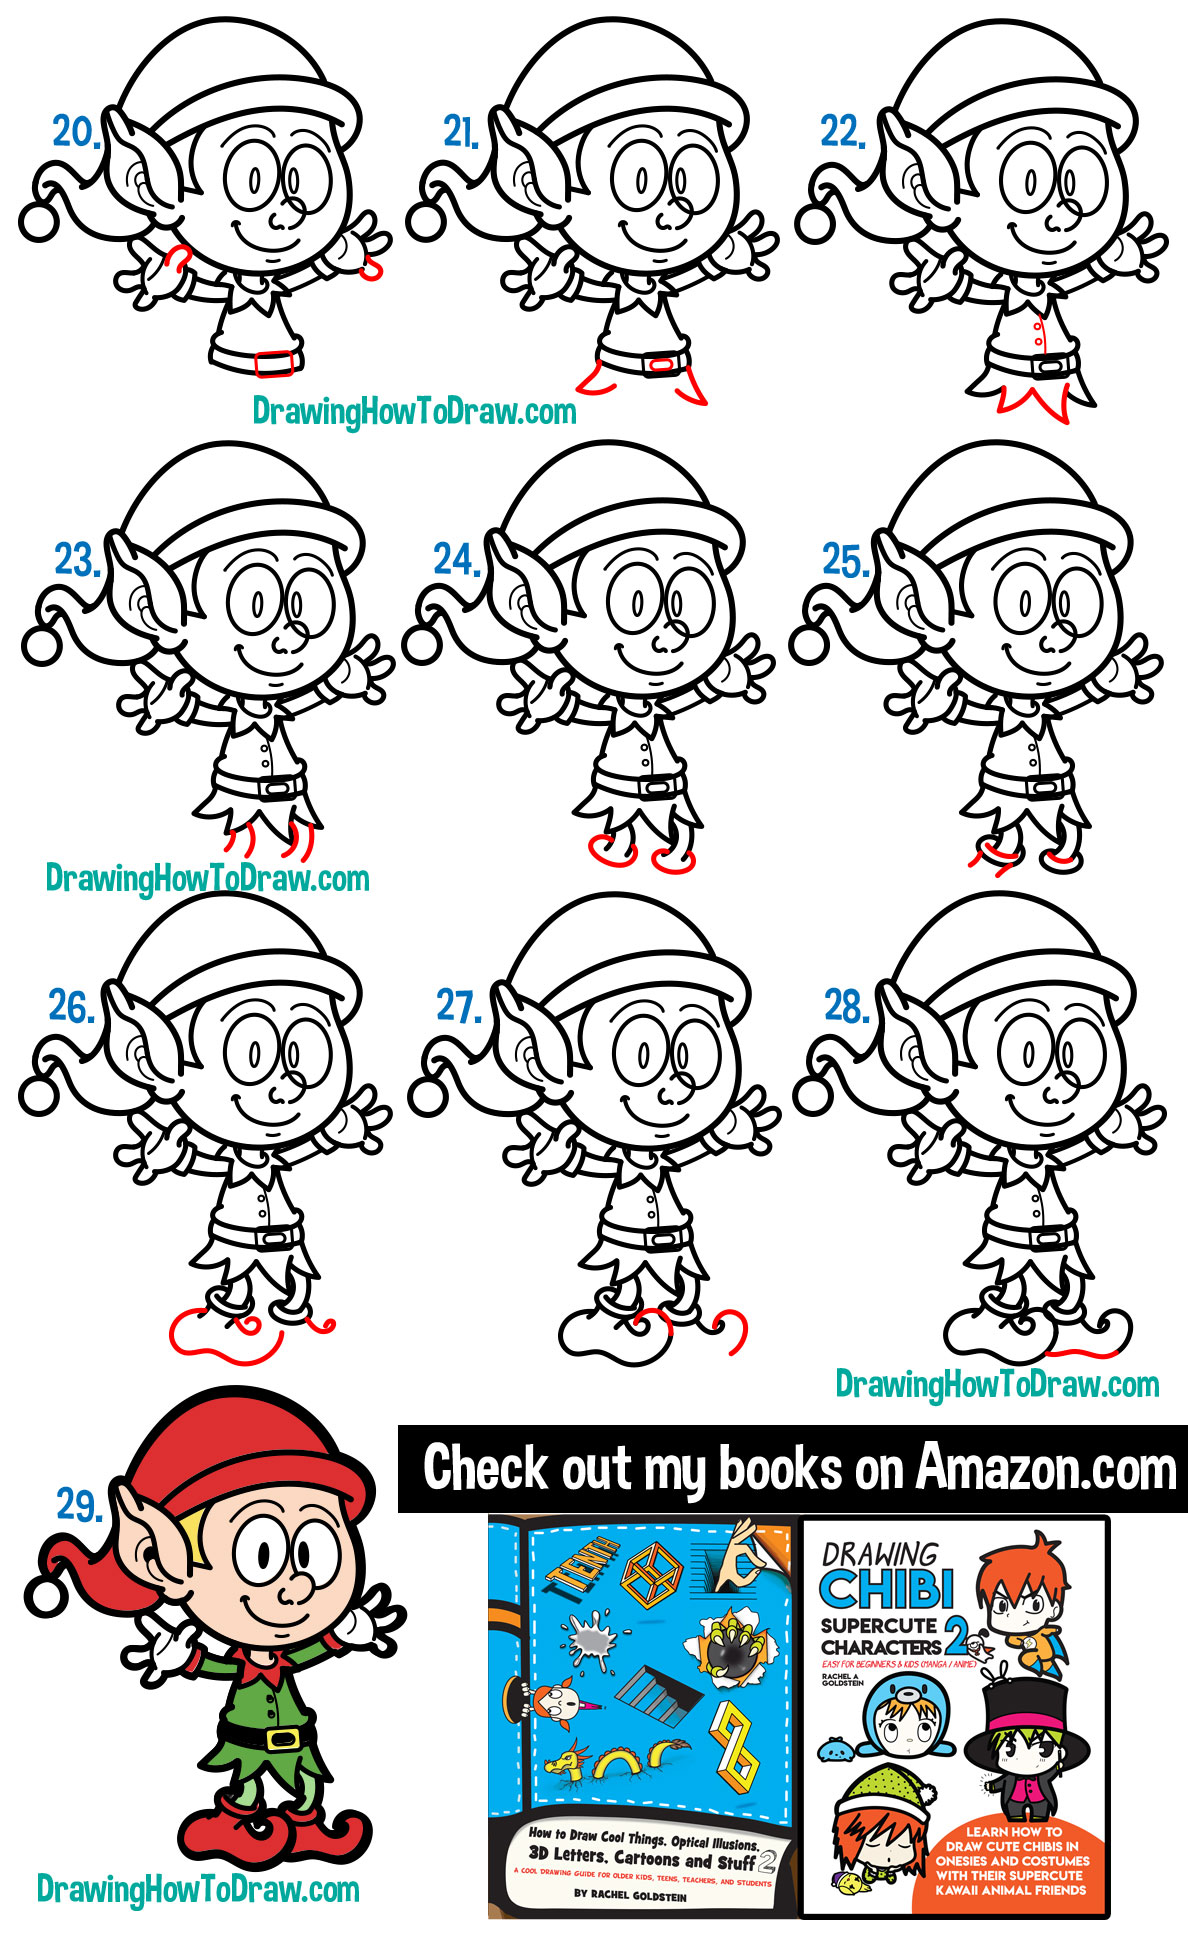
(Step 20) Draw sideways “U” shapes on the hands. Draw a rectangle for the belt buckle.
(Step 21) Draw an oval in the belt buckle. Draw 2 “V” shapes for the fringe on the bottom of the shirt.
(Step 22) Draw a “W” shape for the fringe on the bottom of his shirt. Draw a line and 2 circles for the buttons.
(Step 23) Draw 2 curved lines for each leg.
(Step 24) Draw a sideways “C” shape for each foot.
(Step 25) Draw 2 curved lines and 2 straight lines.
(Step 26) Draw 2 sideways #6-like shapes. Draw a sideways #3-like shape.
(Step 27) Draw 2 curved lines.
(Step 28) Draw a wavy line.
(Step 29) Erase un-wanted lines. Color him in.
Technorati Tags: how to draw an elf, elf, elves, santa’s elf, christmas elf, christmas
Today I'll show you how to draw Rick from the Rick and Morty cartoon tv…
Today I'll show you how to draw Morty from the Rick and Morty cartoon tv…
Today I'll show you how to draw the spunky little rabbit, Kuromi, from My Melody…
Today I'll show you how to draw this cute "bean duck" that I found on…
Today I'll show you how to draw Sosuke and Ponyo in a bubble (chibi /kawaii…
Today I'll show you how to draw a Boo from Super Mario Bros in Kawaii…
View Comments