Here is an easy-to-follow, step-by-step drawing tutorial for sketching out realistic baby eyes and eyebrow. Baby eyes are much cuter than adult eyes, learn how to draw them here. You can use a normal pencil, graphite drawing pencils, or even use your computer’s drawing tablet. Drawing eyes is not an easy thing to do, that’s why I broke down the tutorial into 17 steps. Hopefully, by seeing how I drew it, you will be able to do so as well. Follow along with the tutorial below.
(1) Graphite pencils are optional but preferred. I got this cheaper set of graphite pencils and I actually like them a lot.
(2) Gray paper is optional. It is much easier to draw a tinted paper when it comes to facial features. Here is a good gray-toned drawing pad.
(3) Eraser. I usually use types of erasers. I use (a) A white drawing eraser and (2) Kneaded eraser
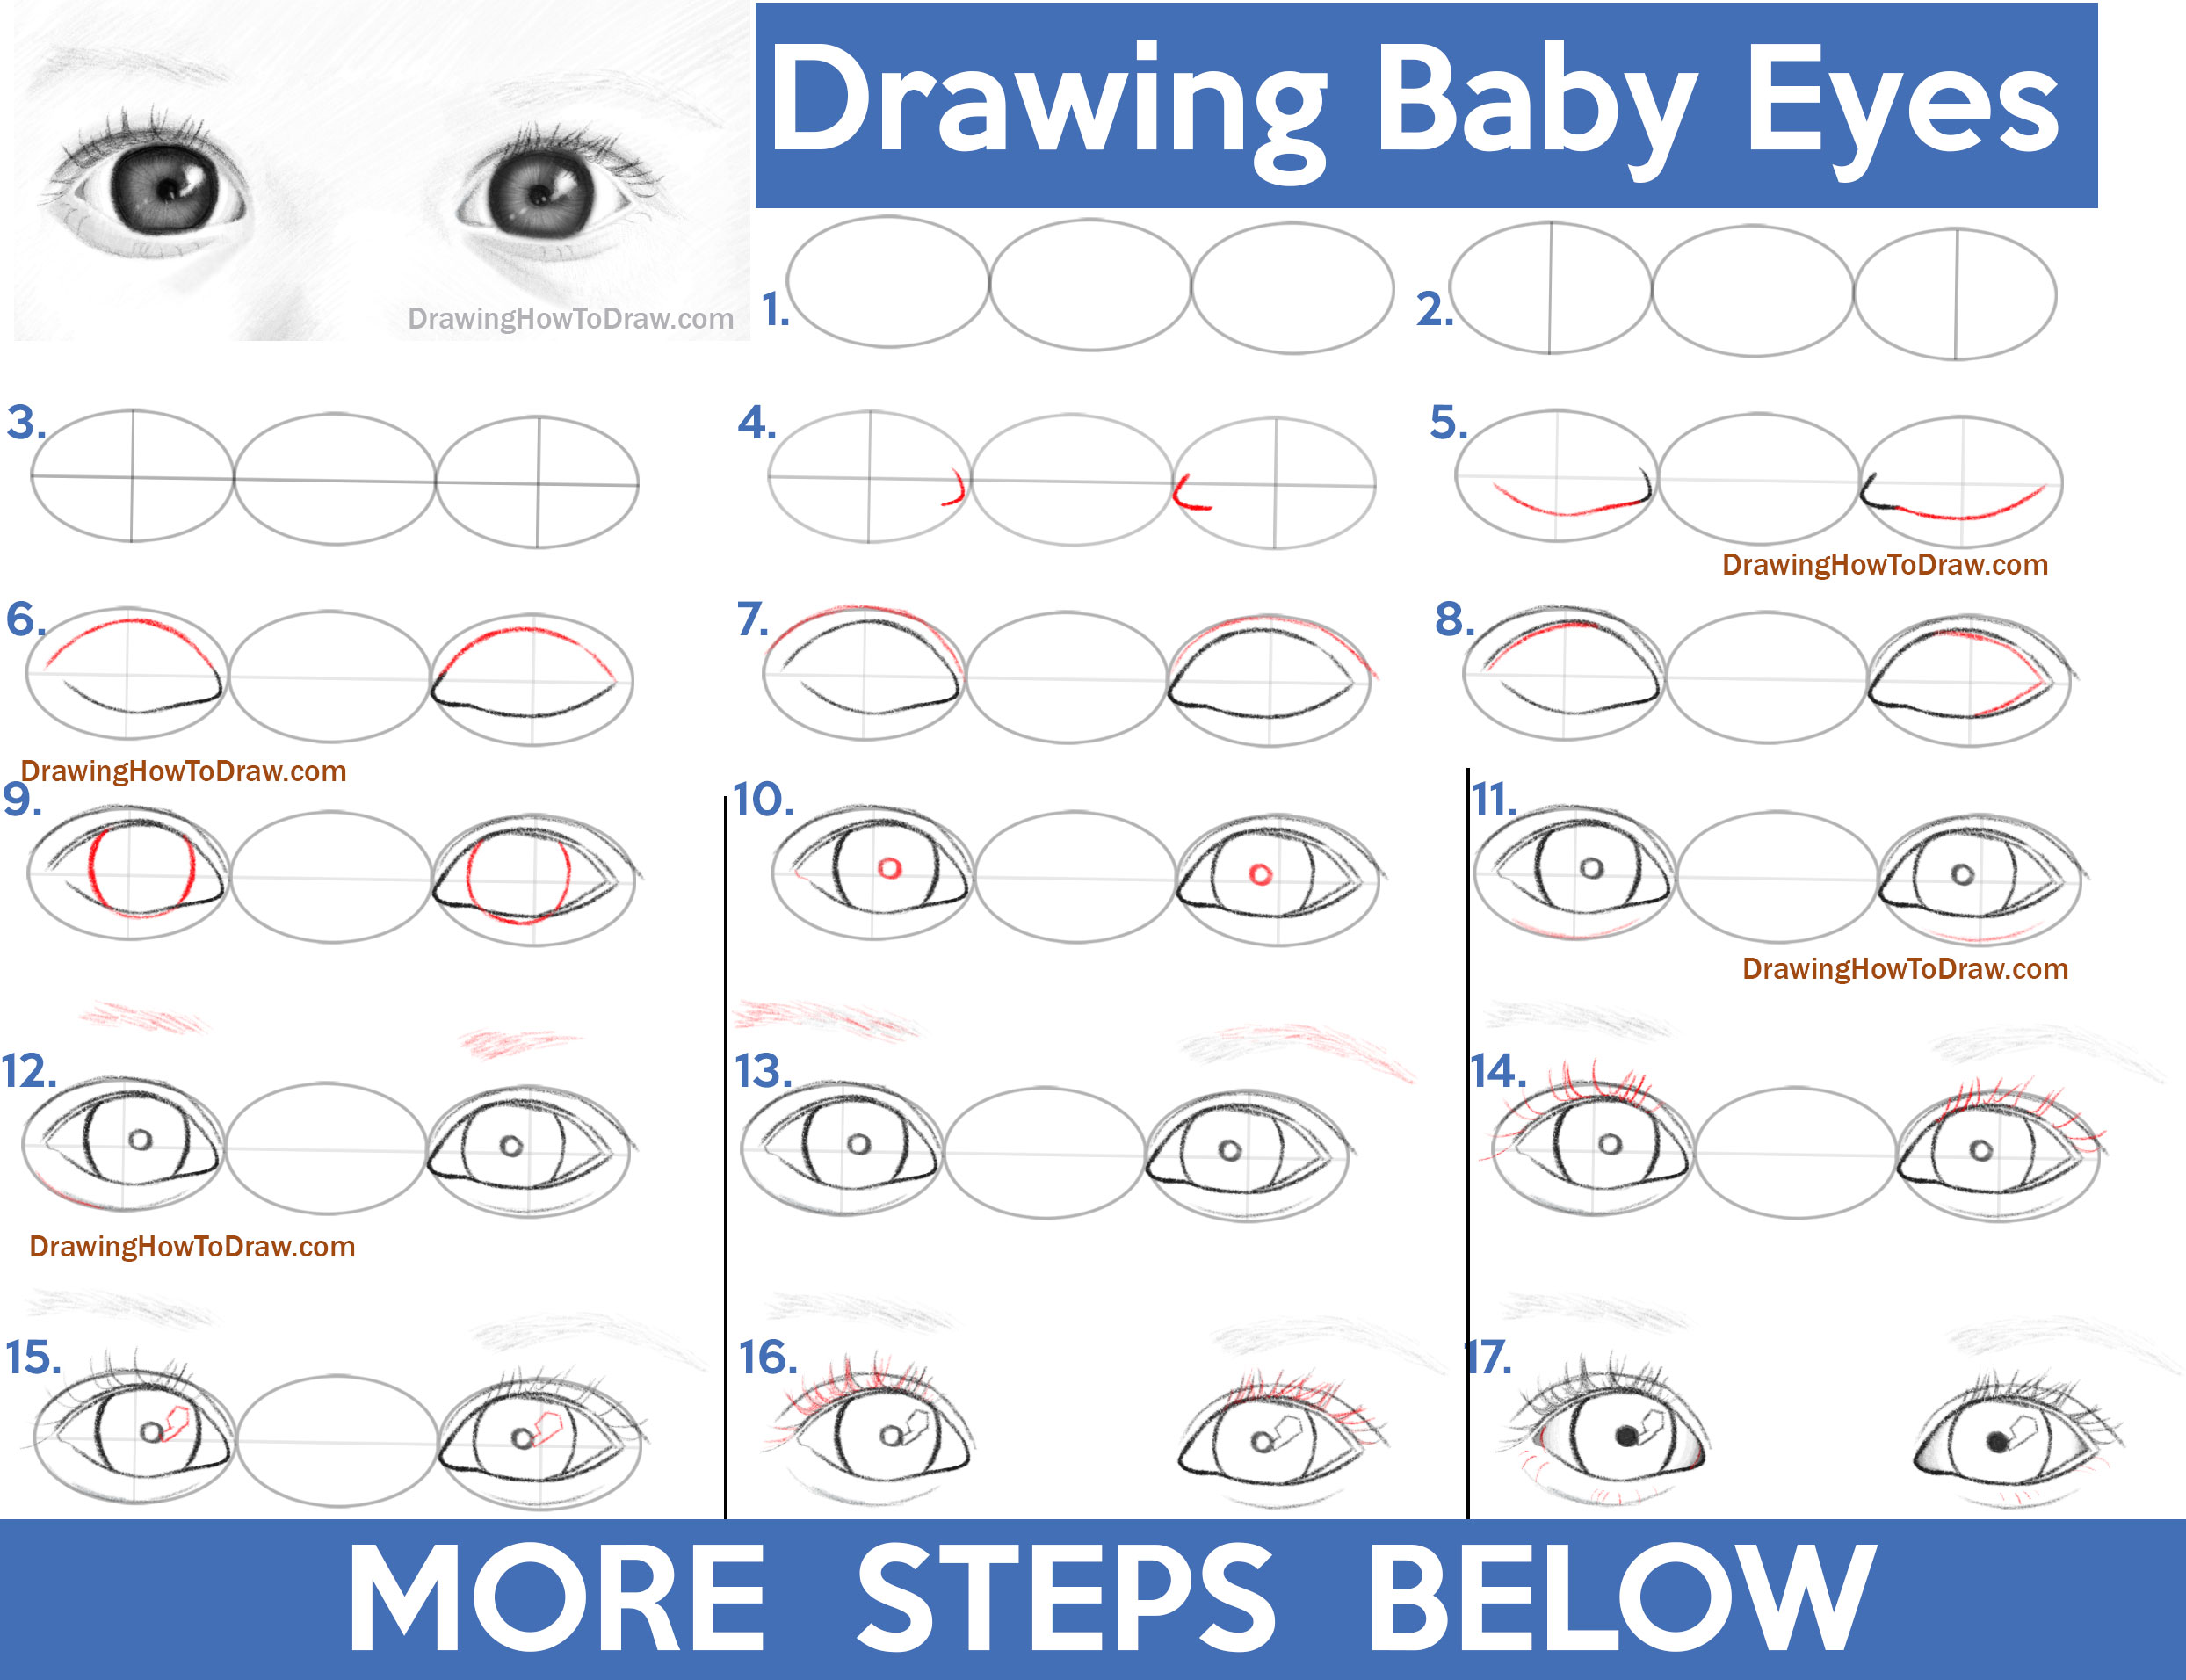
Step 1 – Lightly draw 3 ovals of equal width. These will be erased later on, so draw them lightly.
Step 2 – Draw a line through the center of the ovals on the outside.
Step 3 – Draw a line through the center of them all.
Step 4 – Draw sideways “V” shapes for the inner eyes.
Step 5 – Draw a curved line on the bottom of each eye.
Step 6 – Draw a curved line at the top of each eye.
Step 7 – Draw a curved line for the upper eyelid on both of them.
Step 8 – Draw the inner outline.
Step 9 – Draw a circle iris for both of them. Erase the part of the circle that lands outside the eye.
Step 10 – Draw the left side of the left eye. Draw a circle for each pupil.
Step 11 – Draw a curved line at the bottom of each eye.
Steps 12 + 13 – Draw little lines for the eyebrow hairs.
Step 14 – Draw curved lines for eyelashes. For some of the eyelashes draw “J” shapes that overlap.
Step 15 – Draw a shape for the highlight, it doesn’t have to look like mine.
Step 16 – Draw more lashes between the current lashes and make the current lashes more robust.
Step 17 – Shade the outsides of the eyes. Draw curved lines for the lower lashes.
Step 18 – Draw lines radiating out from the pupil.
Step 19 – Draw more lines radiating out from the pupil. Also, shade the iris a bit more to give it color. Work on the lower lashes a bit, make them thicker at the base.
Step 20 – Shade the upper eyelids. Make the shading darker at the crease and let it gradually gradate out to nothing.
Step 21 – Shade the iris on the outer edges and around the pupil.
Steps 22 – 24 – Use an eraser to add highlights.
Step 25 – Add shading below the eyes.
Step 26 – Add shading all around the eyes.
Step 27 – Lighten the dark outlines of the eyes by tapping them with an eraser. Also, add a bit of shading where the nose will be.
Technorati Tags: baby eyes, baby’s eyes, babies eyes, eyes, how to draw eyes, how to draw baby eyes, baby, babies
Today I'll show you how to draw Rick from the Rick and Morty cartoon tv…
Today I'll show you how to draw Morty from the Rick and Morty cartoon tv…
Today I'll show you how to draw the spunky little rabbit, Kuromi, from My Melody…
Today I'll show you how to draw this cute "bean duck" that I found on…
Today I'll show you how to draw Sosuke and Ponyo in a bubble (chibi /kawaii…
Today I'll show you how to draw a Boo from Super Mario Bros in Kawaii…
View Comments
very helpful for me❤️🍆↔️🍑=baby
Superb tutorial.Im retired.I love to draw and want to draw baby portraits.So beautiful and expressive.Im going to order your book
Thank you, Gerard