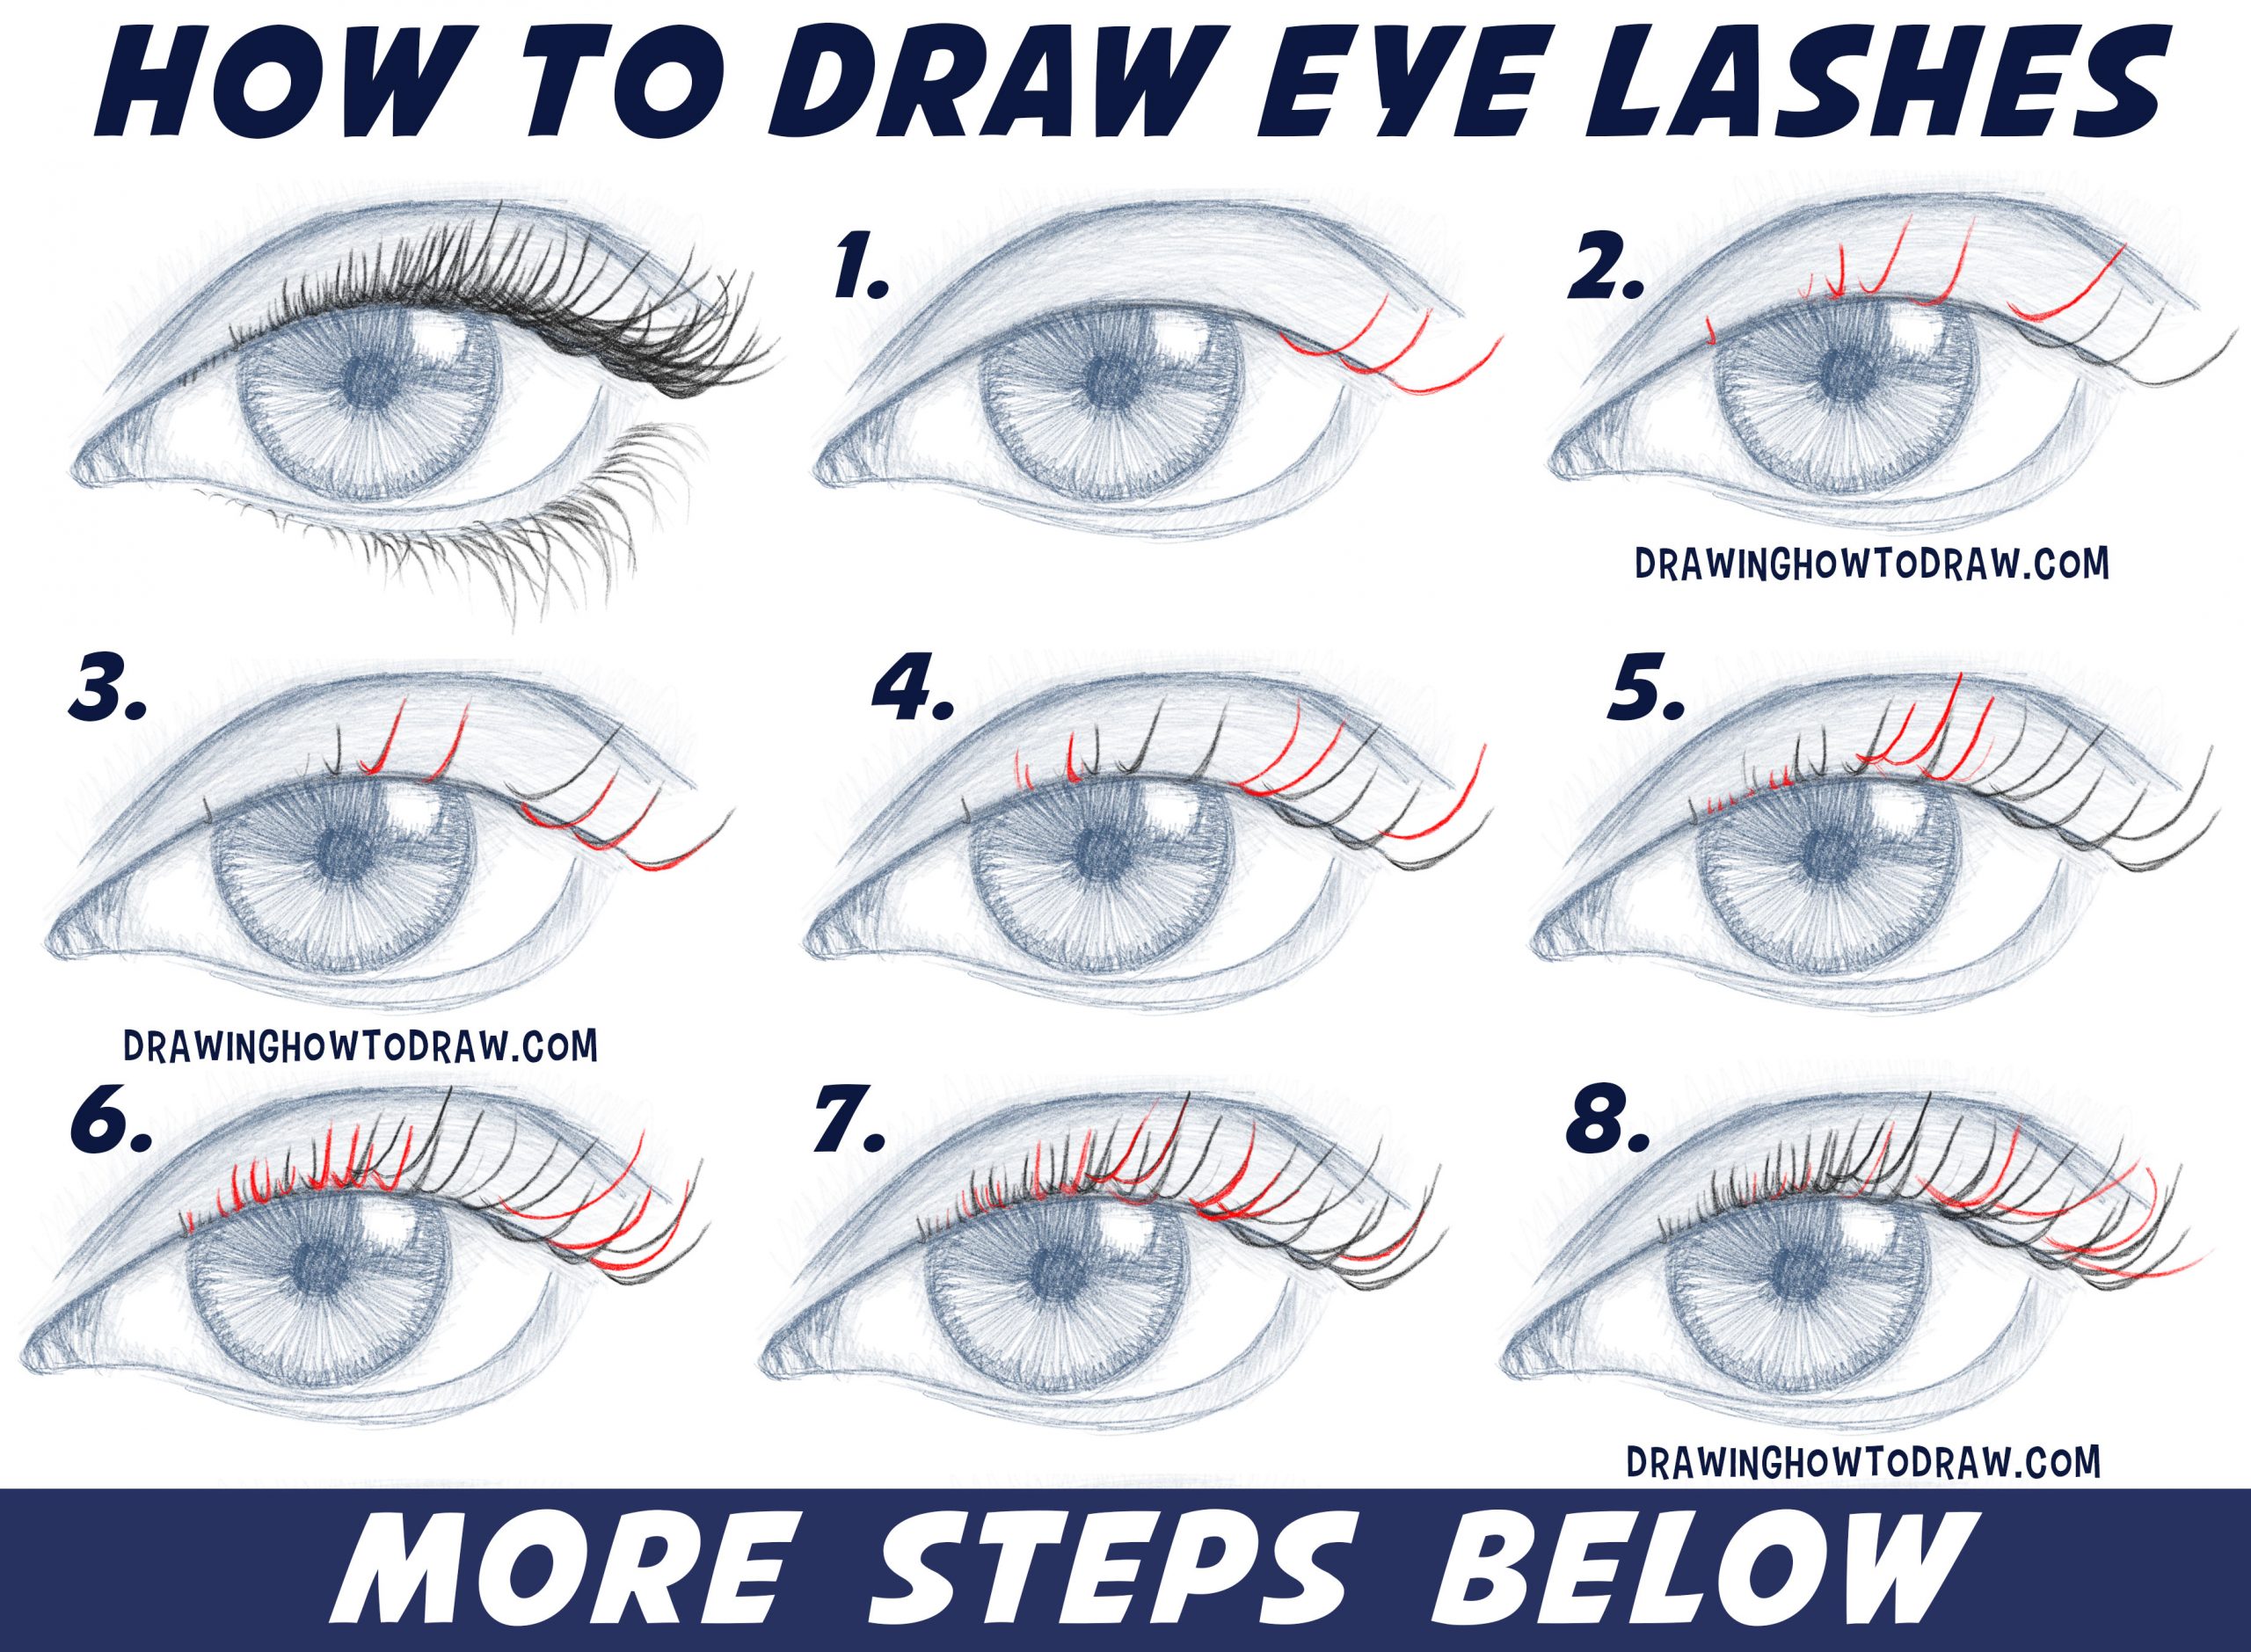
Drawing realistic eyelashes is really hard to accomplish. You can just draw curved lines all over the eyes and expect them to look real. I recreated the eyelashes from a real eye and show you how I did it below. Follow along with the step by step drawings and instructions below to also draw realistic eyelashes. Happy Drawing!
(STEP 01) Draw some curved lines for lashes. See how they turn more into “J” shapes as you go towards the left?
(STEP 02) Draw some “J” shapes. The shapes that are farthest to the left look more like “J”s.
(STEP 03) Draw a curved line that droops down
slightly lower and to the right than each line (except for one of these which curves to the left of that line).
(STEP 04) Draw some more curved lashes.
(STEP 05) Draw some more “J” shapes. Draw some cute little tiny backward “J” shapes on the left side of the eye.
(STEP 06) On the right side of the eye, draw some flattened “C” shaped lashes. As you get to the left side, start forming “J” shaped lashes. Some of these lashes are just curved lines and one even looks like a “U” shape.
(STEP 07) Thicken some of the eyelashes on the right side of the eye. Add some more “J” shapes to the left side of the eye.
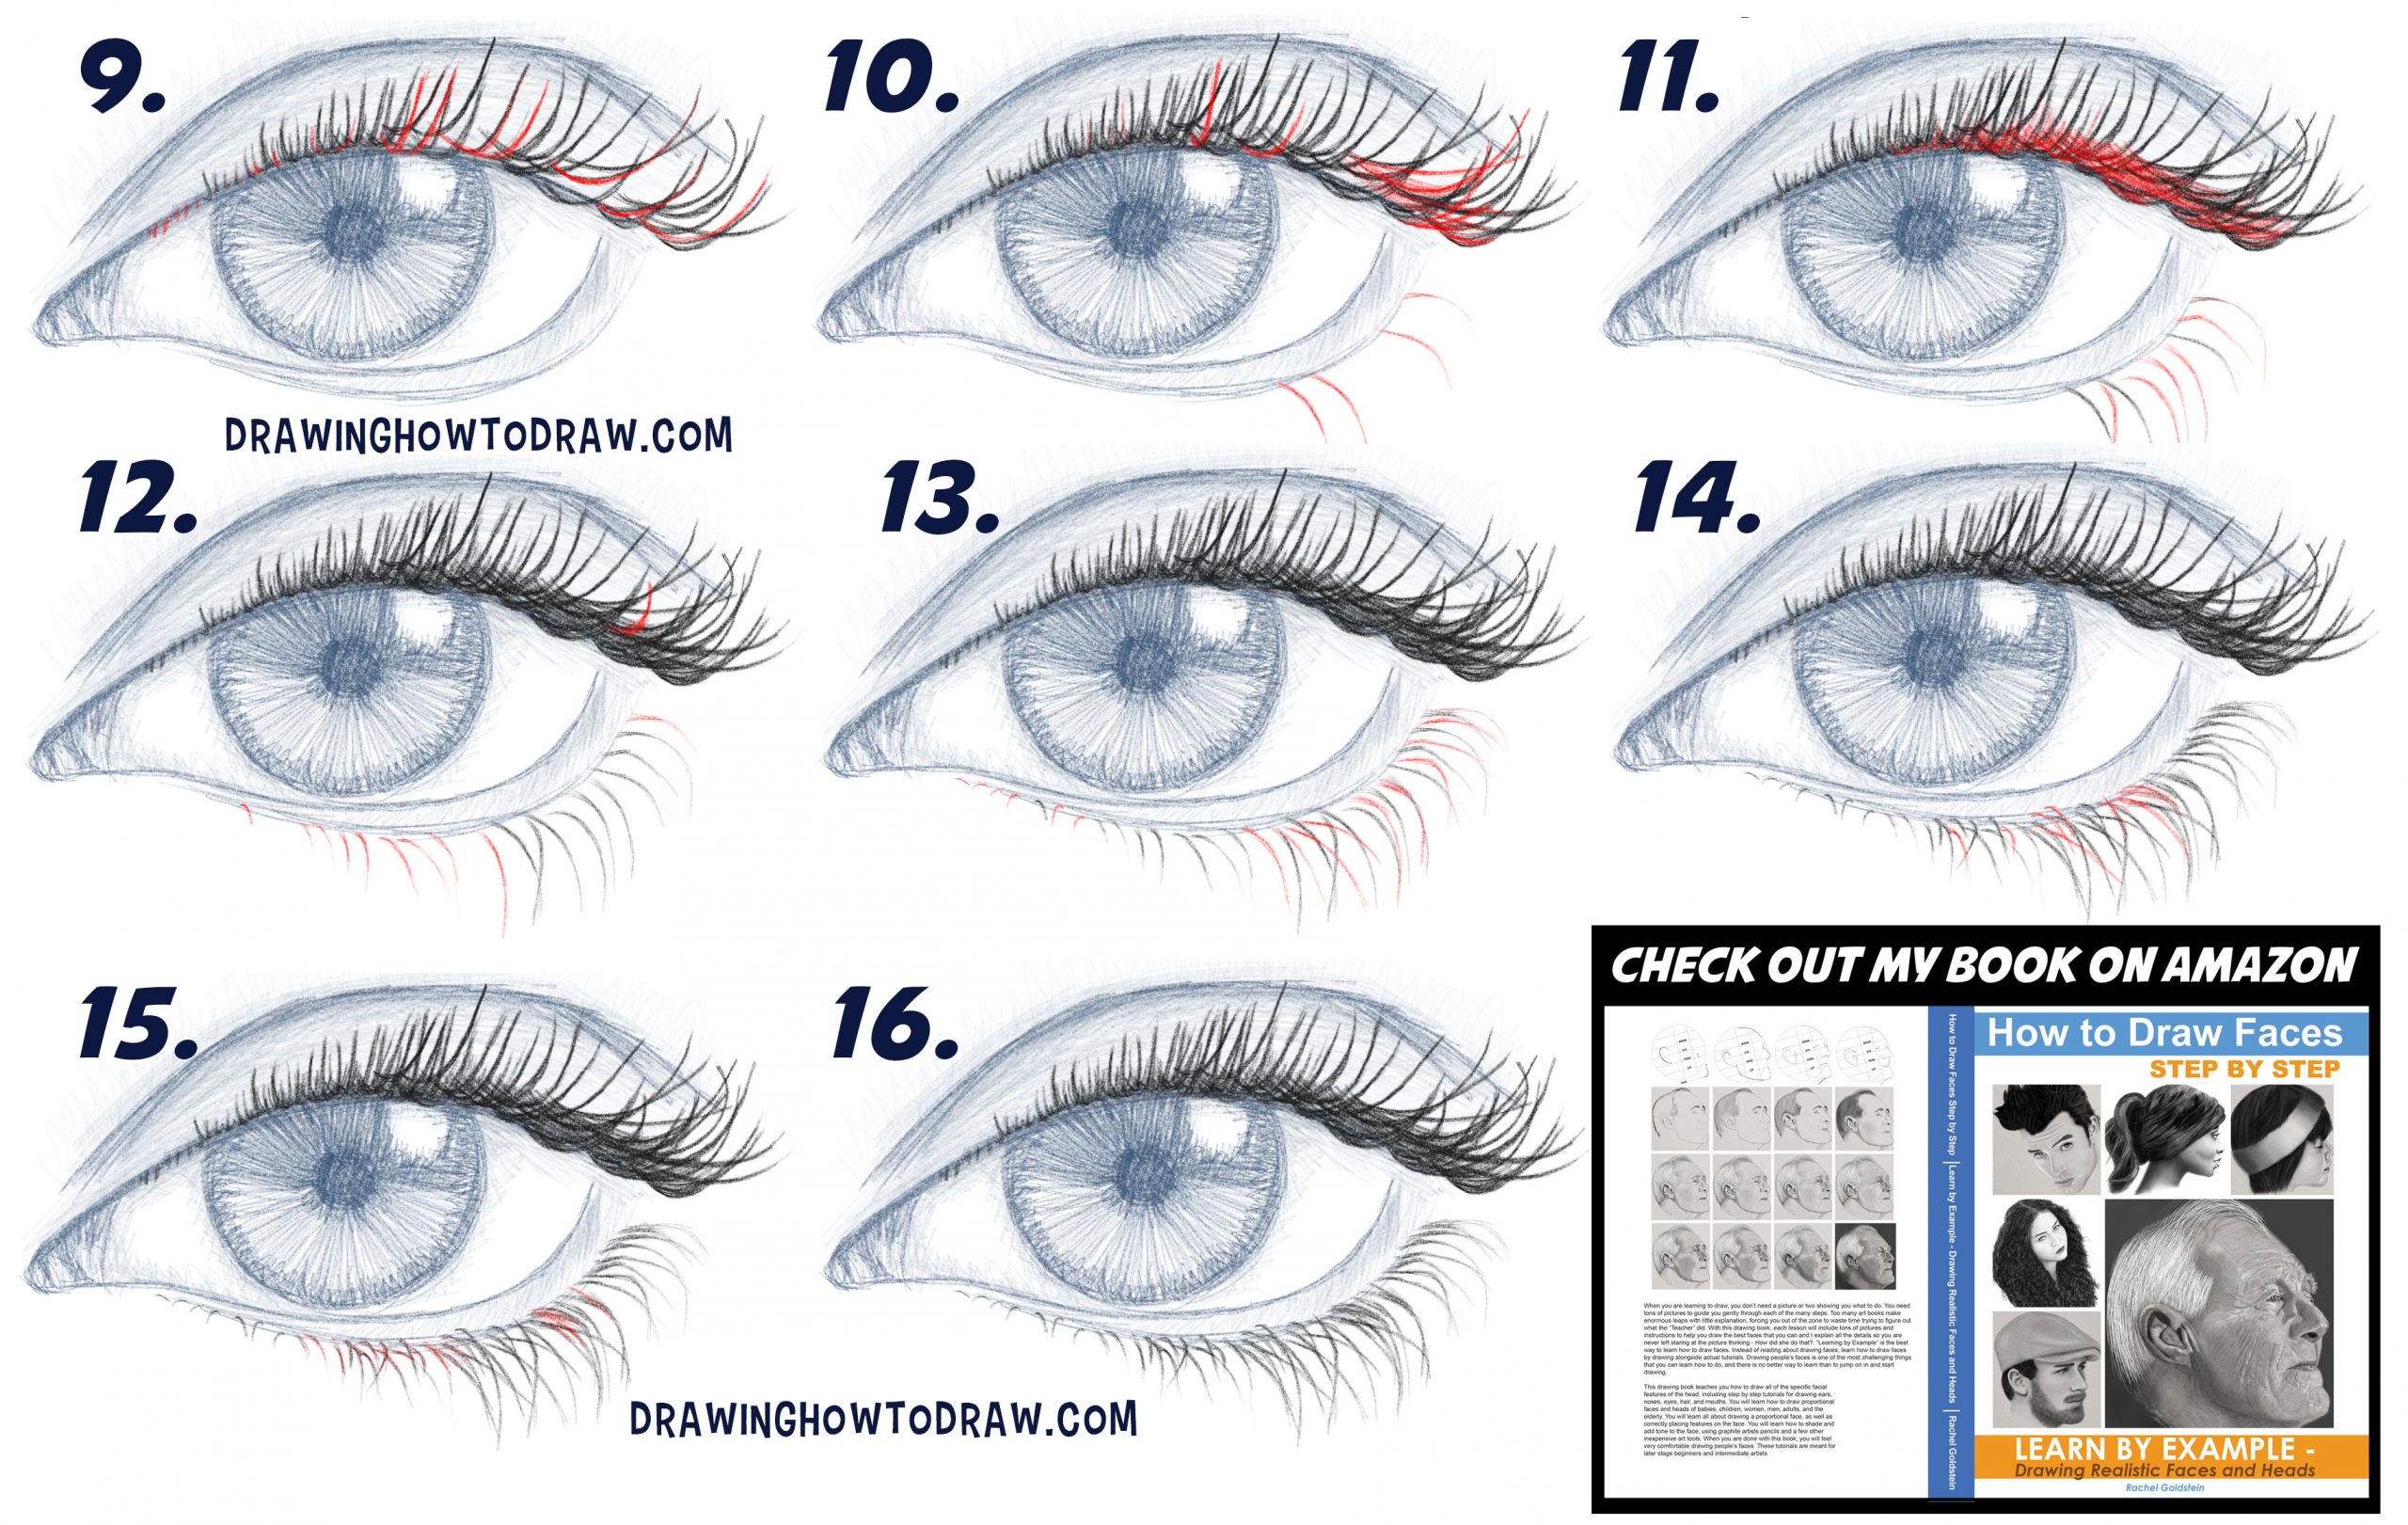
(STEP 08) Draw “J” shaped lashes on the left, and a “J” shape, 2 curved lines, and a backward “C” shape on the right side.
(STEP 09) Draw some long curved lines for the lashes on the right side. Draw some “J” shapes and “U” shapes as you get further to the left.
(STEP 10) Lengthen and thicken some of the lashes on the right. Draw some new long, curved lashes. Draw some “J” shapes for some of the center lashes. Draw some curved lines for lower lashes. Make them thicker at their bases. Notice the angles that they are at.
(STEP 11) Thicken up the upper eyelashes using the current lashes as a guide. Draw curved lines with thicker bases for the lower lashes.
(STEP 12) Draw a curved lash on the upper lashes. Draw some curved lines for the lower lashes. Make the bask thicker. The angles of the lashes change depending on where they are located.
(STEP 13) Continue drawing lashes.
(STEP 14) Elongate some of the lashes. Add some lashes that are going in slightly different directions.
(STEP 15) Continue drawing the lashes, some of them at odd angles.
(STEP 16) Just thicken up some of the lashes.
Technorati Tags: eyelashes, lashes, how to draw eyelashes, drawing eyelashes, how to draw eye lashes, drawing eye lashes, drawing eyes, eyes
Today I'll show you how to draw Rick from the Rick and Morty cartoon tv…
Today I'll show you how to draw Morty from the Rick and Morty cartoon tv…
Today I'll show you how to draw the spunky little rabbit, Kuromi, from My Melody…
Today I'll show you how to draw this cute "bean duck" that I found on…
Today I'll show you how to draw Sosuke and Ponyo in a bubble (chibi /kawaii…
Today I'll show you how to draw a Boo from Super Mario Bros in Kawaii…