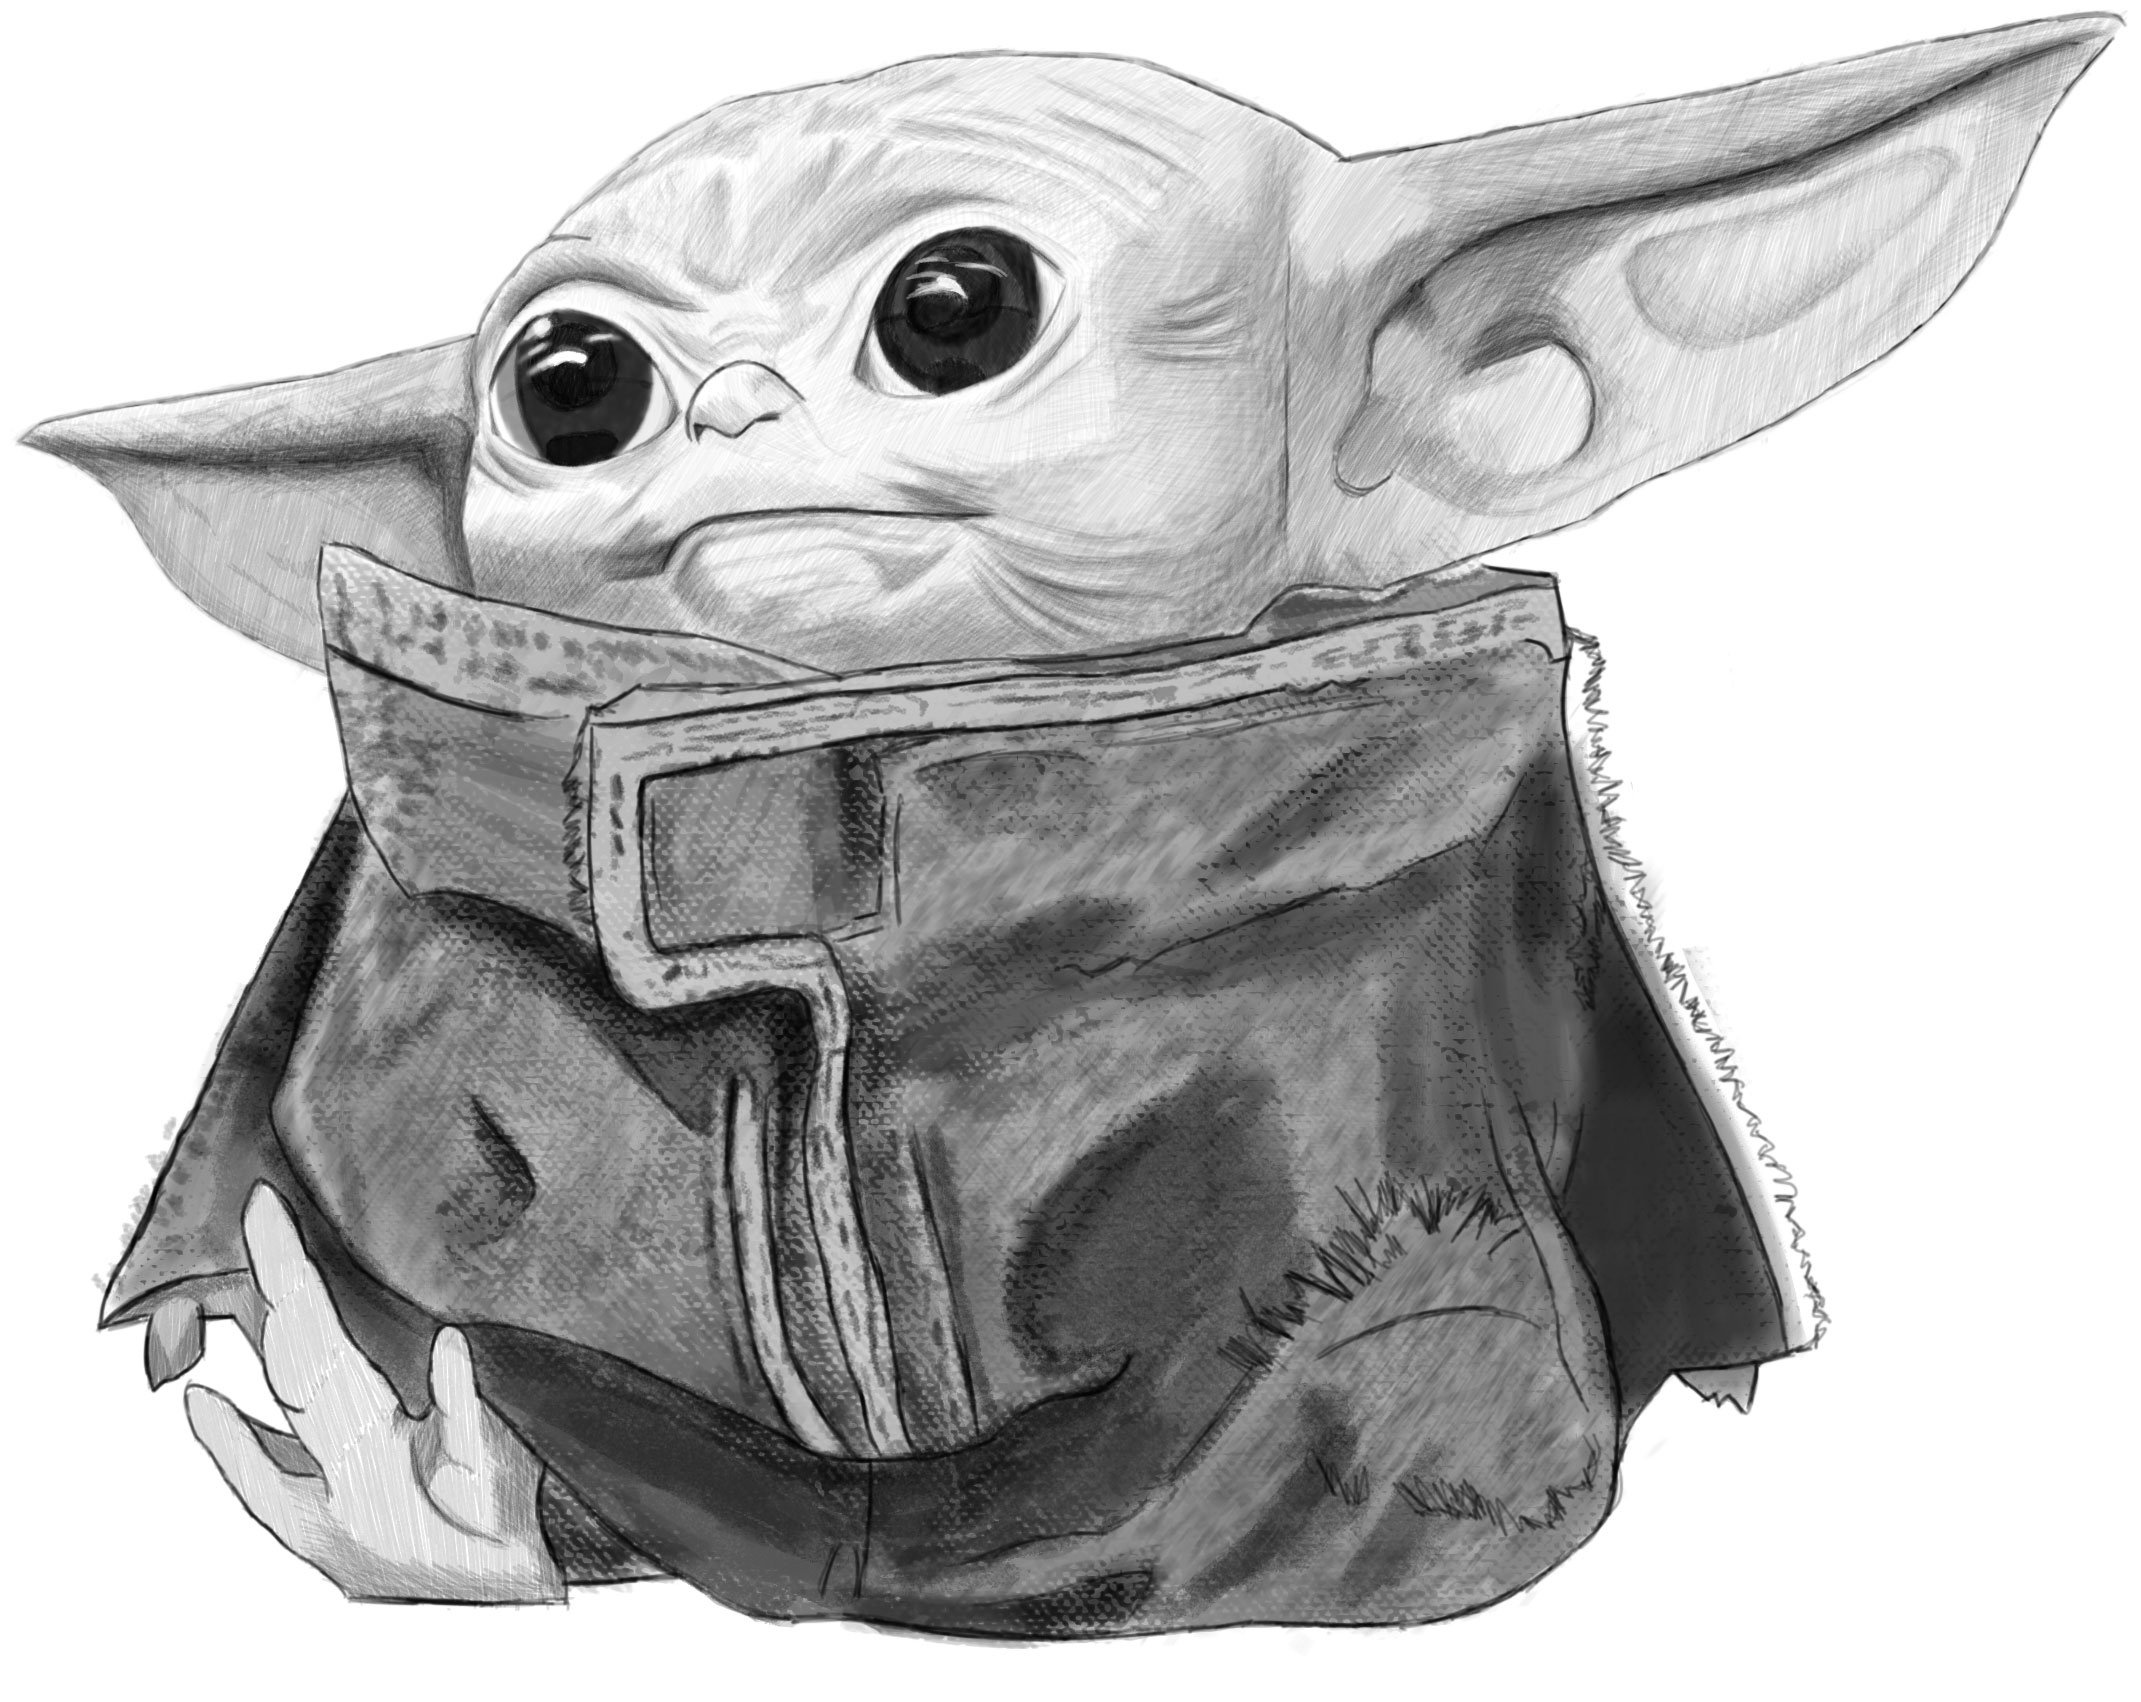
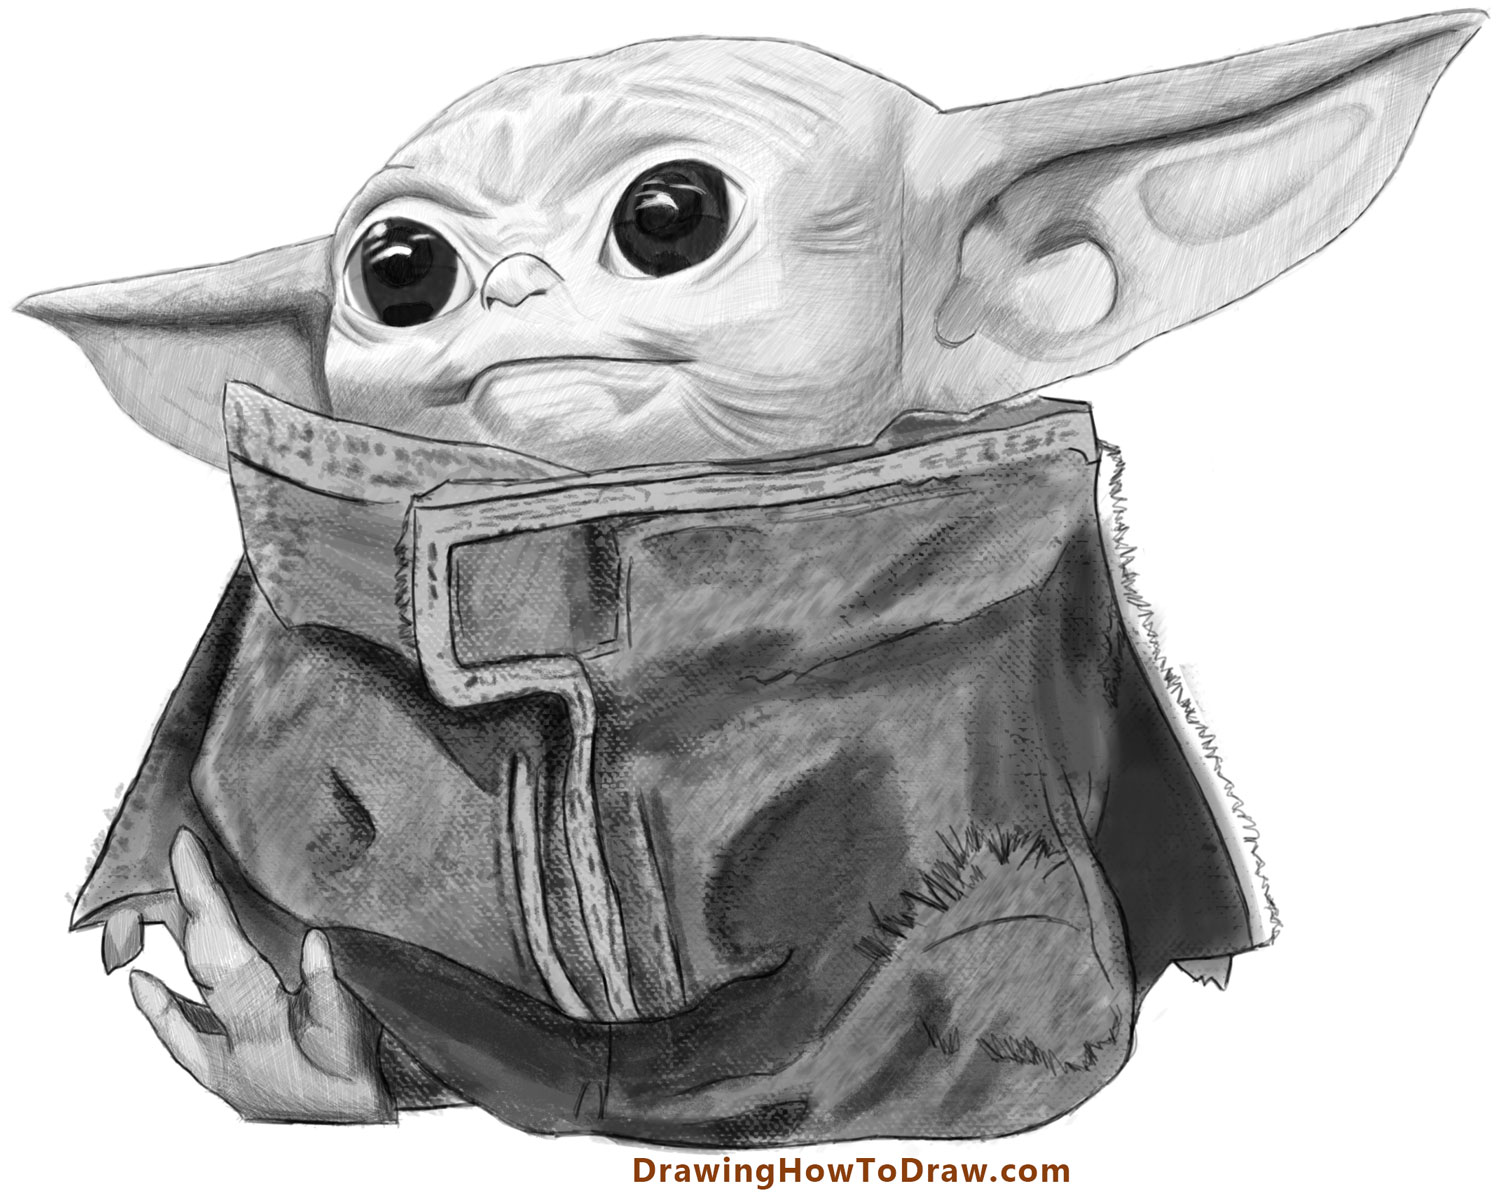
Today, I’ll show you how to draw a realistic Baby Yoda from The Mandalorian, also known as “the child”or “the kid”. Baby Yoda isn’t his real name, but just something everybody seems to call him. I have broken this drawing tutorial down into more than 30 steps to make it as easy as possible for you. I hope you enjoy it. Happy Drawing!
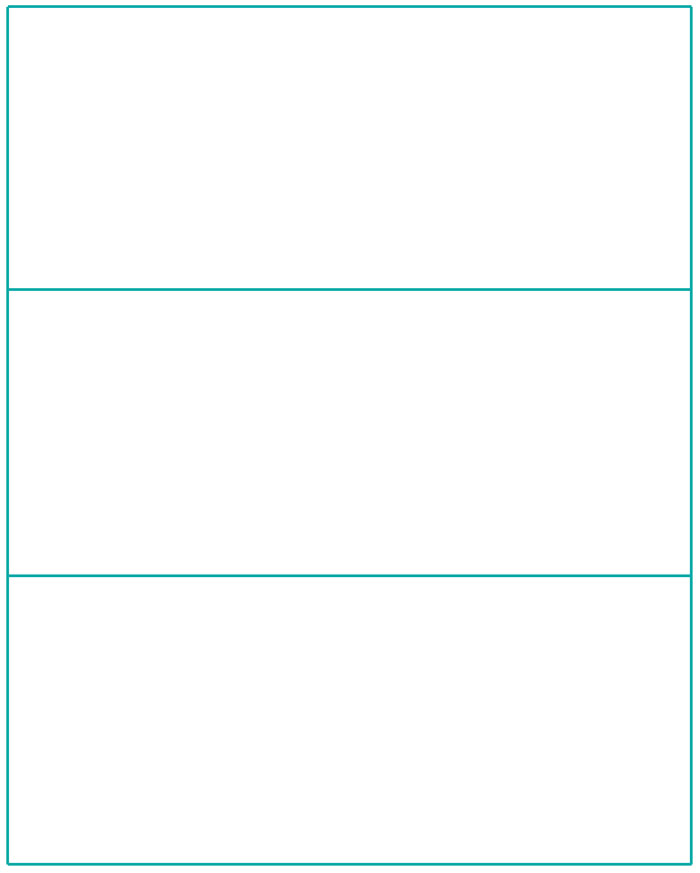
Draw a rectangle that is about 8 inches wide by 10.6 inches long. Lightly separate the rectangle into 3 equal parts.
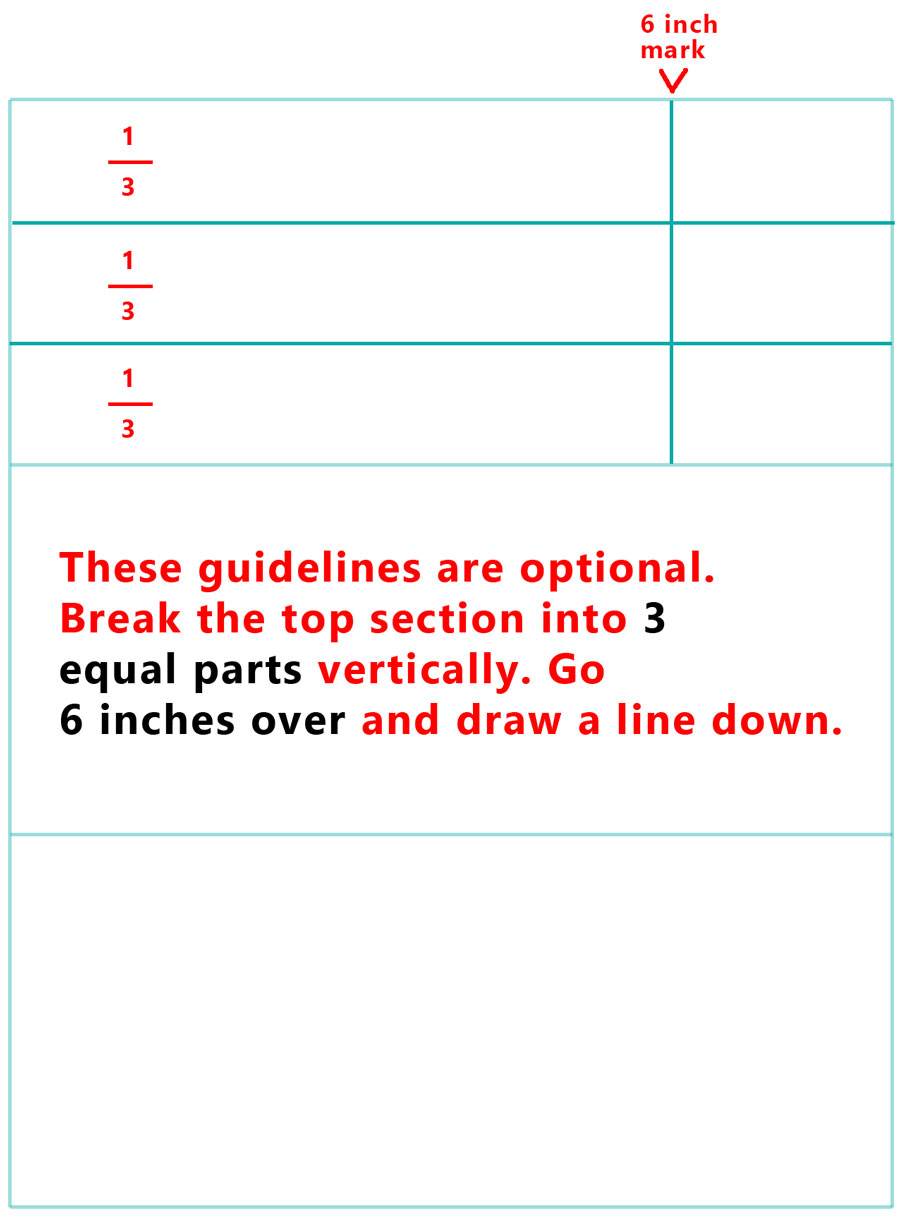
These guidelines are optional. Break the top section into 3 equal parts vertically. Go 6 inches over and draw a line down (if you drew this drawing 8 inches wide, otherwise you could just go 75% of the line over).
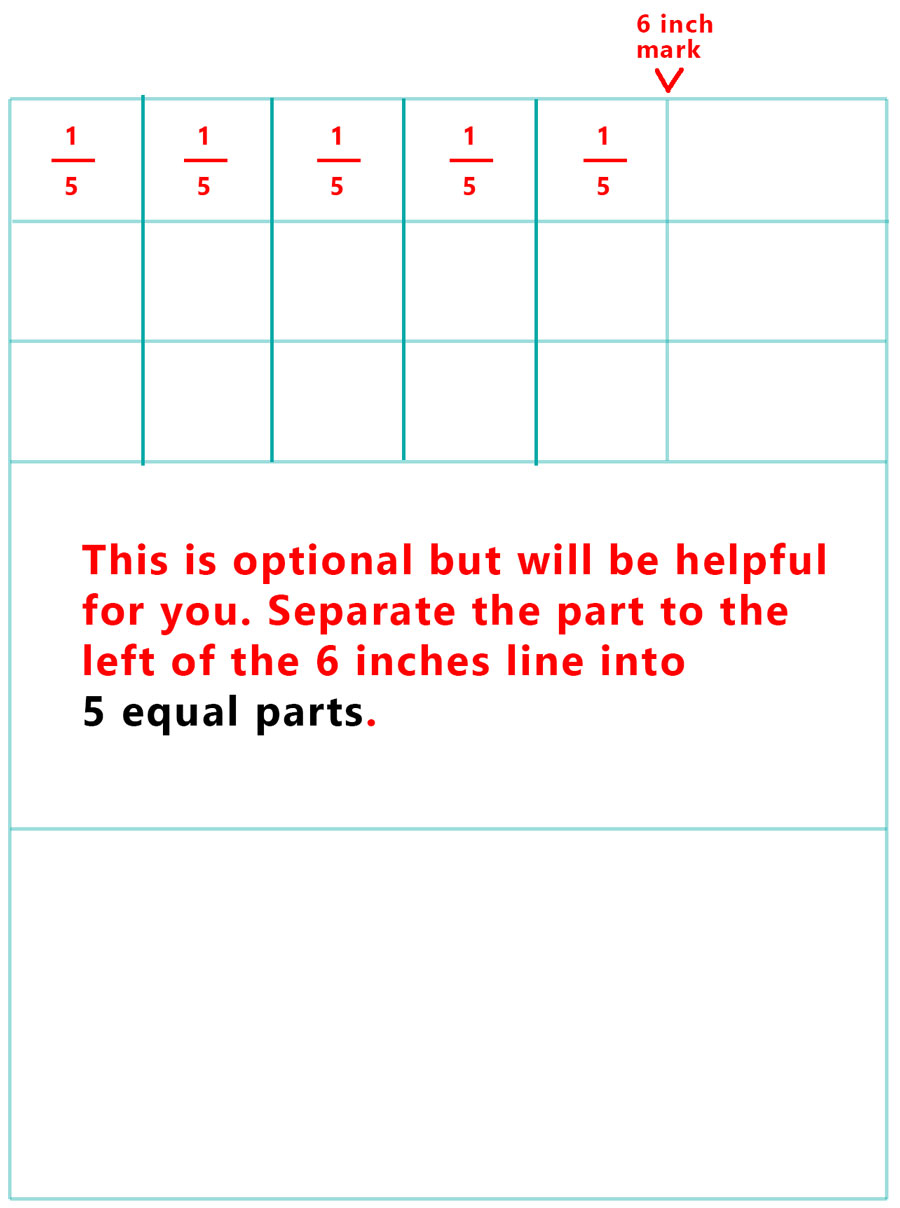
This is optional but will be helpful for you. Separate the part to the left of the 6 inches line into 5 equal parts.
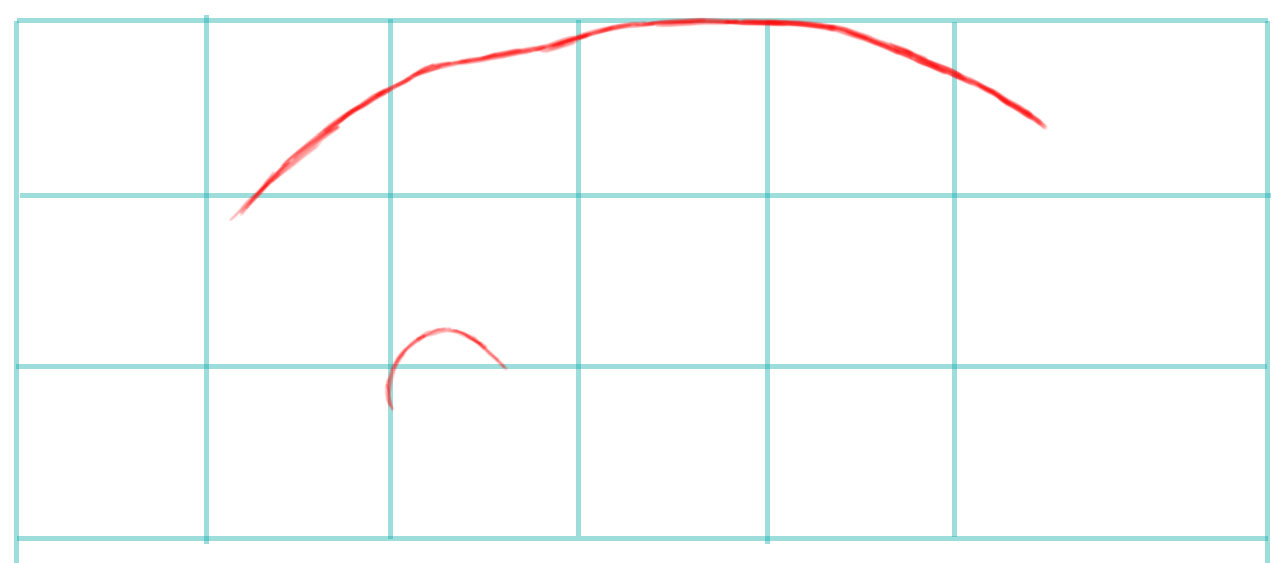
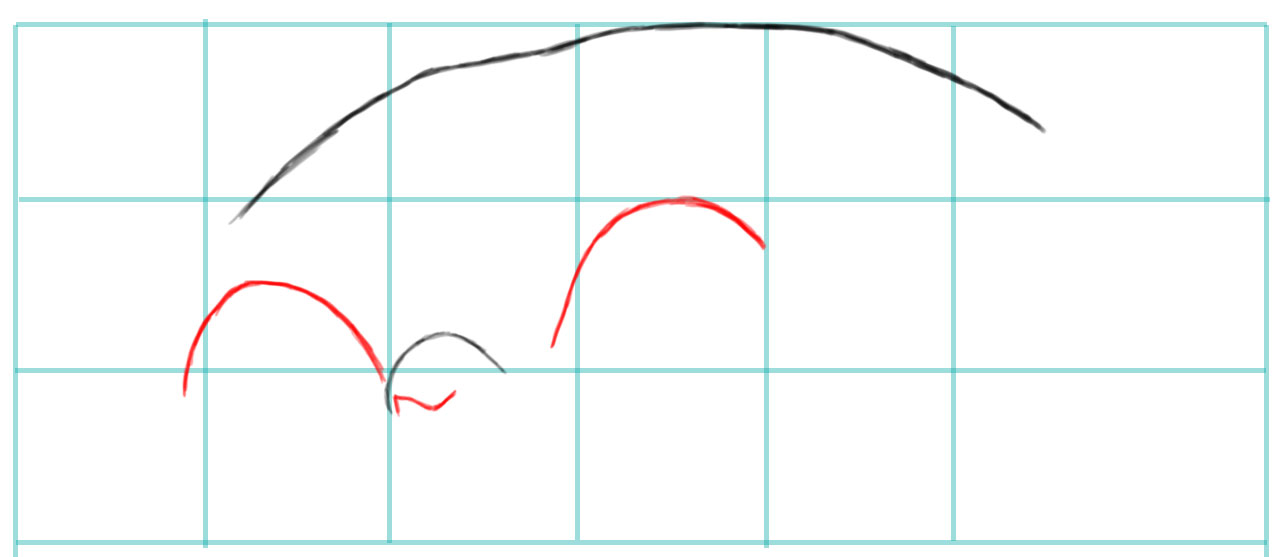
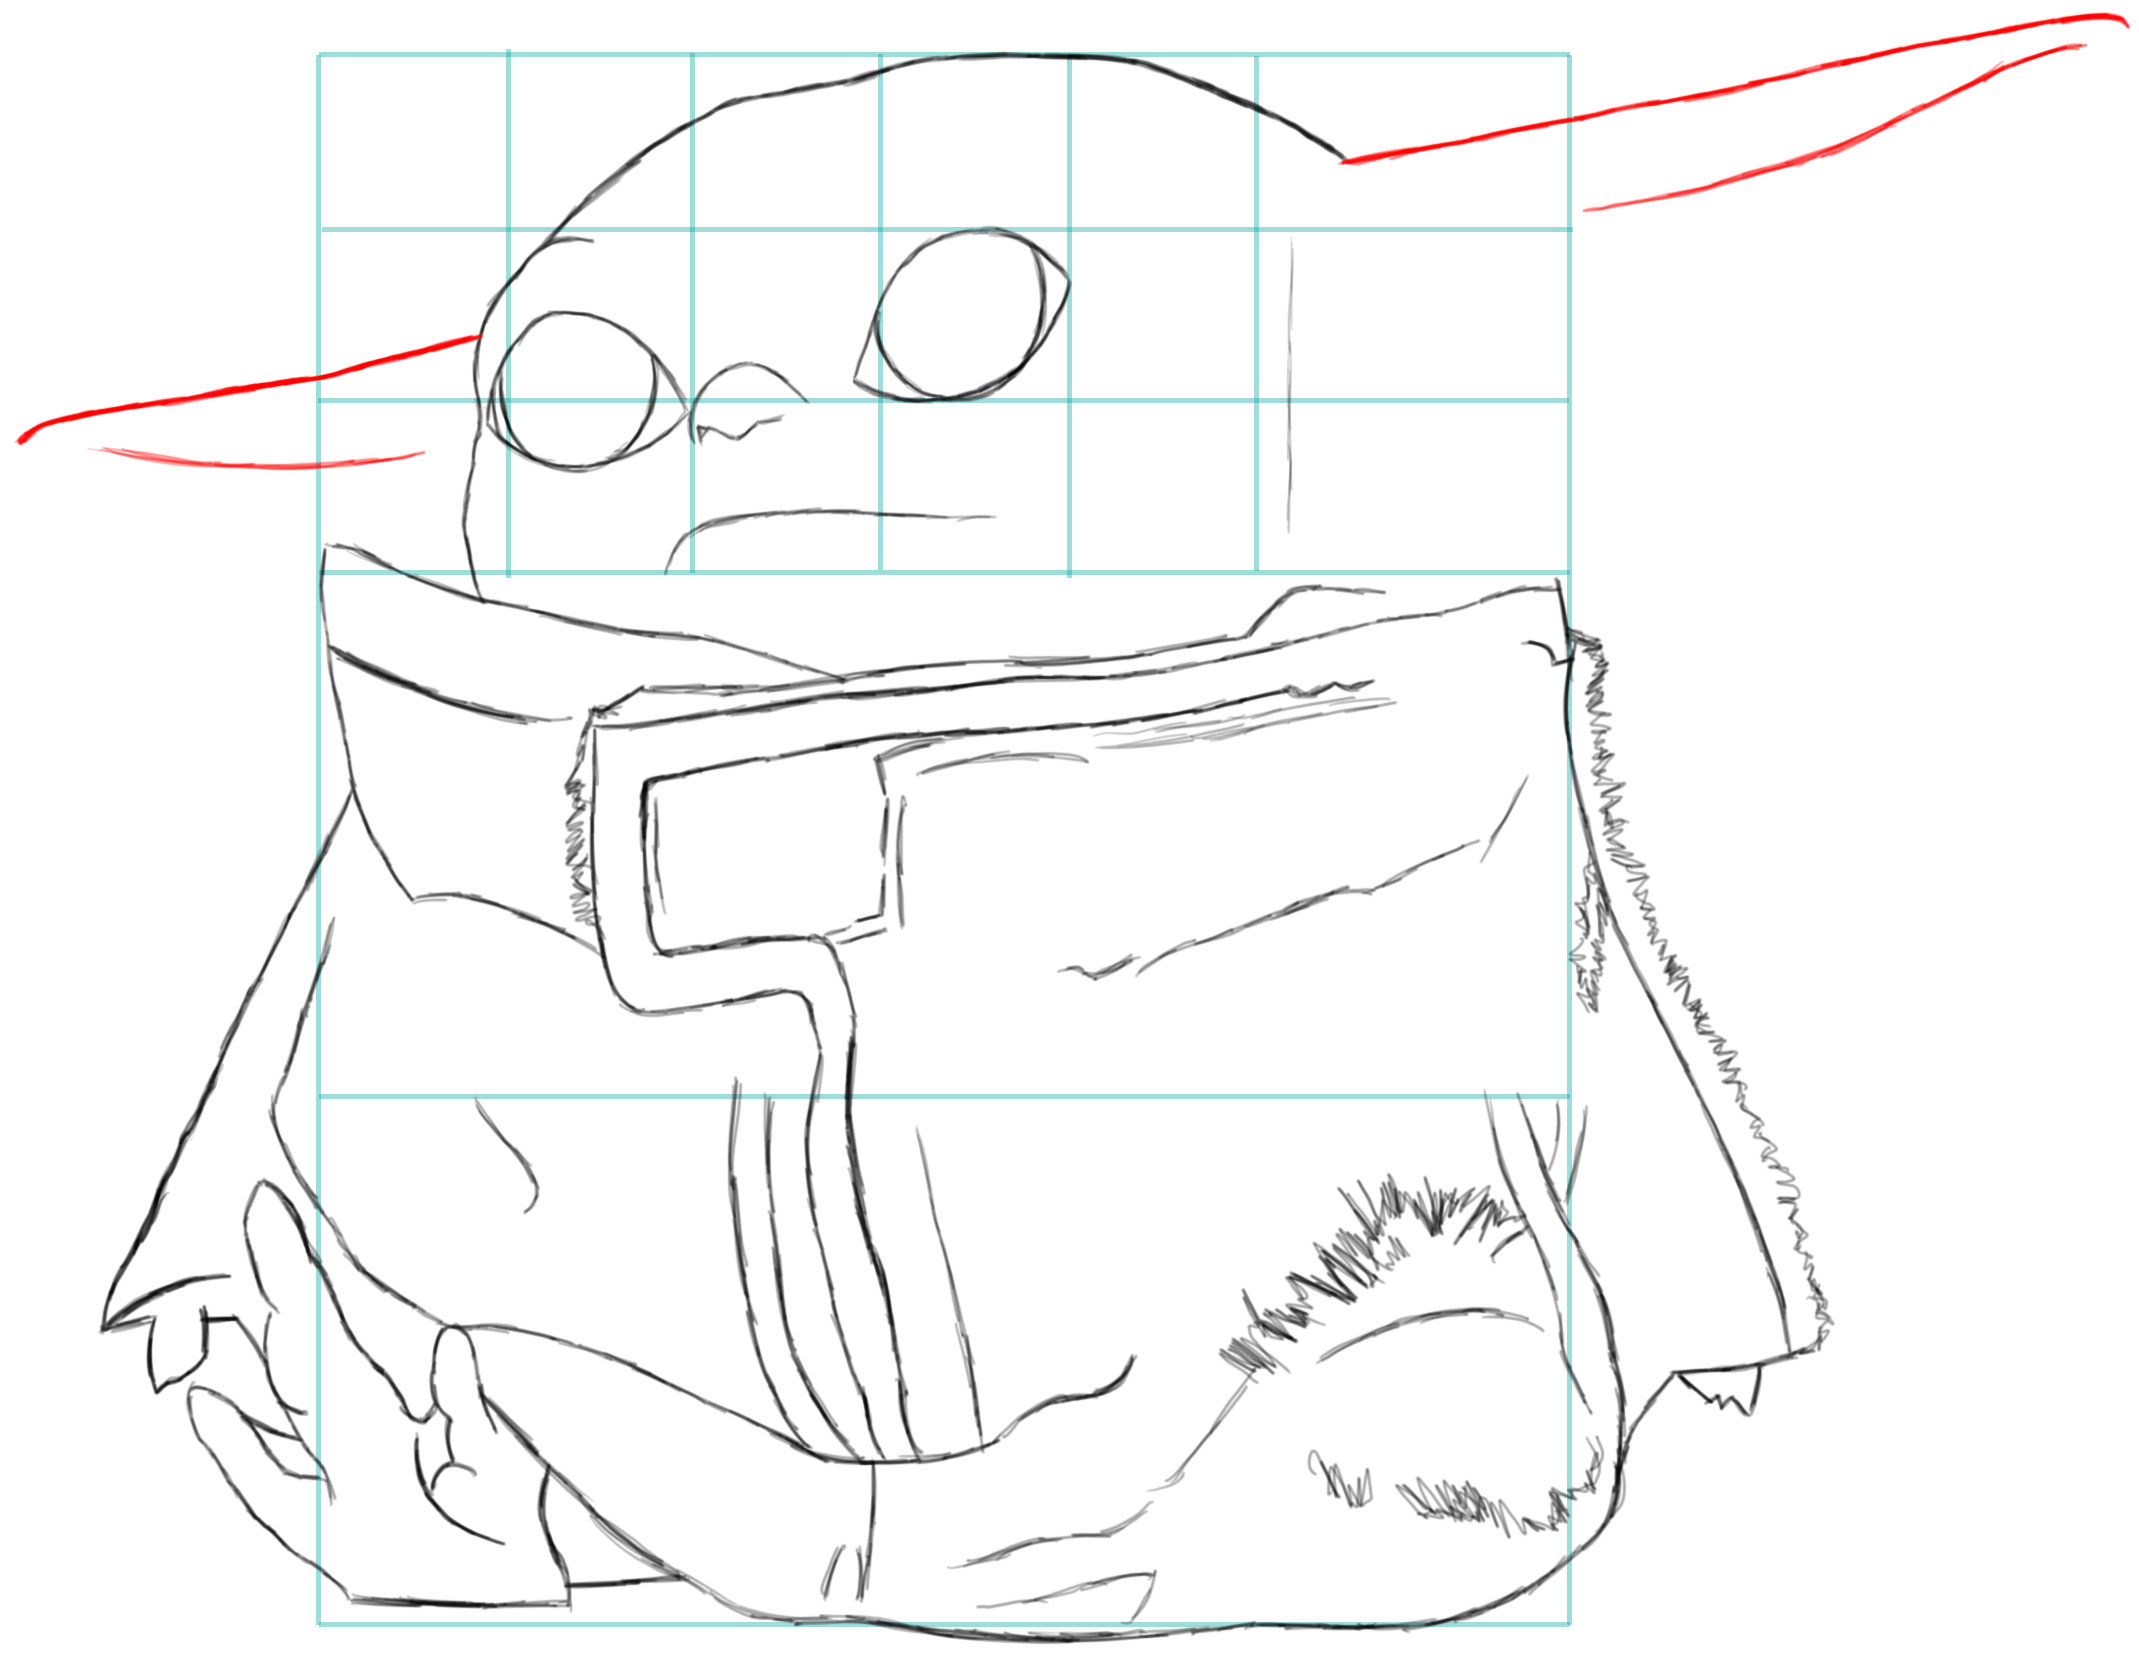
Now let’s start drawing his head. This is where the guidelines will help you. Also, start drawing his nose.
Draw a sideways #2 shape in the nose. Draw a curved line for each eye.
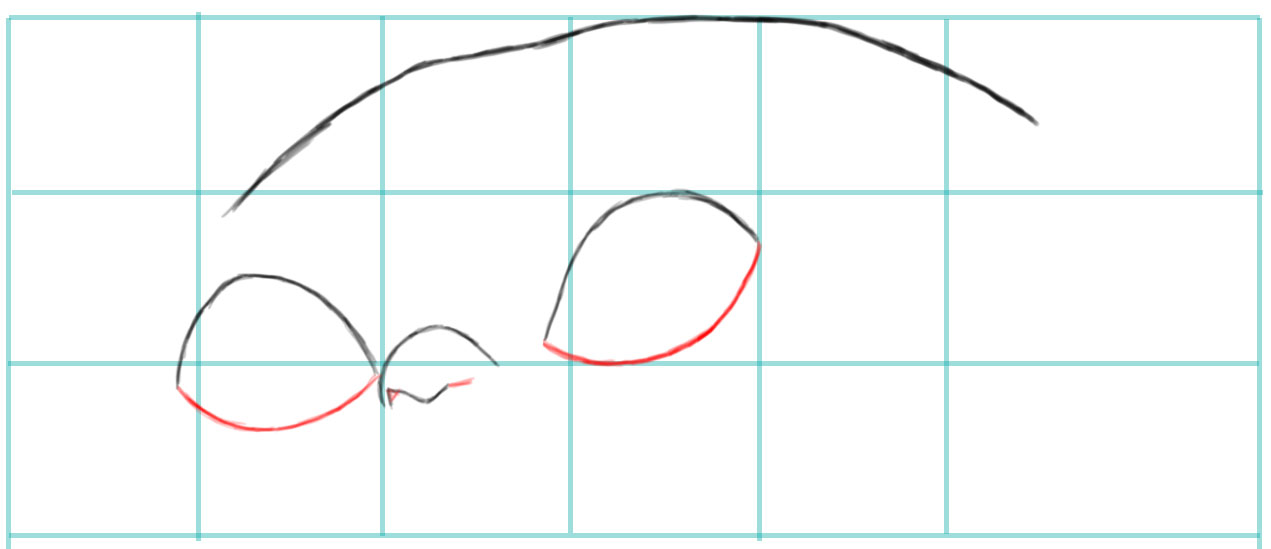
Draw 2 lines on the nose. Draw a curved line for the bottom of each eye.
Draw a curved line to the left and above the left eye. Draw a half-circle in each eye.
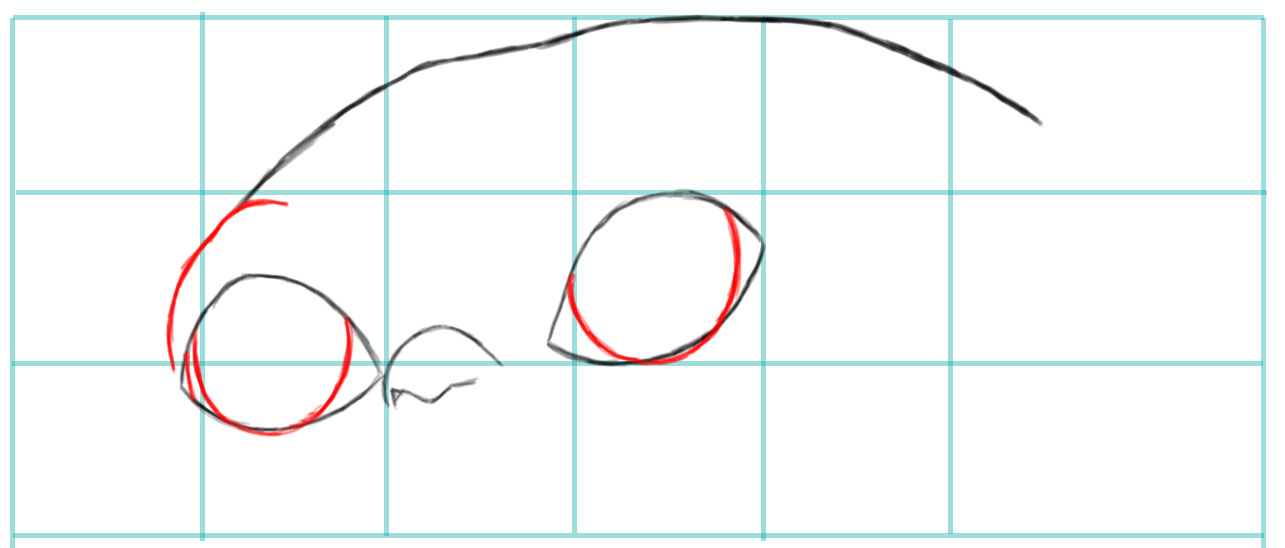
Draw a wavy line on the left side of his face. Draw a sideways “J” shape for his mouth.
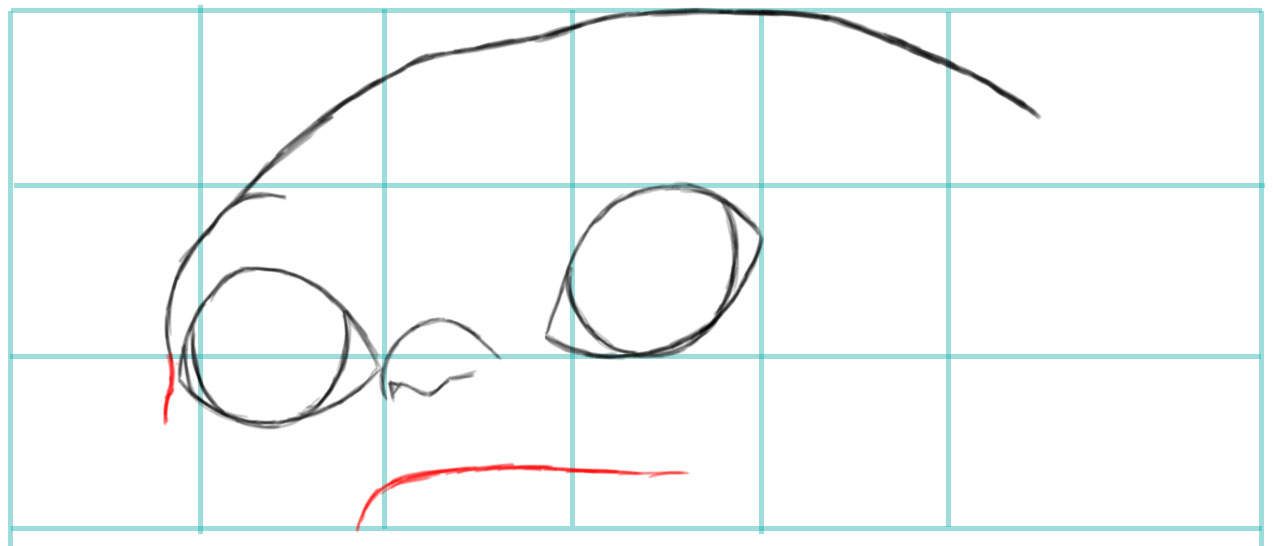
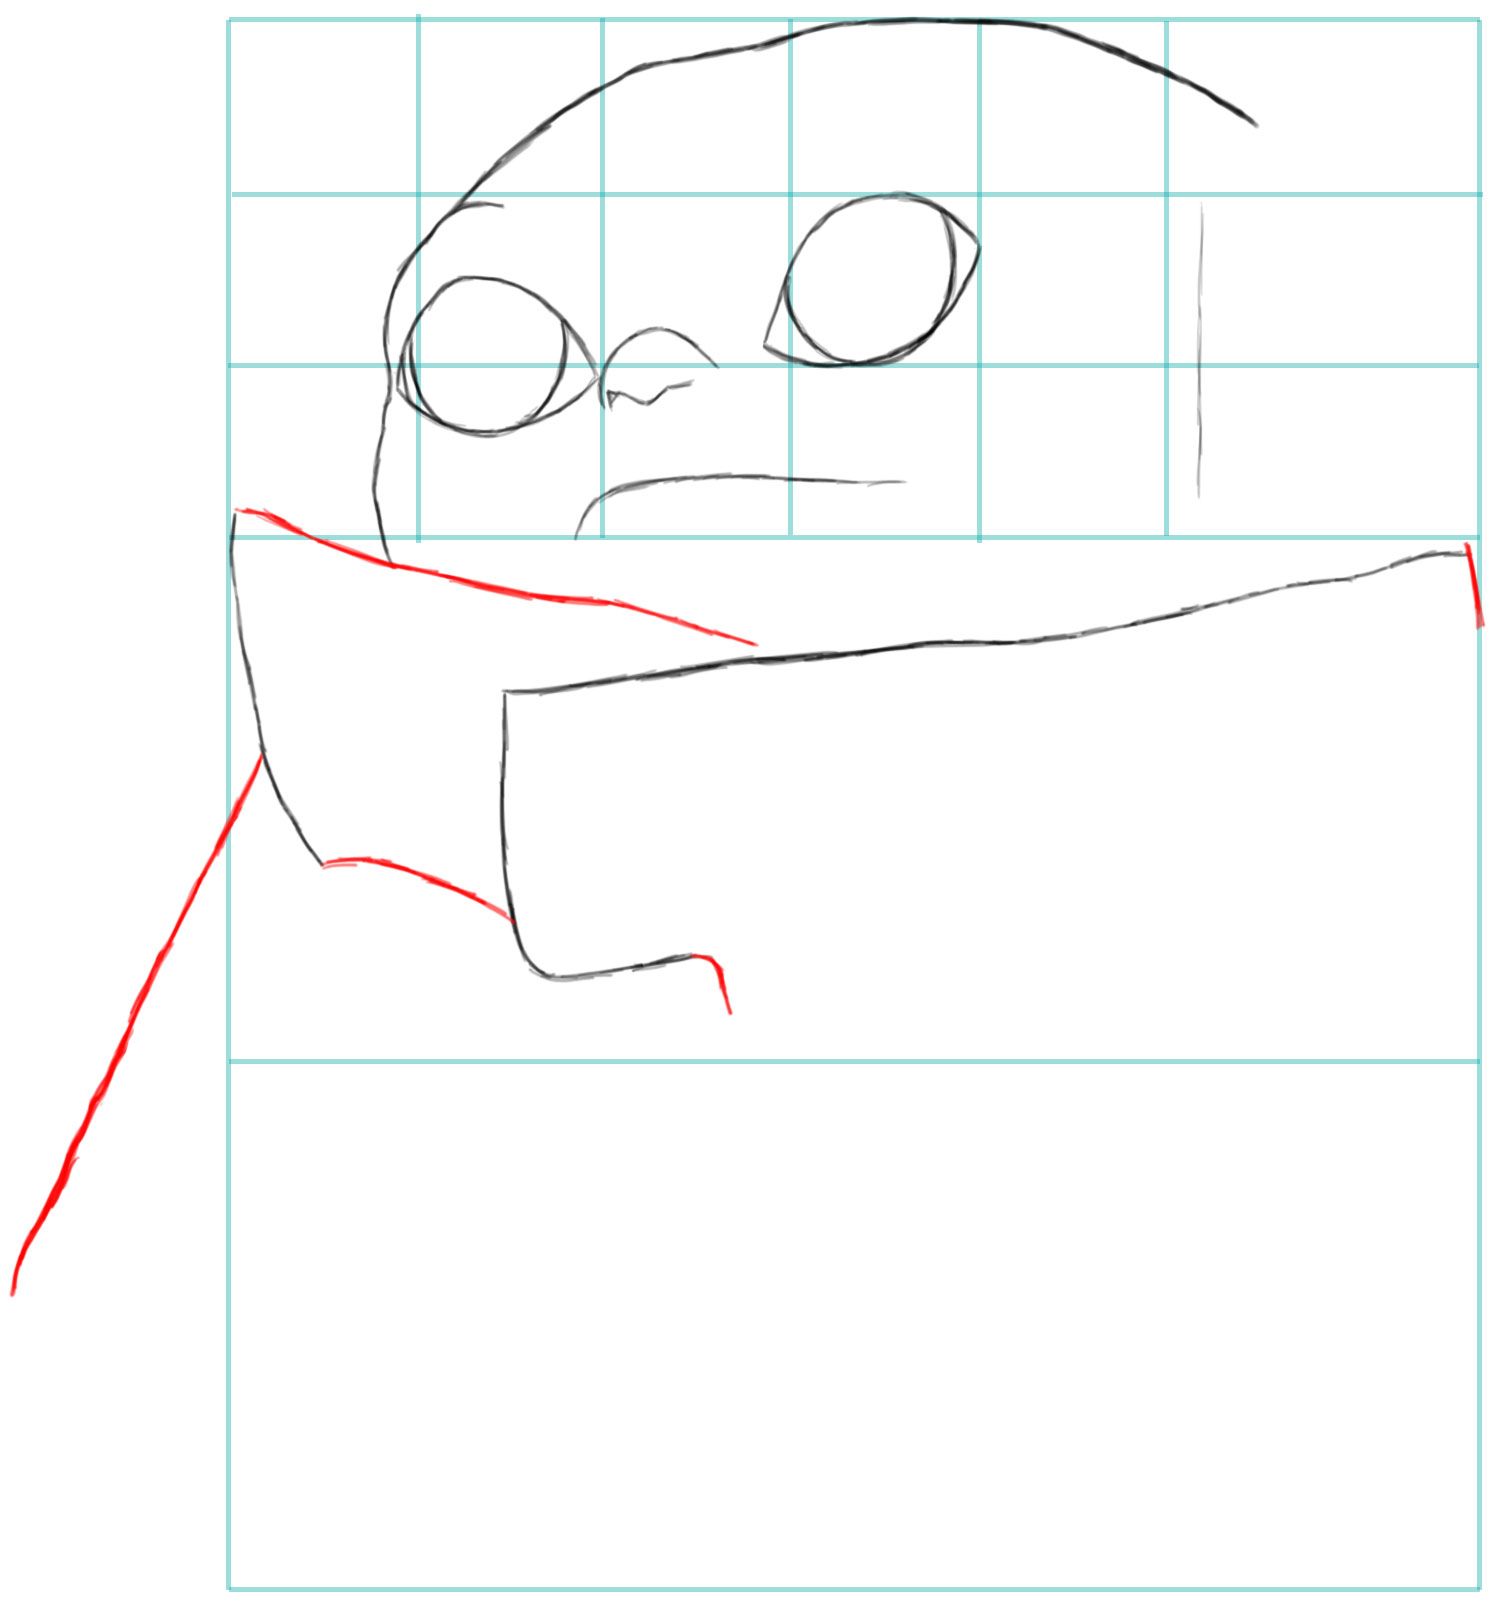
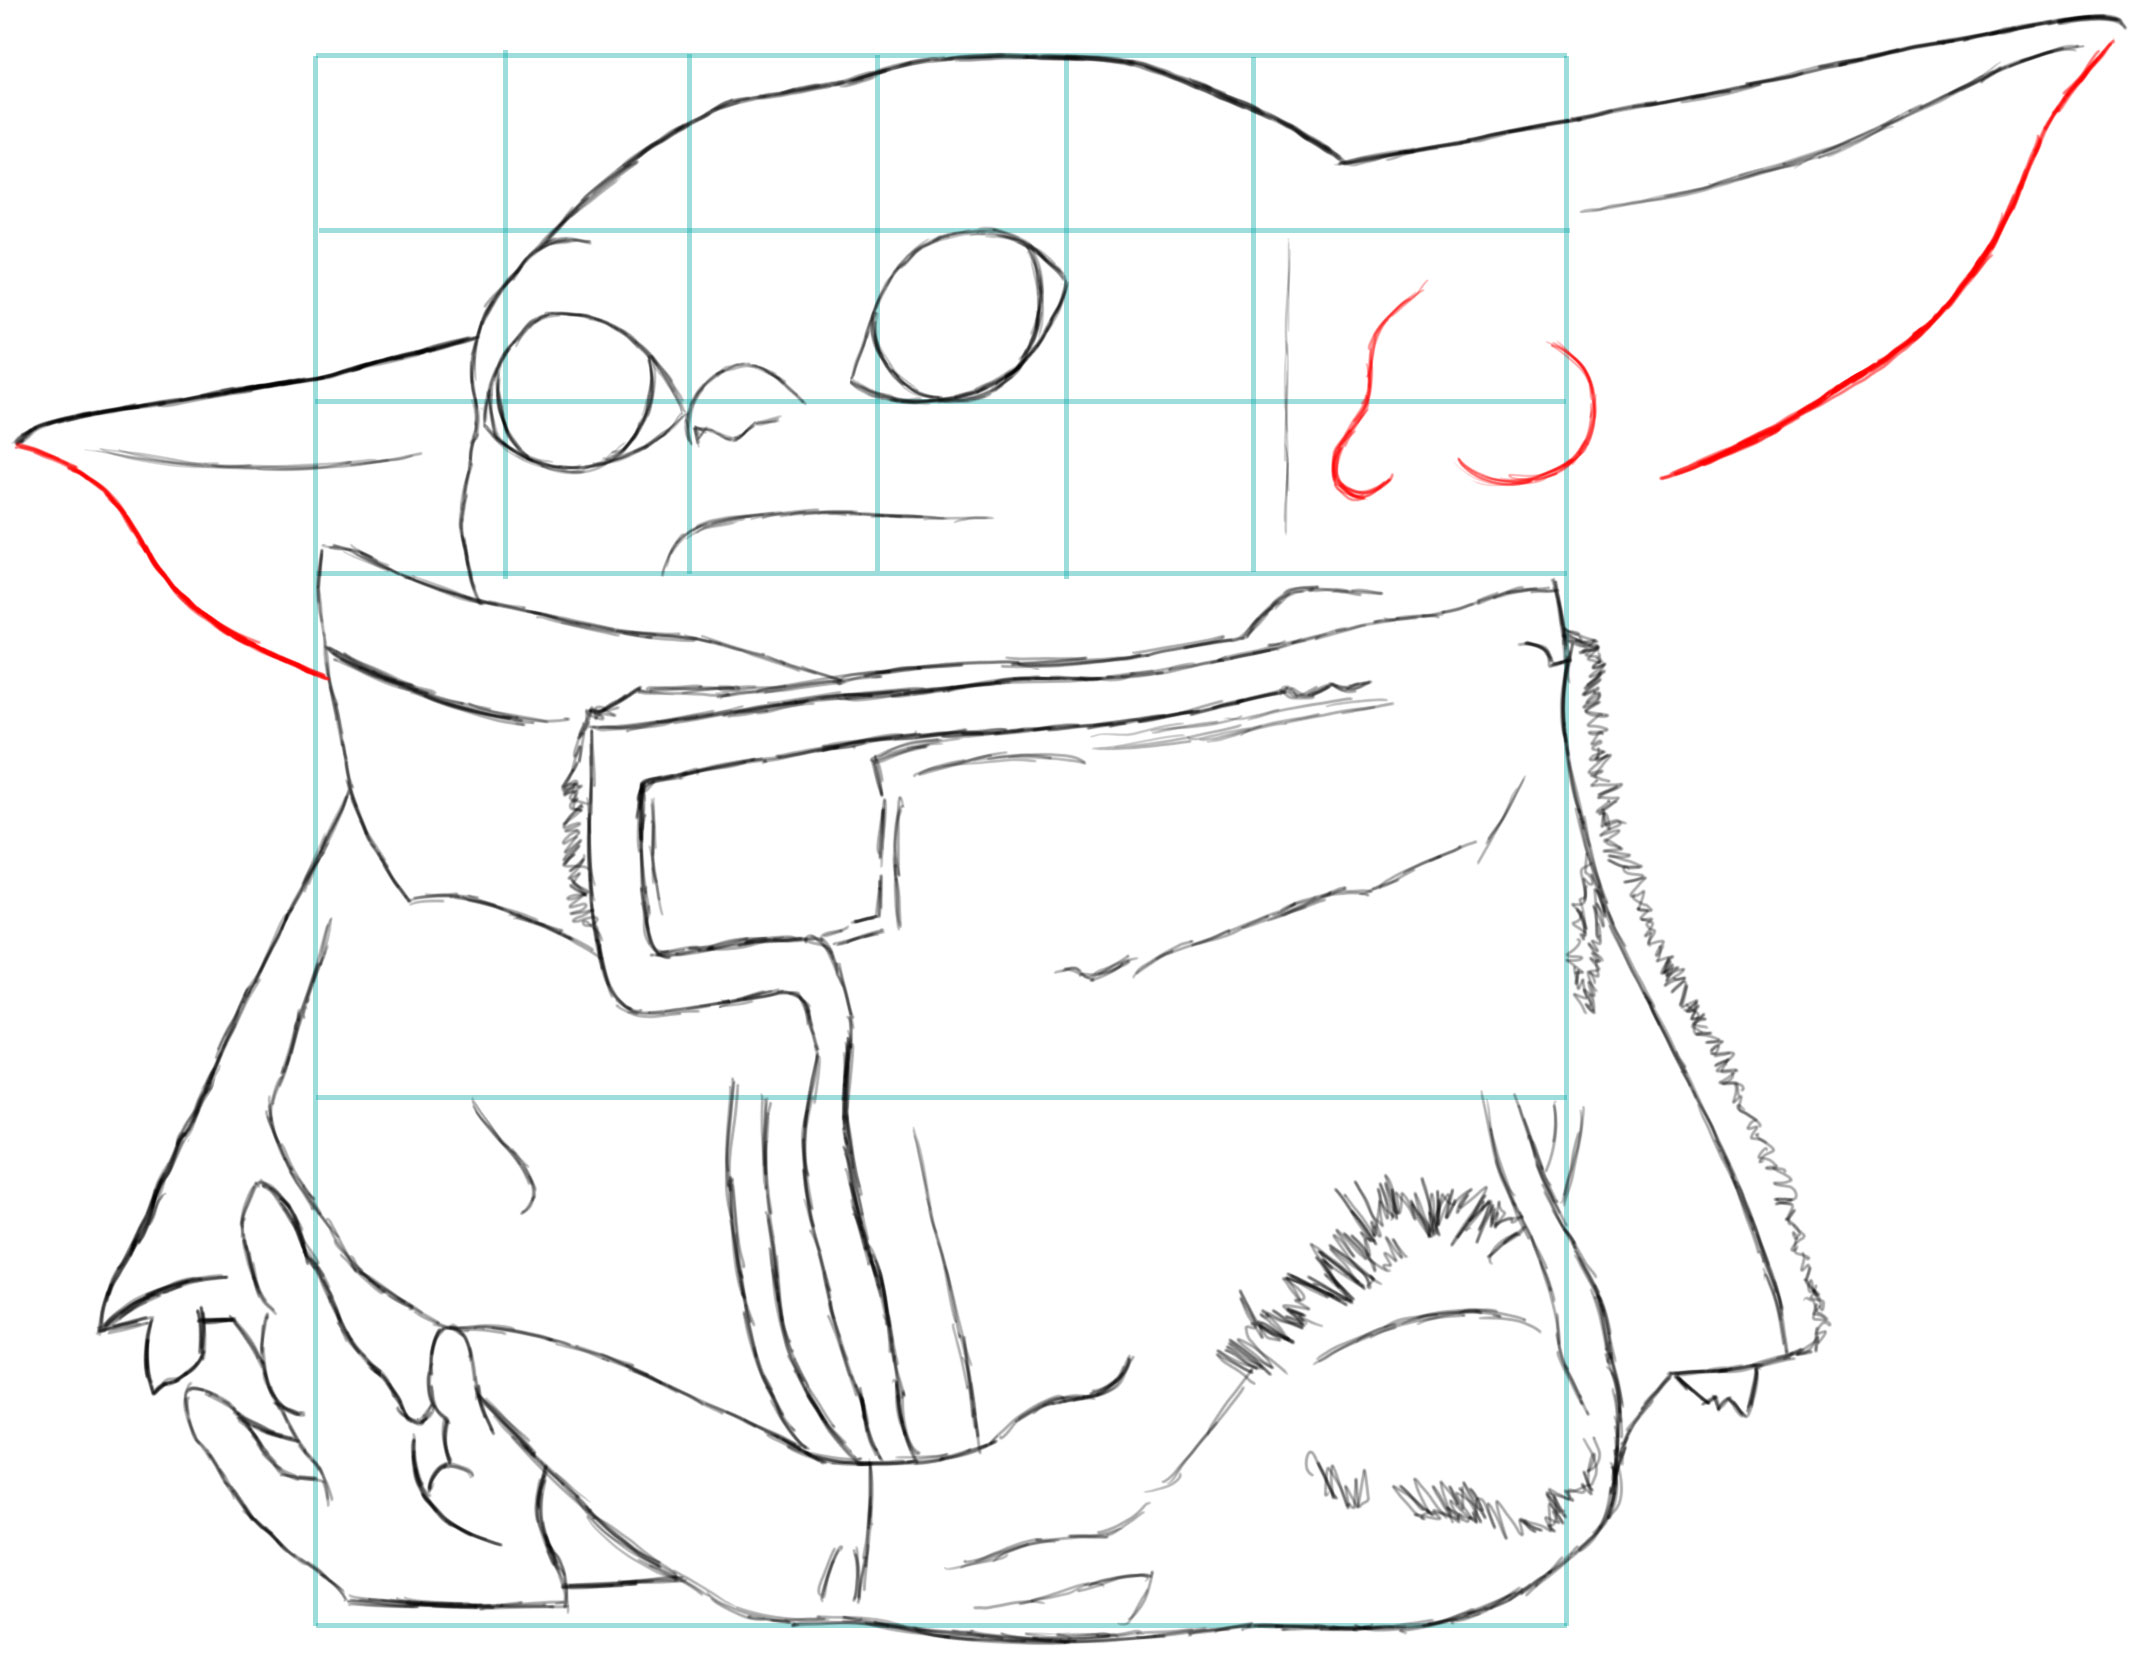
Draw his cheek and the left side of his right ear. Start drawing his coat/sack.
Draw more of his coat/sack.
Draw a flattened “S” curve on the right arm. Draw the rounded shape of the bottom of his sack. Draw a sideways “L” shape on
the left side.
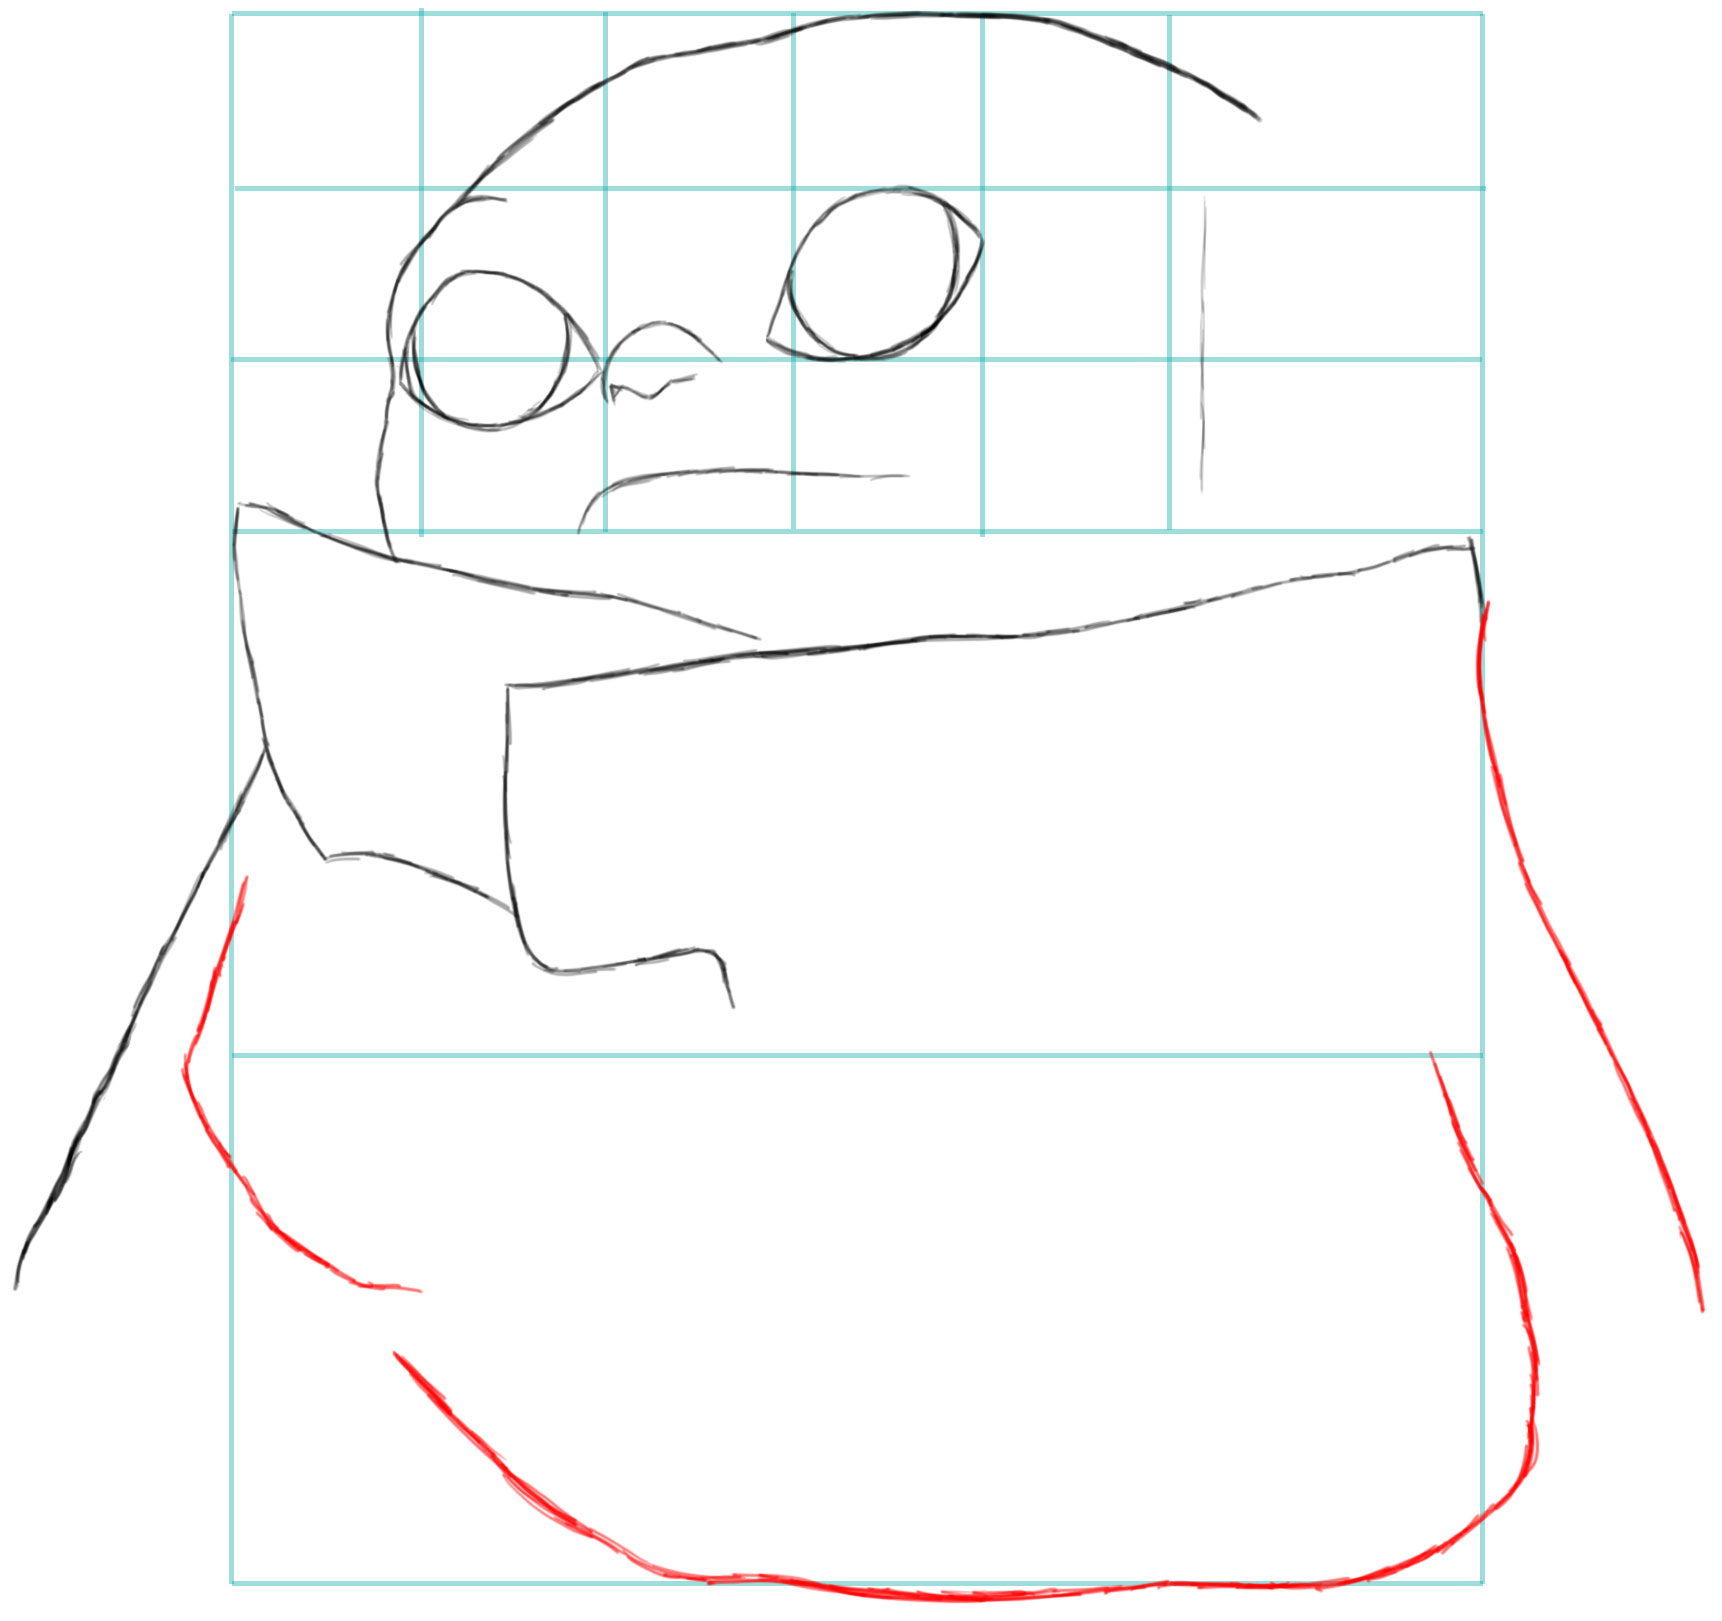
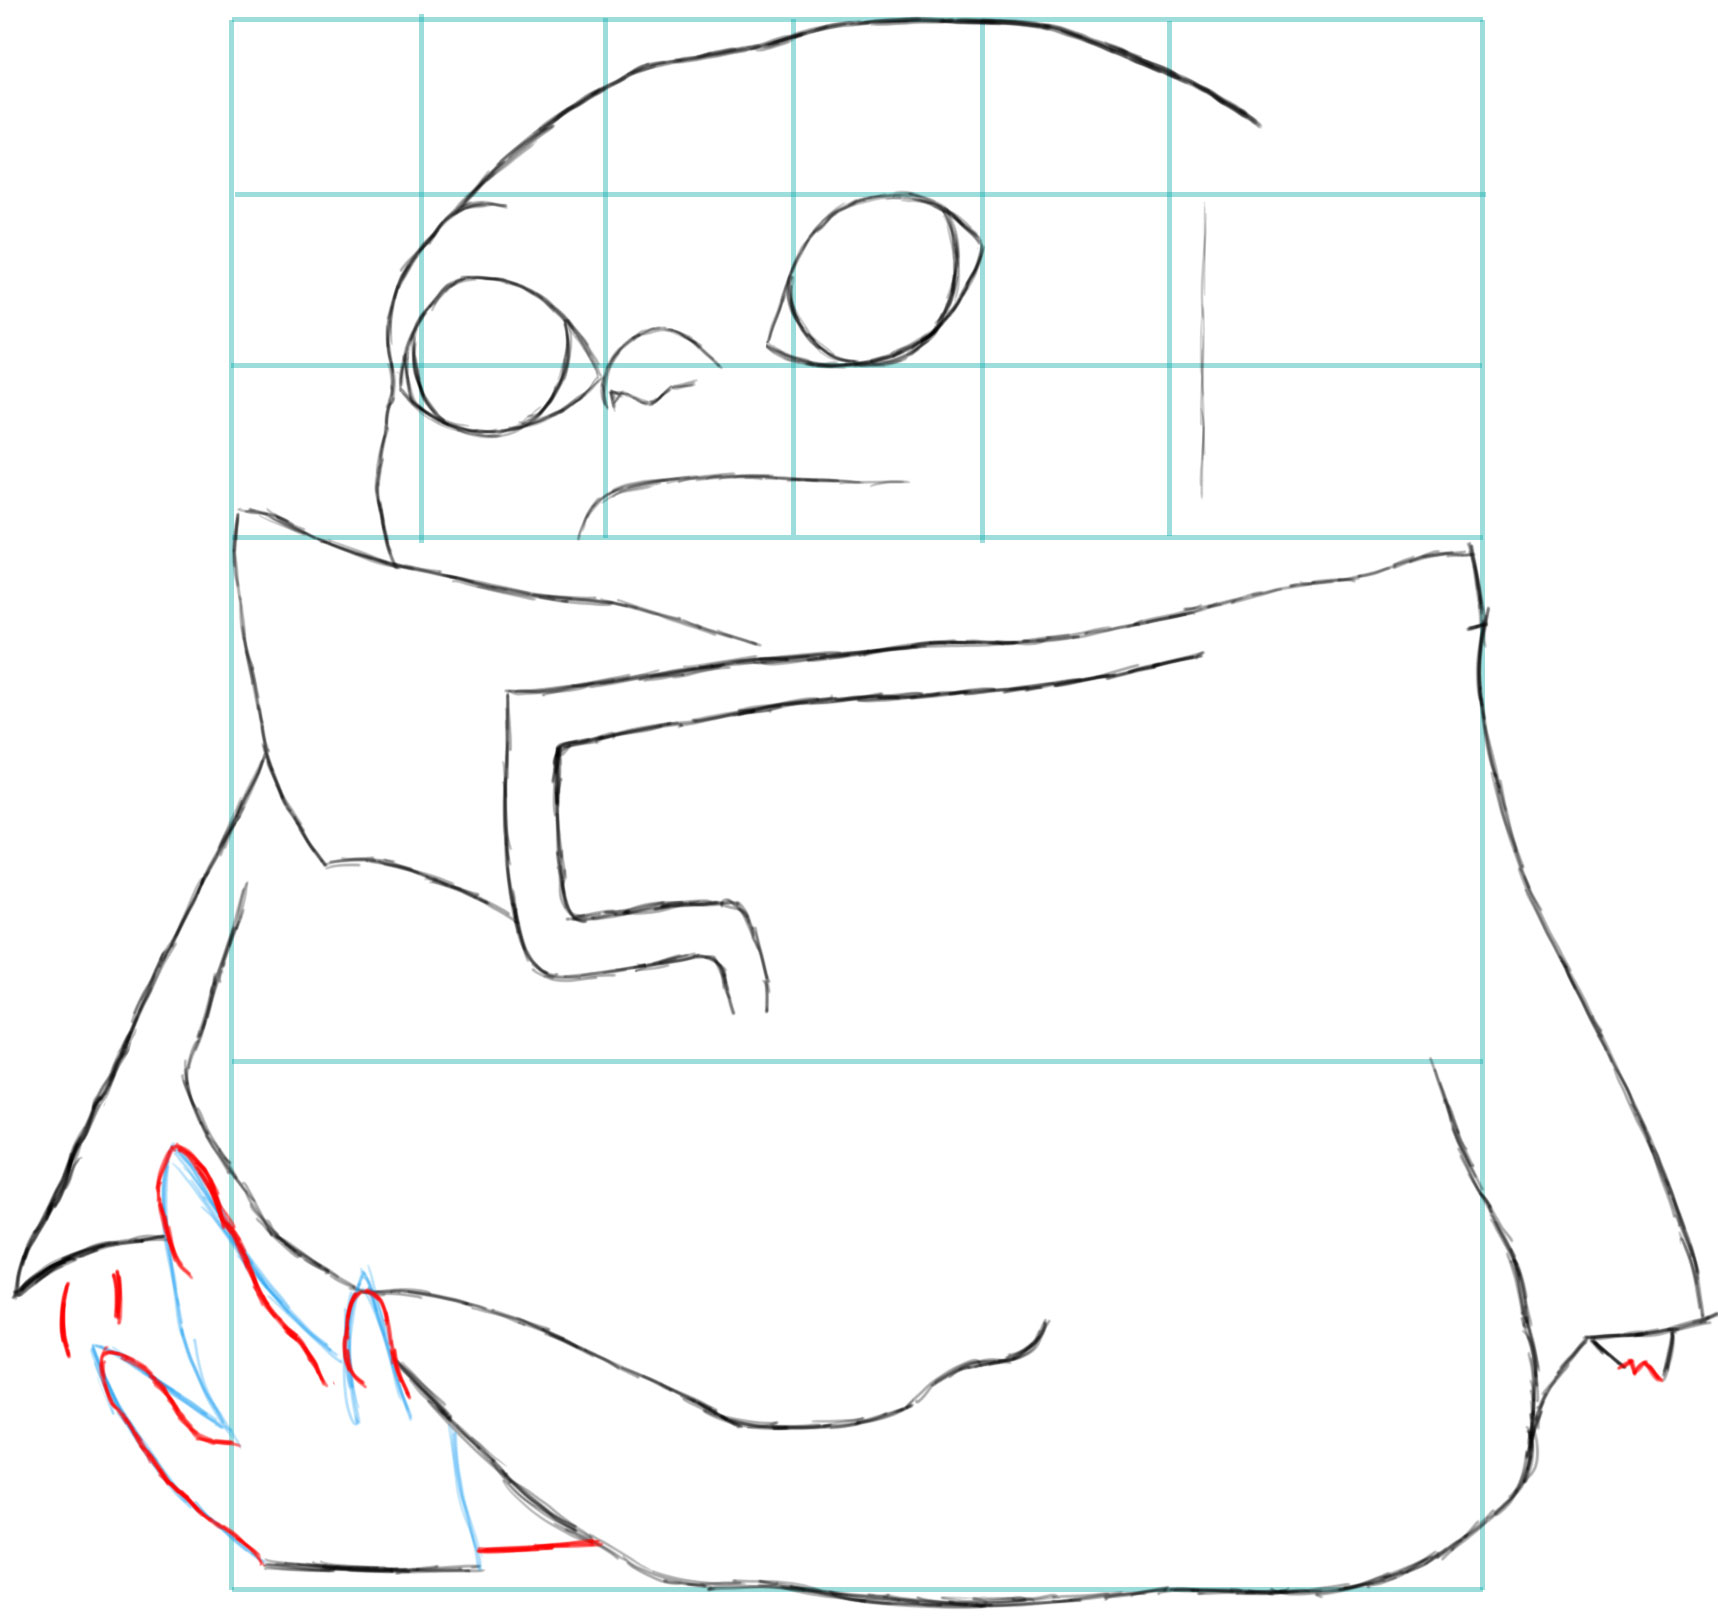
Lightly draw an “M” shape – this is a guideline that will be erased after we draw his foot. Draw some other lines, including a backward #7 on the right arm.
Draw an upside-down “V” and a line guide on the foot. Add an inner outline to the top of the sack. Draw a curvy line at bottom of the sack. Draw 2 slanted lines on the right hand.
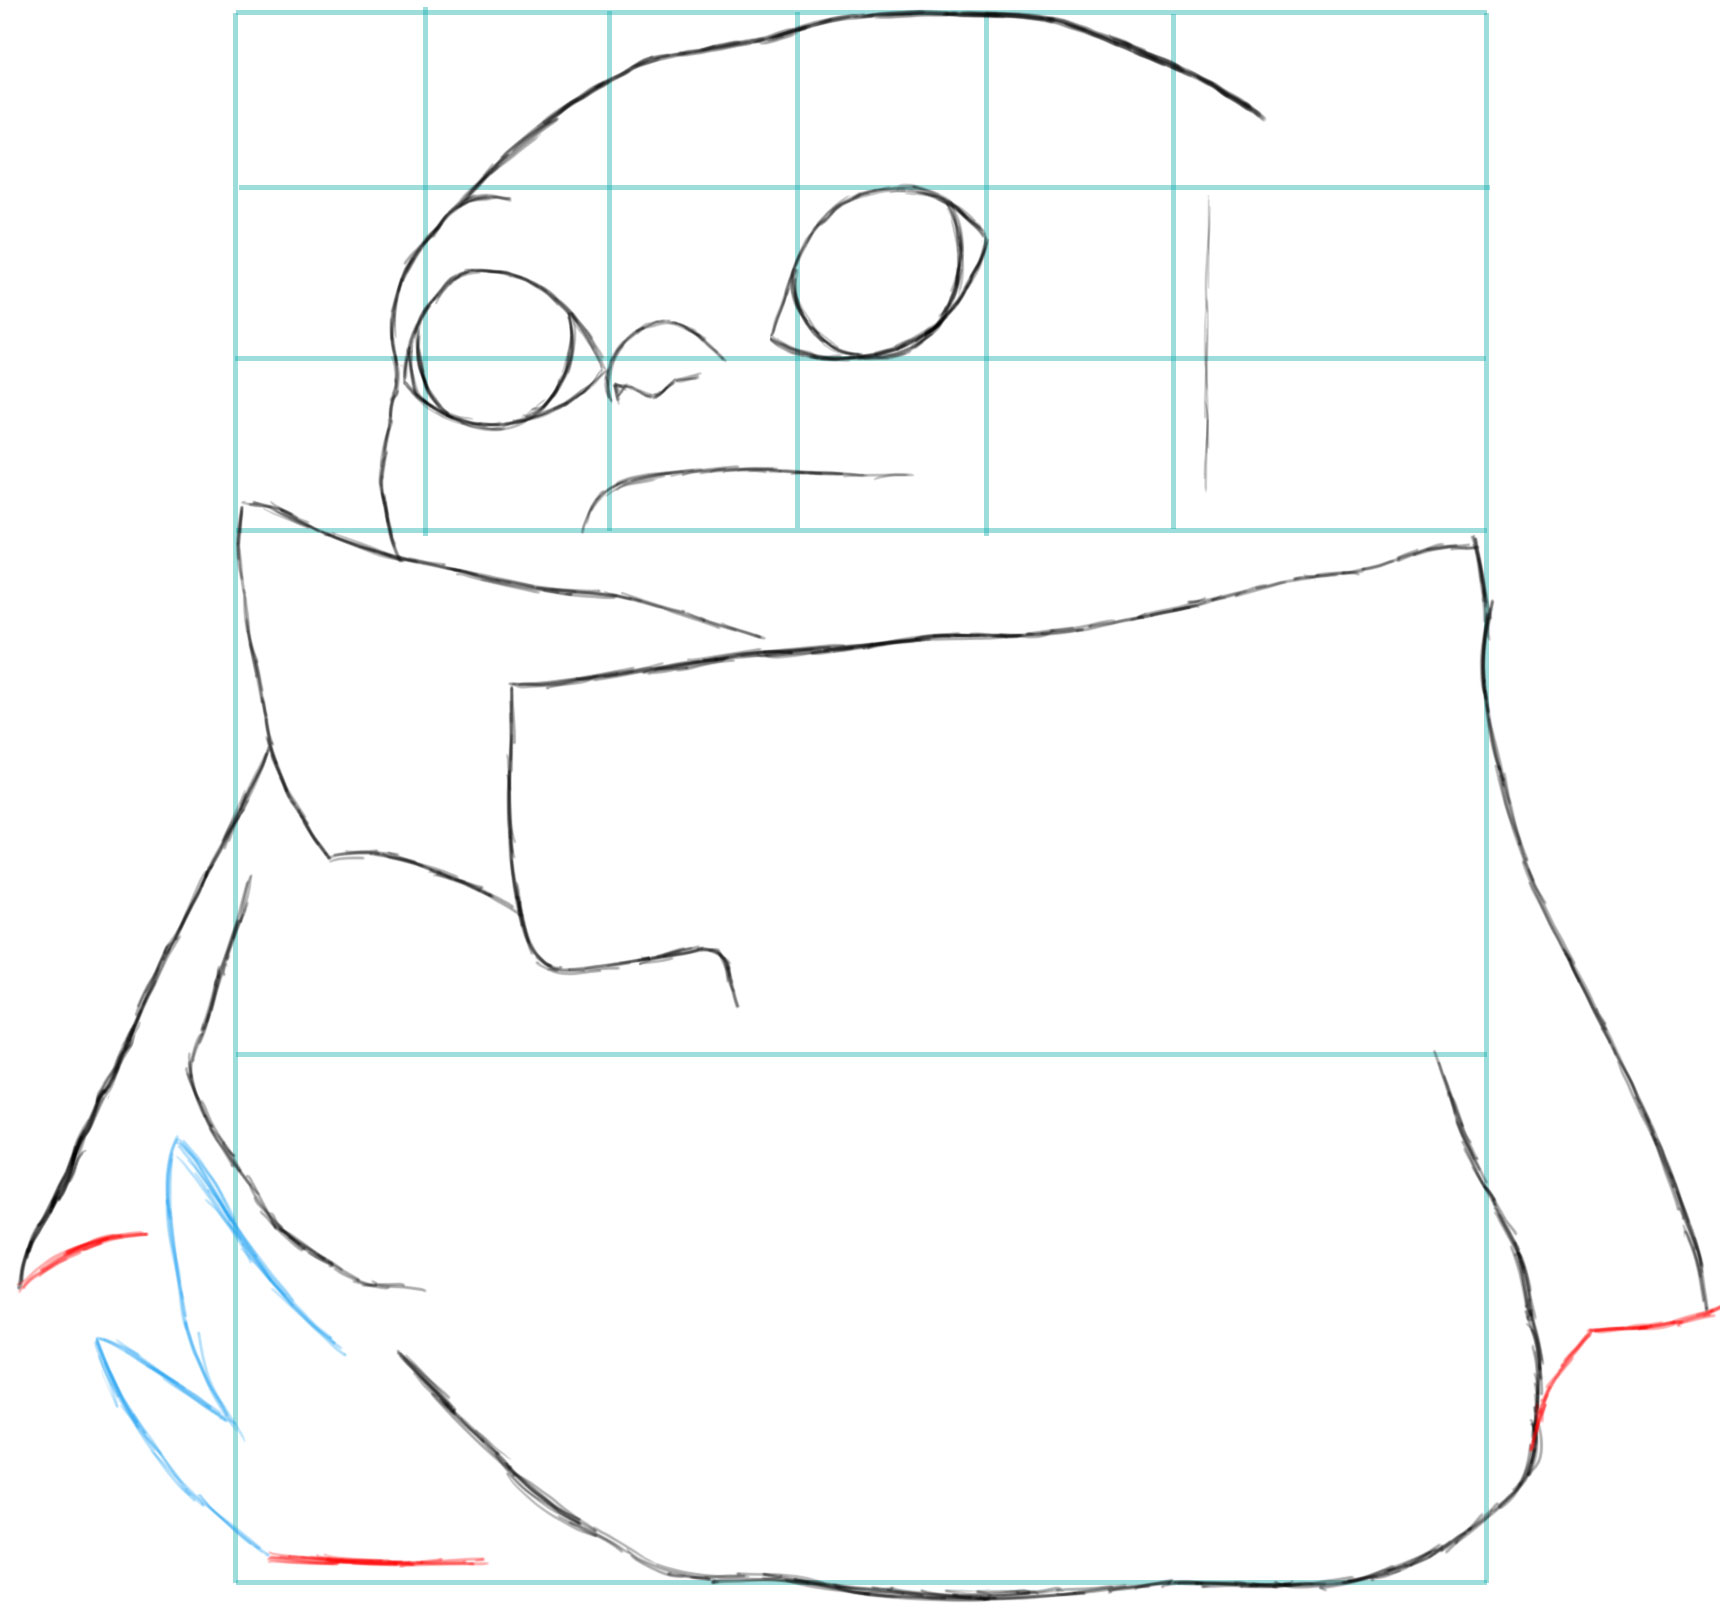
Use the foot’s guidelines to help you draw the lines more accurately. Add an “M” shape to the right hand and 2 curved lines to the left hand.
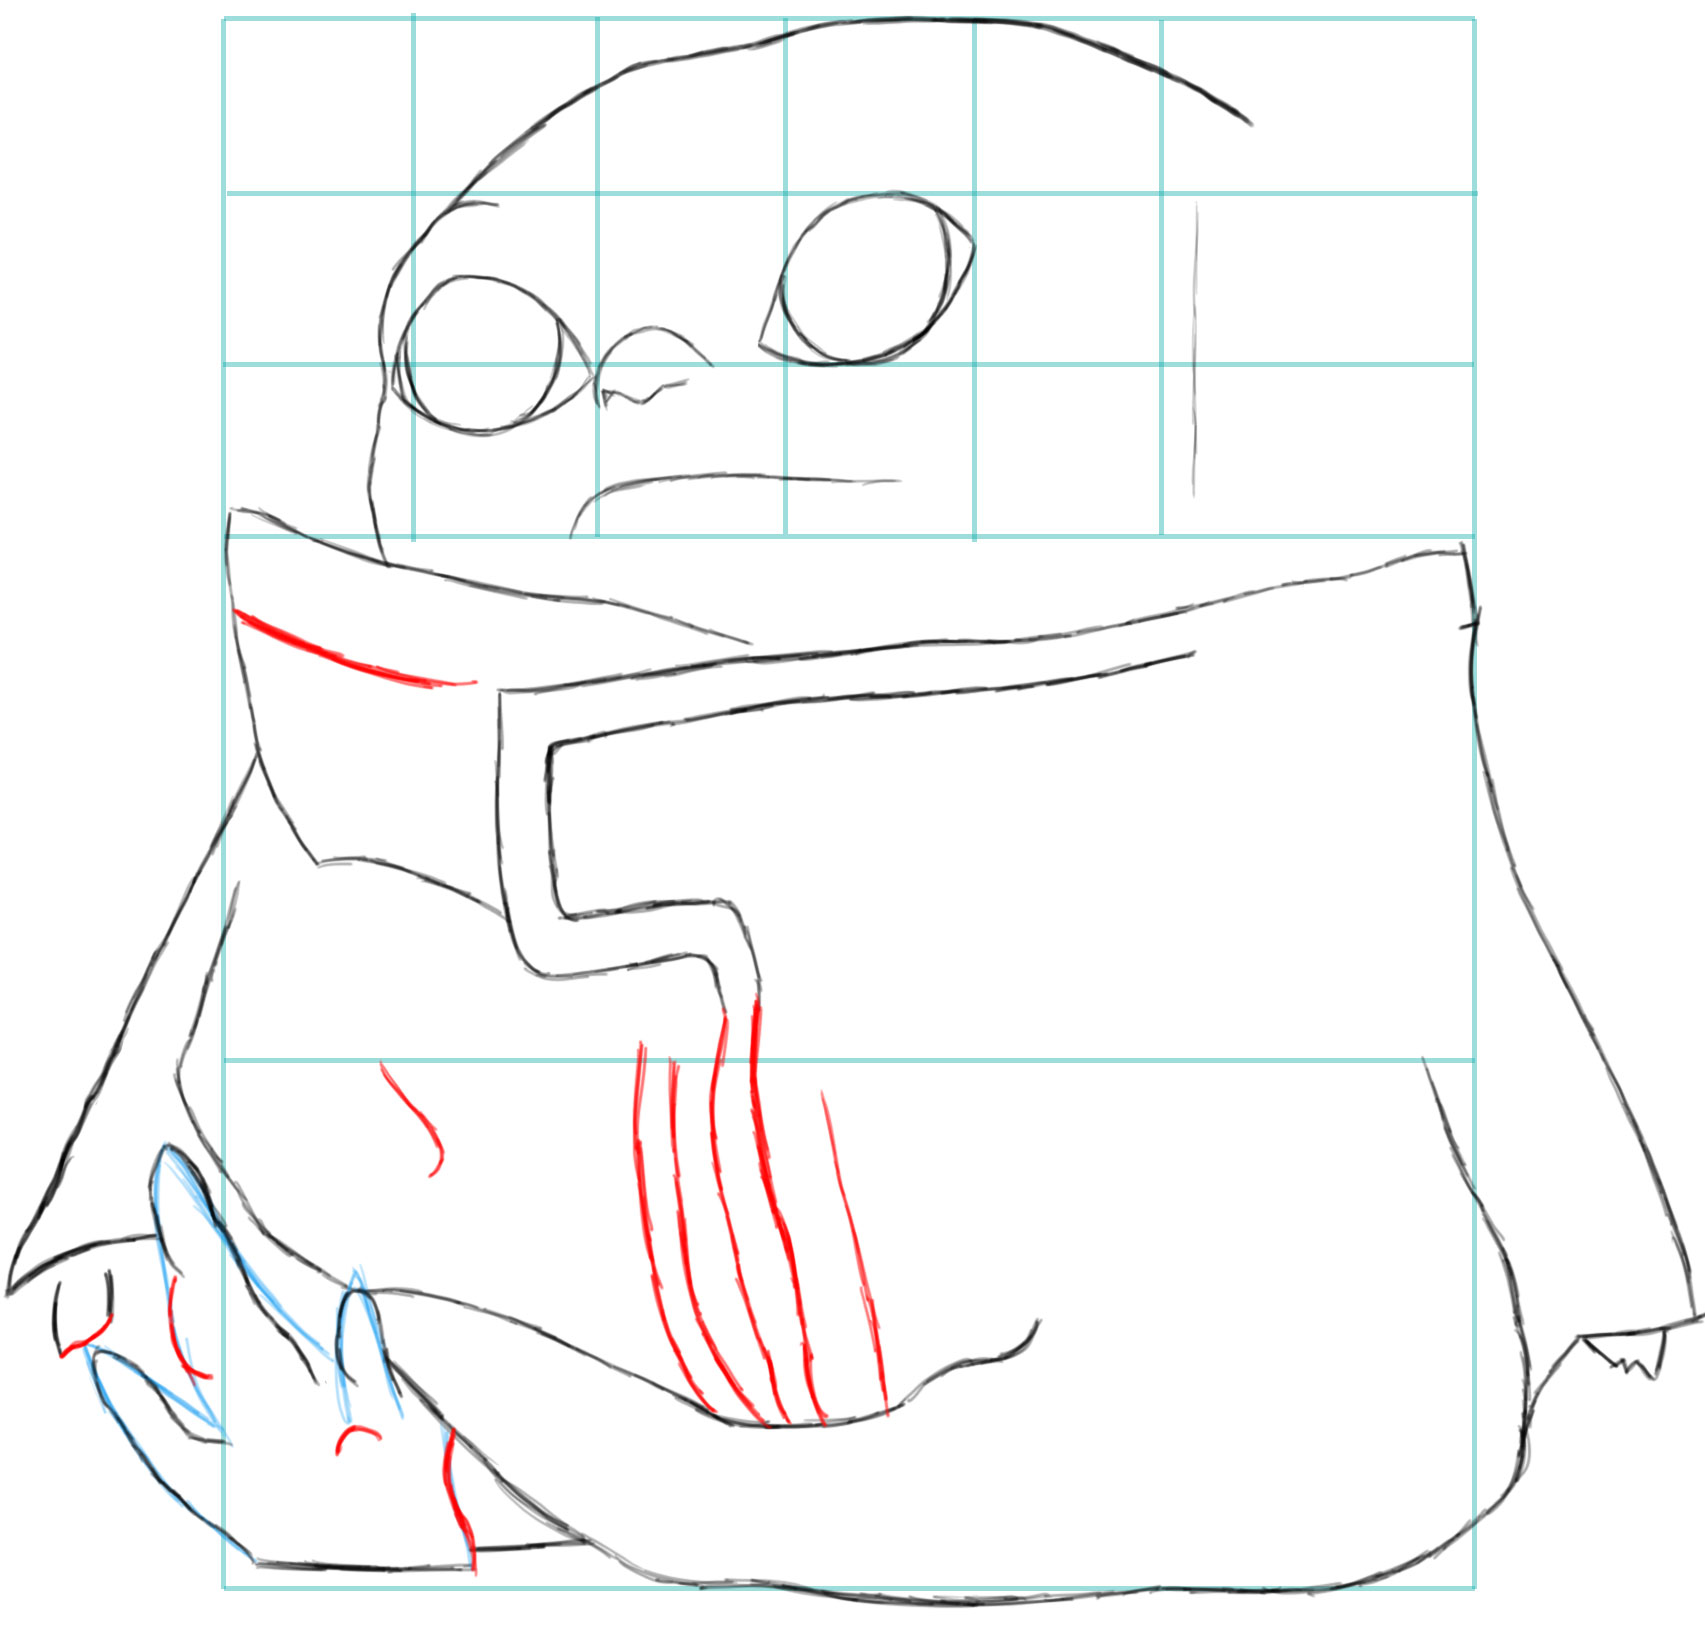
Draw more on top of the foot’s guidelines. Add some more details to the coat/sack.
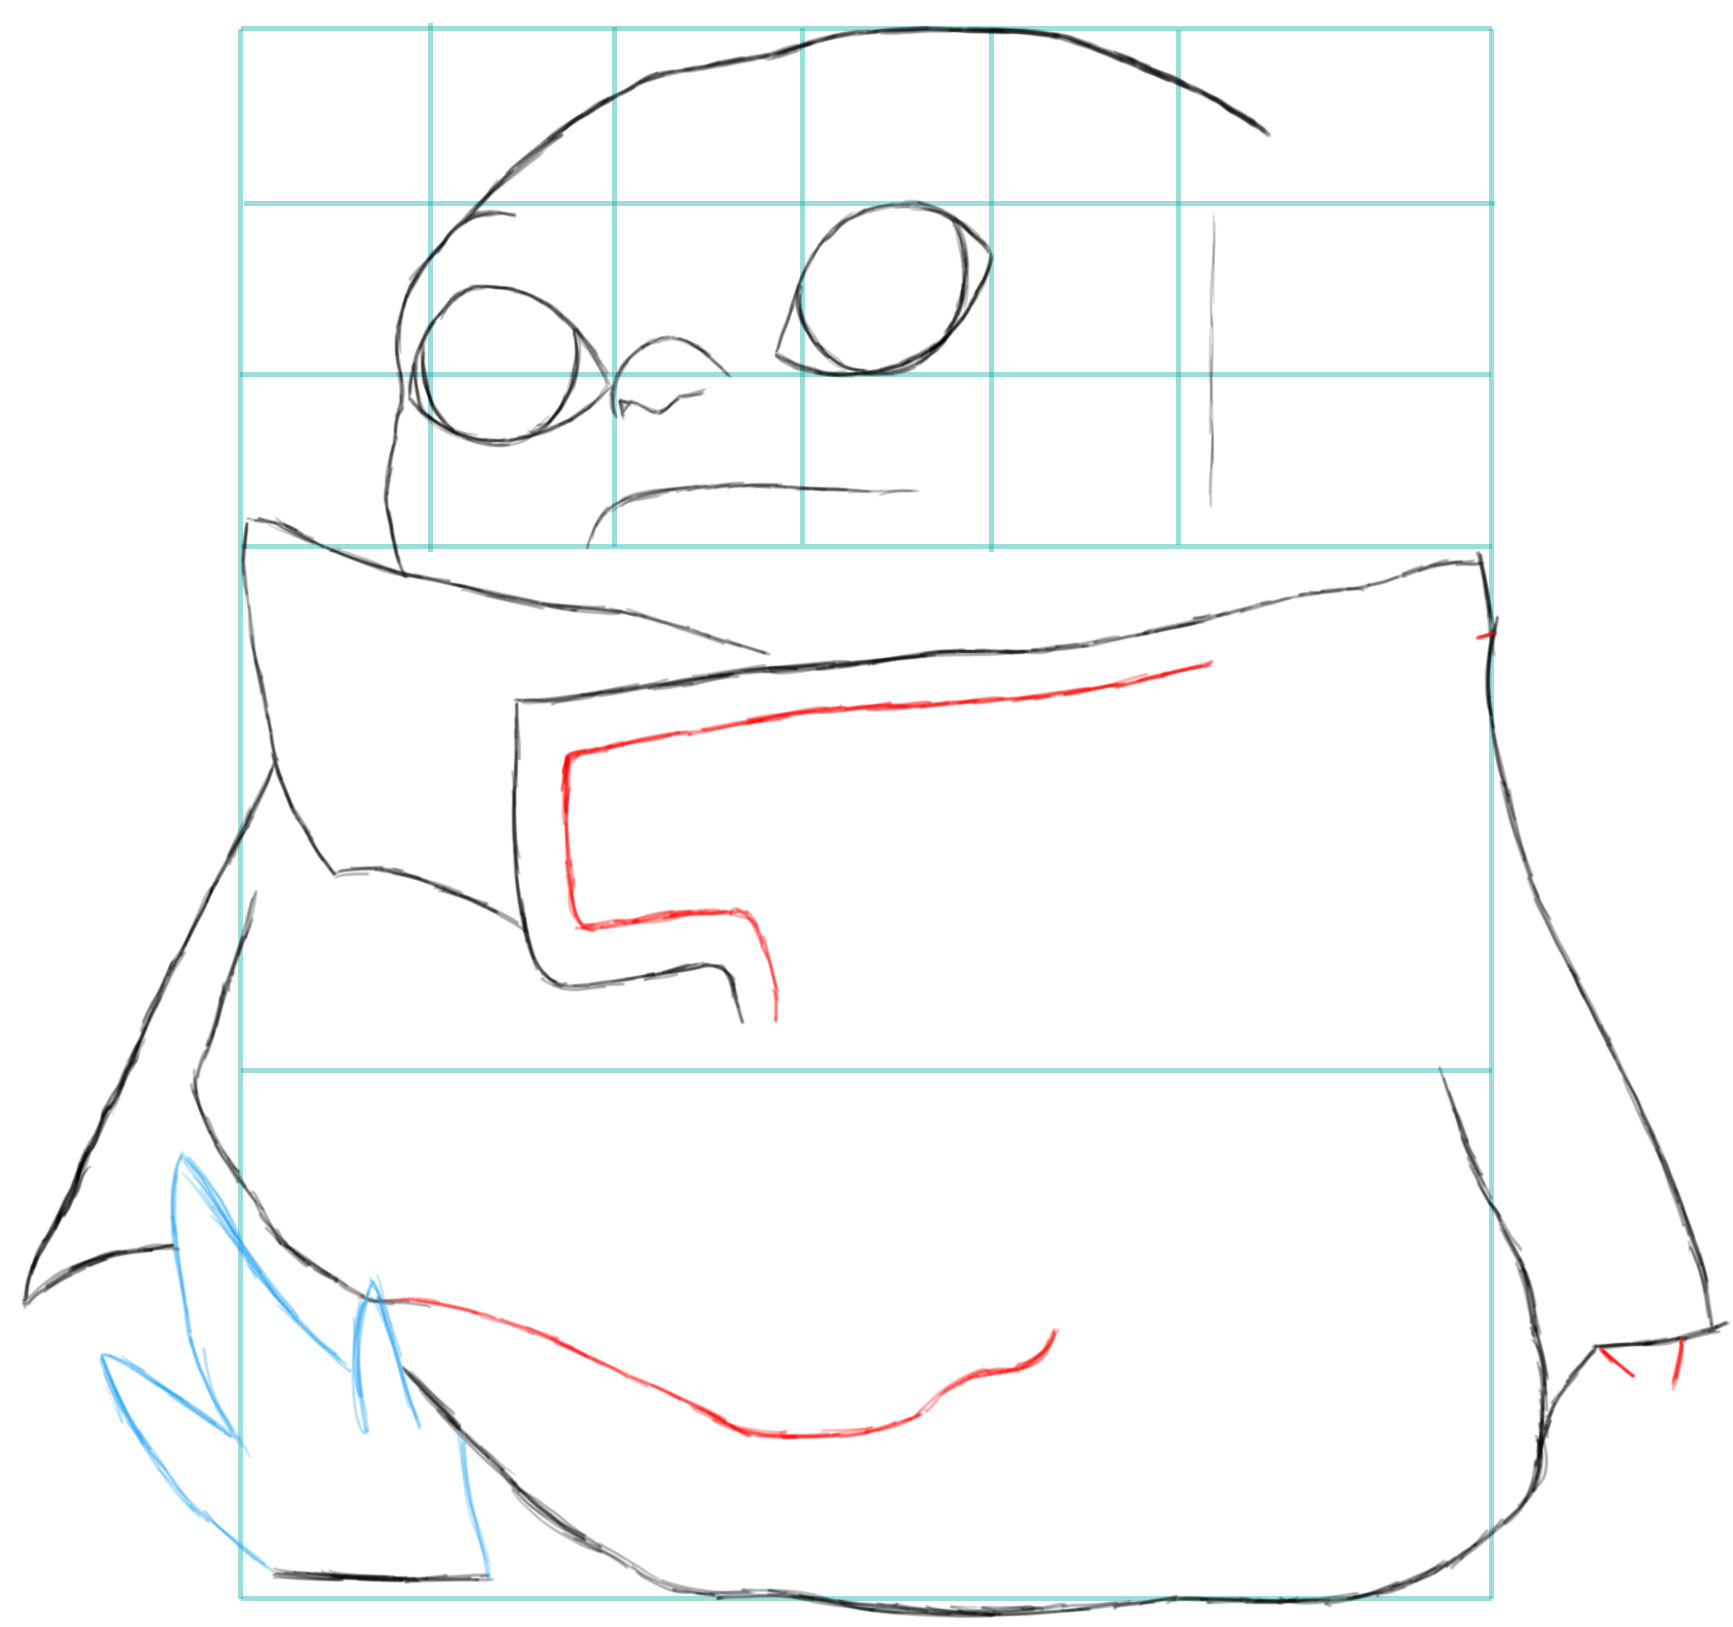
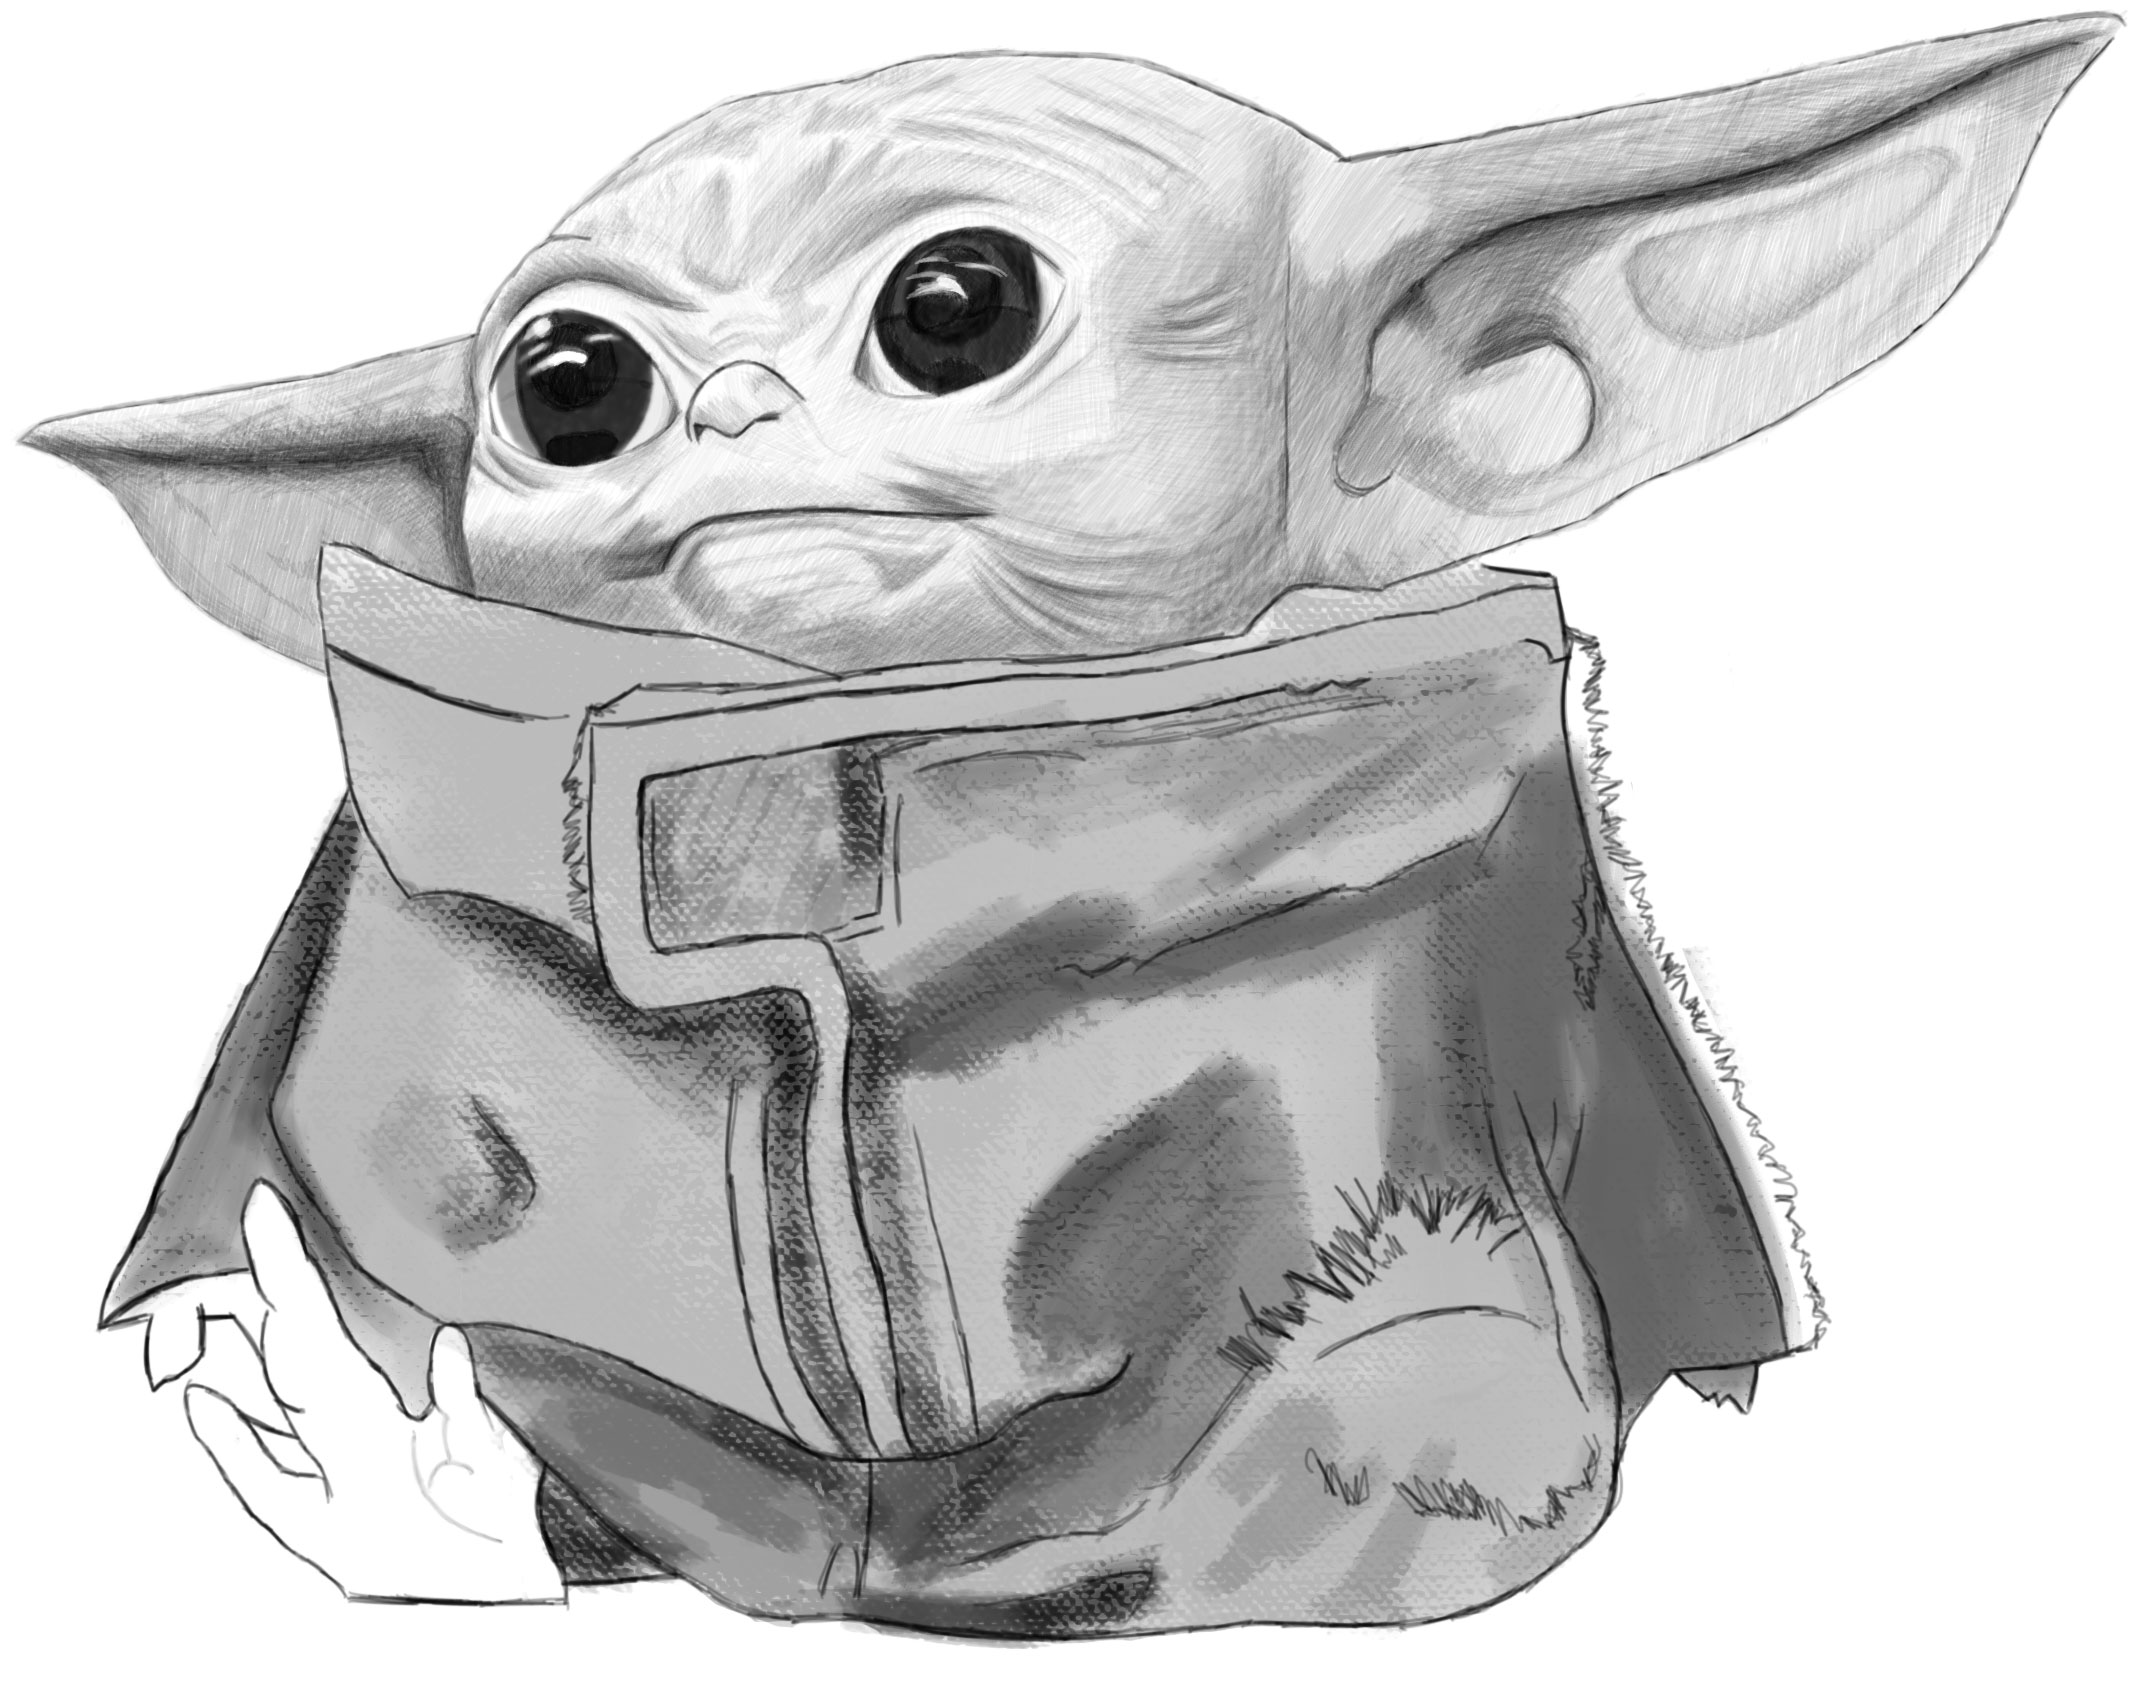
Finish up the foot as well as the left hand and sleeve. Add more details to the sack.
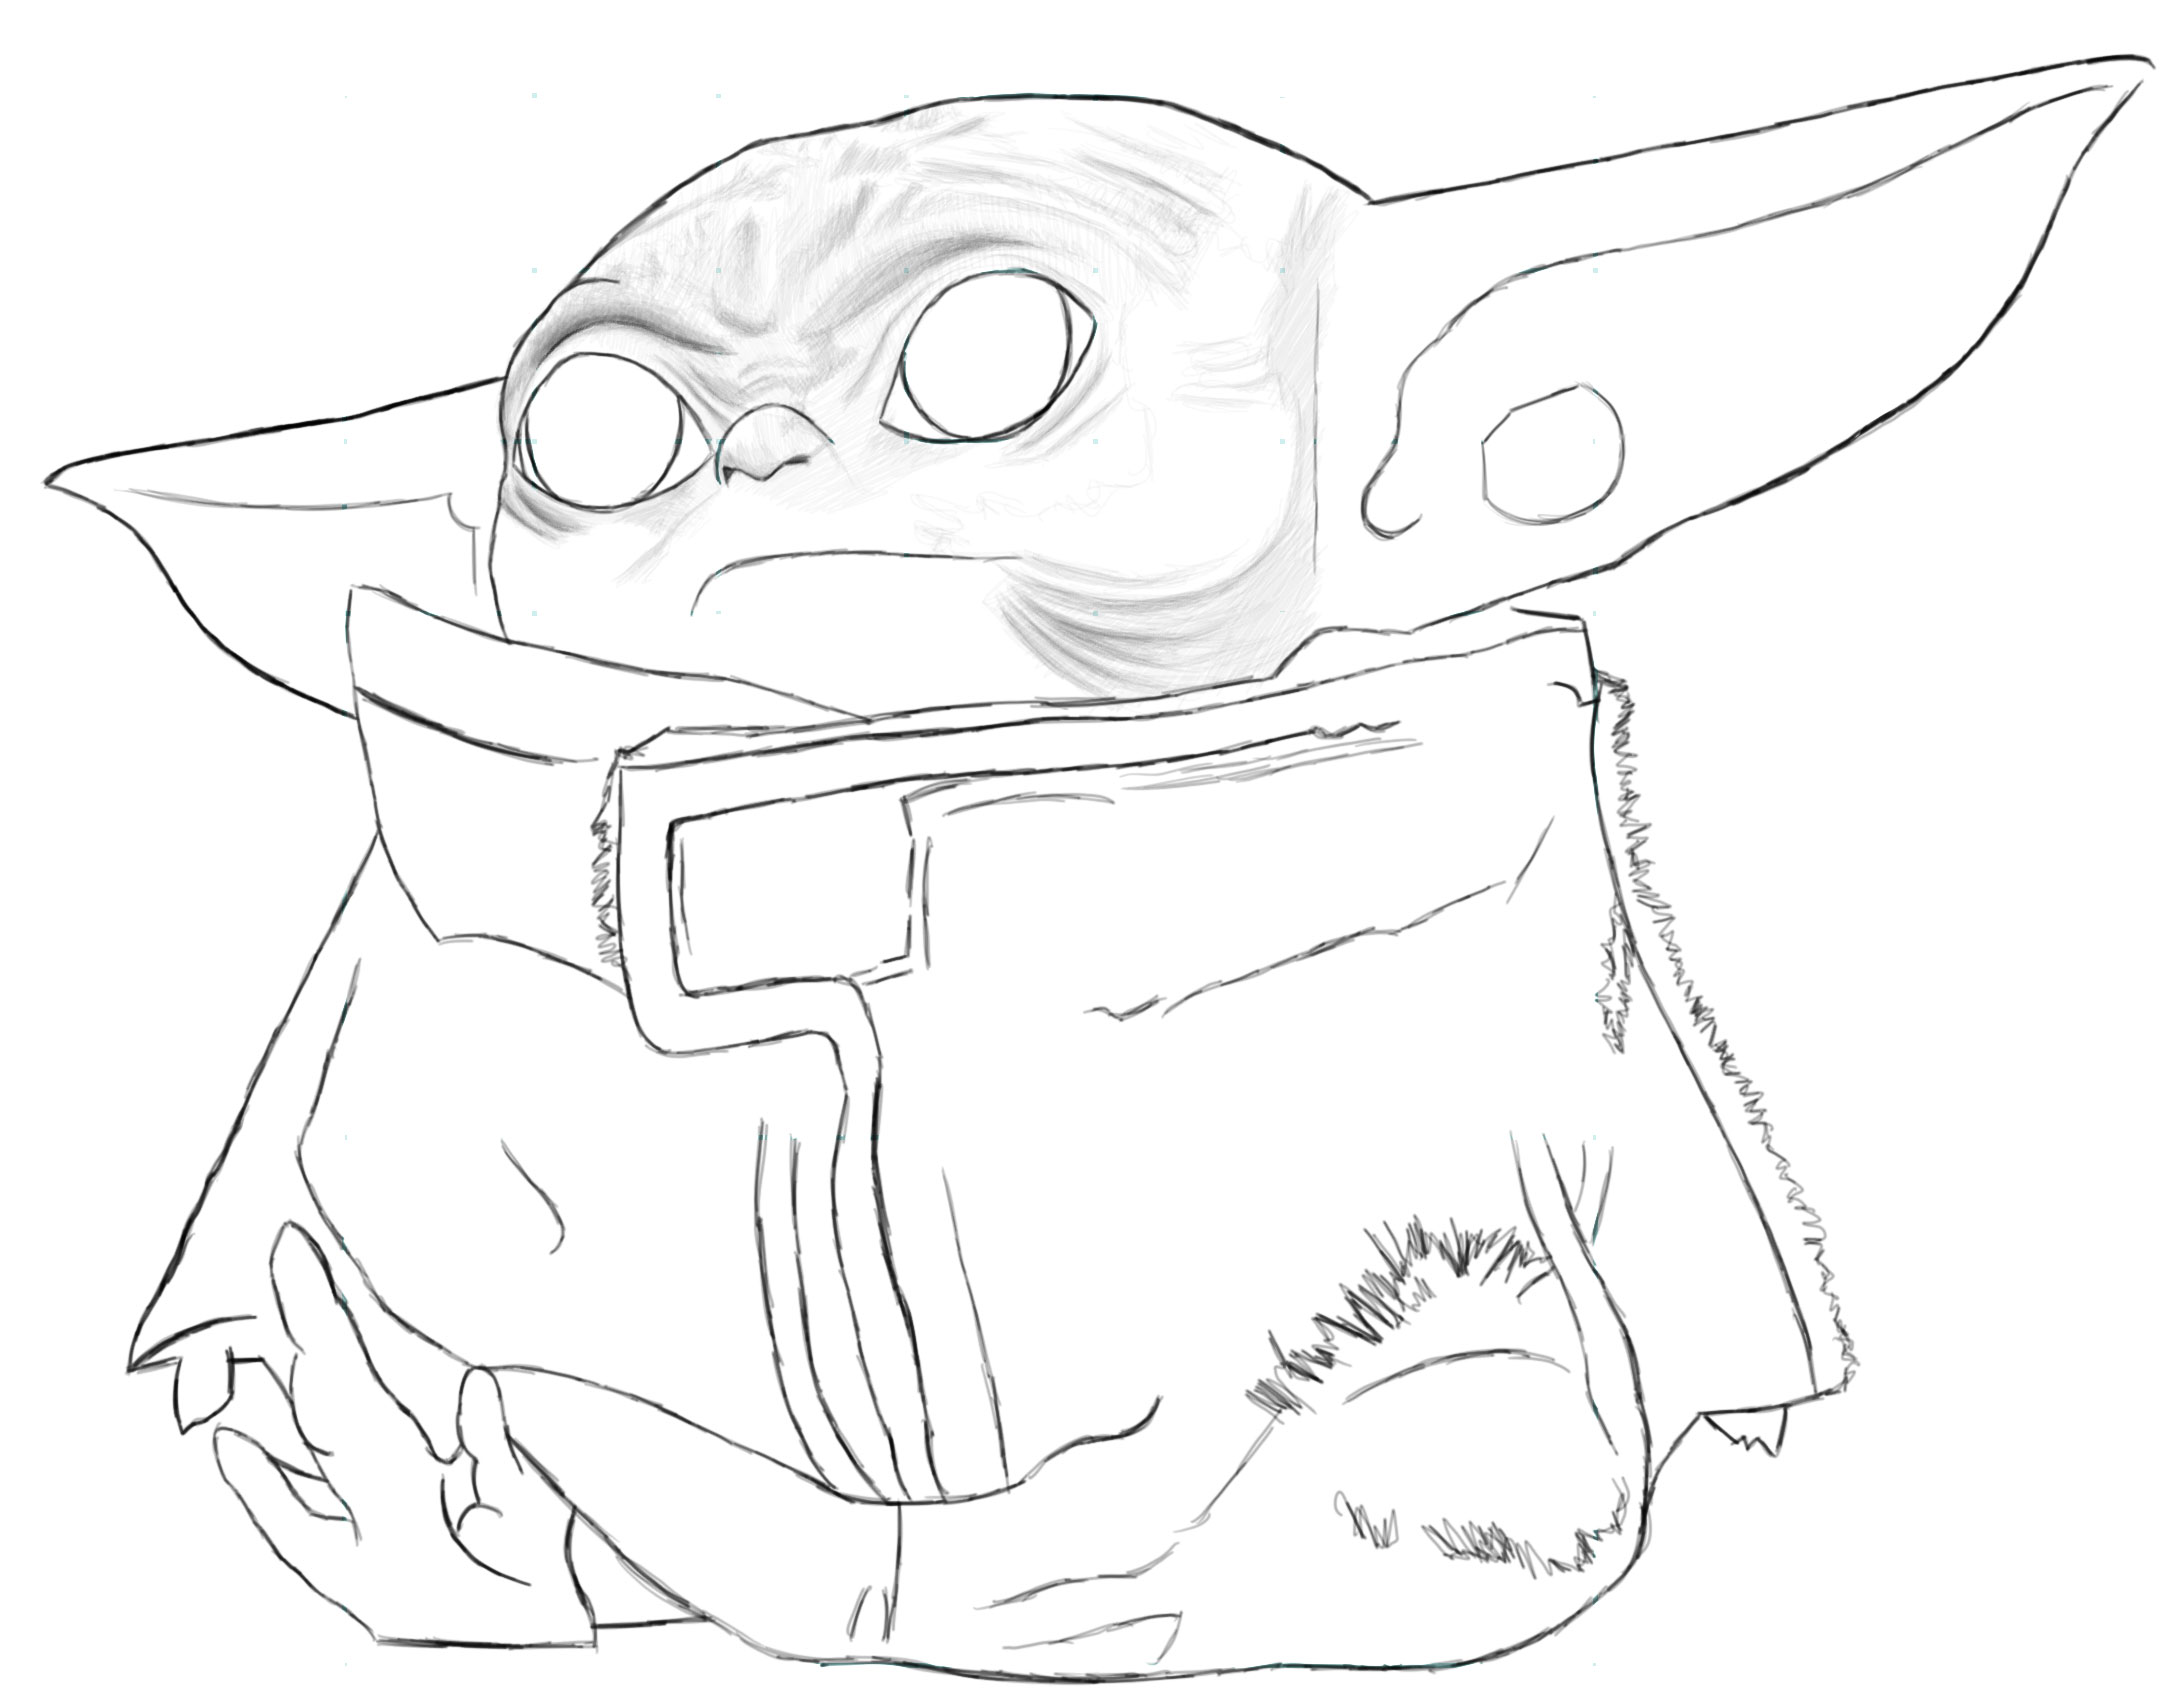
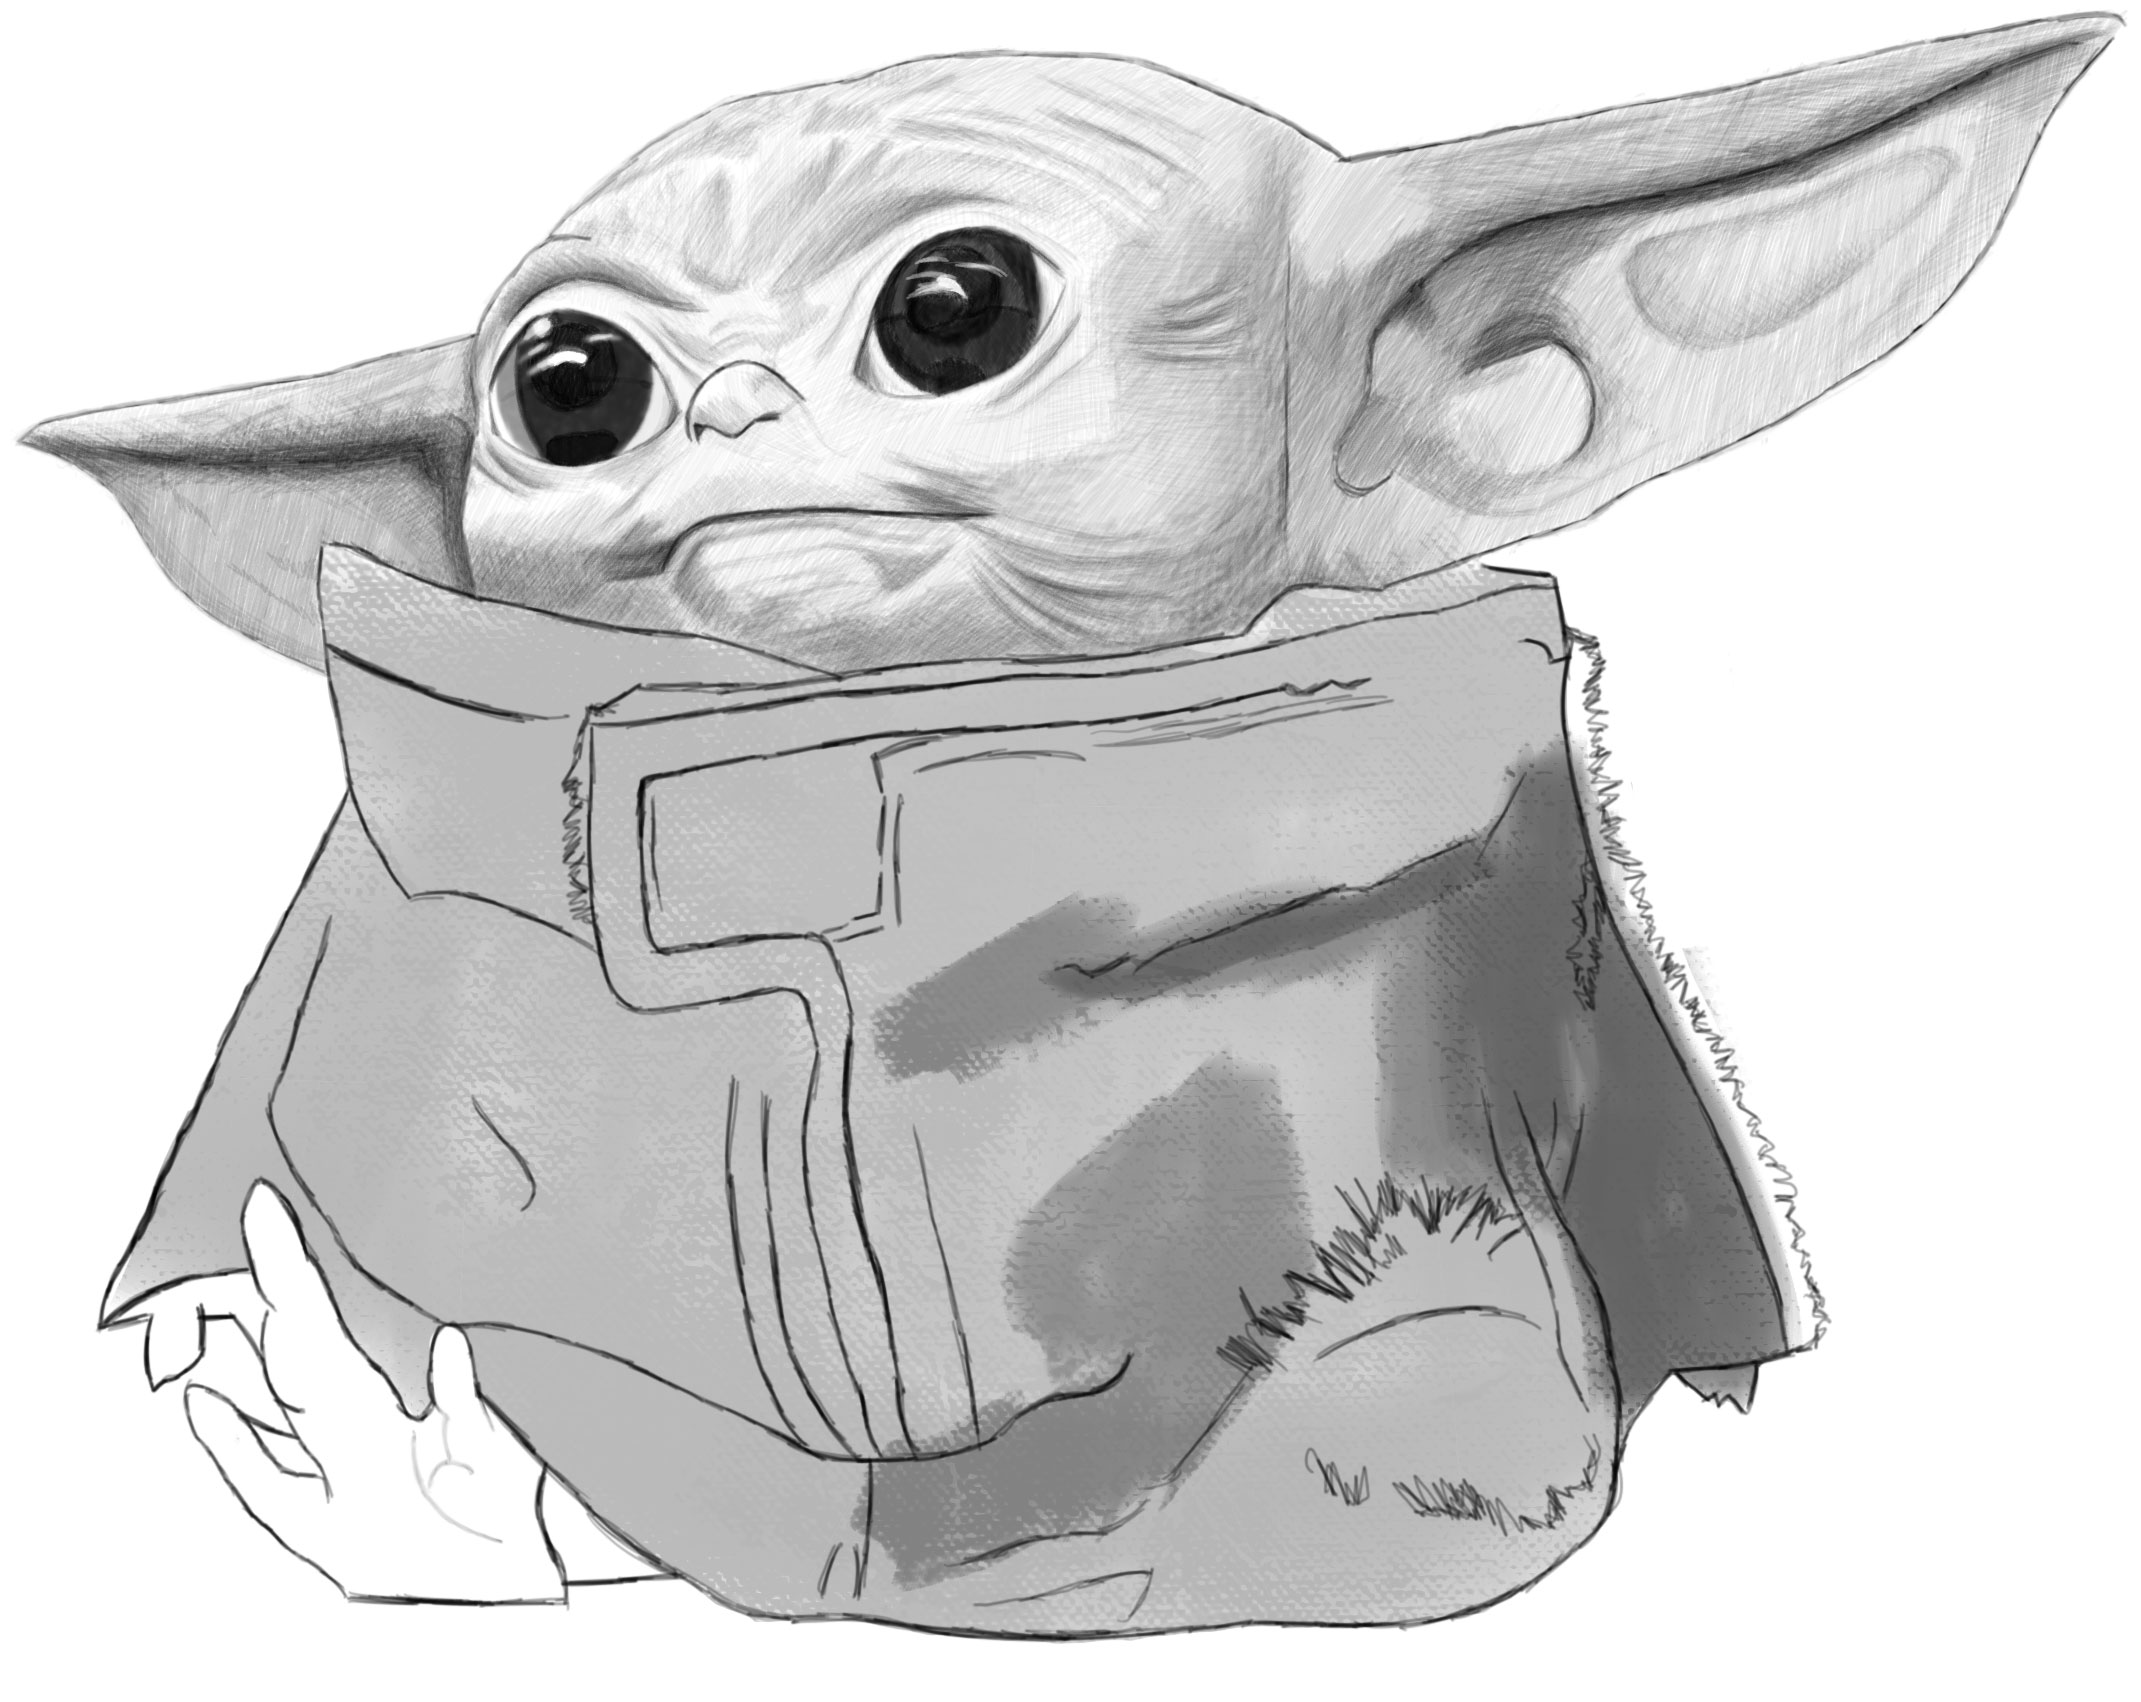
Add more details to the sack, including a lot of zig-zags.
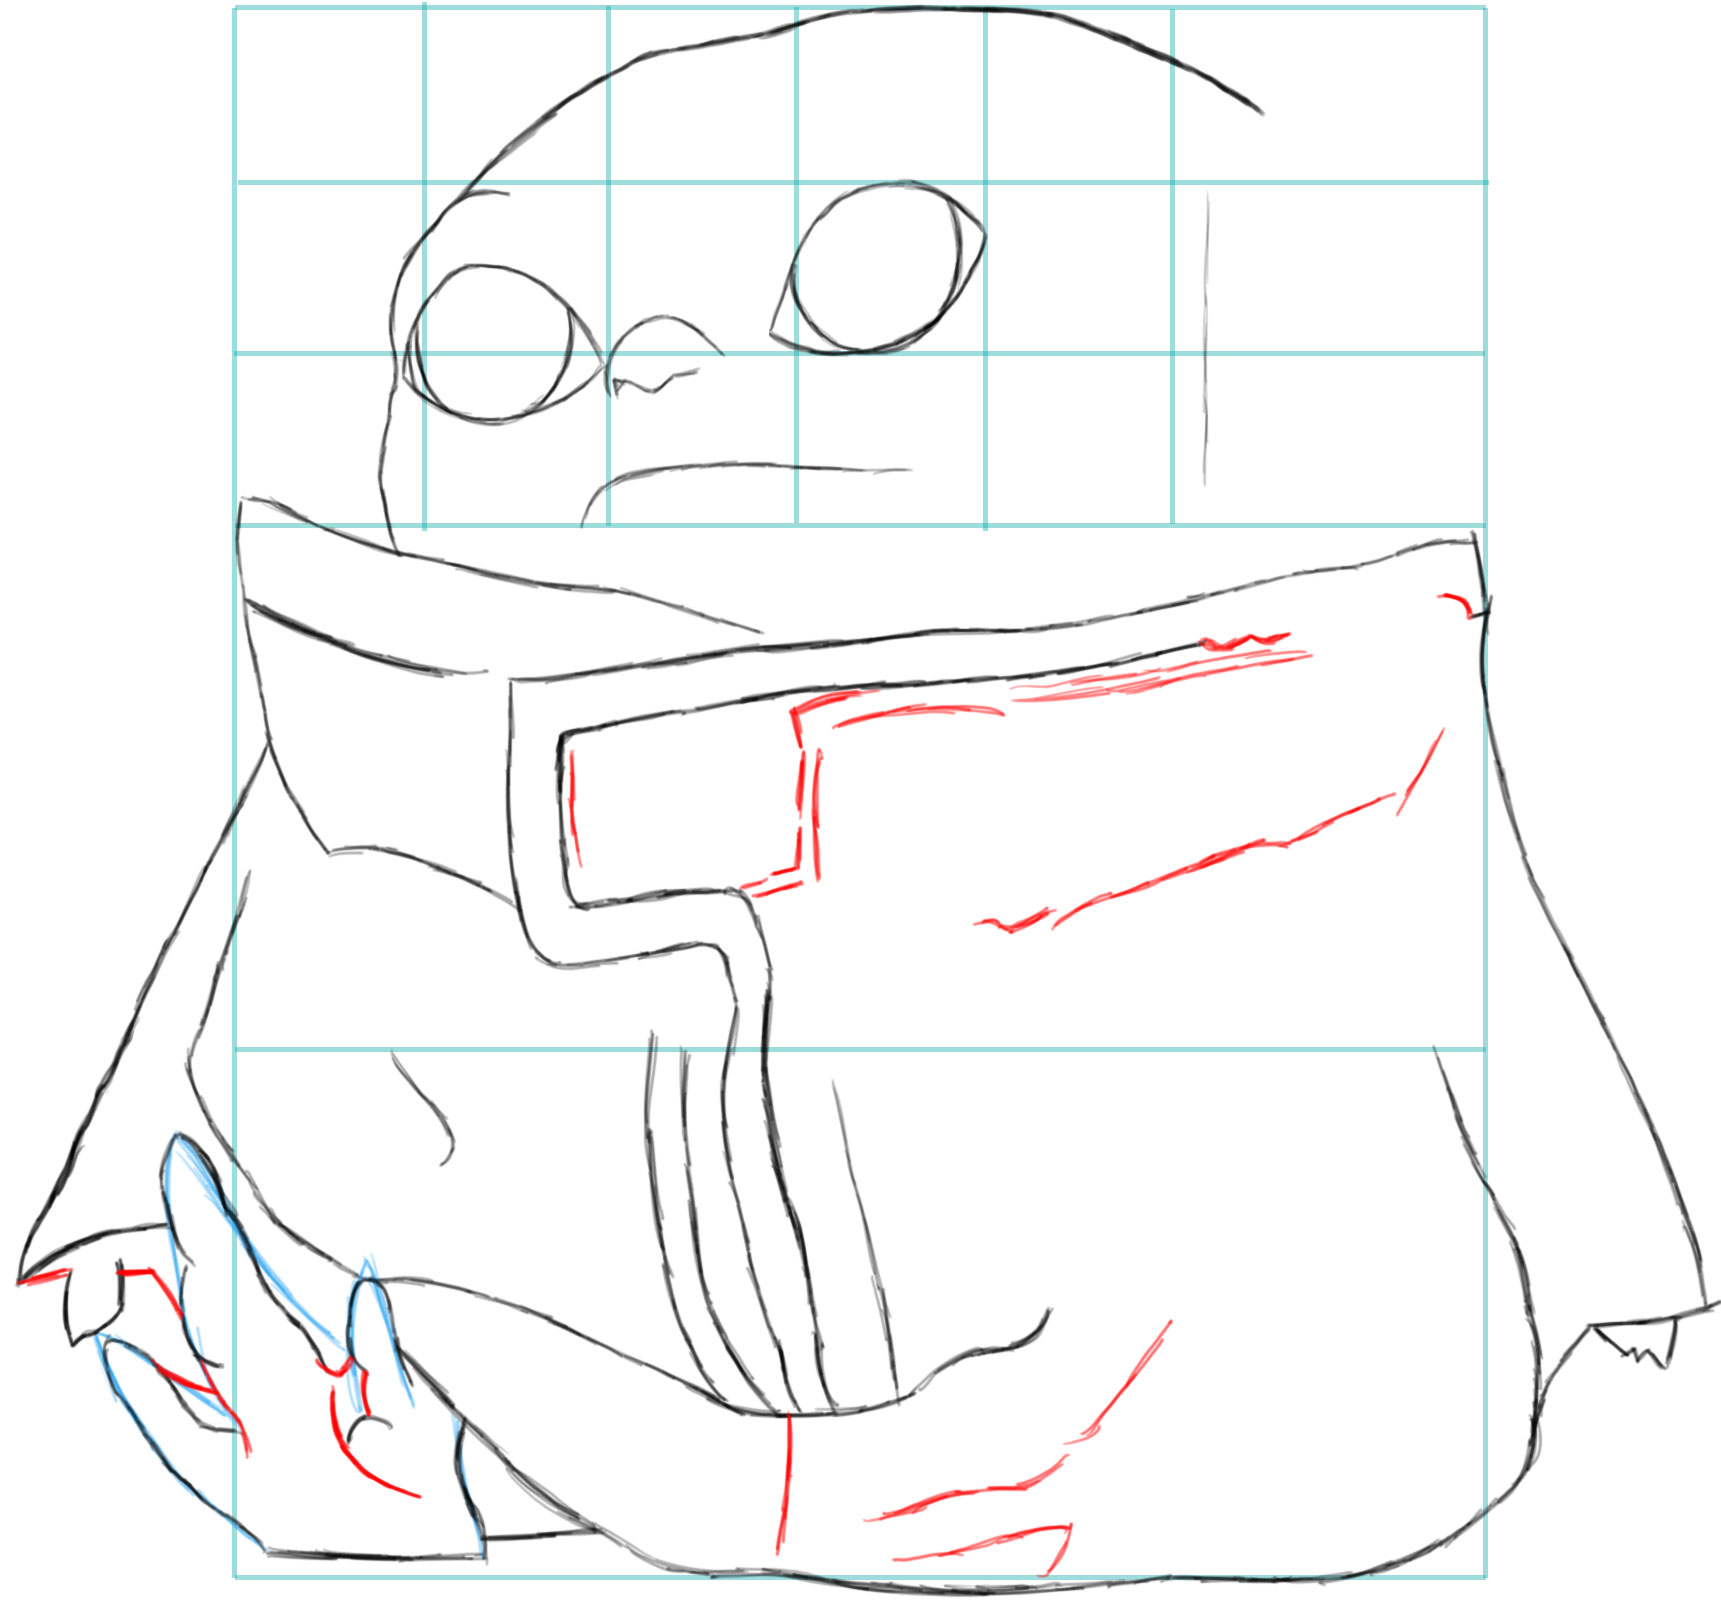
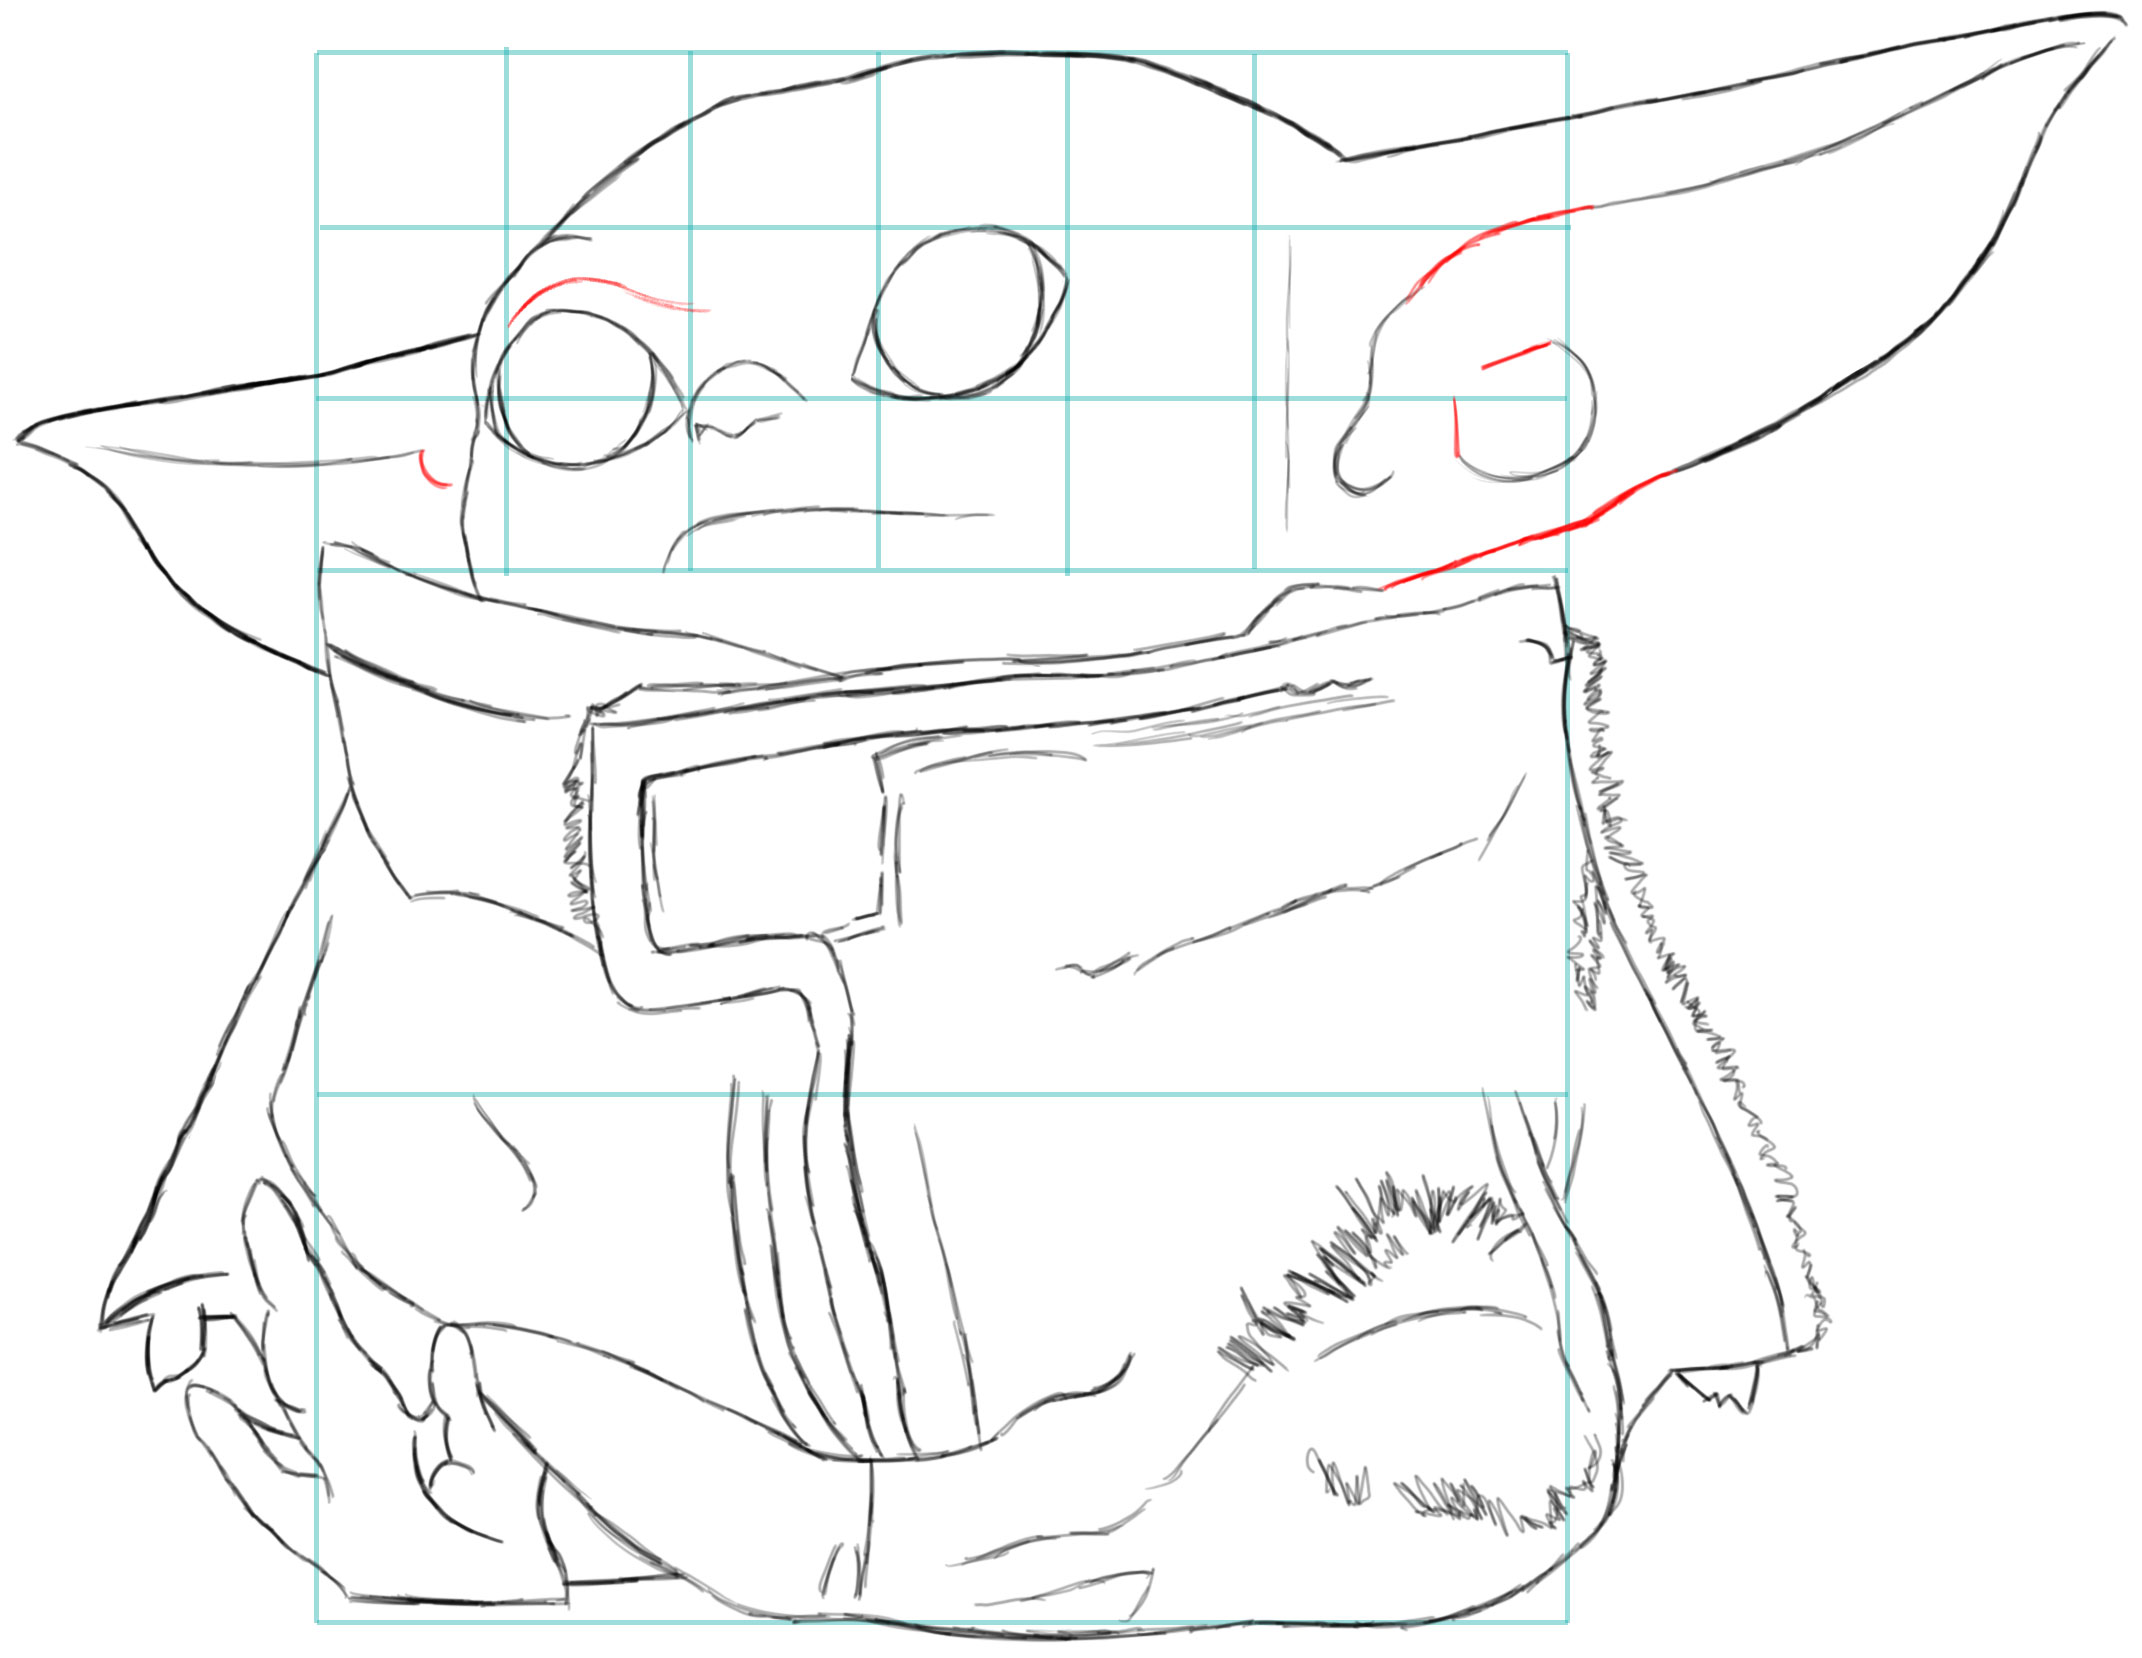
Start drawing the ears.
Draw an “S” curve at the bottom of each ear. Draw a backward #3 + “C” shape.
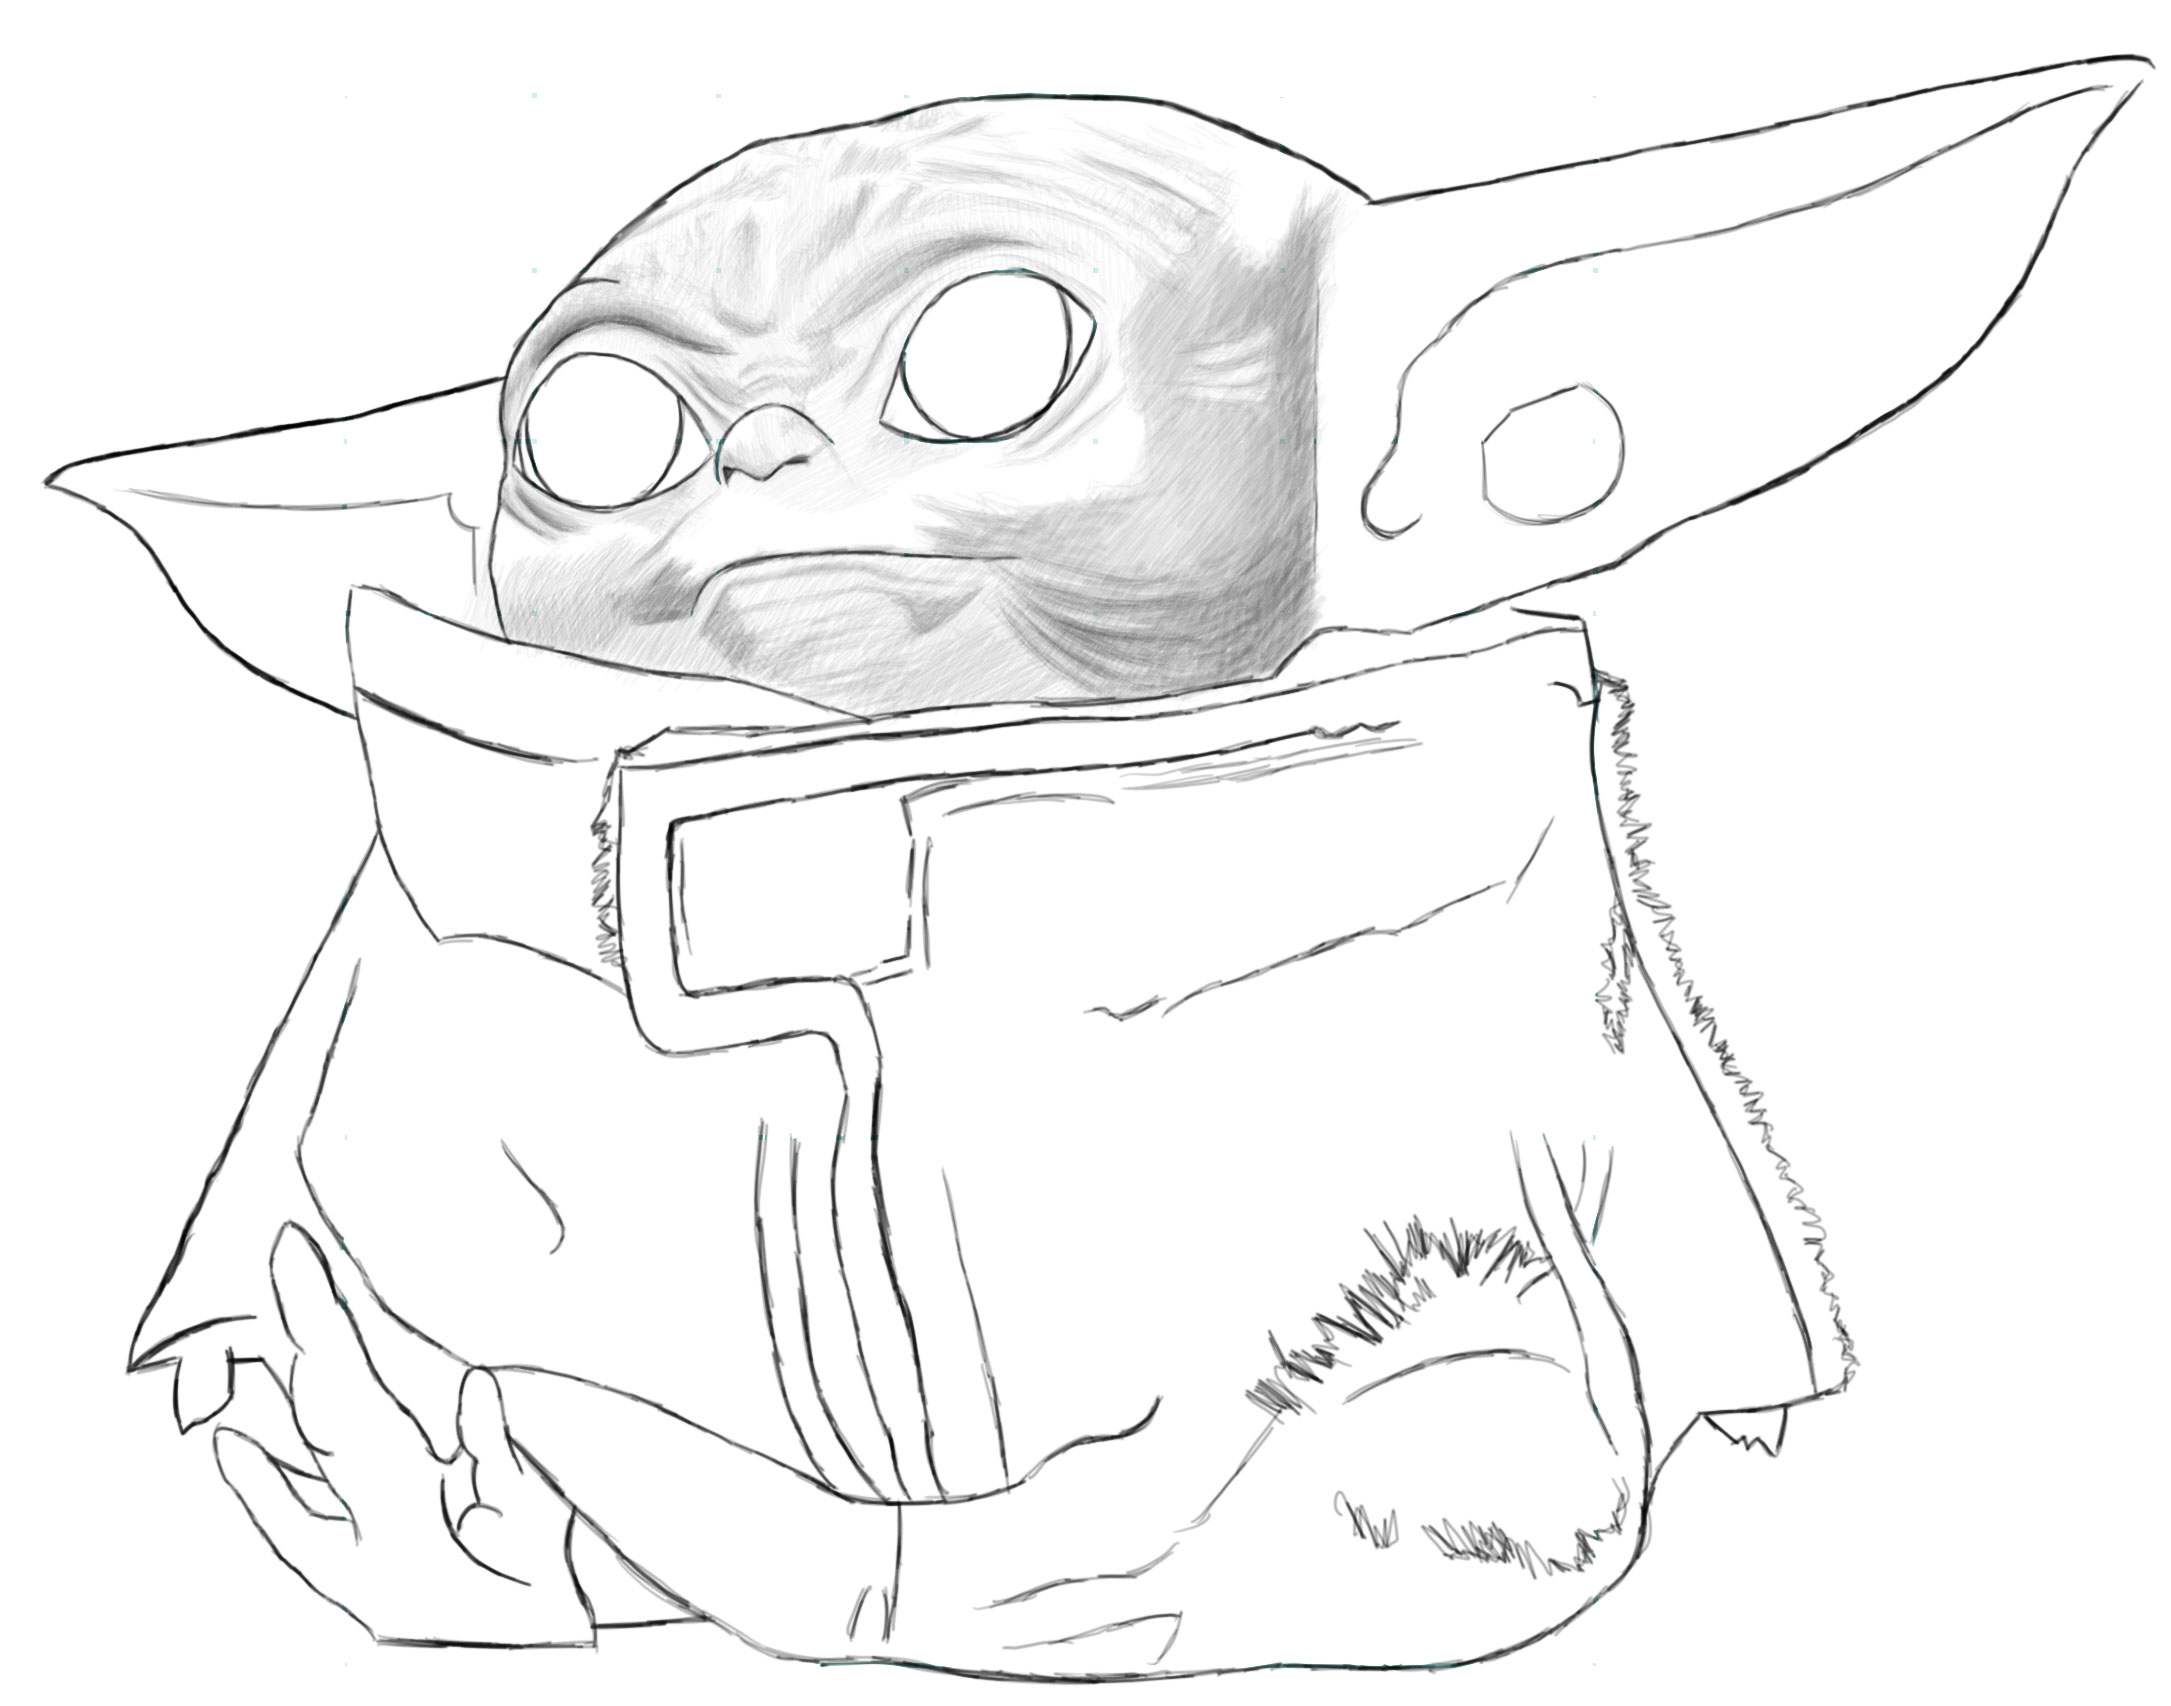
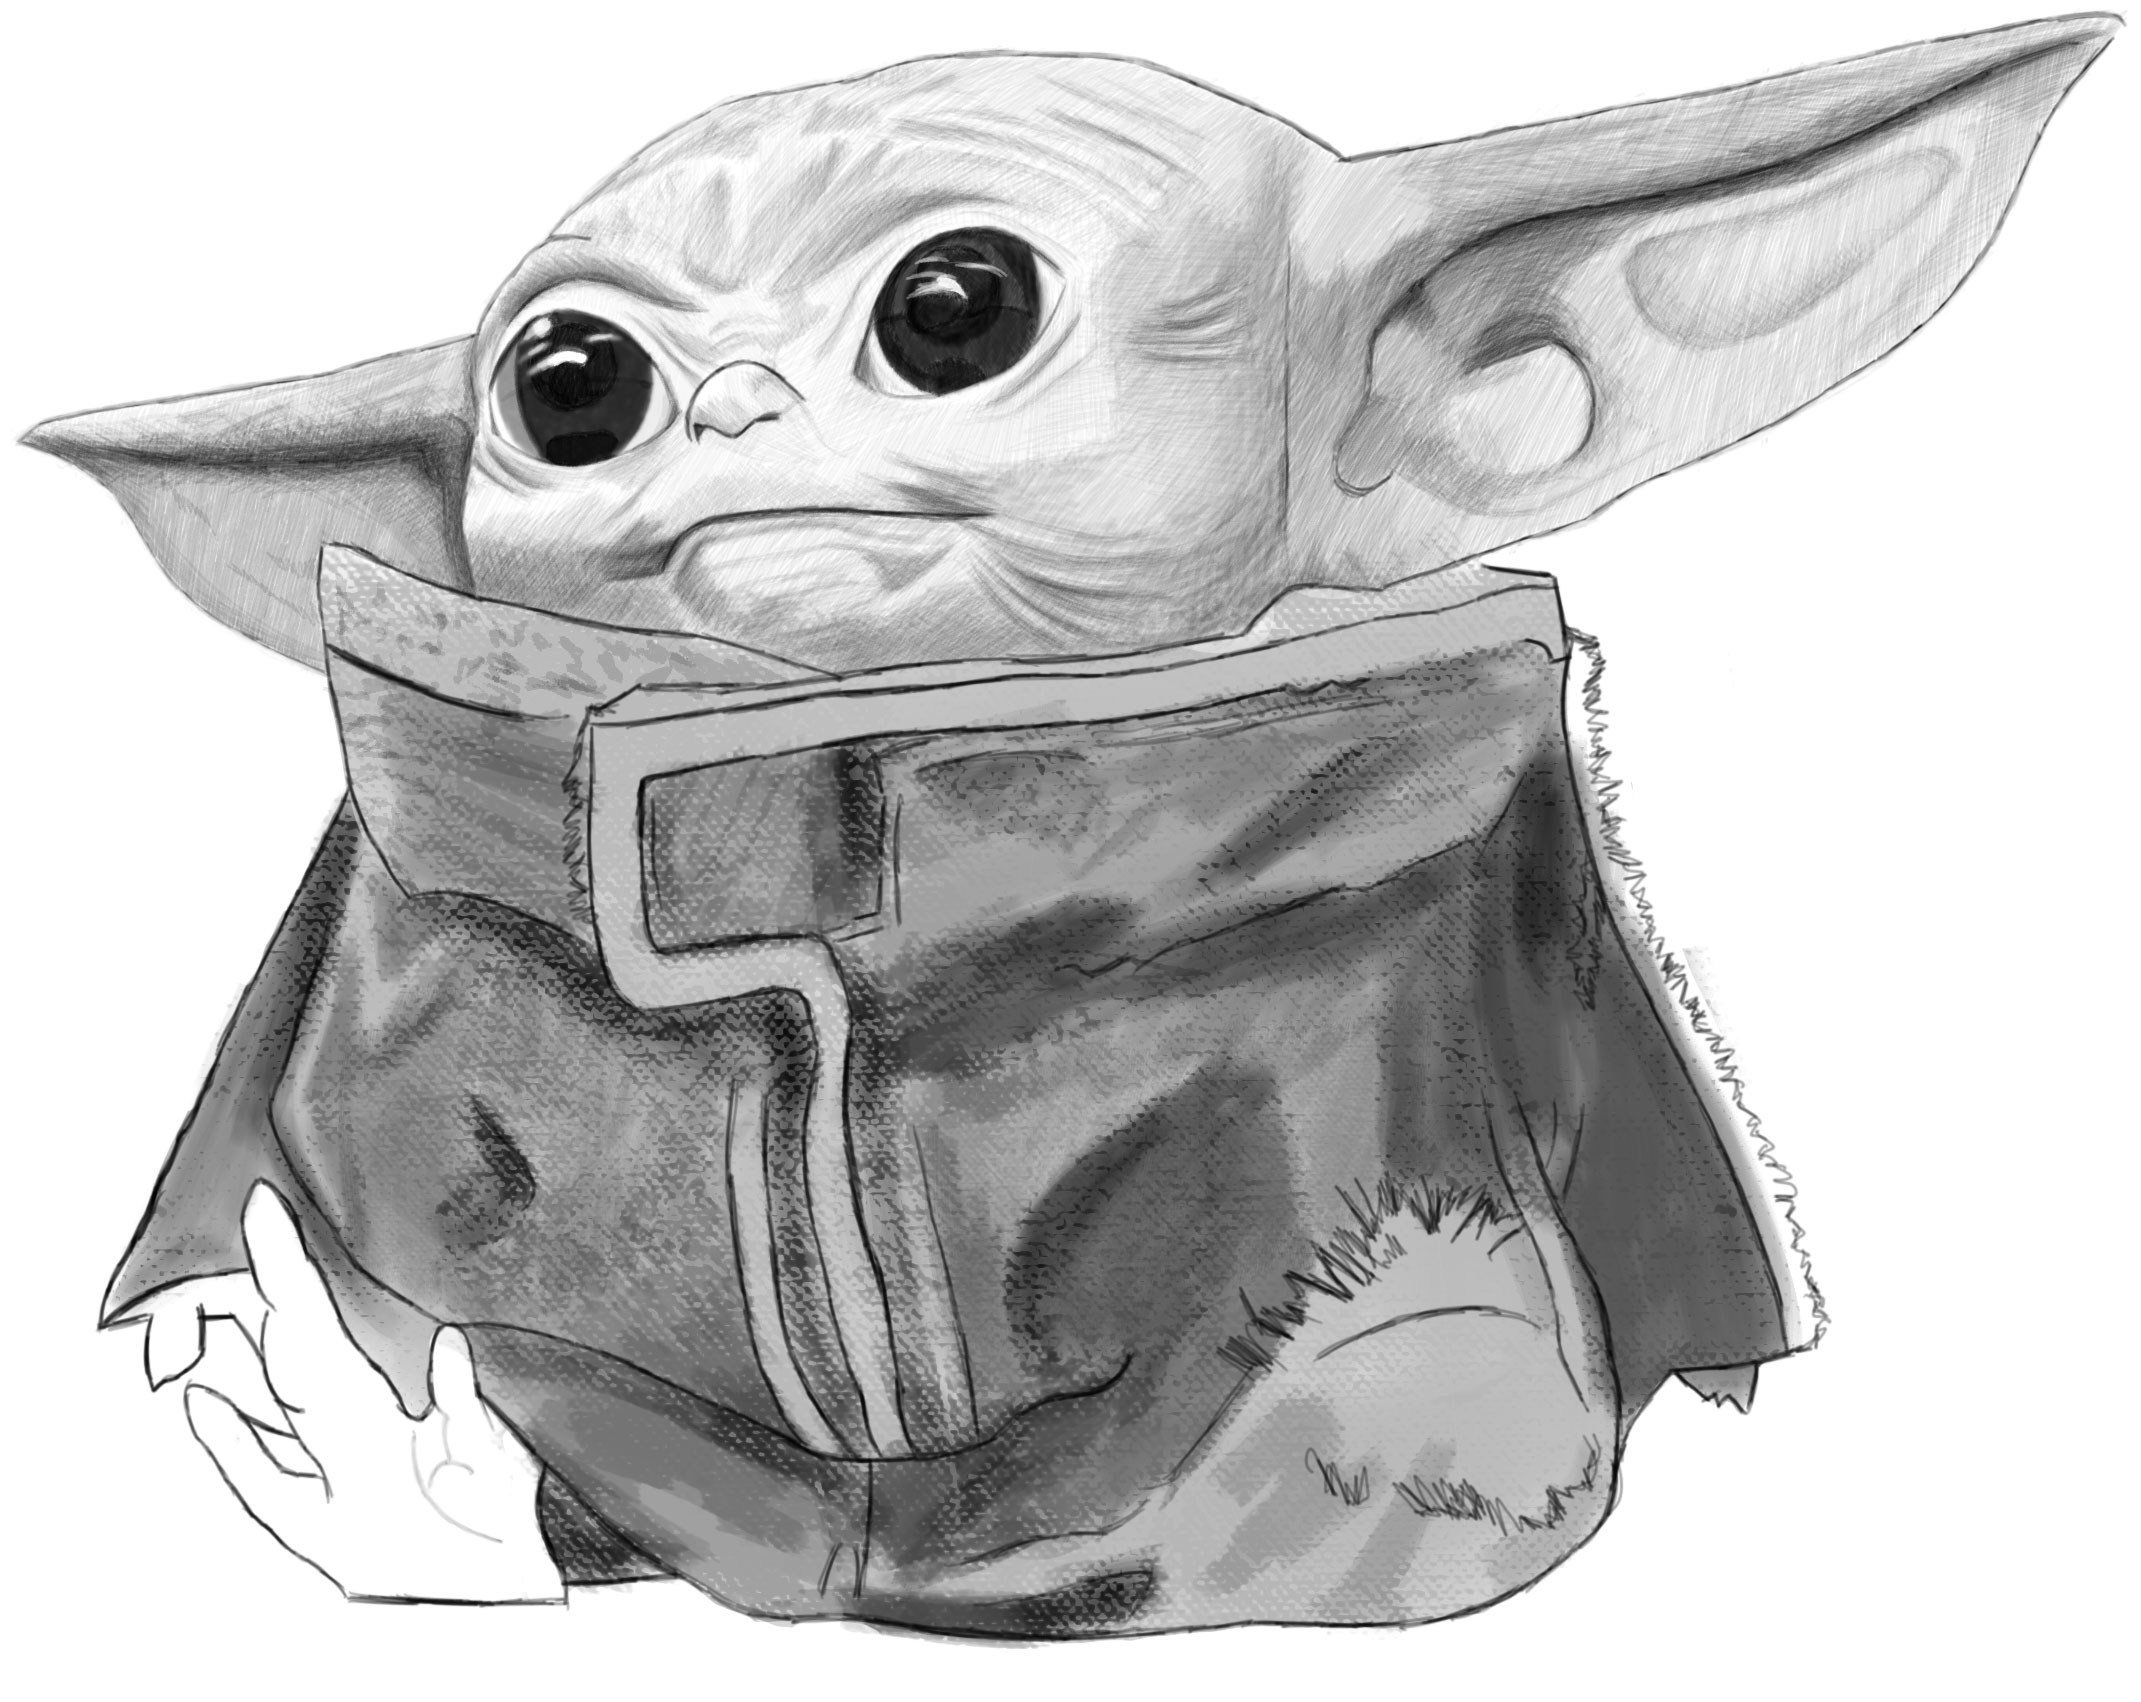
Draw some of the finishing details. Draw a sideways “?” over the left eye.
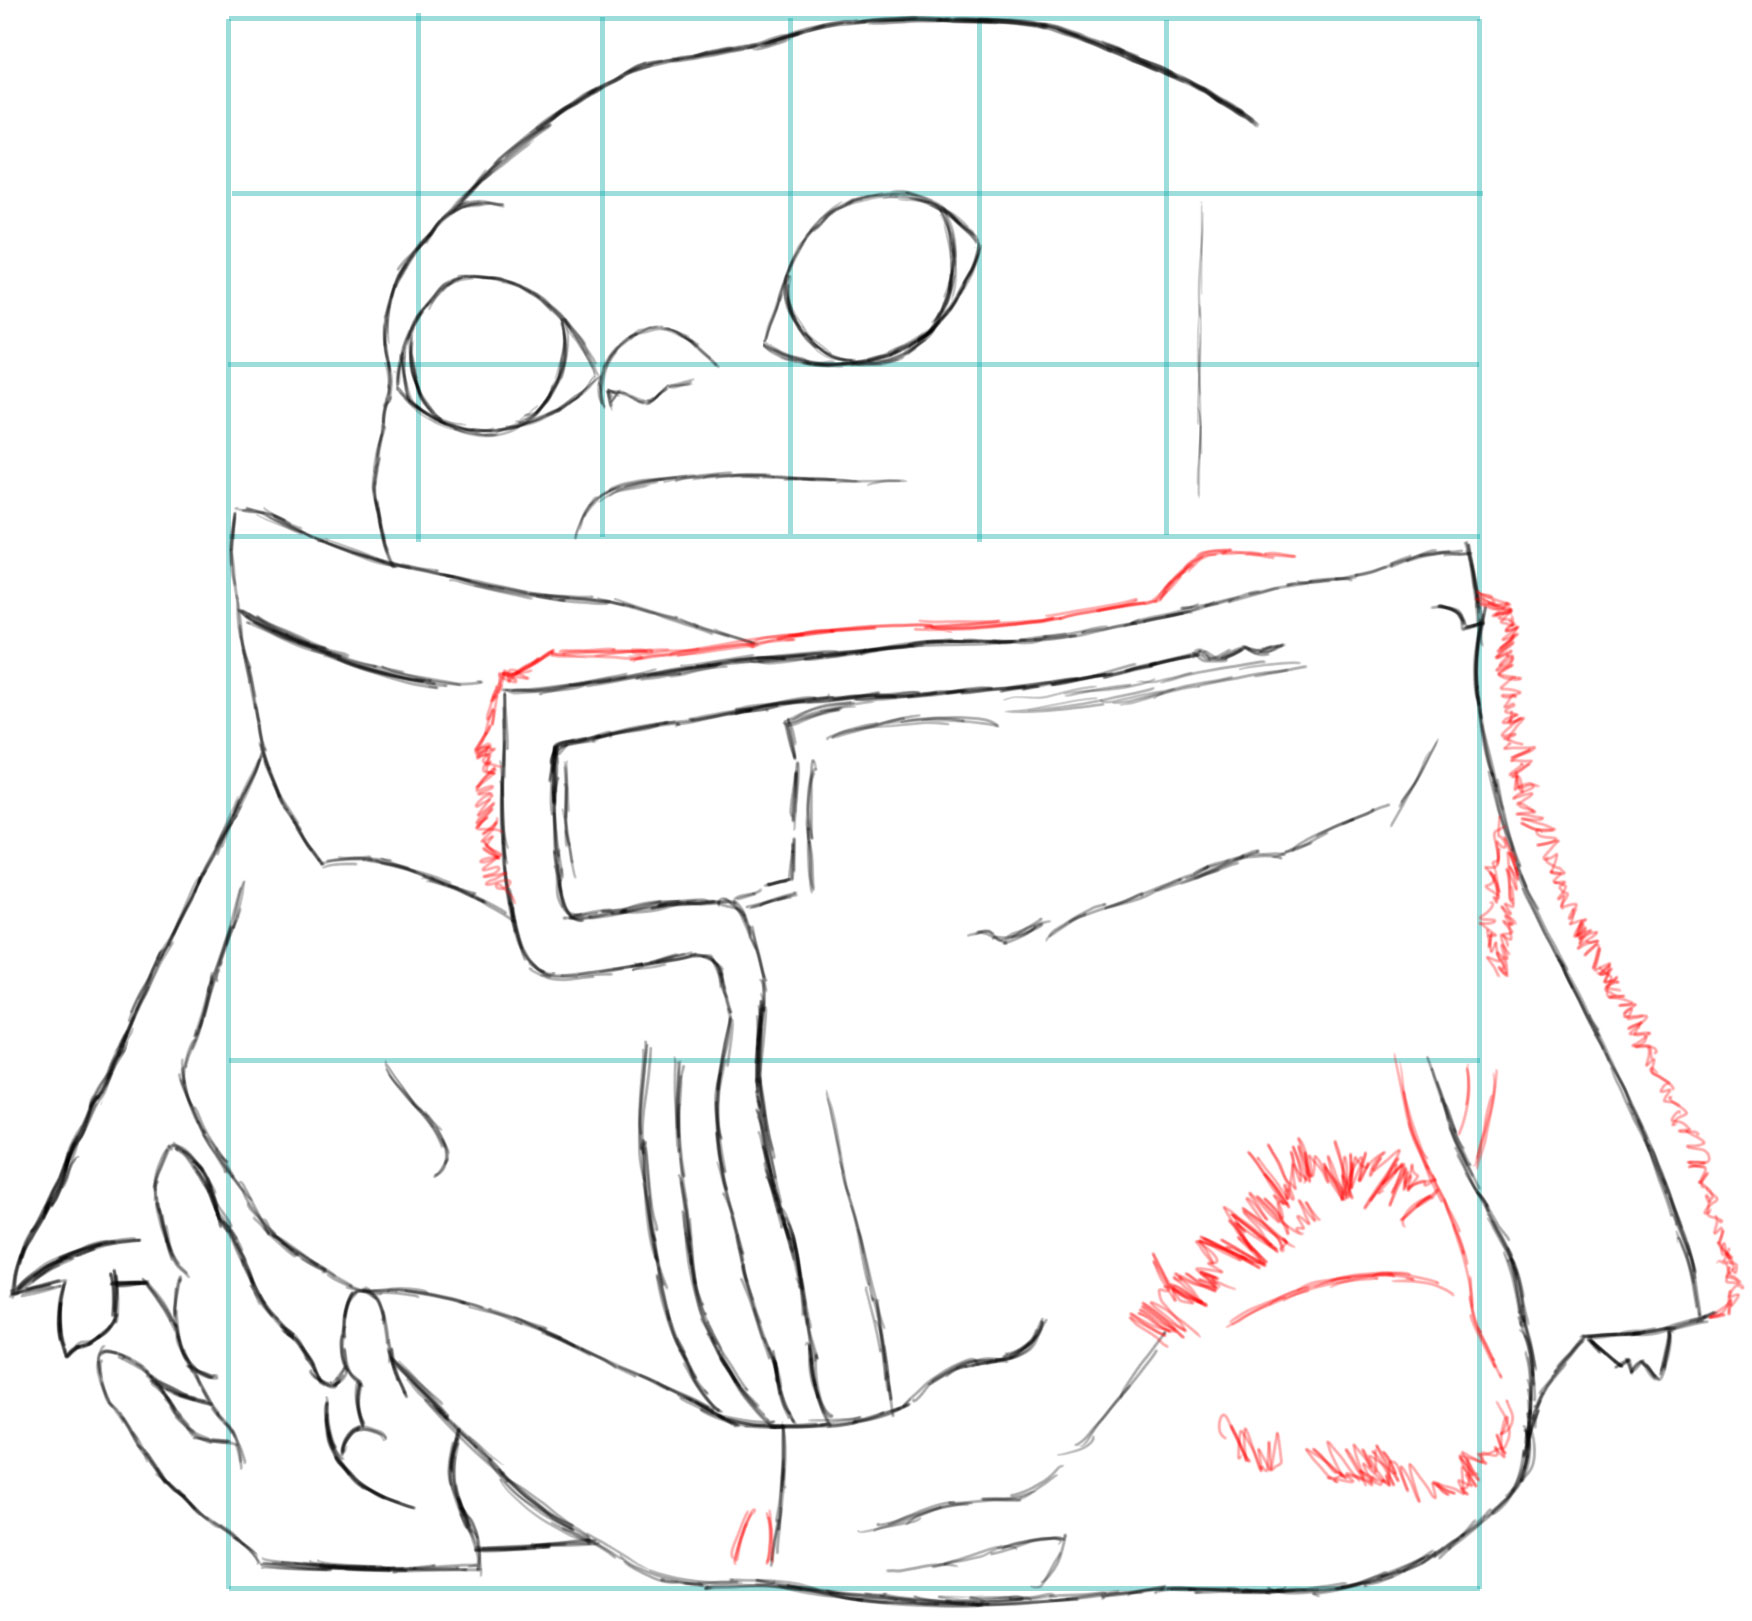
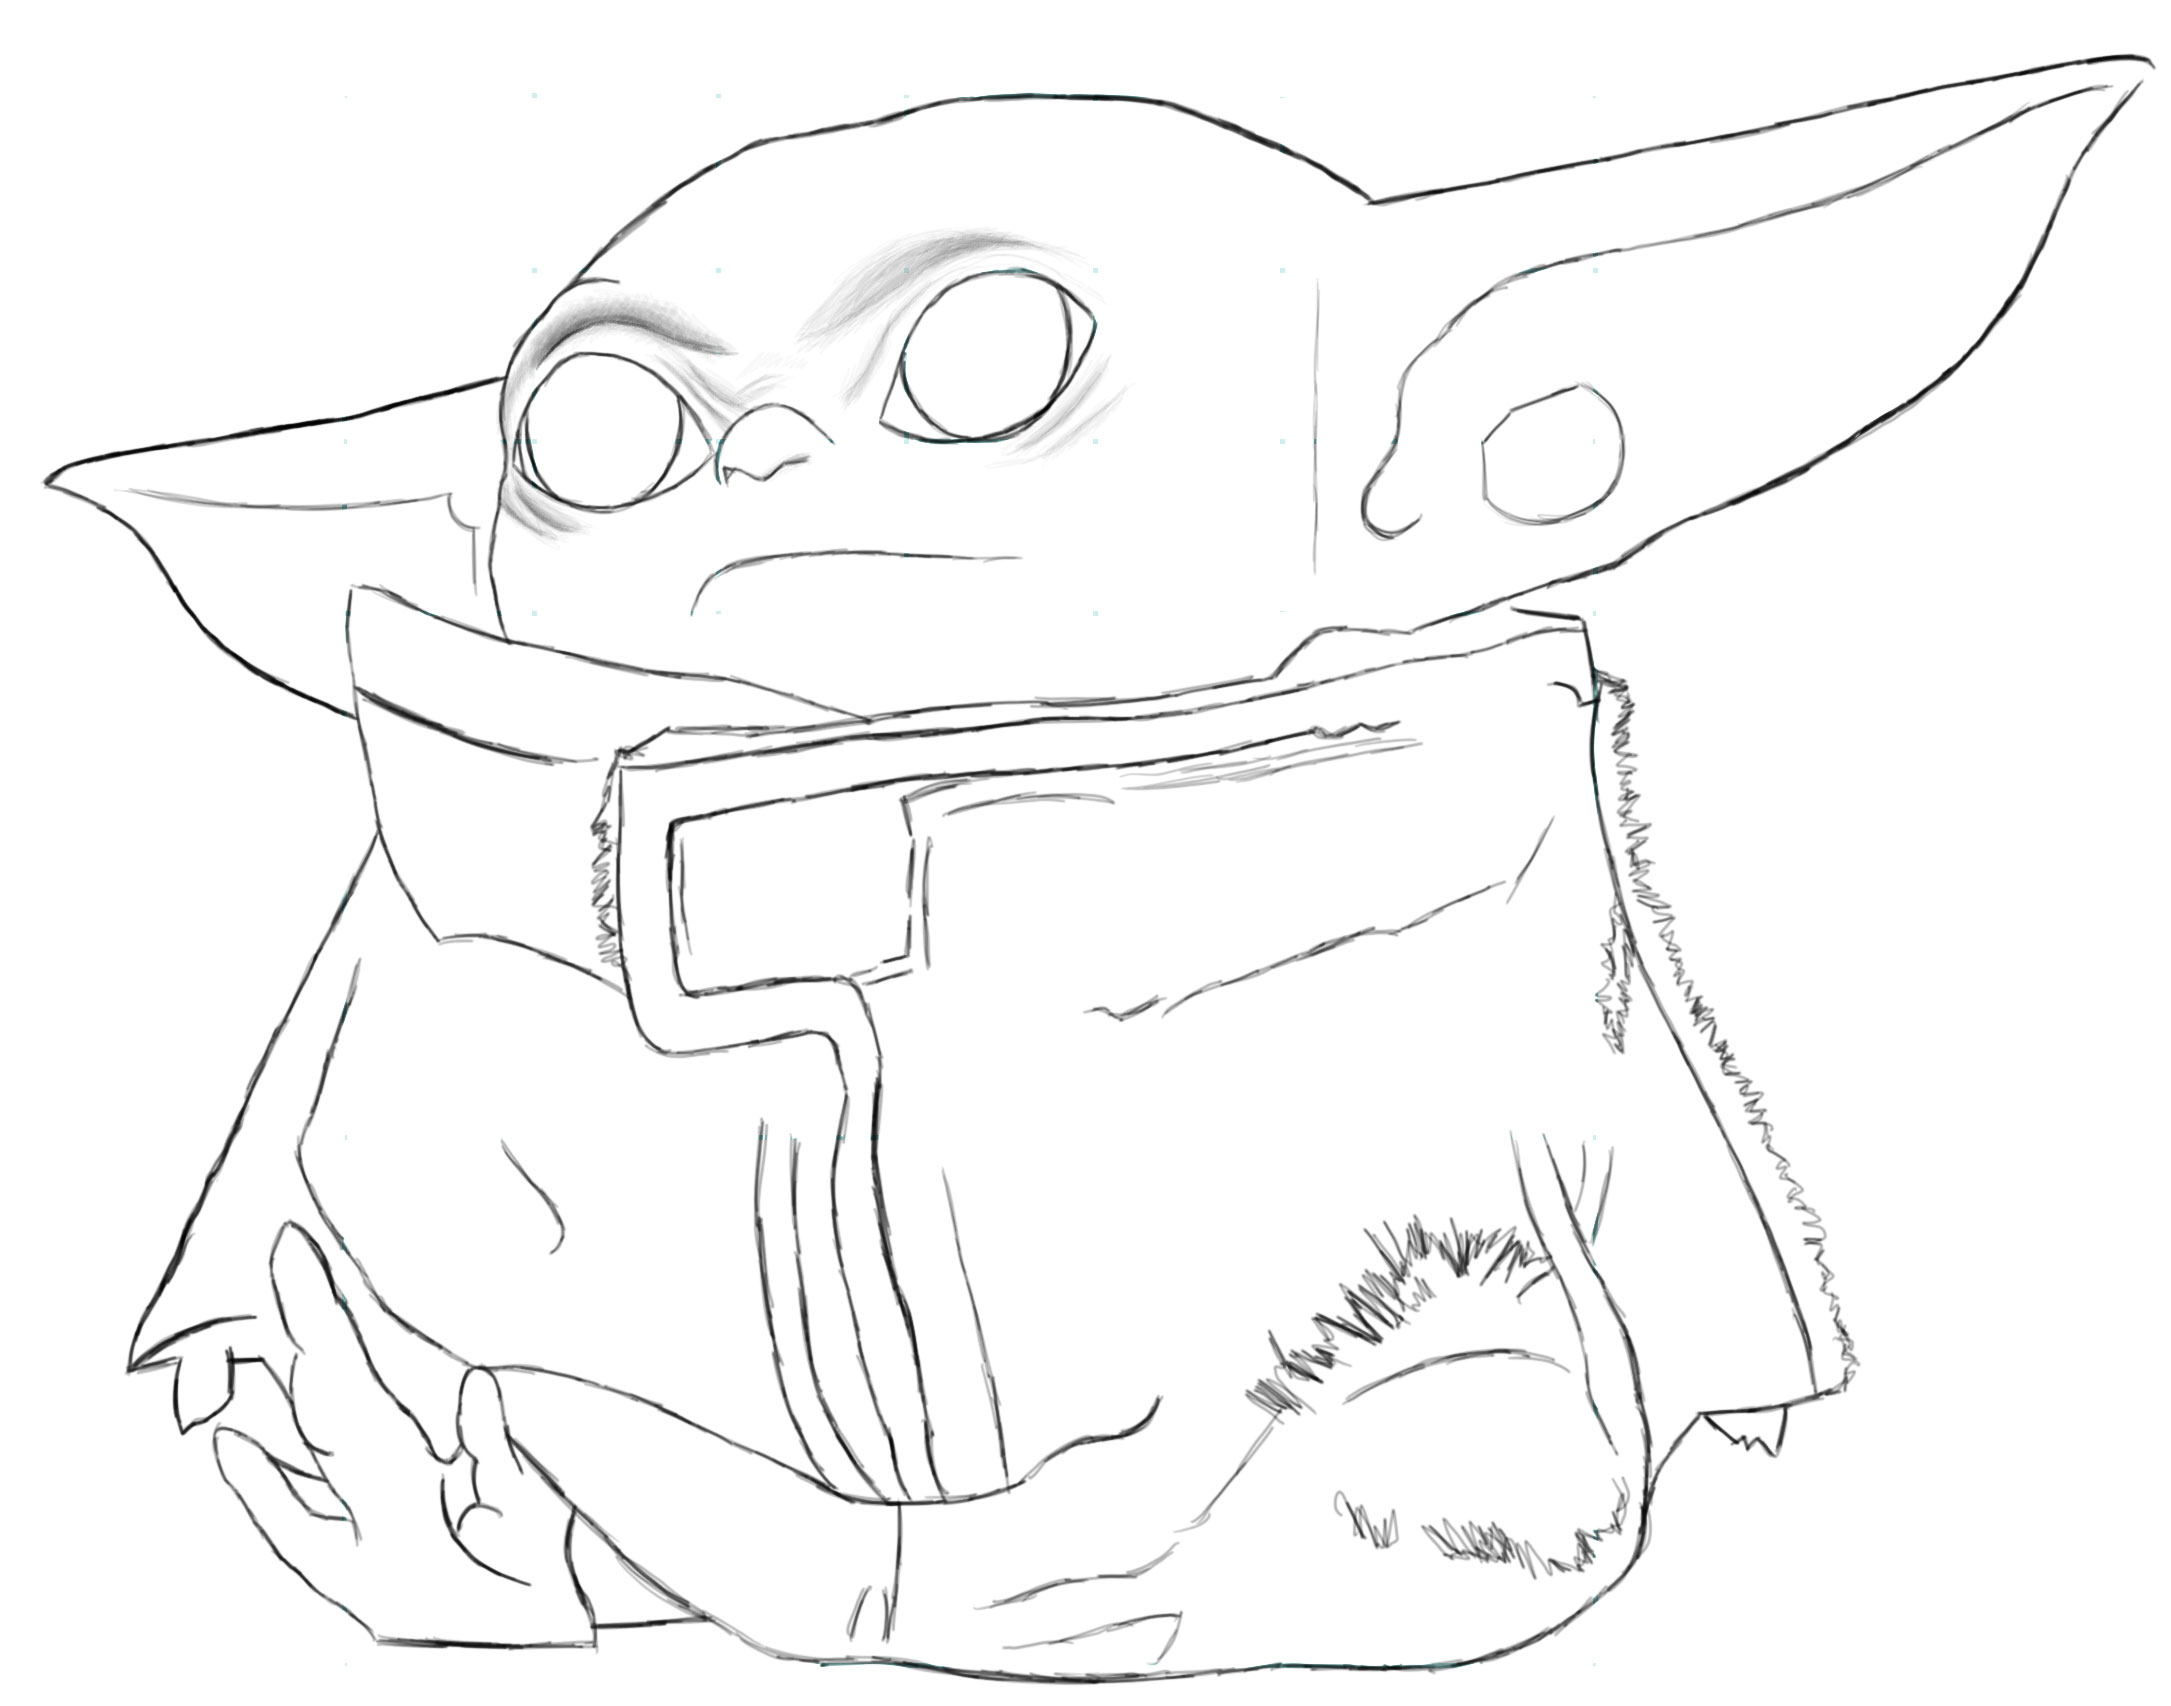
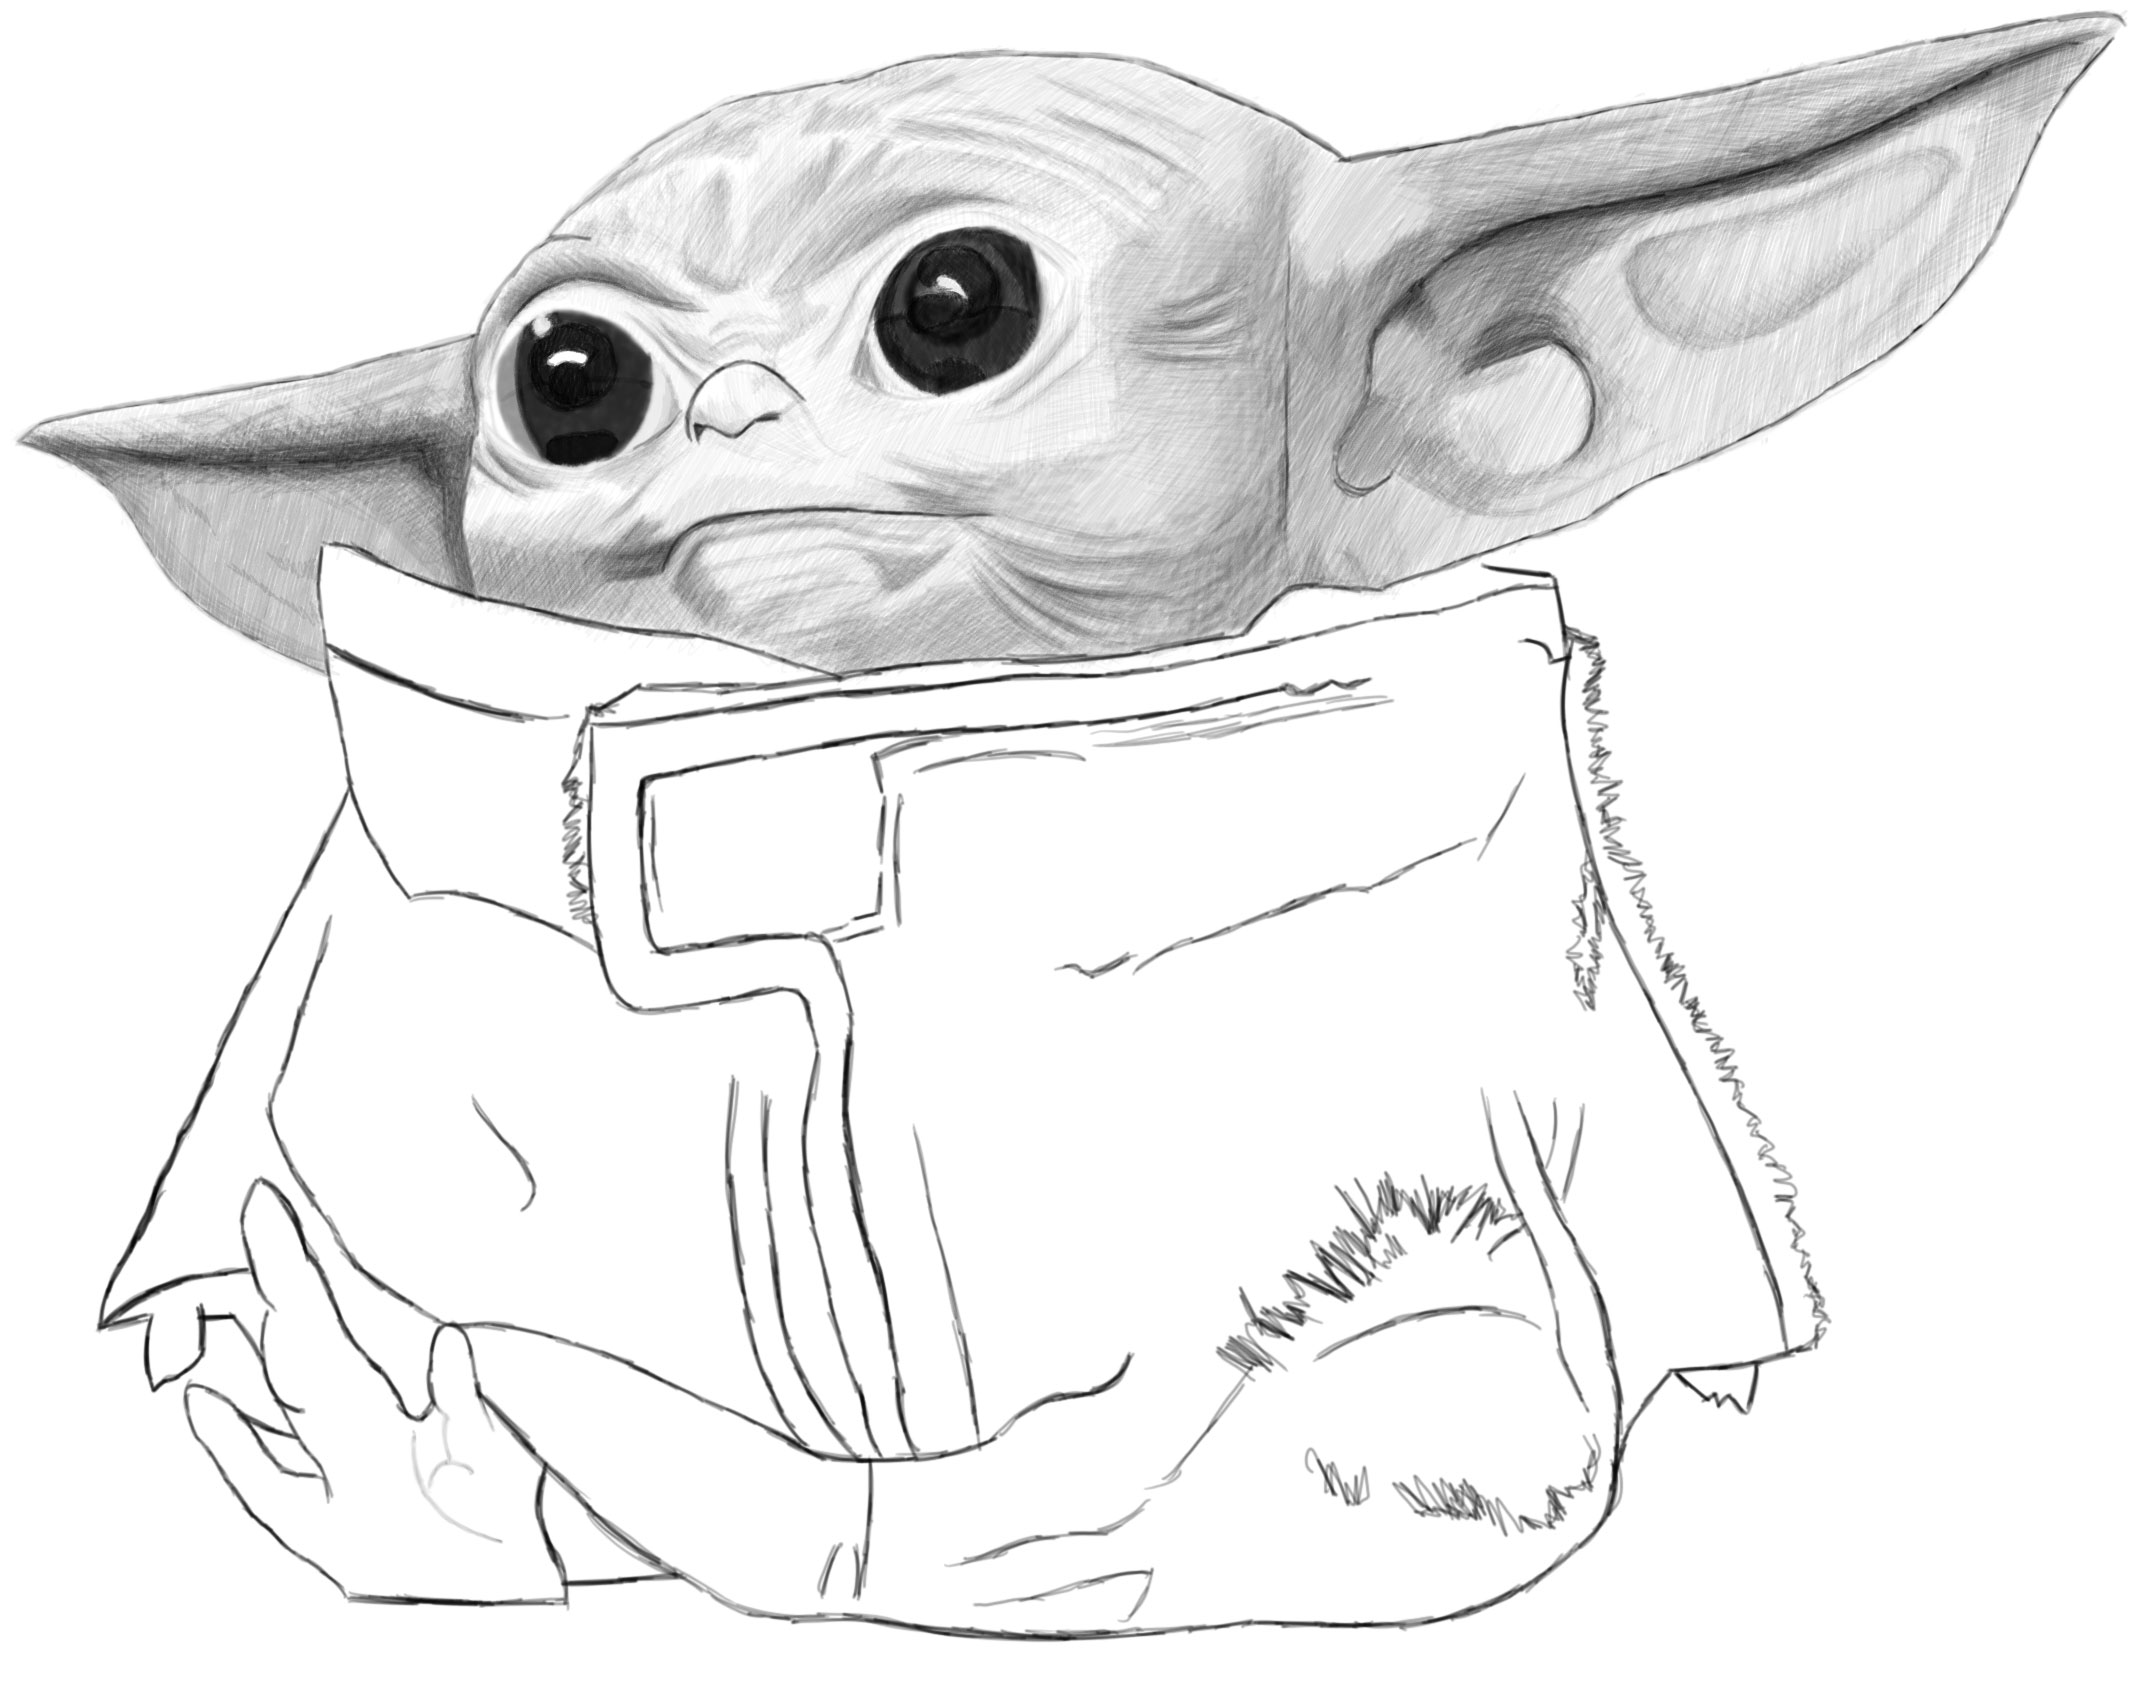
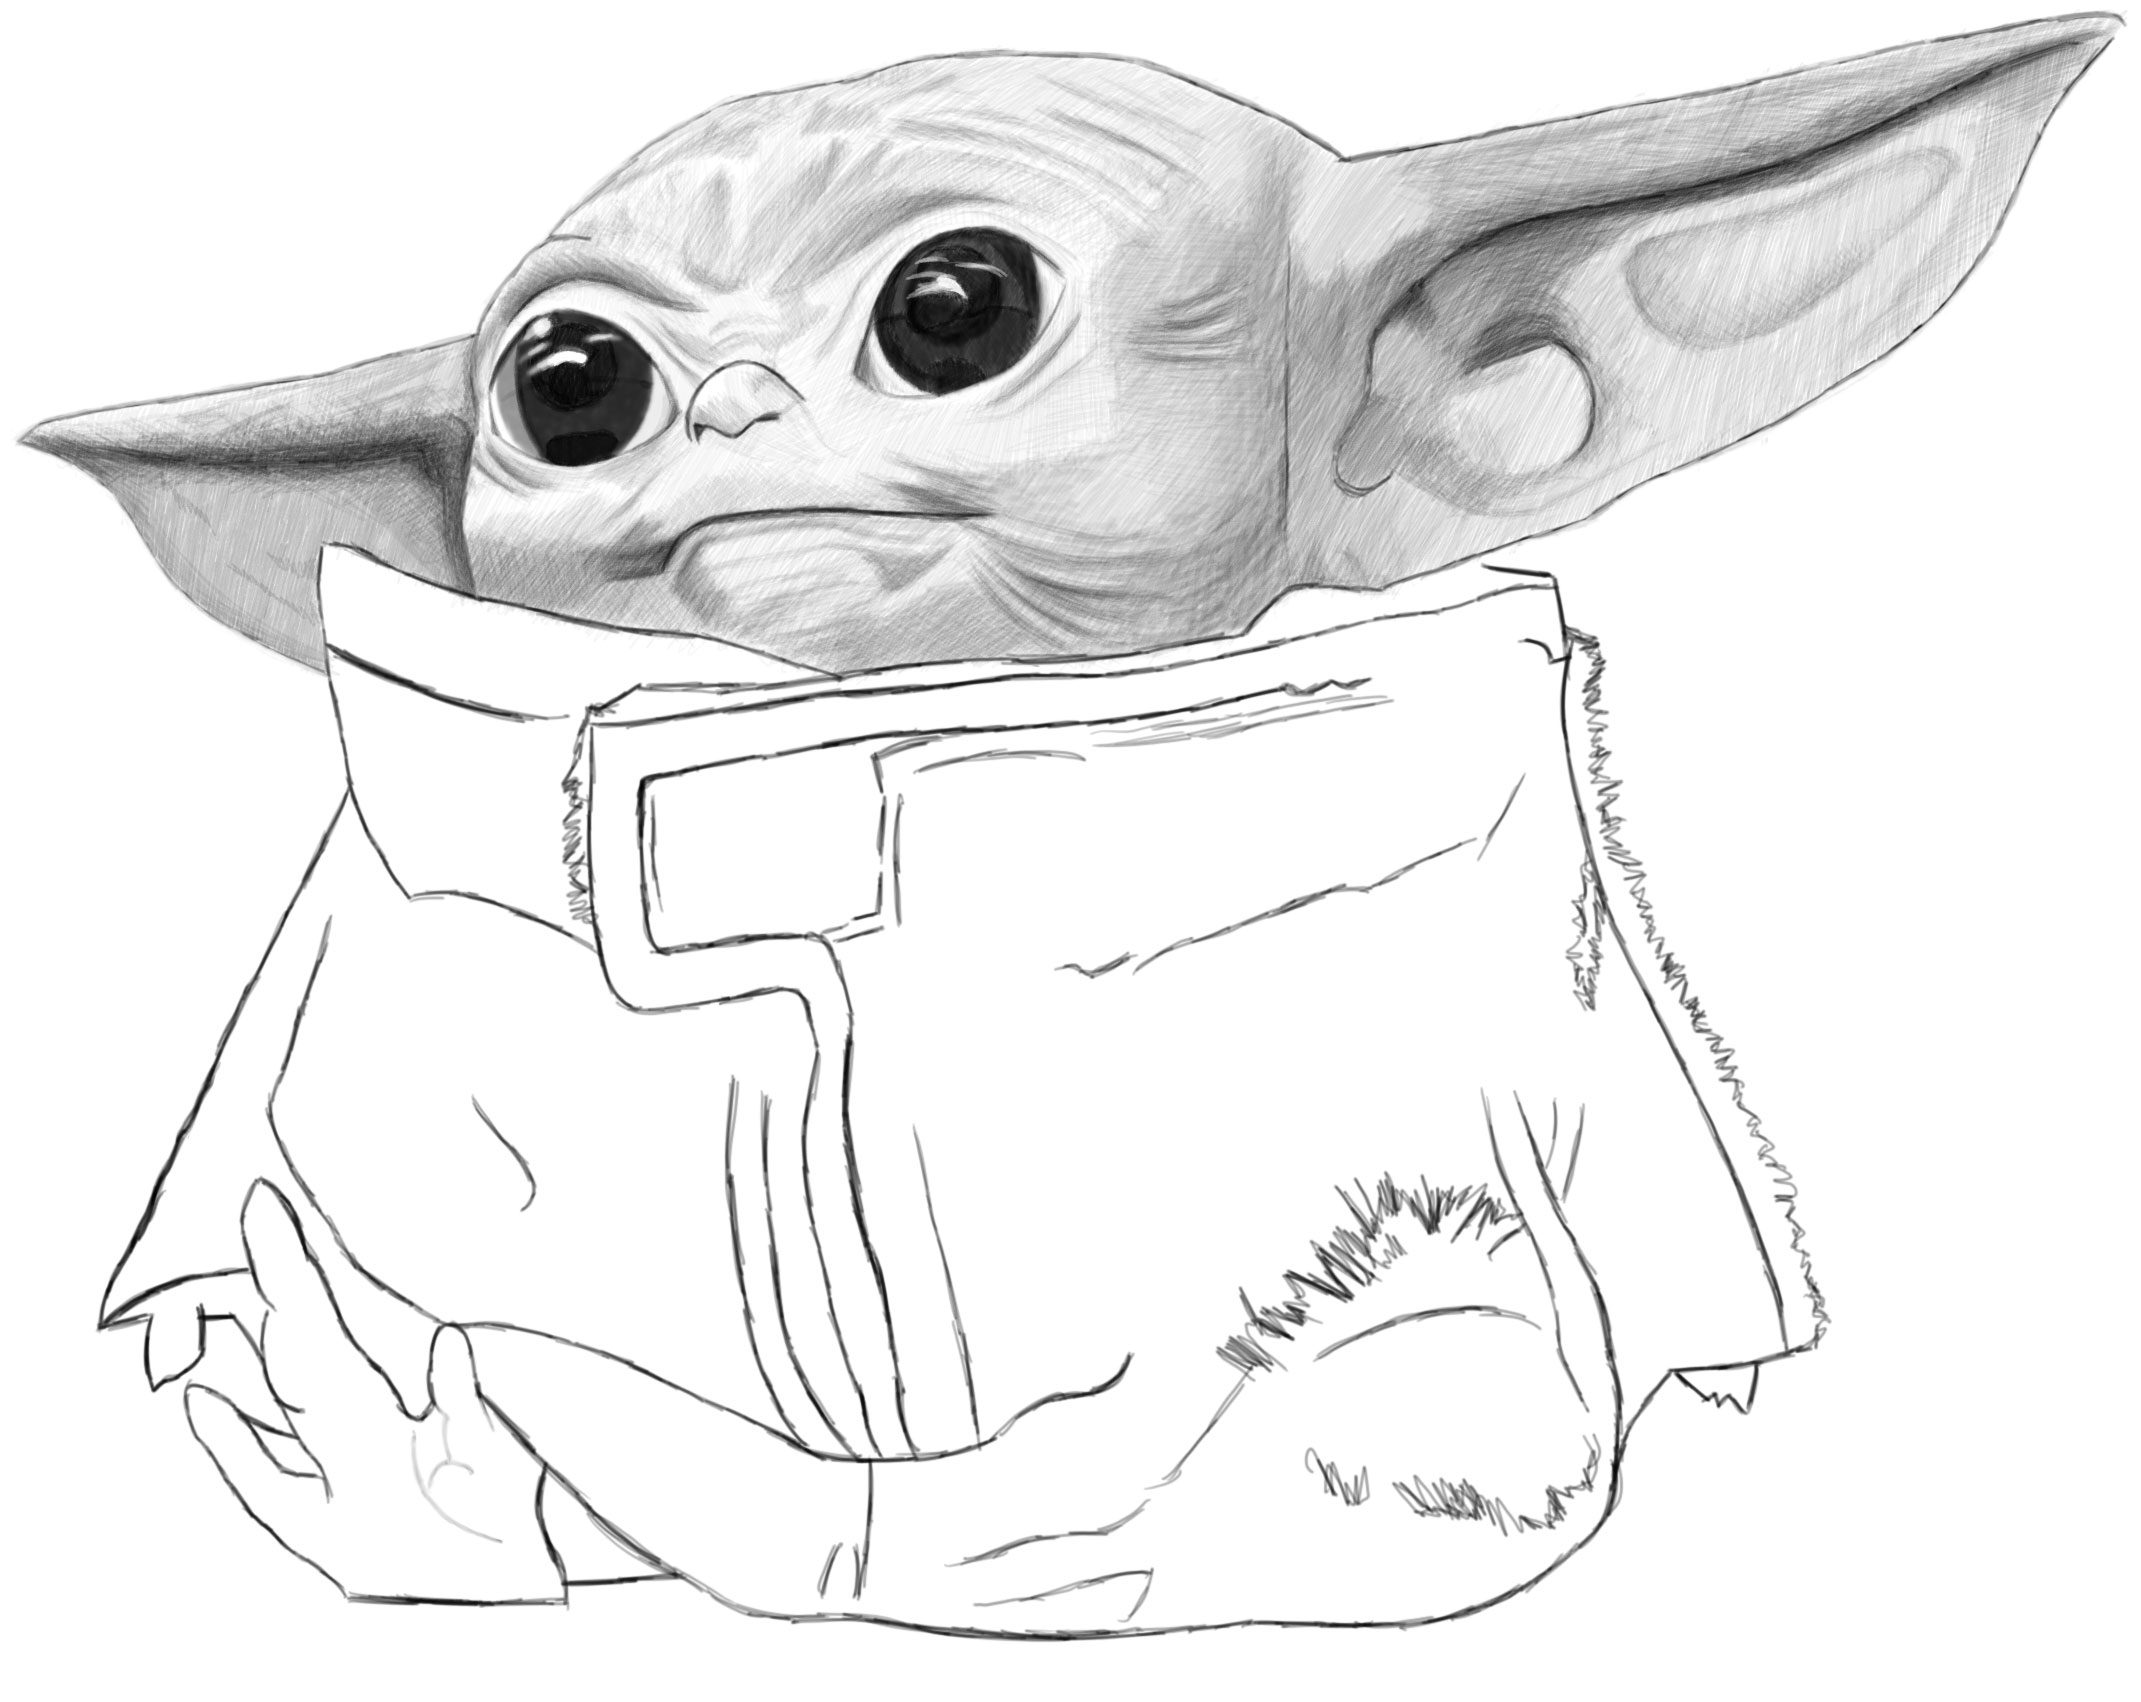
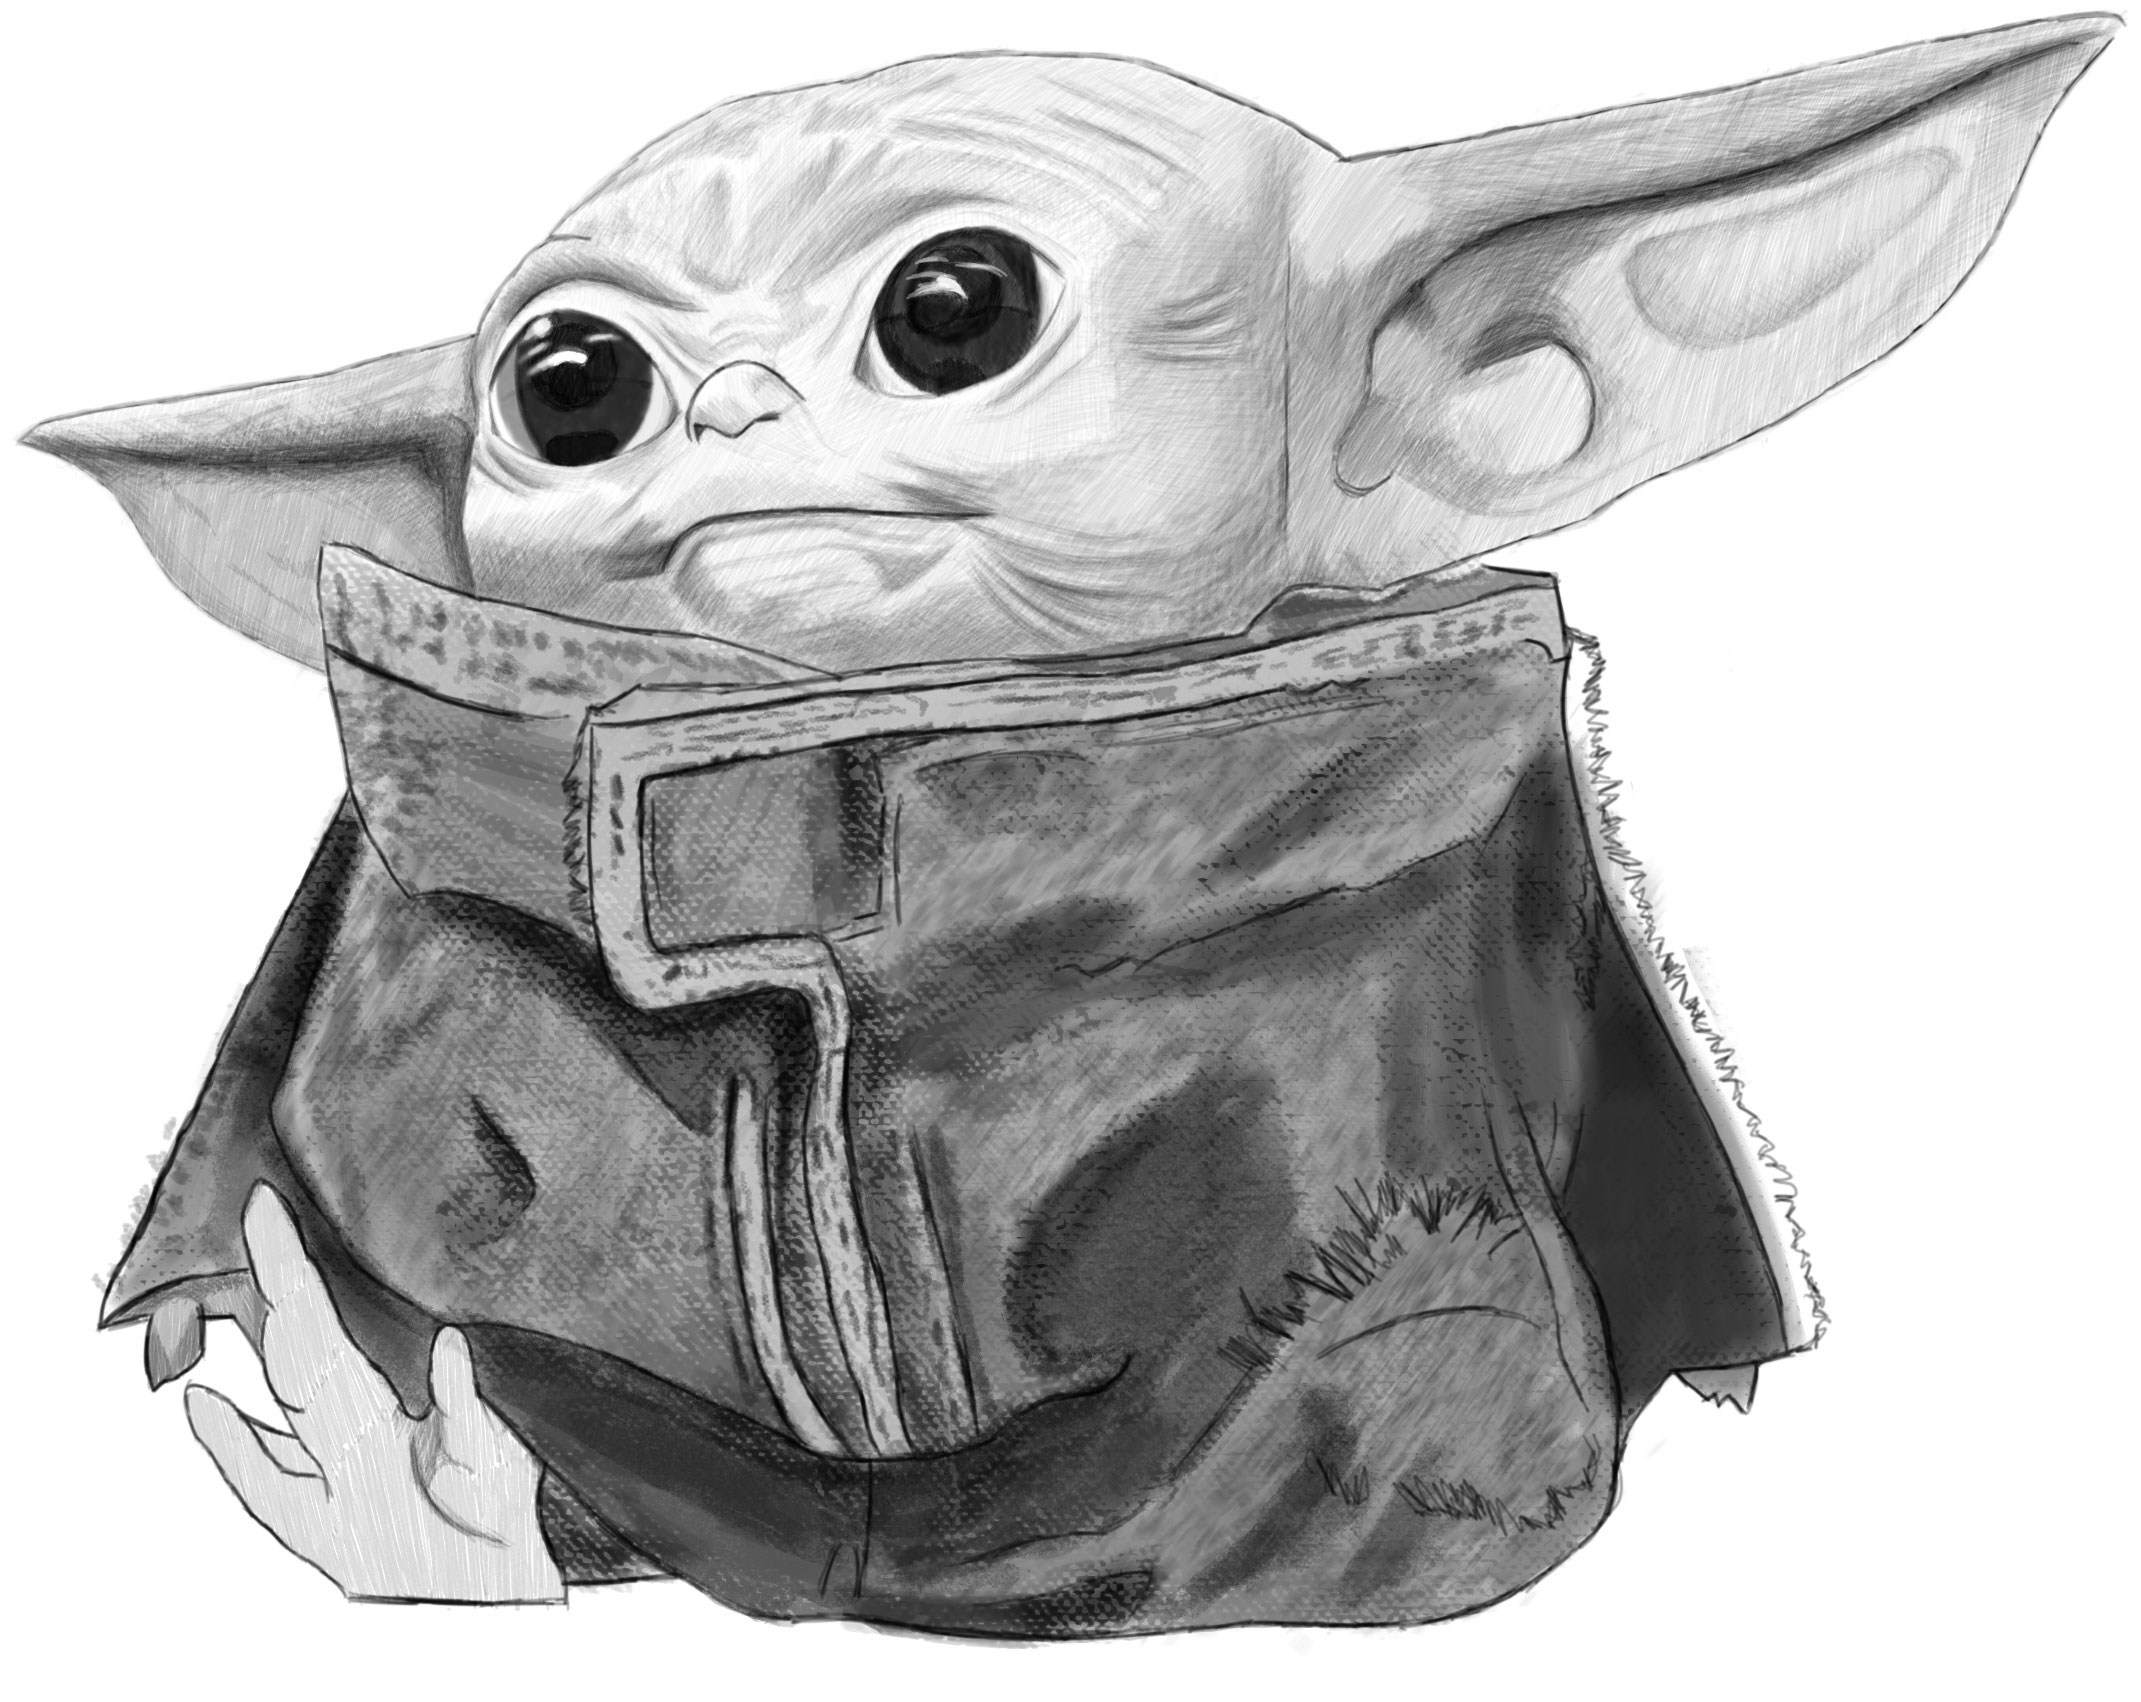
You can erase the guidelines and start shading baby Yoda.
(STEP 33)
Today I'll show you how to draw Rick from the Rick and Morty cartoon tv…
Today I'll show you how to draw Morty from the Rick and Morty cartoon tv…
Today I'll show you how to draw the spunky little rabbit, Kuromi, from My Melody…
Today I'll show you how to draw this cute "bean duck" that I found on…
Today I'll show you how to draw Sosuke and Ponyo in a bubble (chibi /kawaii…
Today I'll show you how to draw a Boo from Super Mario Bros in Kawaii…