Today we are going to work on mastering values and tones in your drawings. This is just one of the many things that you will need to learn in order to become a master drawer/artist.
Tones/values occur in nearly every part of a drawing that you will create. Learning how to create the perfect value for each spot on the drawing is what will turn your artwork into a masterpiece. But before you learn how to master tones/values in your drawings, you will have to work on your craft, which means, ughh, drawing exercises. Sorry.
Today, we will be working on value scales. What are “value scales,” you ask? Well, I was just about to tell you. Value scales are a tool that will help you understand tonal relationships in your drawings. It can also be used as a drawing exercise to learn how to make all of the possible values that your pencil (or whatever tool you are using) can make. Creating value scales also trains your eyes to be able to see and compare small value changes in your artwork. And in the exercises below, I will also show you how to use these value scales to create smooth gradients. Your ability to see and draw these value shifts will help you create beautiful depth in your future drawings.
Click Here or On Picture for the PDF File to Print Out
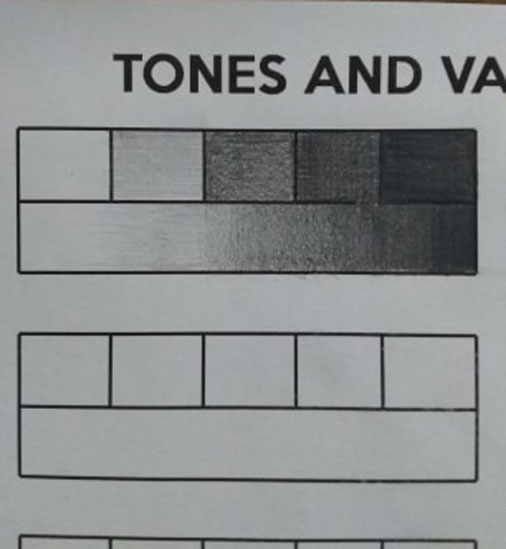
In this first exercise, you are going to create a 5 step value scale as well as practice creating a smooth gradation using those values that you created. This is a great way to become familiar with what range of tones (or values) your pencil can create. You can use any pencil that you want, whether it is a graphite pencil, charcoal pencil, or even colored pencil. This will help you create and see subtle tone variations within your artwork.
So here is how you do it:
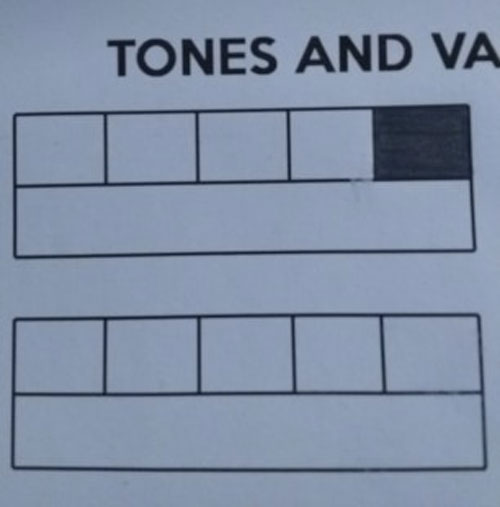
The Value Scale boxes should go from lightest (left) to darkest (right). So use your pencil to fill in the box on the right with the darkest value that you can create with your pencil.
The box on the far left will remain white.
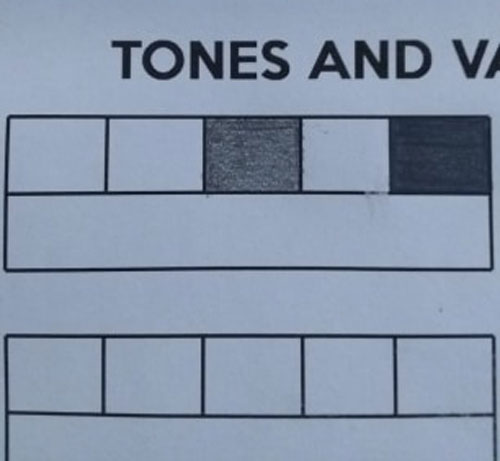
Now fill in the center box with the value that you think would be in the middle of the lightest and darkest. If you aren’t sure, it is always good to go with a lighter value because you can always darken it later on.
Now fill in the remaining boxes with values that are between the values that are around them. So for example, the 4th square should be a value that is darker than the 3rd square but lighter than the 5th square.
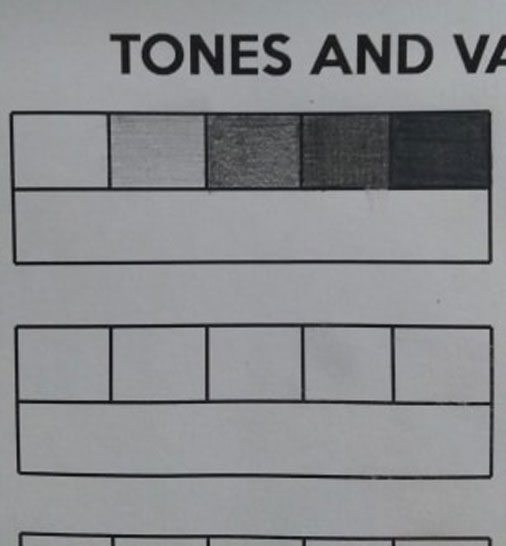
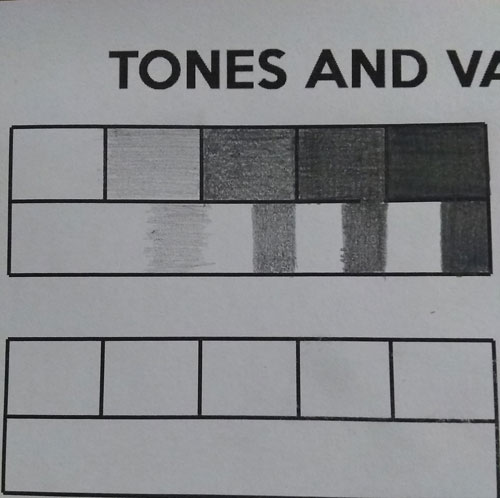
Now we are at the part where we create a smooth gradient from light to dark, using the same exact pencil. Below each rectangle, match the tone on the far right. If you don’t know what I mean, look at the picture above.
Now use your pencil to smoothly create a gradient. I suggest going from left to right on each of these values we create. Just lightly put value down and just keep make it darker as you go toward the right. Match the color to the left and match the color to the right and just gradually make it look as if the gradient is going from dark to light.
Click Here or on Picture for the PDF File to Print Out
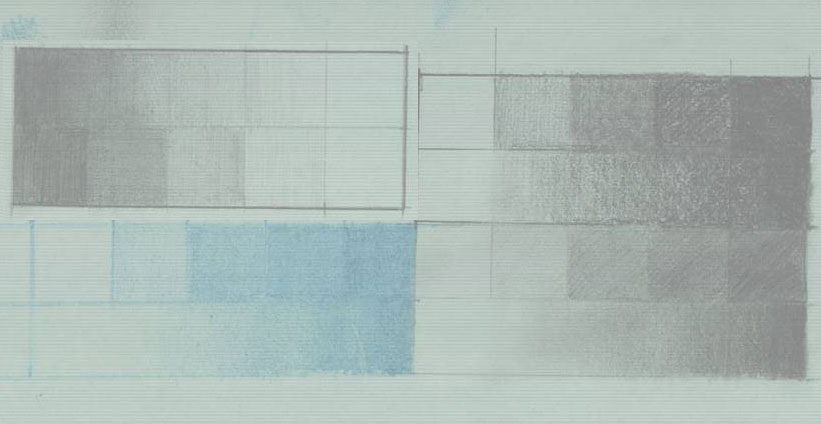
Now do the same thing for this 2nd printout, except this one spreads out with 8 boxes instead of 5. This makes it more difficult but the same rules apply.
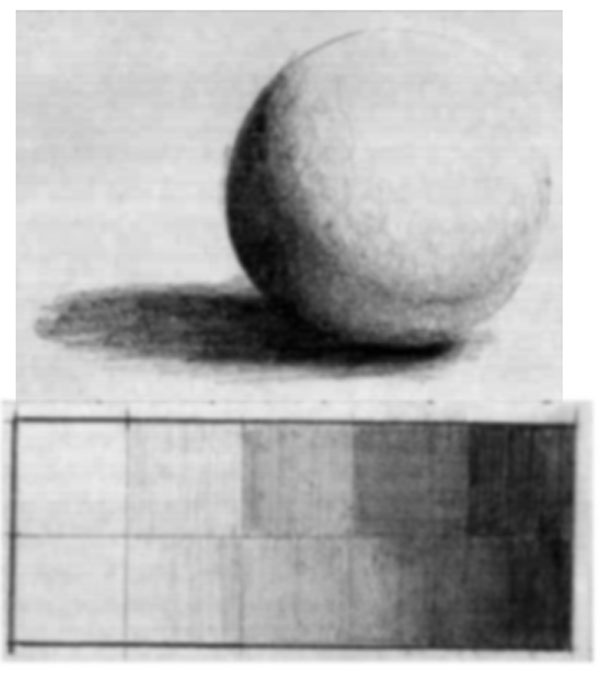
Once you have a value scale in hand, you can use that value scale to discover different values in things that you want to draw.
Hold up that value scale next to the thing that you want to draw.
Choose a value on the subject matter (the item that you want to draw) and try to match it up with your value scale. You probably will need to move your value scale around to find a match. Do this with another value on the scale.
Now you have a good idea of what value to use in your drawing. Lay down that value. I suggest doing this for all of the darkest parts of your drawing first.
Repeat until you have finished your drawing.
Today I'll show you how to draw Rick from the Rick and Morty cartoon tv…
Today I'll show you how to draw Morty from the Rick and Morty cartoon tv…
Today I'll show you how to draw the spunky little rabbit, Kuromi, from My Melody…
Today I'll show you how to draw this cute "bean duck" that I found on…
Today I'll show you how to draw Sosuke and Ponyo in a bubble (chibi /kawaii…
Today I'll show you how to draw a Boo from Super Mario Bros in Kawaii…