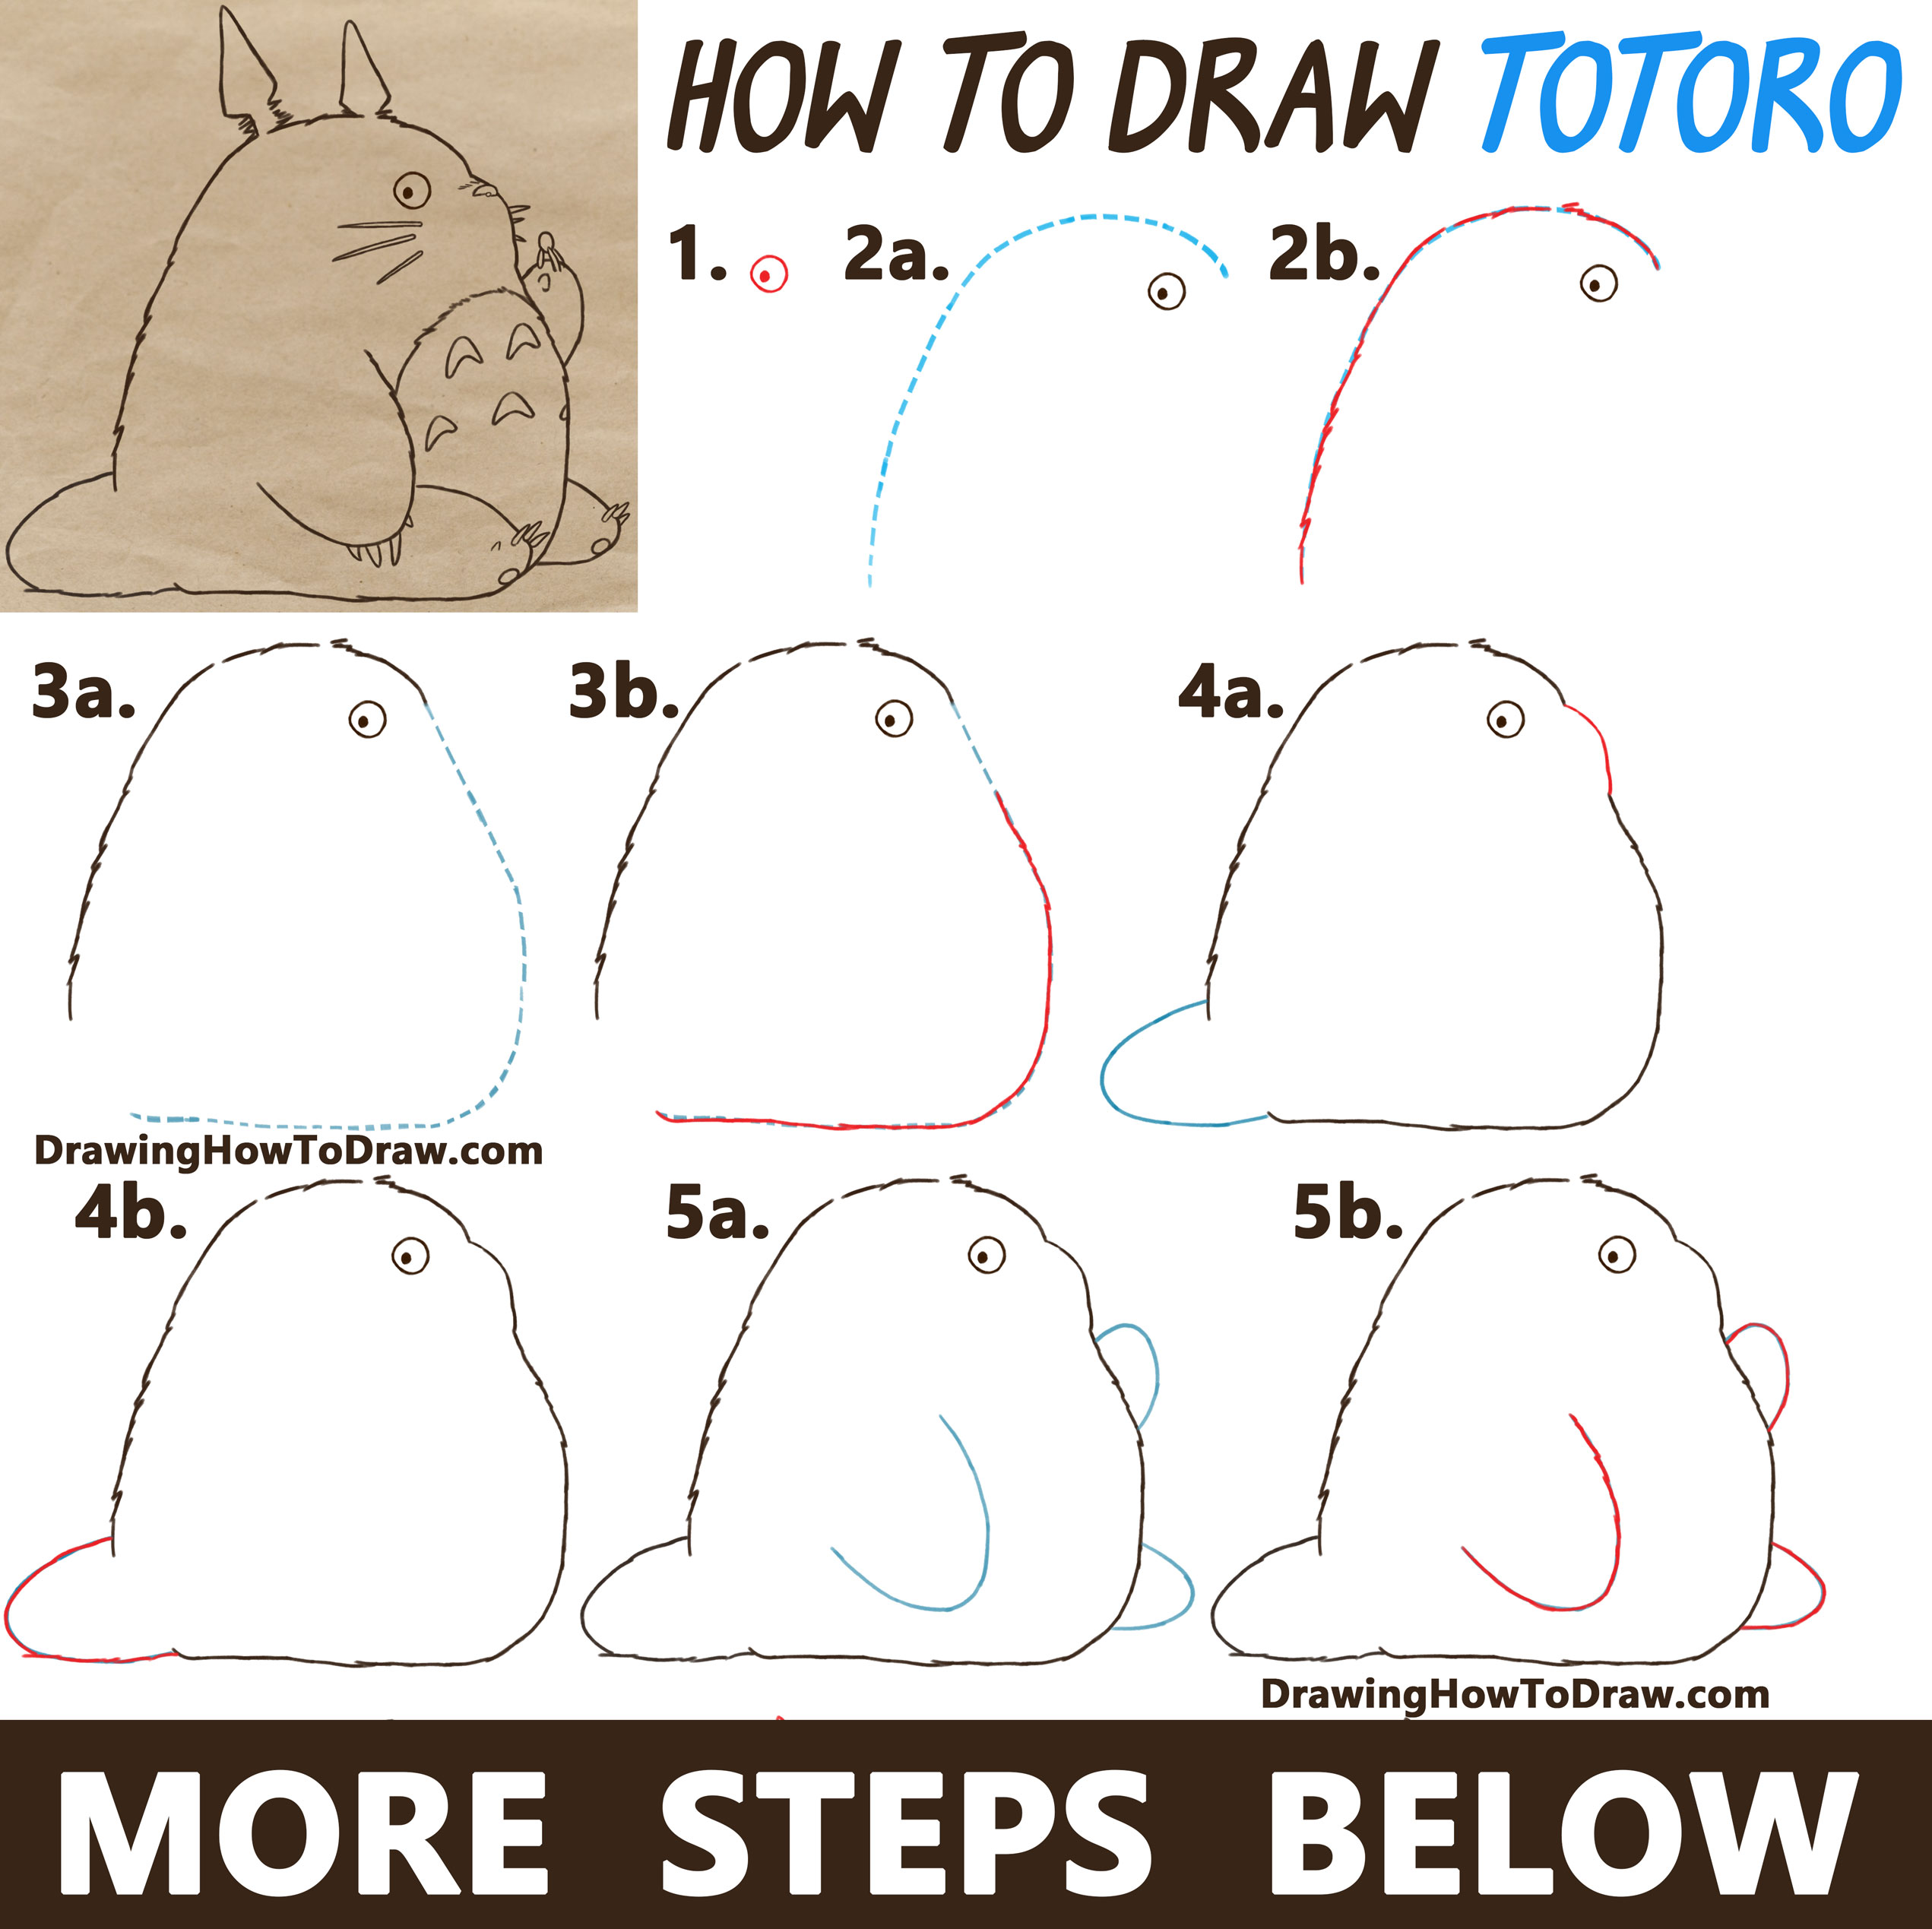
Today I’ll show you how to draw Totoro, the creature from the animated movie, My Neighbor Totoro. I will guide you to drawing him with many steps. I hope you enjoy the tutorial. Happy Drawing!
(STEP 01) Draw his eye. Draw a circle with an oval inside of it.
(STEP 02A) Lightly draw an upside-down “j” shape as a guideline for the fur that you will draw in the next step.
(STEP 02B) Use the guideline from the previous step to help you draw the fur. Draw zig-zaggy lines all around the guide.
(STEP 03A) Lightly draw a “J”-like shaped guideline.
(STEP 03B) Use the guideline from the previous step to help you draw the fur. Draw zig-zaggy lines all around the guide.
(STEP 04A) Draw a small hump on the front of his face (right side). Lightly draw a “U” shaped guideline for his tail.
(STEP 04B) Use the guideline from the previous step to help you draw the tail.
(STEP 05A) Lightly draw 3 “U” shaped guidelines.
(STEP 05B) Use the guideline from the previous step to help you draw the fur. Draw zig-zaggy lines all around the guide.
(STEP 06A) Draw a curved / angled line for the front leg. Lightly draw a curved guideline on his tummy.
(STEP 06B) Use the guideline from the previous step to help you draw the fur. Draw zig-zaggy lines all around the guide. Draw upside-down “V” shapes for his ears.
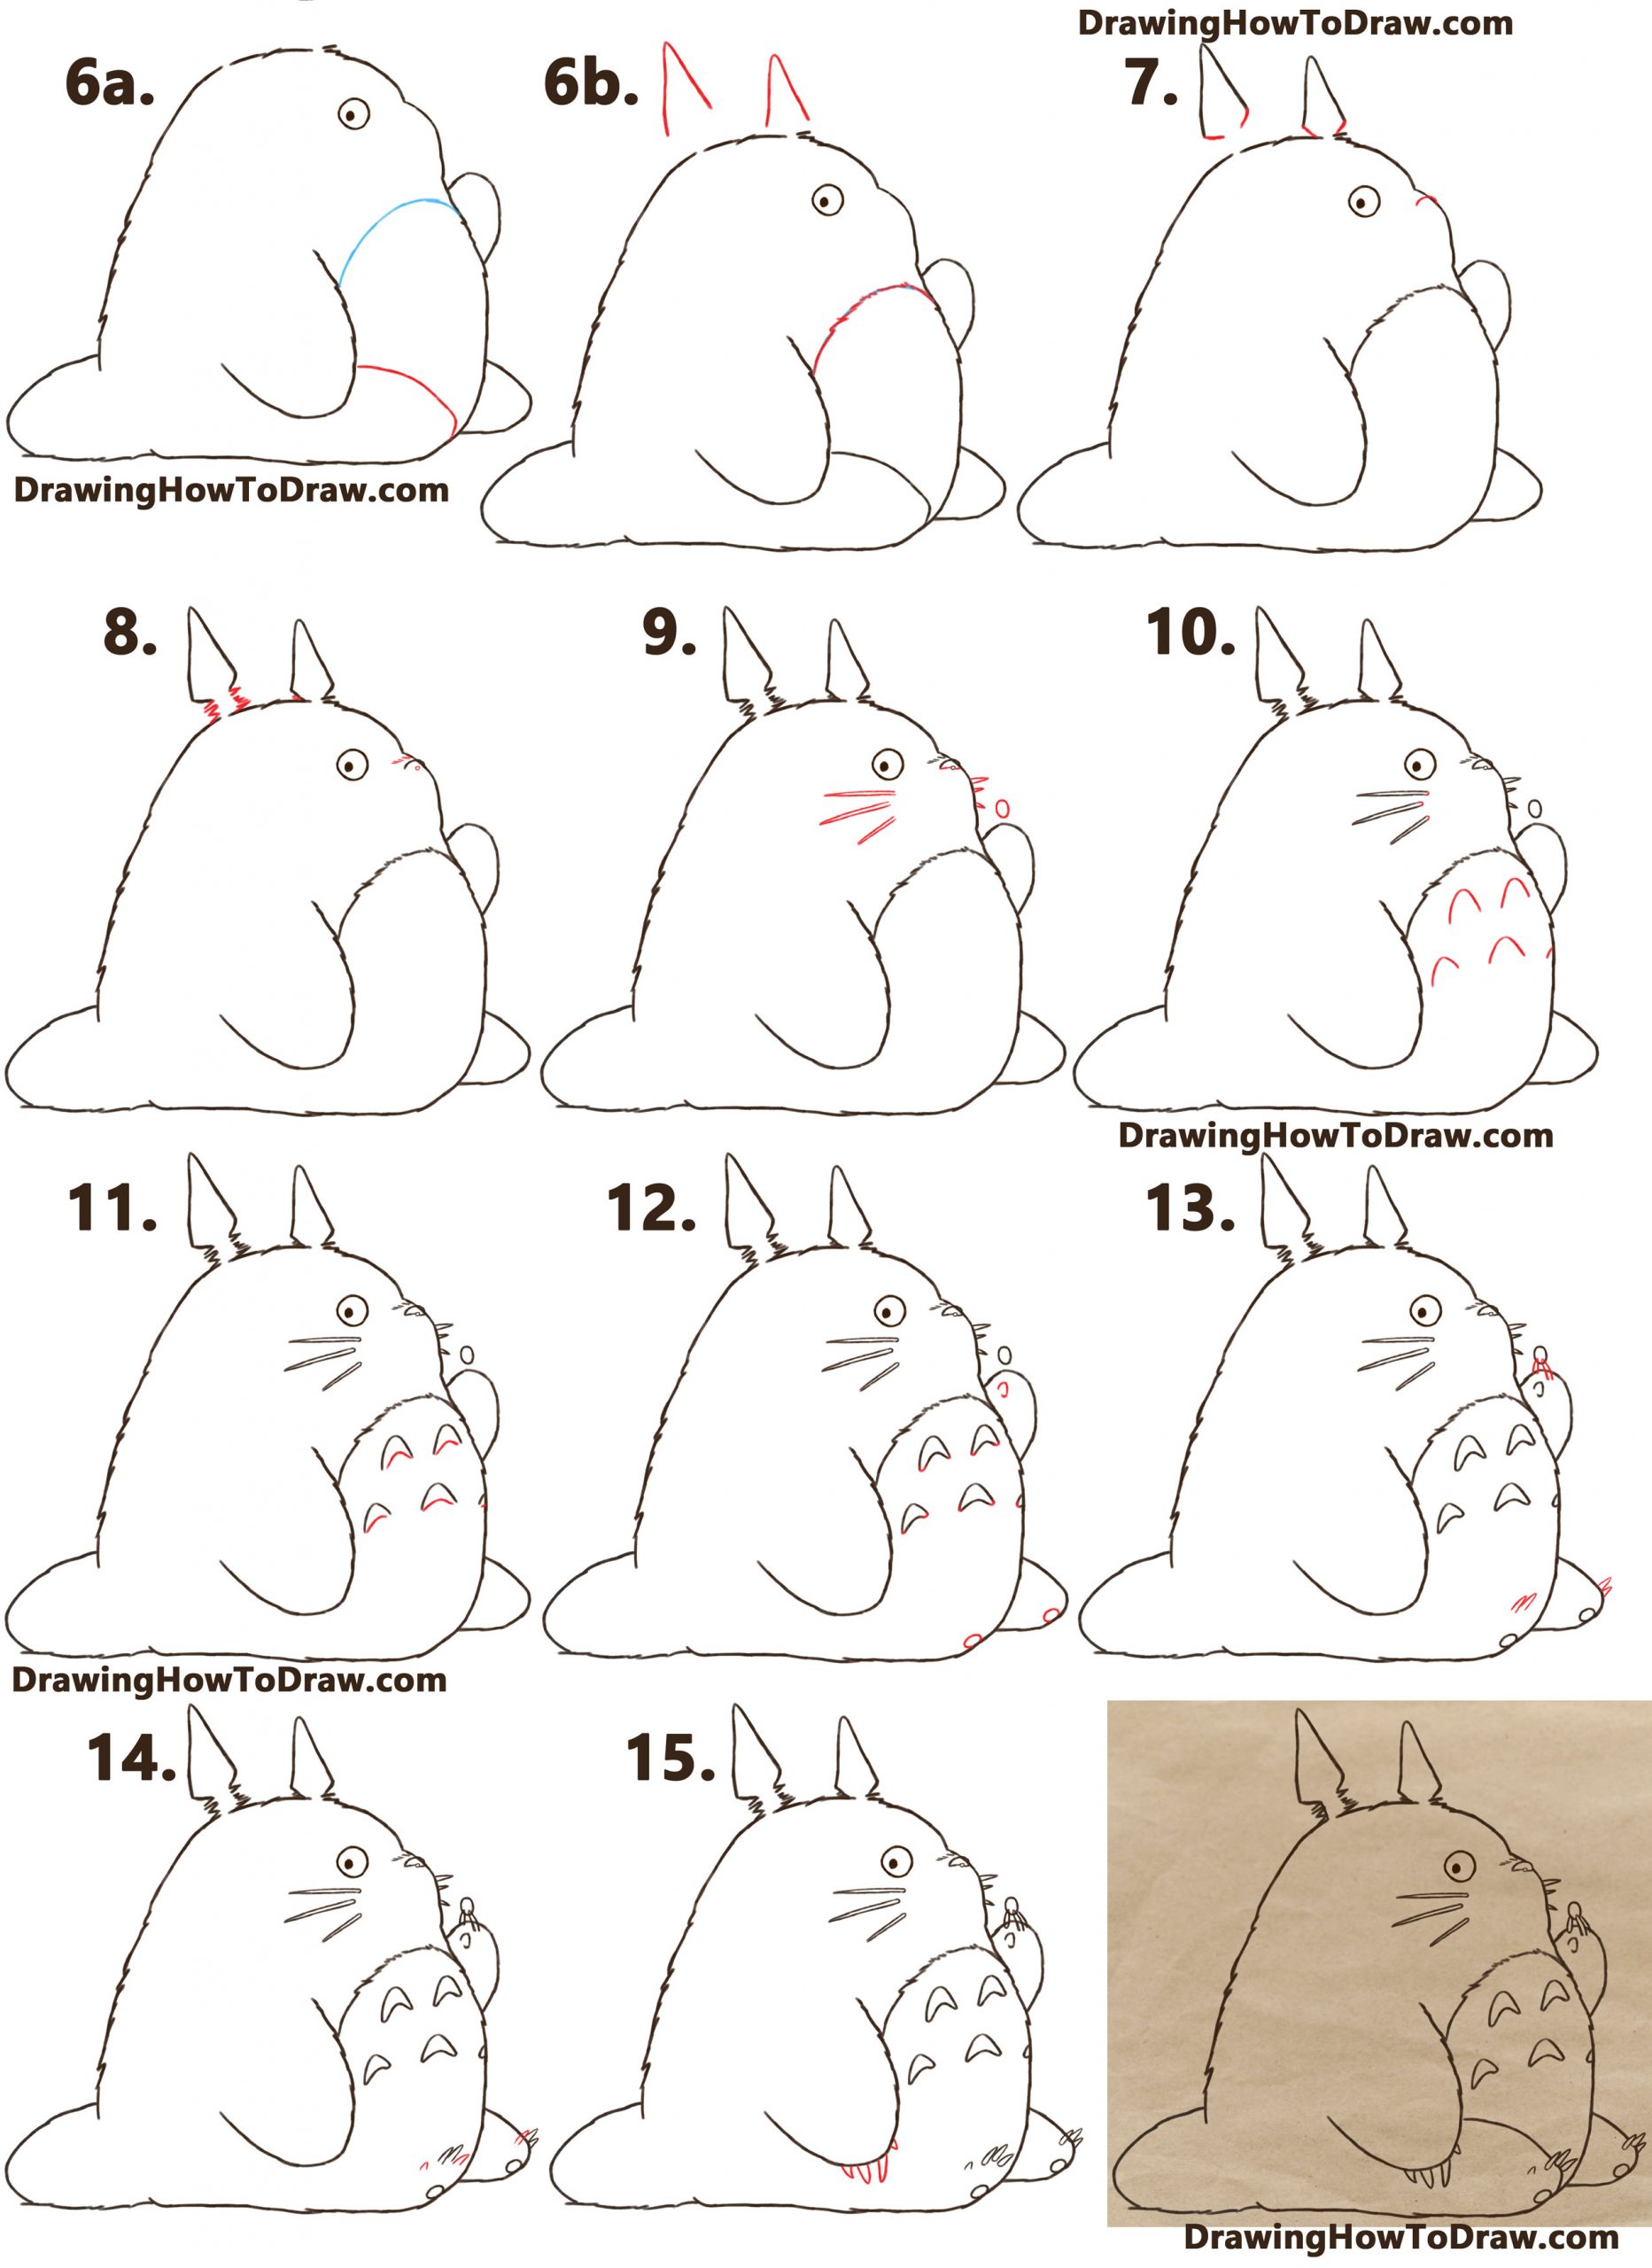
(STEP 07) Draw slanted lines at the bottom of each ear. Draw a curved line for the top of his nose.
(STEP 08) Draw lines going in all different directions (sort of looks like letter “V” shapes) for the fur below his ears. Draw a circle on his nose.
(STEP 09) Draw sideways “V” shapes (the ones on the left are very long and thin). Draw an oval shape above his right paw.
(STEP 10) Draw some “U” shapes.
(STEP 11) Draw a slightly curved / slightly angled line that makes these shapes look like boomerangs.
(STEP 12) Close up the boomerang shapes with curved lines. Draw some partial ovals.
(STEP 13) Draw some curved, tall “V” shapes for his hand’s nails. Draw “M”-like shapes on the feet’ nails.
(STEP 14) Draw more “V”-like shapes on his feet.
(STEP 15) Draw curved lines at the bottoms of the nails. Also, draw a curved line on the hand as well. Draw more “V” shaped nails on the other hand.
(STEP 16) Erase any unneeded lines and darken up the lines.
Today I'll show you how to draw Rick from the Rick and Morty cartoon tv…
Today I'll show you how to draw Morty from the Rick and Morty cartoon tv…
Today I'll show you how to draw the spunky little rabbit, Kuromi, from My Melody…
Today I'll show you how to draw this cute "bean duck" that I found on…
Today I'll show you how to draw Sosuke and Ponyo in a bubble (chibi /kawaii…
Today I'll show you how to draw a Boo from Super Mario Bros in Kawaii…
View Comments
this app is so good