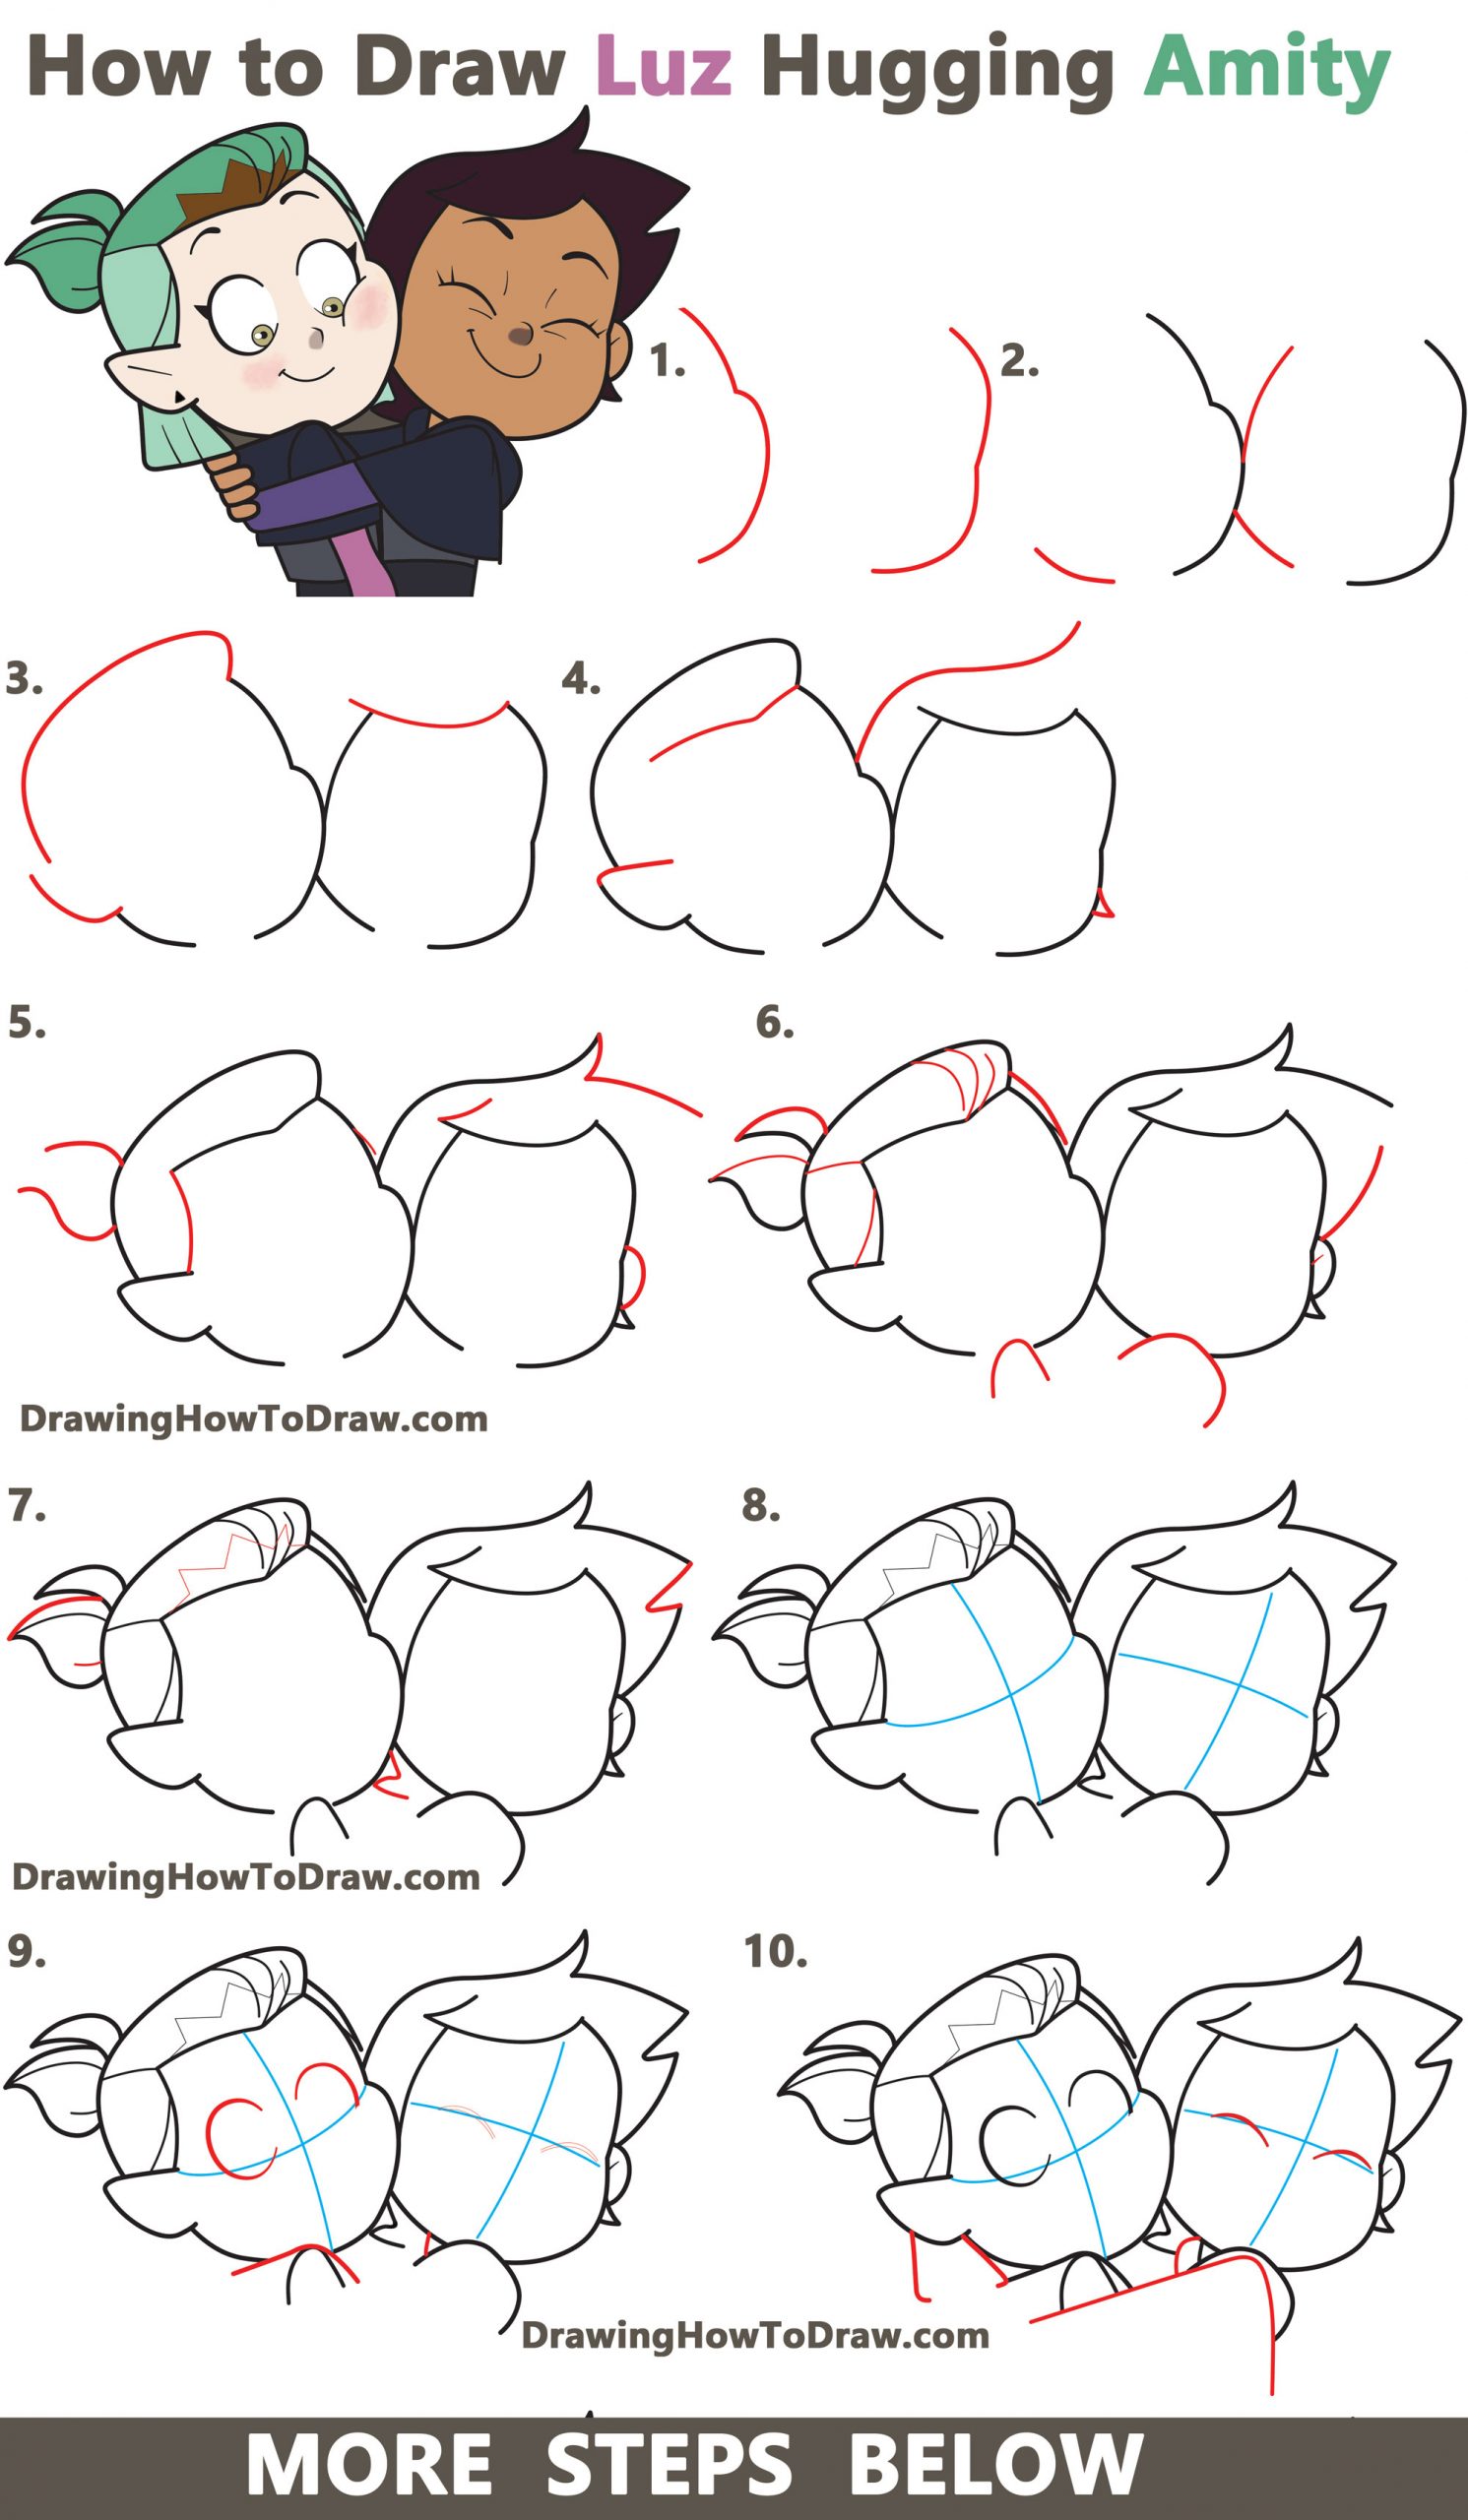
Today I’ll show you how to draw Luz and Amity hugging from Disney’s Owl House. I have broken it down into many, many steps to make it as easy as possible for you to follow along. I hope you enjoy the drawing tutorial. Find it below. Happy Drawing!
(STEP 01) Draw two #3-like shapes to start the picture off.
(STEP 02) Draw curved lines on the left side of the faces.
(STEP 03) Draw some curved lines for their hair. Also, draw an “L”-like shape for the ear on the 1st face.
(STEP 04) Draw a flattened “V” shape for the bangs on the 1st face. Also draw the top of her ear, which looks like a sideways #7. Draw a sideways “S”-like shape and a sideways “V” shape on the 2nd face.
(STEP 05) Draw a sideways “S” and “C” shape, as well as 2 curved lines on the 1st face. Draw a curved line, a curved #7 shape, and a backward “C” shape on the 2nd face.
(STEP 06) Draw a bunch of curved lines and a sideways “C” shape and an upside-down “U” shape for shoulders.
(STEP 07) Draw some curved lines. Lightly draw zig-zags on the 1st face’s hair (this is where her hair is a slightly different color). Draw a “Z” shape to the right of her face. Draw a sideways “V” shape on the 2nd face.
(STEP 08) Lightly draw guidelines through the face. These will be erased later on but will help you place the facial features in the right place.
(STEP 09) Draw a “C” shape eye and a partial backward “C” for the first face’s eyes. Draw curved lines for the 2nd face’s eyes. Draw a shoulder and neck.
(STEP 10) Draw 2 “J” shapes for the hair on the 1st face. Fill in the eyes on the 2nd face. Draw an upside-down “J” shape below her face. Draw a curved #7 like shape at the bottom of the picture.
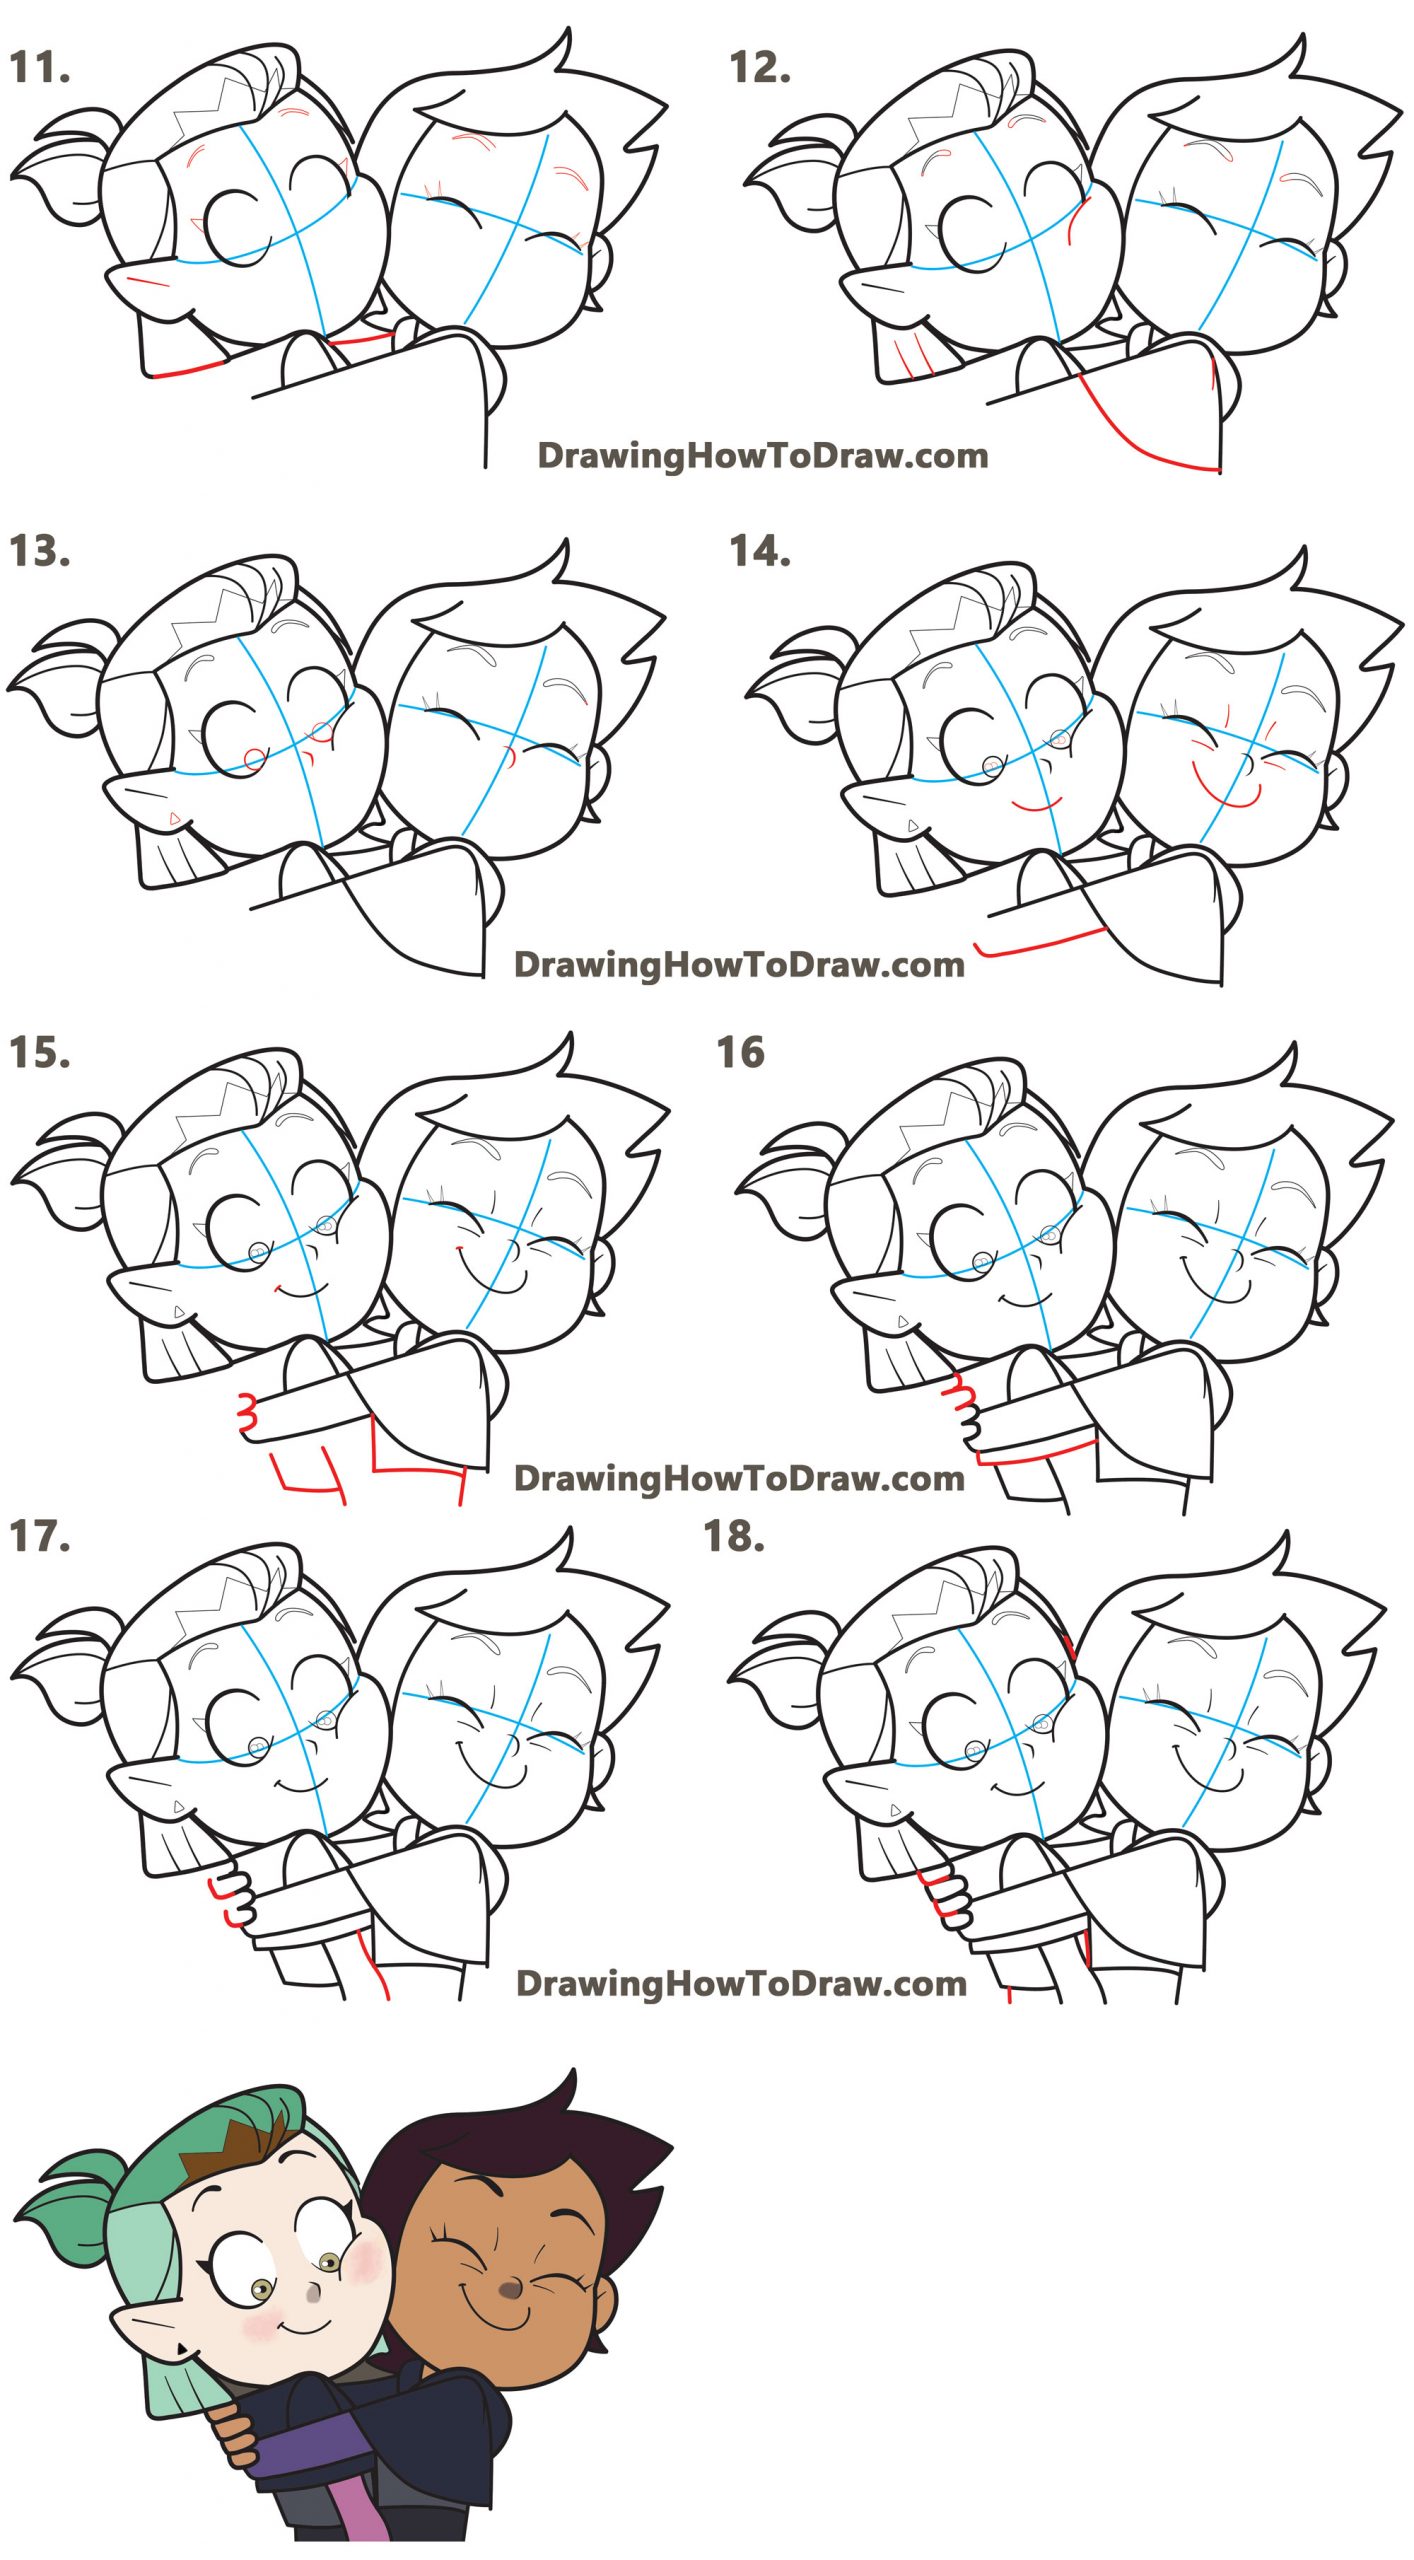
(STEP 11) Draw “V” shaped eyelashes. Draw some lines. Draw curved lines for eyebrows.
(STEP 12) Draw curved lines on either end of the eyebrows. Draw some curved lines and straight lines as well.
(STEP 13) Draw a circle and a sideways #6 shape inside the eyes of the first girl. Draw a triangle on her ear. Draw a #7 shape for her nose. Draw a backward “C” shape for the 2nd face’s nose.
(STEP 14) Draw sideways #8 shapes, curved lines, and a sideways “L” shape.
(STEP 15) Draw a curved line a the end of each smile. Draw a #3 and #44 shape.
(STEP 16) Draw another #3 shape(these are fingers) and a sideways “L” shape.
(STEP 17) Draw an “L” shape above 2 of her fingers. Also, draw a wavy line.
(STEP 18) Draw more “L” shapes on top of the fingers. Then finish up the picture with a few more lines.
(STEP 19) Erase guidelines and un-needed lines.
(STEP 20) Color them in.
Today I'll show you how to draw Rick from the Rick and Morty cartoon tv…
Today I'll show you how to draw Morty from the Rick and Morty cartoon tv…
Today I'll show you how to draw the spunky little rabbit, Kuromi, from My Melody…
Today I'll show you how to draw this cute "bean duck" that I found on…
Today I'll show you how to draw Sosuke and Ponyo in a bubble (chibi /kawaii…
Today I'll show you how to draw a Boo from Super Mario Bros in Kawaii…
View Comments
This is very cute.
Also can you do a gabby’s dollhouse character?