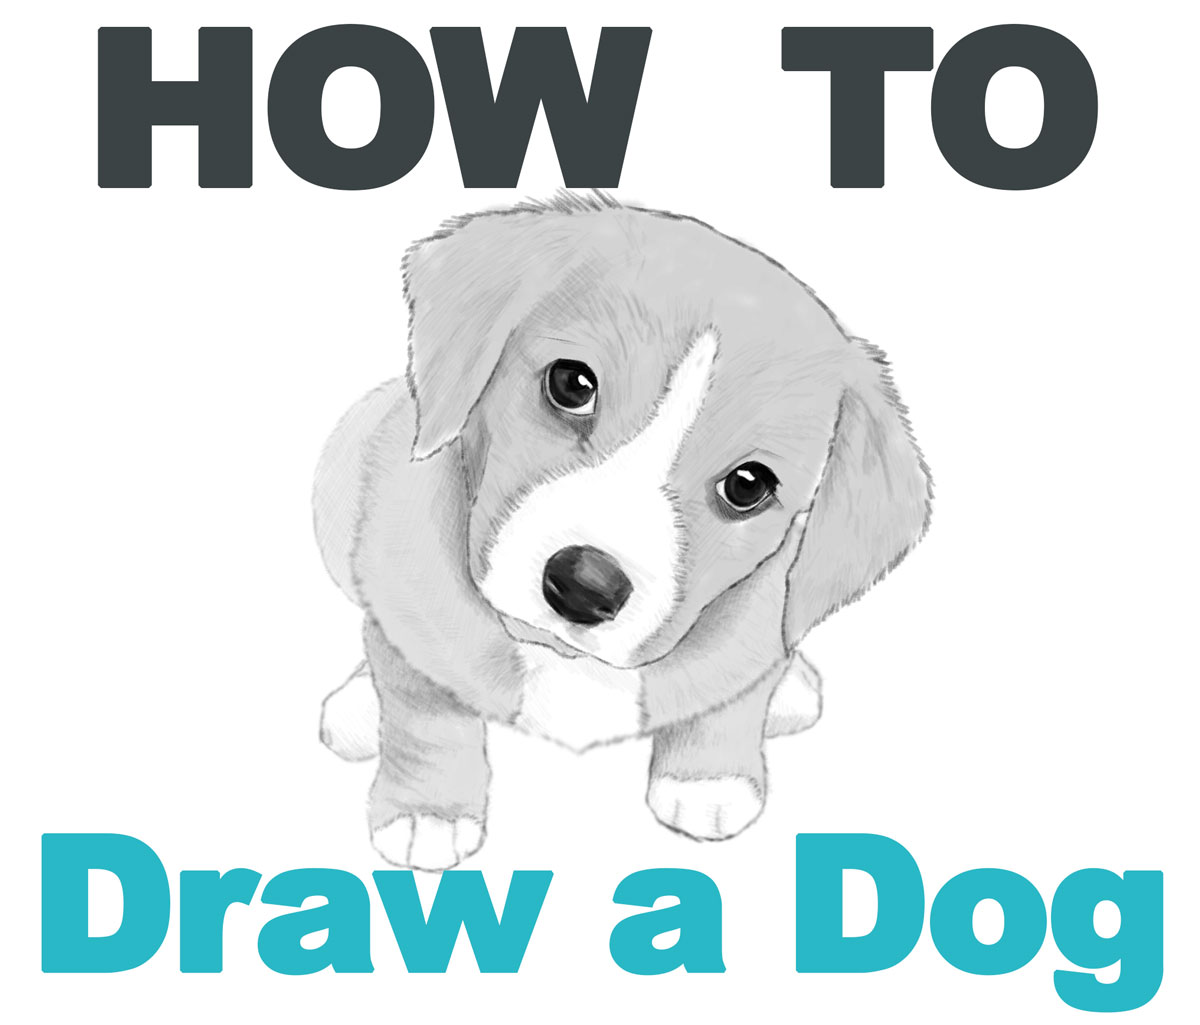
Today I’ll show you how to draw a realistic dog or puppy. Drawing dogs isn’t as tough as you think it is. I will guide you through drawing this cute little puppy with almost 20 steps. Find out how to draw this dog, with this simple step-by-step lesson below. Happy Drawing!
So, to start off, all of the beginning steps should be drawn as lightly as possible. We will be drawing guidelines to help us draw the puppy.
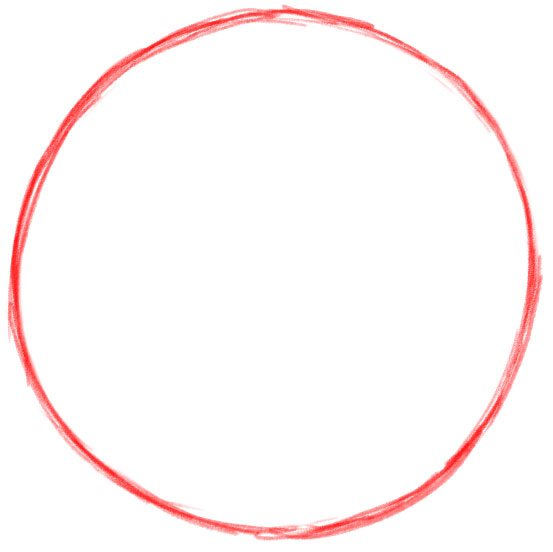
Lightly draw a circle. It doesn’t need to be perfect.
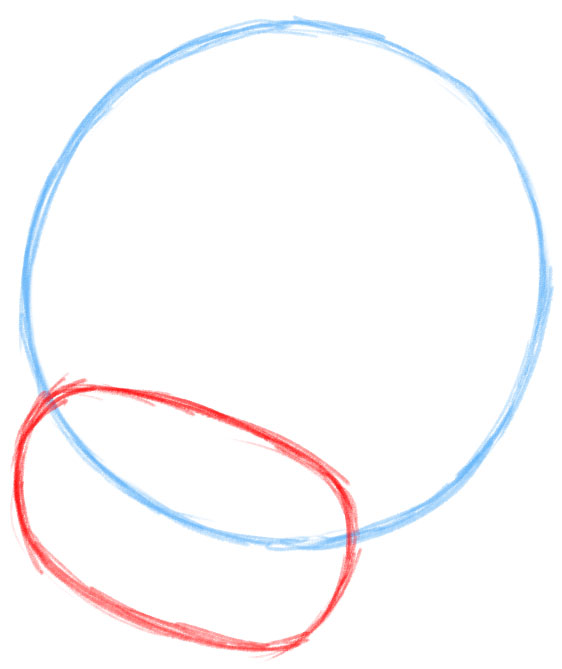
Lightly draw this rectangle/oval shape. This is a guideline and will be erased later on.
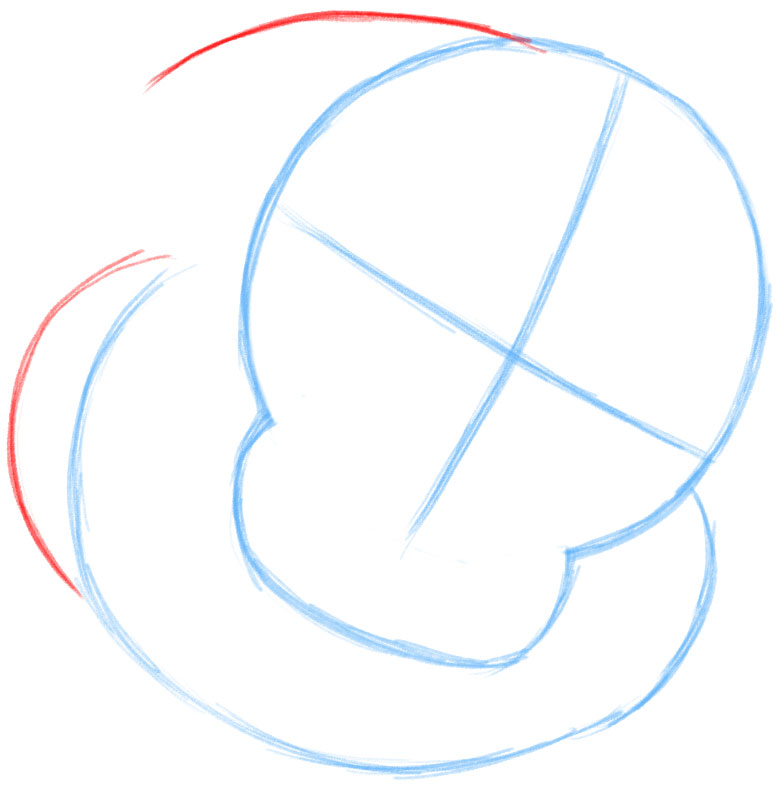
As you see, I have erased the bottom of the circle and the top of the oval. Lightly draw guidelines through the circle. Lightly draw part of an oval. All of these lines will be erased, later on, so draw them very lightly.
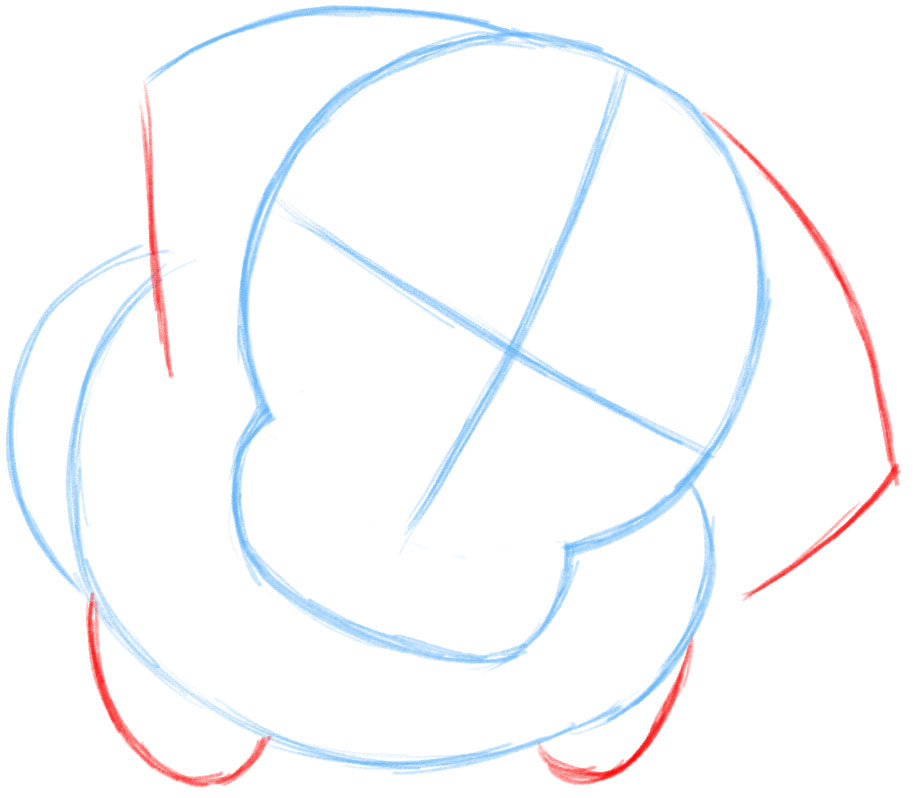
Draw some more guidelines, this time the ears and parts of the legs. These also are guidelines and need to be drawn lightly.
Lightly draw some more guidelines.
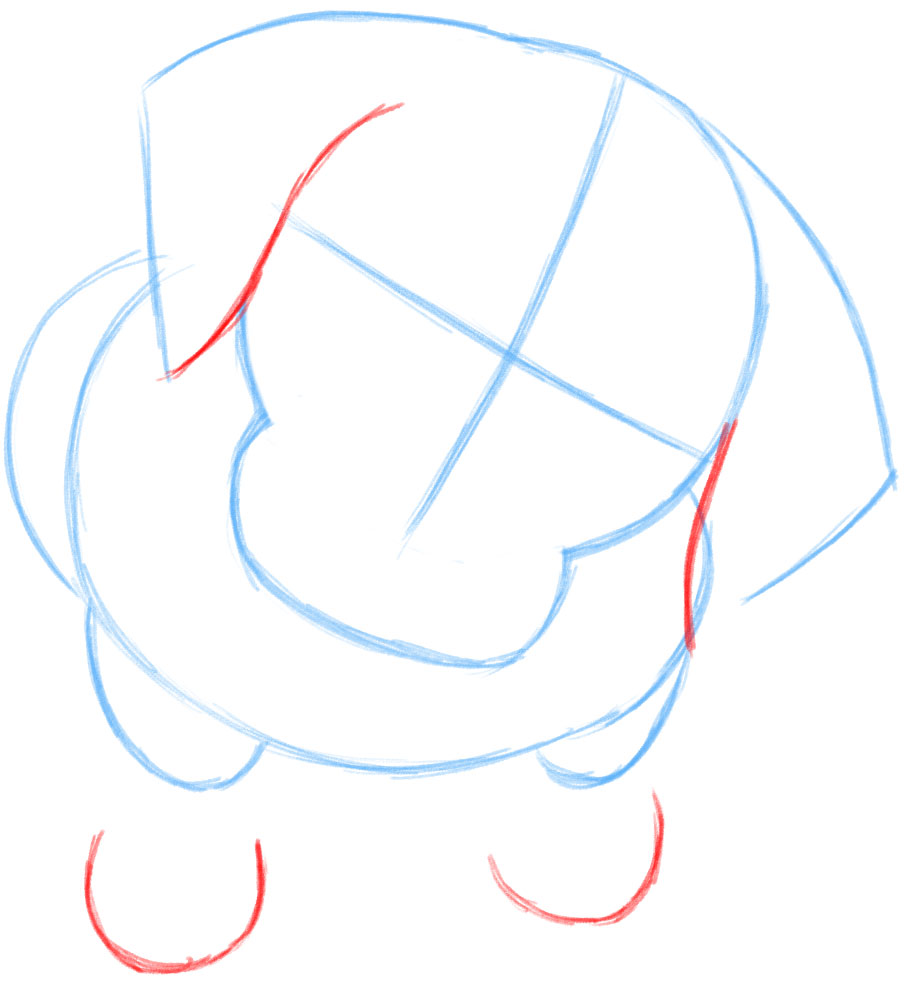
Lightly draw an “S”-like shape, a wavy line, and 2 half circles. These are guidelines and should be drawn lightly.
Draw some lines on the right leg and ear. Draw a tall “U”-like shape for the left leg. Also, draw a backward #7-like shape for the back leg. These are all guidelines and need to be drawn lightly.
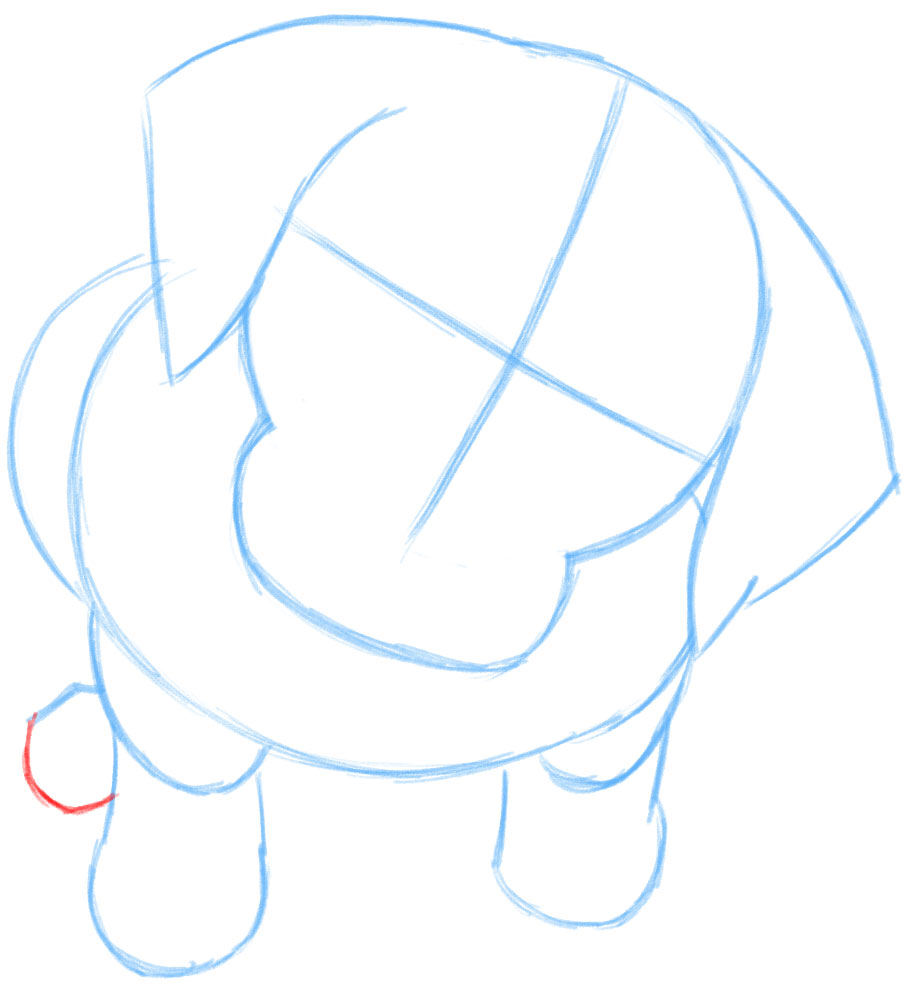
This is the last guideline. Draw a curved line on the back leg.
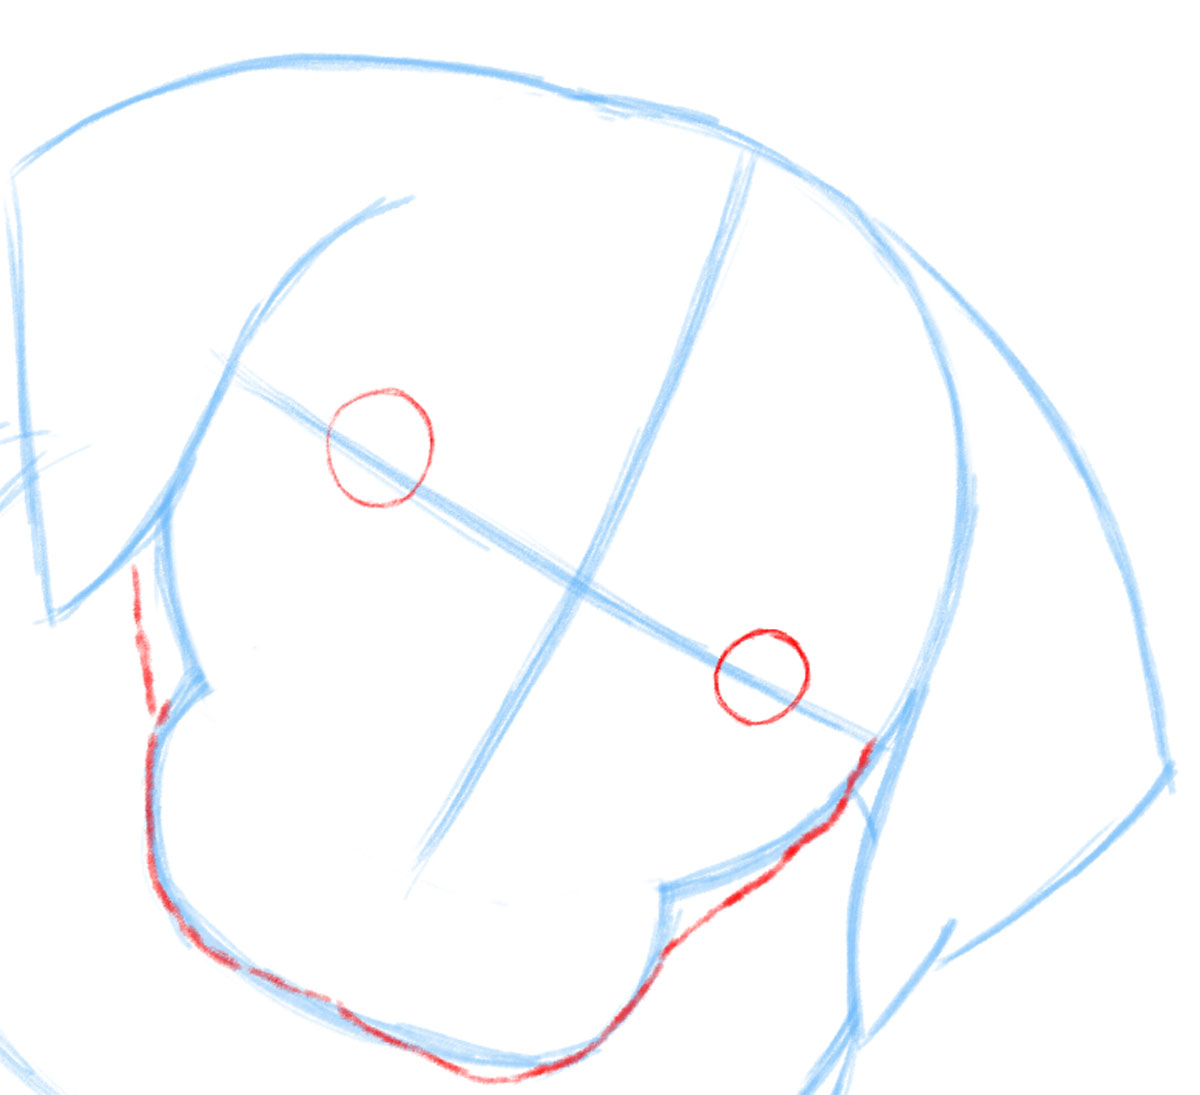
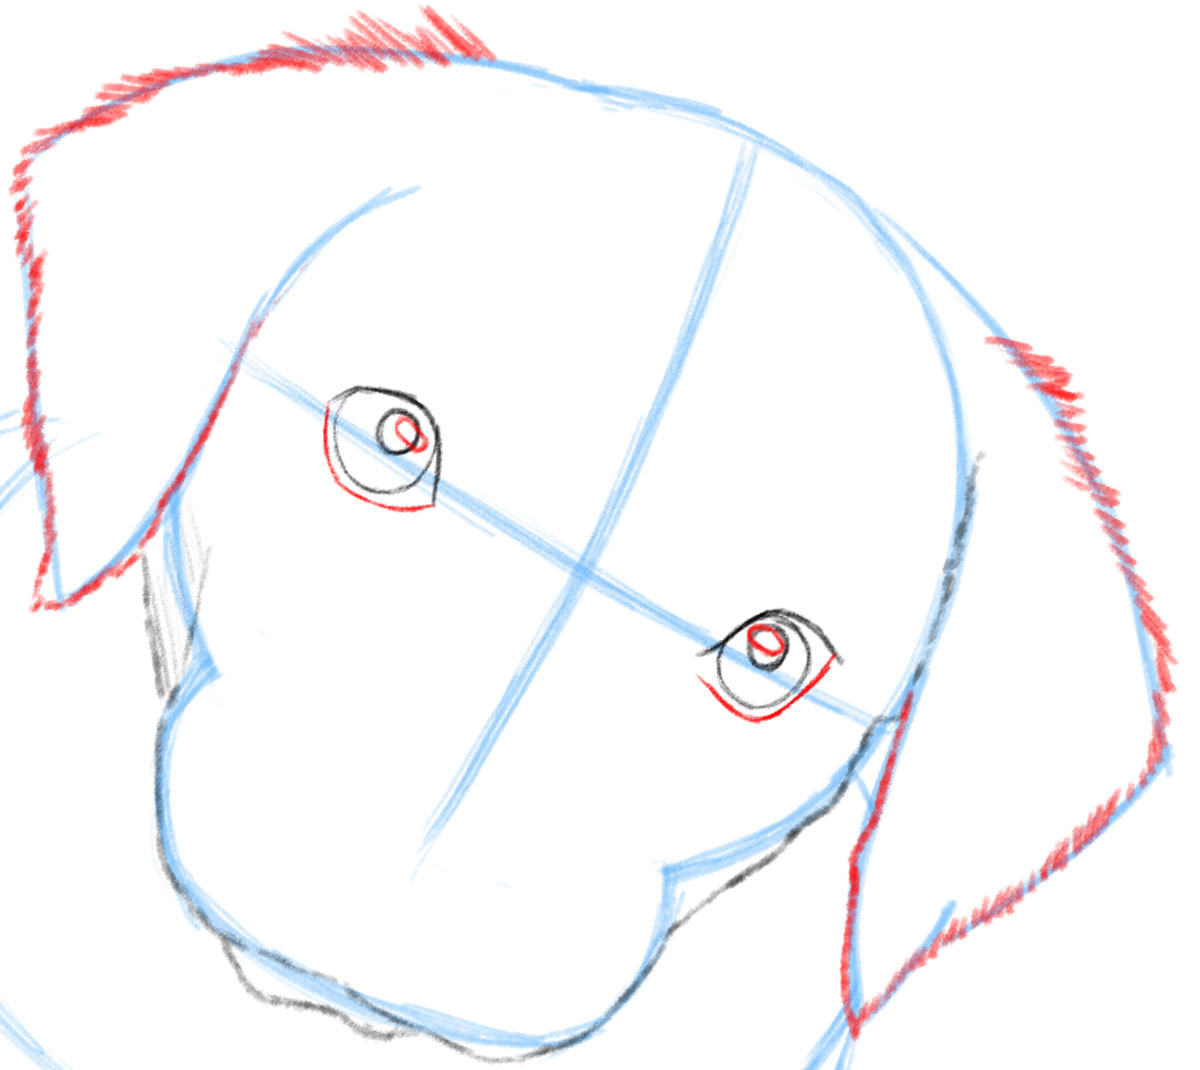
Let’s work on the dog’s face. Draw a circle for each eye. Use the guidelines to help you draw the lines of the dog’s face. You should make the lines sort of messy, with short strokes to make it look like fur.
Draw a curved line over each eye. Draw a smaller circle in each eye. Draw some fur (messy short lines) on the right ear. For the mouth, sort of draw a sideways #3 shape.
Draw some short, messy, uneven lines all around the ears to draw the fur. Draw a curved line at the bottom of the left eye. Draw a backward “J”-like shape on the bottom of the right eye. Draw an oval in each eye (this will be the eyes’ highlight).
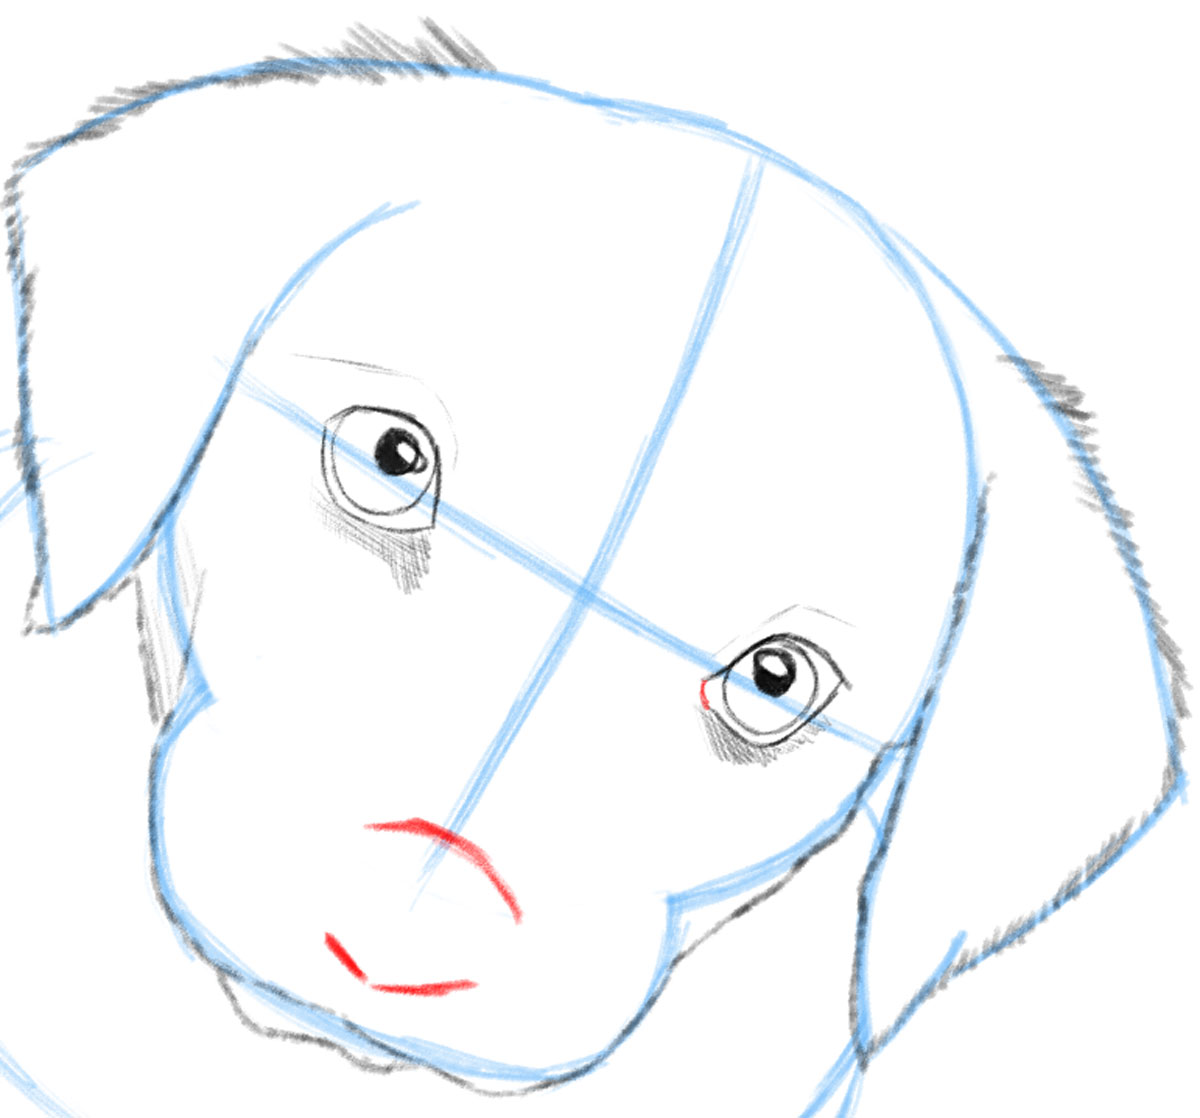
Draw a curved line on the right eye to finish it. Fill in part of the eye. Draw what would be his brows, above his eyes. Start shading under his eyes by lightly drawing lines under his eyes. Draw an almost “V”-shape for the bottom of the dog’s nose. Draw a curved line above it.
Draw the top of the dog’s head. Draw the sides of his nose. Start adding dark shadows to his eyes. Draw lines on his snout, uneven lines that are of different sizes and in different directions (see the picture).
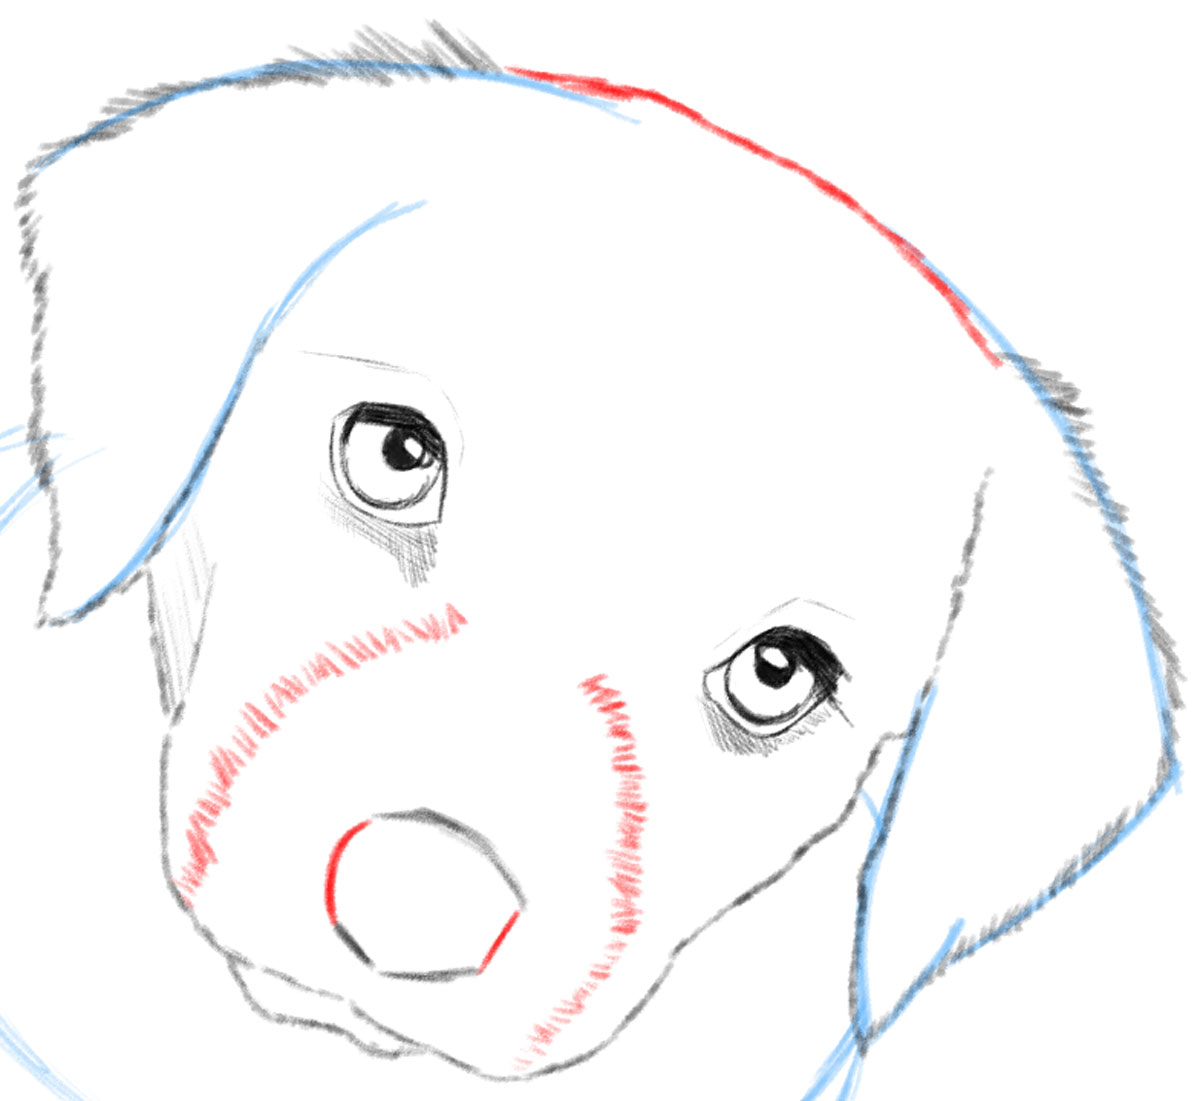
Add more fur above his snout. Add some lighter shading to his eyes. Draw fur around his body and butt area. Draw uneven lines like you did earlier. Now smudge it a bit with a tissue. You want it to be a bit less sharp than the face so it looks further in the background. Draw almost a sideways “V” and “D” shape for his nostrils.
Finish the shading in the eye by adding more shading that is dark, but much less dark than the previous steps. You will notice from my picture that you can see parts of the eyes are quite a bit lighter than other parts. Continue to add fur to other parts of the dog’s body. Add shading below his eyes and smudge it a little bit with a tissue. Add shading to his nose (very dark at the bottom, slightly less dark in the center, and very light at the top. Also, darken the top of each nostril.
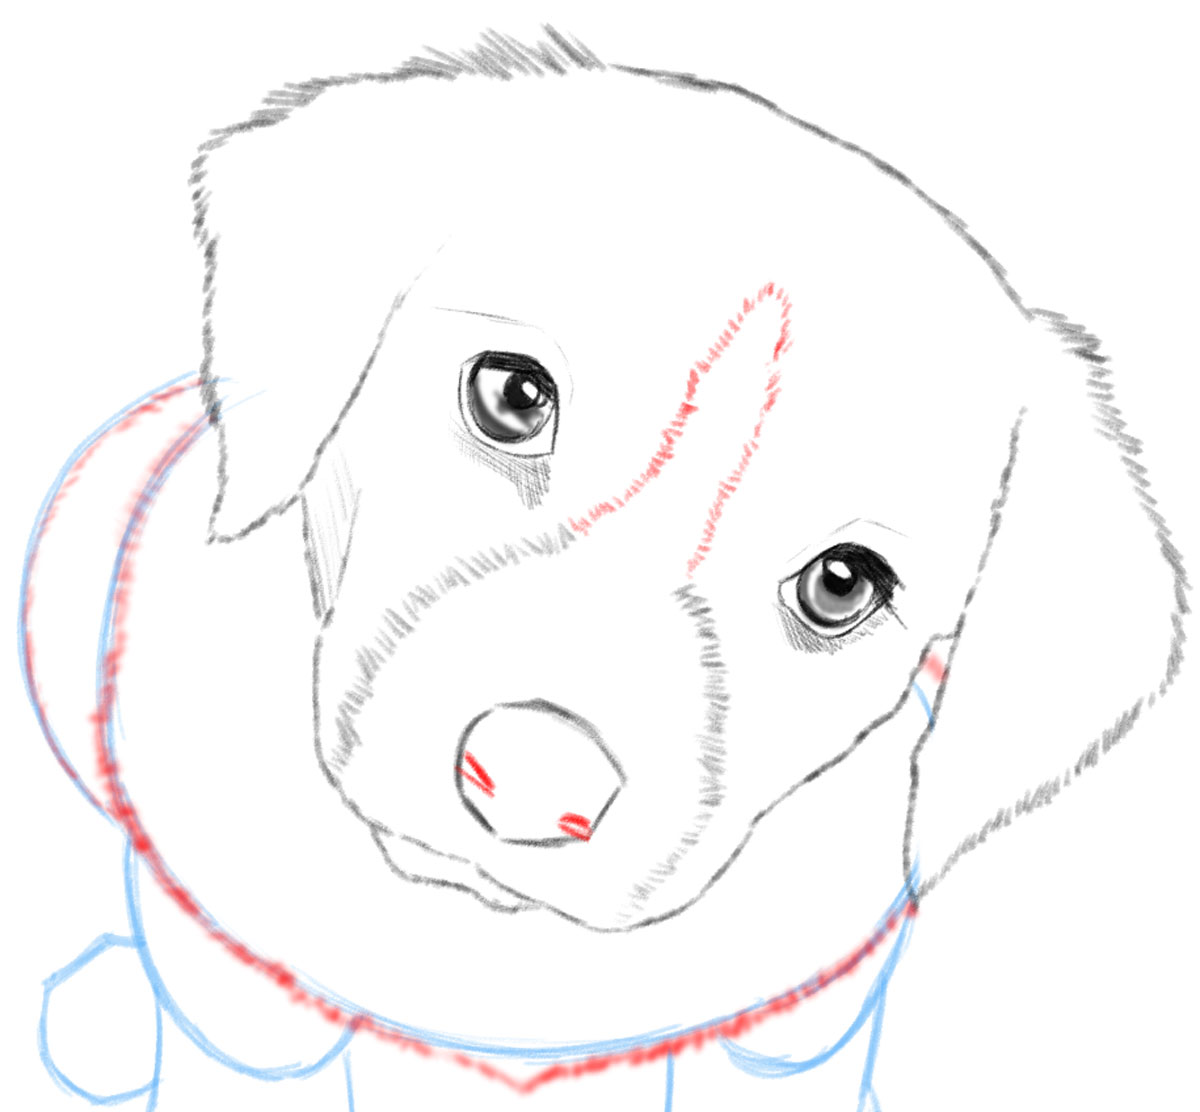
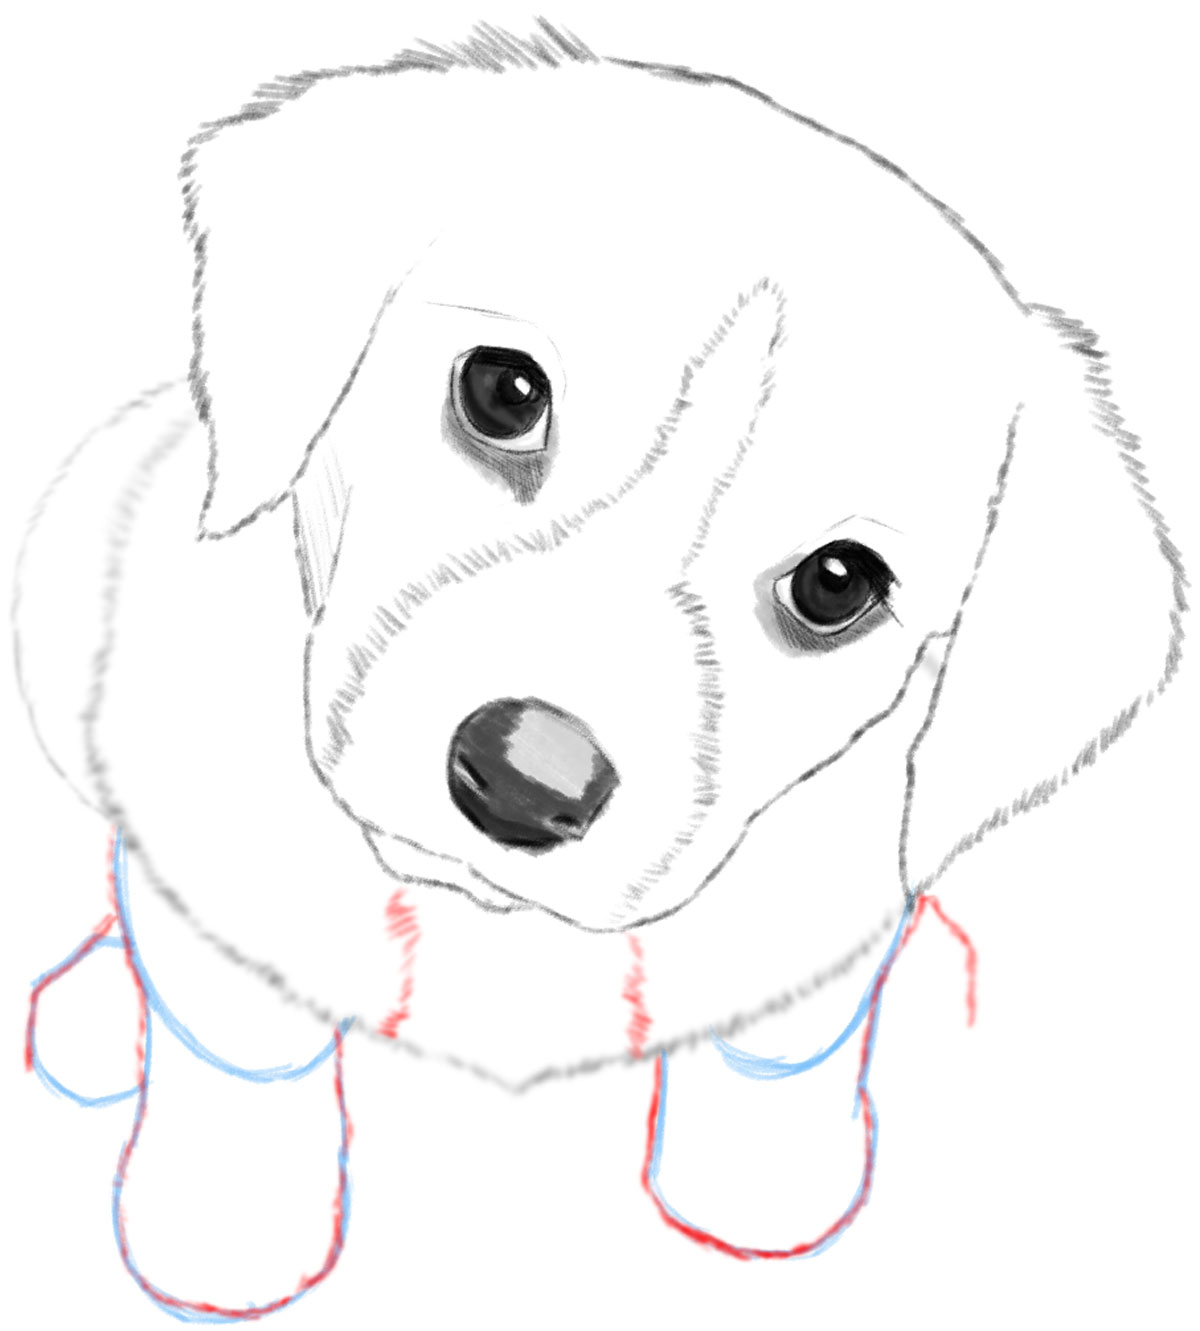
Draw lines for toes and finish up the back feet. Darken up the nose’s shading.
Add some very light shading on the feet and around his nose. Use the tissue to smudge some color onto the parts of the dog that have color. Or, you can shade it with the side of your pencil if you want him really dark (just be careful, it can be quite messy). If you want to protect your drawing when you are doing this, put a 2nd piece of paper under your hand.
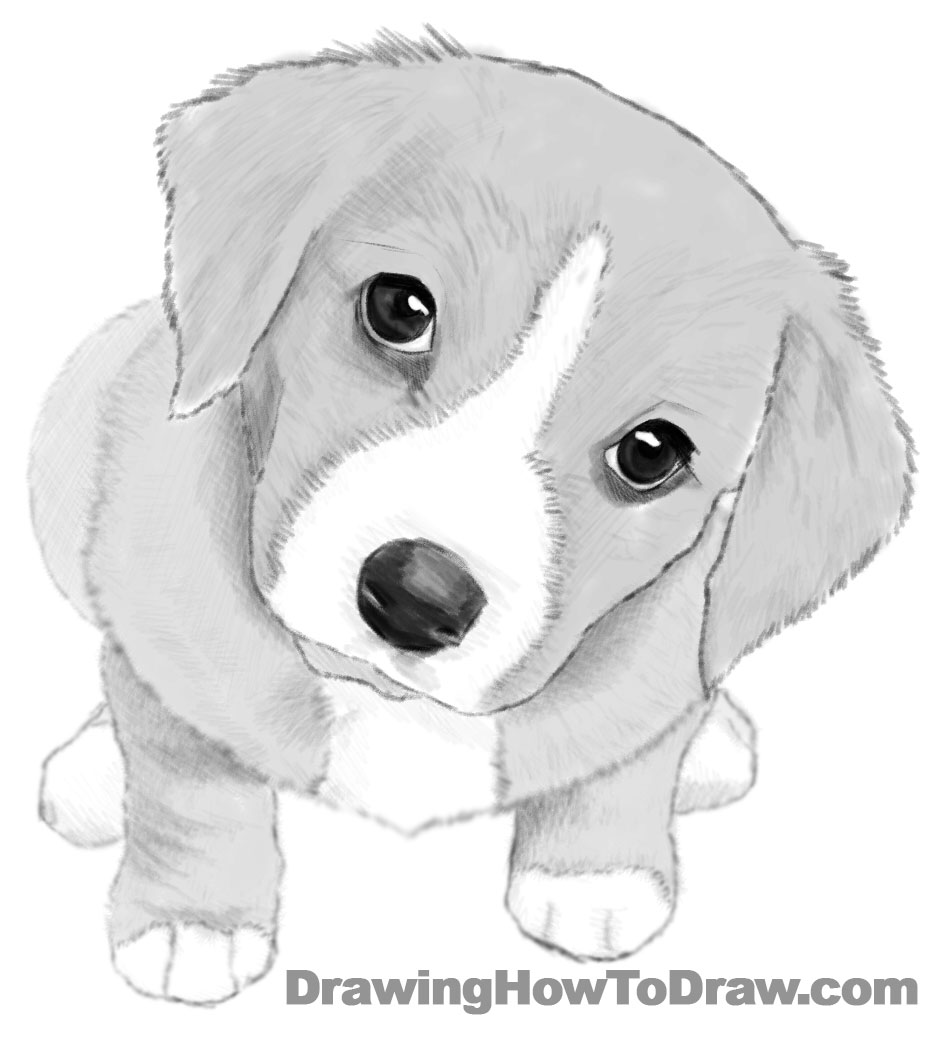
Add some fur shading in some areas. The fur on the legs has shorter hairs, so you can use short uneven strokes to create that effect.
Use longer lines for the fur on other parts of the body. I didn’t want to much detail on mine so I decided to just draw fur in a few places.
I hope your dog/puppy turned out great! Come back soon for more tutorials!
Today I'll show you how to draw Rick from the Rick and Morty cartoon tv…
Today I'll show you how to draw Morty from the Rick and Morty cartoon tv…
Today I'll show you how to draw the spunky little rabbit, Kuromi, from My Melody…
Today I'll show you how to draw this cute "bean duck" that I found on…
Today I'll show you how to draw Sosuke and Ponyo in a bubble (chibi /kawaii…
Today I'll show you how to draw a Boo from Super Mario Bros in Kawaii…
View Comments
Thx I really enjoyed this! It wasn’t as hard as I thought and I think my friend will love it on her card!
This is well done!