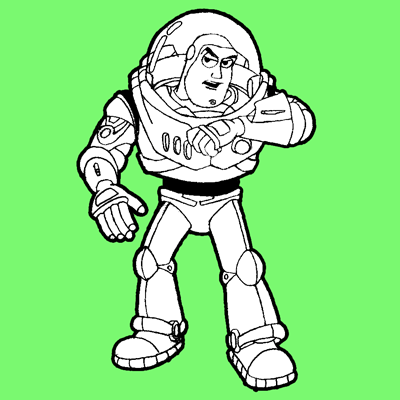
Learn how to draw Buzz Lightyear from Toy Story with the following step by step drawing lesson. Buzz Lightyear is a space ranger and is one of the main characters of Toy Story 1, 2, 3, as well as the tv series Buzz Lightyear of Star Command. His often says “To infinity … and beyond!” and kids all over the world (especially boys) love him. My own son was obsessed with him until he was 5. So follow these steps and you will be able to draw him too.
Here are More of Our Toy Story Drawing Tutorials (Including Woody)
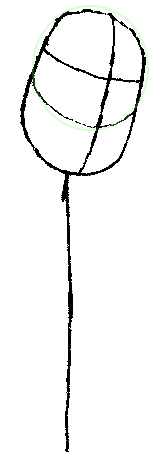
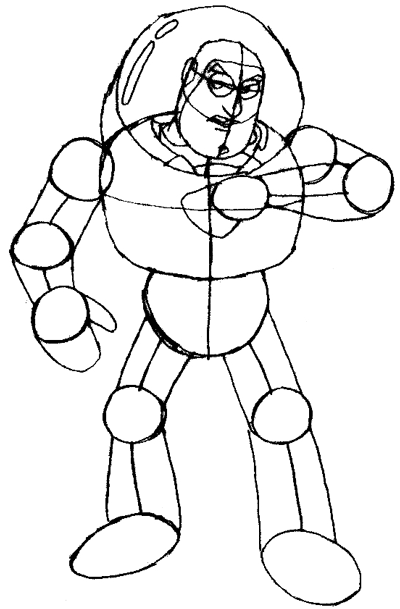
Start off by drawing a lollipop with a straight stick. It is important to make the top of the lollipop a pear-shape because Buzz has a huge jaw. Some people like to first draw a circle and then make a letter ‘u’ shape below it to make the pear shaped face…but it is up to you on how you want to draw Buzz’s face. Also add a cross section for the face. The vertical line determines the “center” of the head where the nose is placed, and the horizontal line determines where the eyes will be placed.
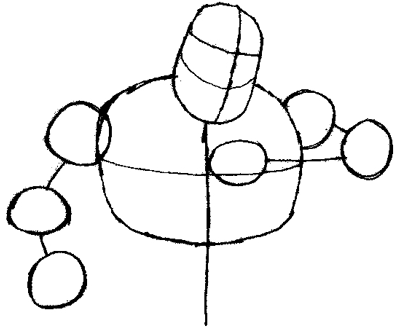
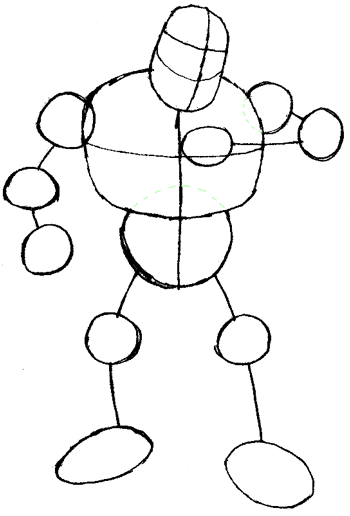
Draw a large round-cornered square for his chest…almost like an oval.
Draw some guides for his arms. In contrast to his chest, Buzz’s arms are actually short. Draw circles / ovals for 3 part of each arm.
Draw a round shape at the bottom for his pelvis. Add guides for his legs.
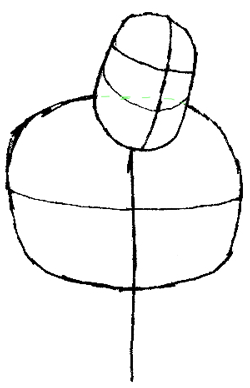
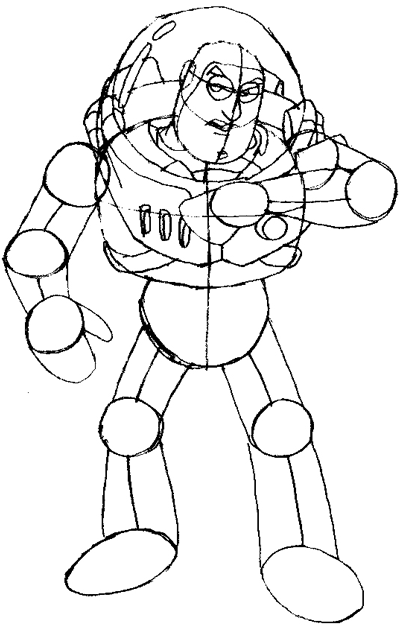
Draw Buzz’s glass dome. Remember that this dome is connected to his chest.
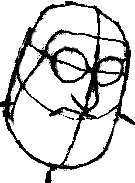
Draw an upside down letter ‘L’ like shape for Buzz’s hood. Draw a circle for each eye. Draw a backwards letter ‘J’ for Buzz’s nose. Draw the top of the mouth as well.
Draw a circle in each of the eyes. Draw the bottom of the mouth and the teeth.
Add an oval where Buzz’s ear should be. Draw a line under the mouth. Draw a backwards number ‘6’ like shape in the chin. Square out the nose a bit. Draw a number ‘7’ like shape (sideways) for each eyebrow. This is what the face should look like after you finish it up.
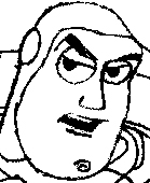
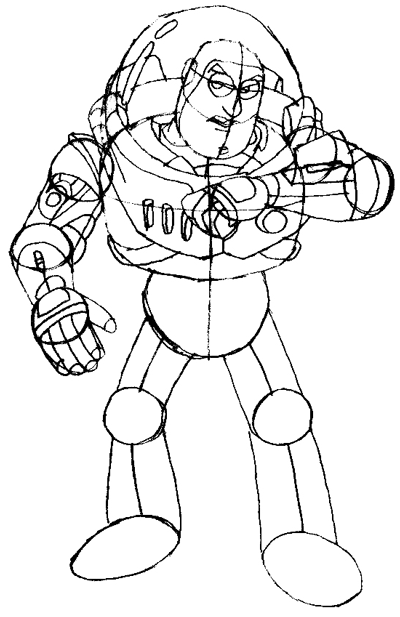
This is Buzz’s finished face on his body. Draw two long ovals for the shine on his dome.
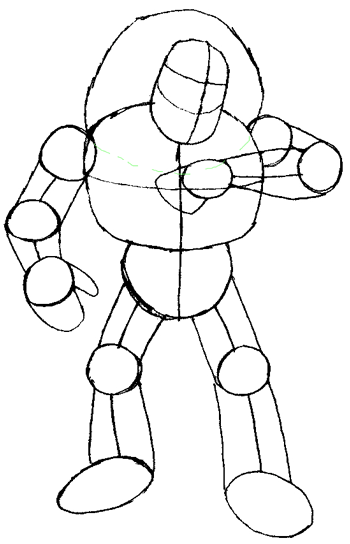
Draw the details to his chest.
Draw the details to his arms. Keep in mind that Buzz is a toy, so he has ball joints for his shoulders.
Draw the details to his legs.
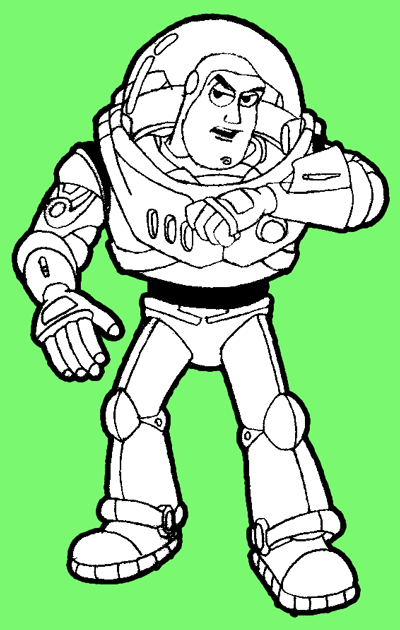
Erase your guide lines, add blackings, and you’re done!
Here are More Toy Story Drawing Lessons (Including Woody)
Technorati Tags: draw buzz, draw buzz lightyear, drawing buzz, drawing buzz lightyear, buzz, buzz lightyear, toy story, drawing toy story, toy story characters, how to draw, drawing lessons for kids, drawing lessons, drawing tutorials
Today I'll show you how to draw Rick from the Rick and Morty cartoon tv…
Today I'll show you how to draw Morty from the Rick and Morty cartoon tv…
Today I'll show you how to draw the spunky little rabbit, Kuromi, from My Melody…
Today I'll show you how to draw this cute "bean duck" that I found on…
Today I'll show you how to draw Sosuke and Ponyo in a bubble (chibi /kawaii…
Today I'll show you how to draw a Boo from Super Mario Bros in Kawaii…
View Comments
This was helpful but mine isn’t that good.
Thank you so much for this illustration. I couldn't get over how easy it was. I've been drawing & painting since I was five years old, but never had any real lessons that taught me anything. So, this was an enormous help. Thank you, thank you, thank you!!! I really appreciate this lesson & surprised at what I accomplished.
Thank you so much for the great comment Merry!
awsome
i had a go at this for my friends little boy [ leighton lightyear ] .he loves it. i couldn't
believe how easy it was to do. thank you.
HARD but very nice