Do you want to learn how to draw Mickey Mouse, a Disney cartoon character who was created in 1928 by Walt Disney. Mickey is currently the main character in the Disney Channel’s Playhouse Disney series “Mickey Mouse Clubhouse”. Mickey is the leader of The Mickey Mouse Club. Today I will show you how to draw this famous mouse, Mickey Mouse, with easy to follow steps. After following this online drawing lesson, kids, teens, as well as others will be able to draw Mickey easily.
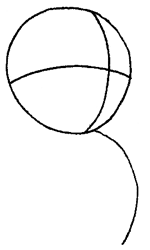
Start off by drawing a lollipop with a curved stick. Also add a cross section for the face. The vertical line determines the “center” of the head where the nose is placed, and the horizontal line determines where the eyes will be placed. The curved stick will be Mickey’s spine. Notice that this line goes around the circle because it is like a ball.
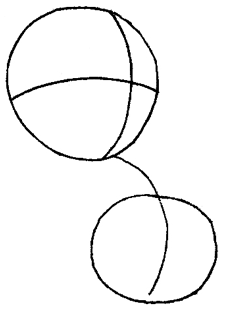
Draw a small circle at the bottom of the spine.
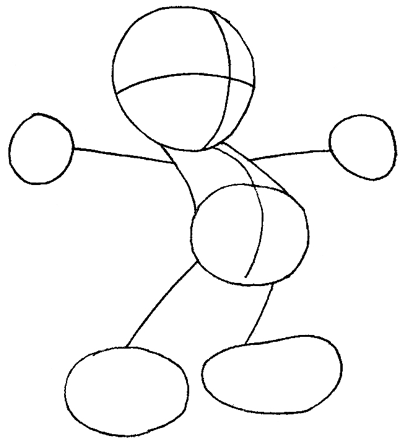
Add stick arms and feet. Since Mickey is a cute cartoon character, make sure that the sticks are short to give him cute arms and legs. Also make the feet ovals large to give him big cartoony shoes.
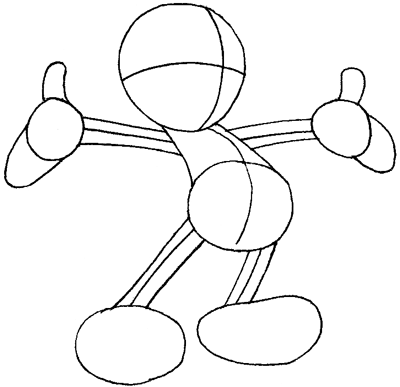
Complete the arm and legs sticks to give them muscle. Add curves to where his thumbs and fingers should be.
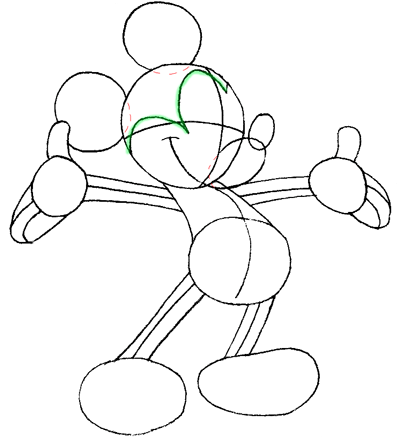
Draw two circles on top of his head for his ears. Add a curve in front of his head for his snout and mount. Add a small oval on its end for his nose. Draw two lines inside the finger guide to create digits. I put red dashed lines under the ears to show you that they are circles that are hidden by Mickey’s face. Also, I highlighted part of his face in green to show you that it looks like a letter ‘m’ (sideways).
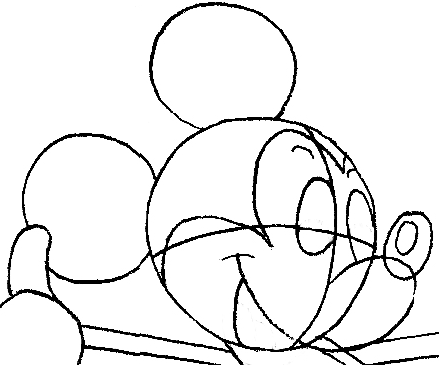
Draw an oval for each eye…part of the right eye is hidden by Mickey’s snout (which is an oval). Draw another oval as the nose and a smaller oval inside of it for the highlight of the nose. If you look at the nose and mouth together…it looks like a sideways number ‘2’.
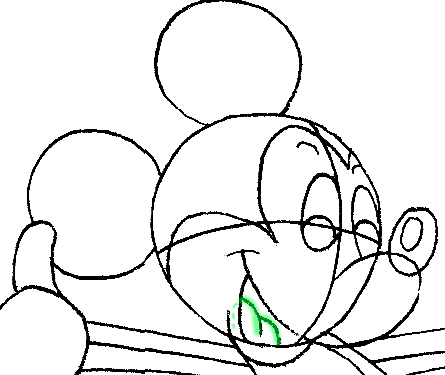
Now draw a circle inside both of the eyes…and draw a number ‘3’ like shape (sideways) inside the mouth for a tongue. Also draw his chin.
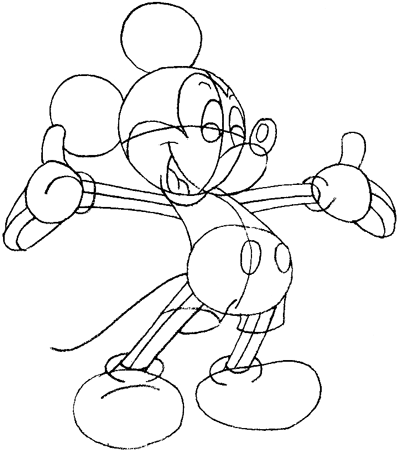
You can now draw the details of his face, clothes, and gloves.
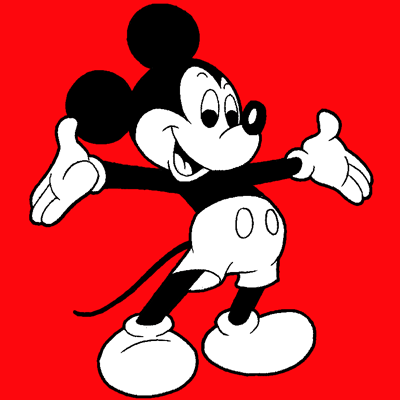
Delete all the guide lines, and fill in the legs, body, and top of his head with black to give him “fur”, and you’re done!
Technorati Tags: mickey mouse, draw mickey mouse, drawing mickey mouse, how to draw mickey mouse, draw mickey, drawing mickey, how to draw mickey, drawing lessons, drawing tutorials, how to draw, drawing for kids, cartooning, mouse, mice, draw mouse, drawing mice
Today I'll show you how to draw Rick from the Rick and Morty cartoon tv…
Today I'll show you how to draw Morty from the Rick and Morty cartoon tv…
Today I'll show you how to draw the spunky little rabbit, Kuromi, from My Melody…
Today I'll show you how to draw this cute "bean duck" that I found on…
Today I'll show you how to draw Sosuke and Ponyo in a bubble (chibi /kawaii…
Today I'll show you how to draw a Boo from Super Mario Bros in Kawaii…
View Comments
The body and legs are hard
Thanks.I drew it. It was simple :)
WowowowowowowowowowowowowowowowowowowowowowowowowowowowowowowoWOWOWOWOWOWOWOWOWOWOWOWOWOWOWWOPEACE LOVE LOVE THIS WEBSITE GREAT JOB MAKER!!!!!
hi people..
i drew a real nature drawin and it came out great...
gorgia should like this website even her art came out ungly.....
:) :) :) :)
THIS WBSITE RRRRRRRRRRRRRRRRRRRRRRRRRRRRRRRROOOOOOOOOOOOOOOOOOOOOOOOOOOOOOOOOCCCCCCCCCCCCCCCCCCCCCCCCCCCCCKKKKKKKKKKKKKKKKKKKKKKKKKKKKKKKKKKKKSSSSSSSSSSSSSSSSSSSSSSSS....
I WISH LOTS AND LOTS OF PEOPLE KNOW IT...................................
MY FAVOURITE WEBSITE FOR ART..............
Awww...thank you!
I luv ur work Admin
i love this website mines turned out fine i pure love this website xxxxxxxxxxxxxxxxxxxxxxxxxxxxxxxxxxxxxxxxxxxxxxxxxxxxxxxxxxxxxxxxxxxxxxxxxxxxxxxxxxxxxxxxxxxxxxxxxxxxxxxxxxxxxxxxxxxxxxxxxxxxxxxxxxxxxxxxxxxxxxxxxxxxxxxxxxxxxxxxxxxxxxxxxxxxxxxxxxxxxxxxxxxxxxxxxxxxxxxxxxxxxxxxxxxxxxxxxxxxxxxxxxxxxxxxxxxxxxxxxxxxxxxxxxxxxxxxxxxxxxxxxxxxxxxxxxxxxxxxxxxxxxxxxxxxxxxxxxxxxxxxxxxxxxxxxxxxxxxxxxxxxxxxxxxxxxxxxxxxxxxx
Thank you, Kayley!
This realllllllyyy helped! great job:)
:-) :-) :-) :-)
LOVE LOVE LLLLLLLLLLLOOOOOOOOOOOOOOVVVVVVV
nice tutorial very helpful thanks
cool very cool ilike to beat how give this idea