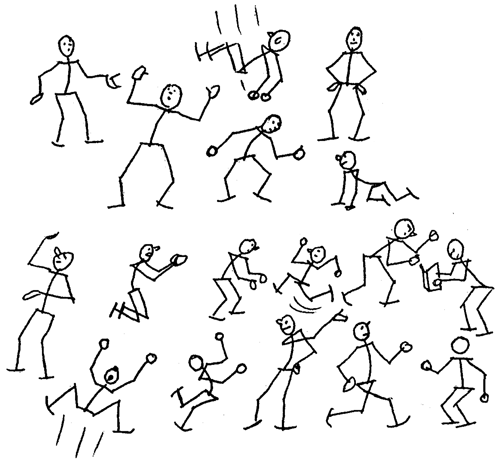
Today we will learn how to bring our cartoon people figures to life and put them in action. To put a figure in action we use a simple skeleton as a guide and foundation. On the bottom of the illustration pictures for this lesson you will find a number of these little skeletons in different actions and poses. Study each of these little sketches and notice how simple it is to suggest any particular action you want to by using these little figures.
Our Other Cartooning & Drawing Comics Tutorials as well as This Drawing People Moving Article.
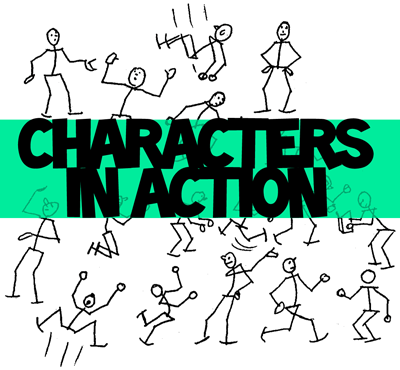
How to Draw Cartoon People Figures Moving in Different Movements and Actions Drawing Lesson
There are a few important points, though, to remember in bringing out action in your cartoon figures.
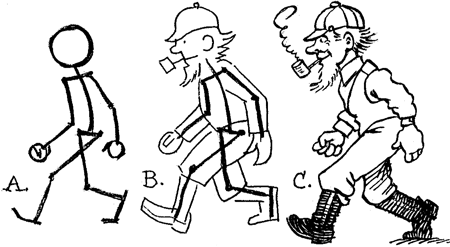
So, let us go to the first three sketches above, showing a farmer walking. Notice how the action is first suggested by a simple skeleton (A), then blocked in roughly (B), and finally finished up in ink (C). Whenever a person walks or runs or kicks, the arms have a tendency to swing back and forth–the right arm swinging with the left leg and the left arm moving in the same direction as the right leg. Remember this point–it is essential that you follow it if you want the action of your figures to look natural.
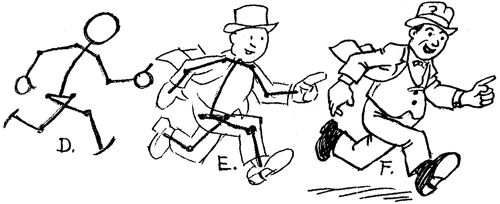
In Figure’s D, E. and F, we have worked out a two-thirds view of a man running. Notice here again the arms and legs swing, the right arm back with the left leg, and the left arm forward with the right leg. Also notice how his coat-tails flying back help to indicate the action. This is another good point to remember.
Something many students seem to overlook is the fact that no matter what action a person goes through, the weight of his body must be balanced or he will certainly fall over. In figure G, which shows a skeleton walking towards us, we see that the weight of the body rests on the left foot, which comes directly under the center of the body. Notice, too, that when a figure is shown walking, the hip that is on the same side as the leg that is bearing the weight of the body is higher than the other hip, while the shoulder on that side is lower than the opposite shoulder. This is just another little ole’ trick that will bring out a natural walk in your figures. Figure H is the completed figure with the skeleton in dotted lines.
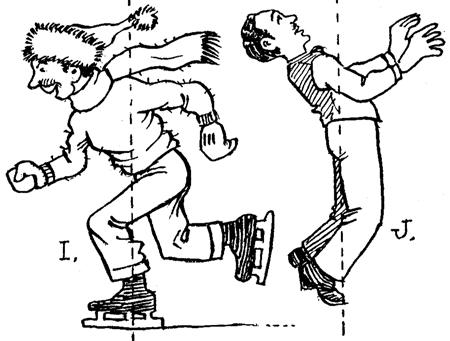
In the drawing of the boy skating we again see how the balance of the figure is maintained by placing the foot bearing the weight of the figure under the center of the body. That is, in this particular sketch the upper part of the body and the right arm on one side of the dotted center line balances the lower part.of the body and the left arm on the other side of the center line. A good plan to follow is to go through the action yourself that you are going to draw and see what is the natural position that your body, legs and arms assume in the particular action you are going through.
For example, in the next sketch (J) I went through the action myself and found that may arms quite naturally went forward in order to balance myself. Whenever you can do so, have a friend pose in different actions while you sketch the action of his body on a scratch pad. This is wonderful practice and will help you immensely.
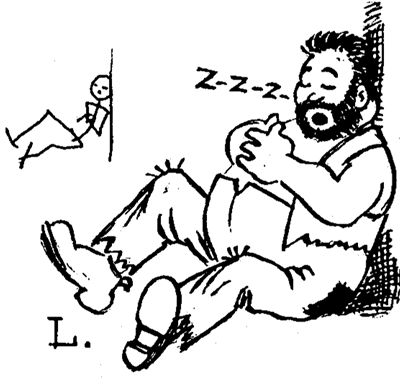
When we speak of action, we don’t necessarily mean that your figure roust always be running, walking, jumping, etc. There is action indicated even when the figure is shown lying down (K) or asleep (L) below. Remember, too, that it is up to you what action your comic character goes through and that by bending the legs. arms, and body in the proper directions you can make your drawings portray any action you desire.
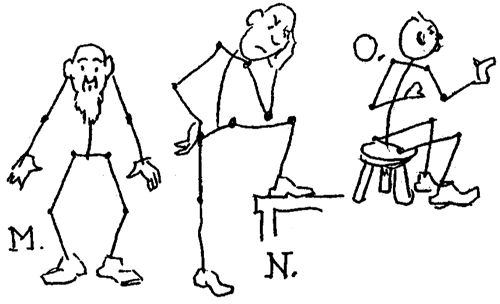
I also want you to practice making a number of little skeletons of your own in different poses. You will find that this is not only a lot of fun, but will enable you to draw better action into your final sketches. If you want to work on this a bit, try to draw the following three figures, making each about five inches high. Don’t shade these figures.
1. A bald-headed farmer in overalls and boots, front view, with a frightened expression on his face. Use the skeleton marked N as a guide for the action of the figure.
2. Using the skeleton N as a guide, draw a young fellow in his vest and shirt sleeves with a sorrowful look on his face.
3. Draw a two-thirds back view of a fat man sitting on a stool. Use skeleton 0 as a guide. His left, hand will be hidden by his body.
Here you see a bunch of the skeletonized / stick figures in action that we spoke about above.
Our Other Cartooning & Drawing Comics Tutorials as well.
Technorati Tags: figures in motion, people in motion, figures in action, how to draw people moving, drawing people moving, drawing moving figures, running, walking, jumping, sitting, reading, playing, sports, cartooning, draw cartoons, draw comics, drawing lessons, drawing tutorials
Today I'll show you how to draw Rick from the Rick and Morty cartoon tv…
Today I'll show you how to draw Morty from the Rick and Morty cartoon tv…
Today I'll show you how to draw the spunky little rabbit, Kuromi, from My Melody…
Today I'll show you how to draw this cute "bean duck" that I found on…
Today I'll show you how to draw Sosuke and Ponyo in a bubble (chibi /kawaii…
Today I'll show you how to draw a Boo from Super Mario Bros in Kawaii…
View Comments
how to draw a man with a konfu(bird like??) pose?
How do you draw a girl walking a dog?