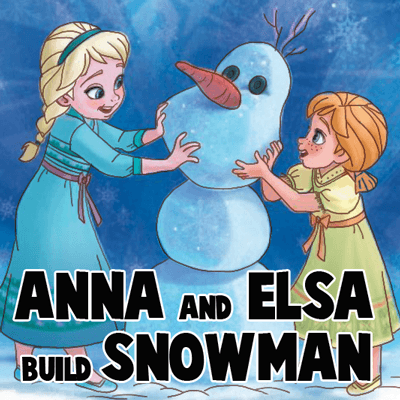
If you love Disney’s Frozen as much as I do, then you are going to be excited to draw this picture of Princess Anna and Elsa building a snowman (future Olaf). Here they are playing so happily as young children. I will show you how to draw all the figures in this picture by using simple geometric shapes, letters, and numbers. However, this drawing tutorial is a lot more complicated than most of the tutorials on this site. Don’t get frustrated if it is too hard for you to complete…keep practicing and you will get it right.
Here are Our Other Disney Frozen Tutorials
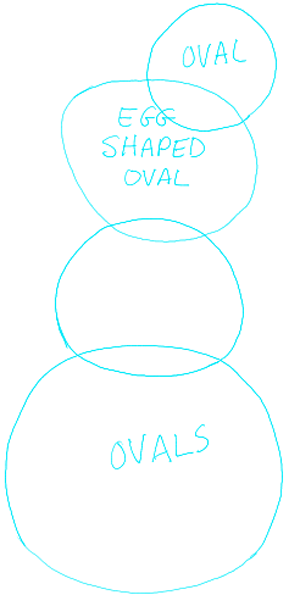
Start off with drawing the snowman. It is an early version of Olaf. Use a bunch of ovals, drawn lightly, to draw the basic shape of him.
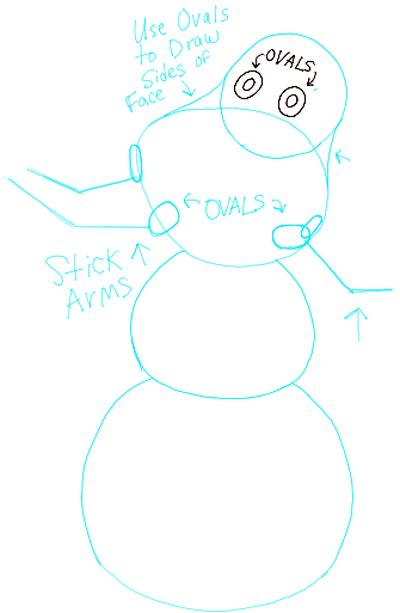
– Draw 2 ovals for his eyes.
– Lightly draw ovals at the sides of his face…these will later on become Anna’s and Ella’s hands.
– Also draw 3 stick arms.
– Draw 2 ovals for the nose…we will outline them soon.
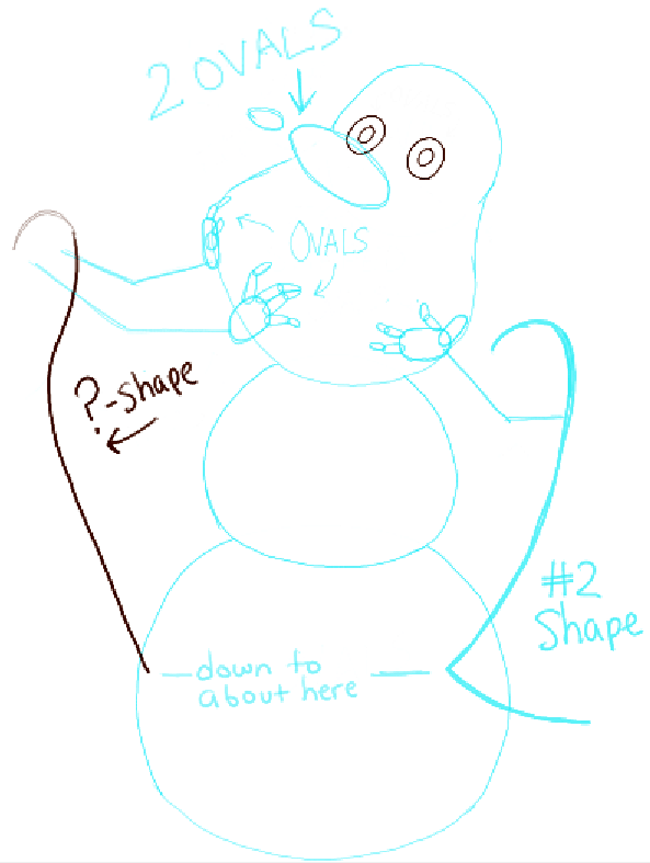
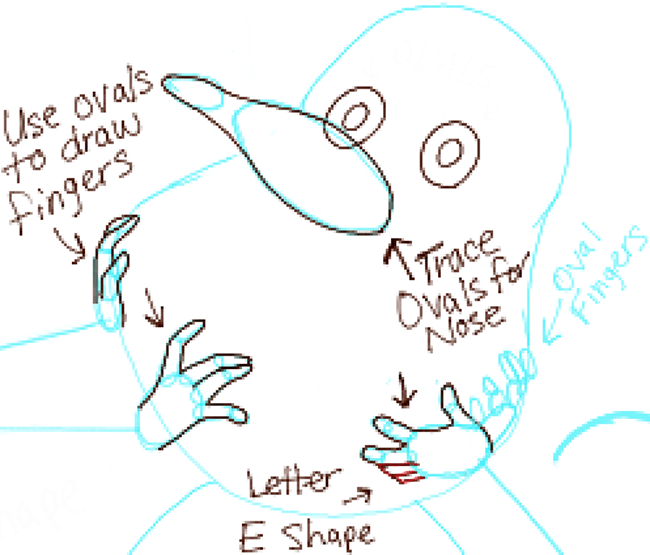
– Draw long ovals for fingers (the close up of these fingers are right below). We will outline these ovals to make the girls’ fingers soon.
– Start the shape of the girls’ bodies. Draw a #2 shape on the right side of the snowman and a ? shape on the left side of the snowman.
– Above is a close up of the girls’ fingers.
– Outline the ovals that you drew for fingers…as seen above. On the hand on the far right…draw a capital letter ‘E’ for the back fingers.
– Lightly draw a few more ovals for the hand that will be on the back right side.
– Trace the ovals that we drew for the snowman’s nose.
– Outline the stick arm that is on the right side…as seen above.
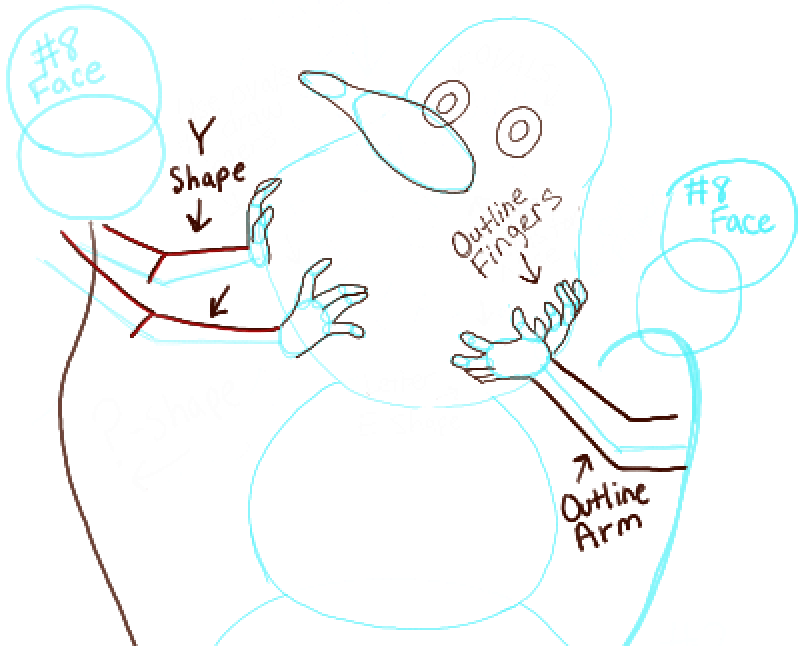
– Draw two sideways, letter ‘Y’-like shapes for the 2 arms on the left.
– Lightly draw 2 ovals that form a #8-like shape on the top of each girl.
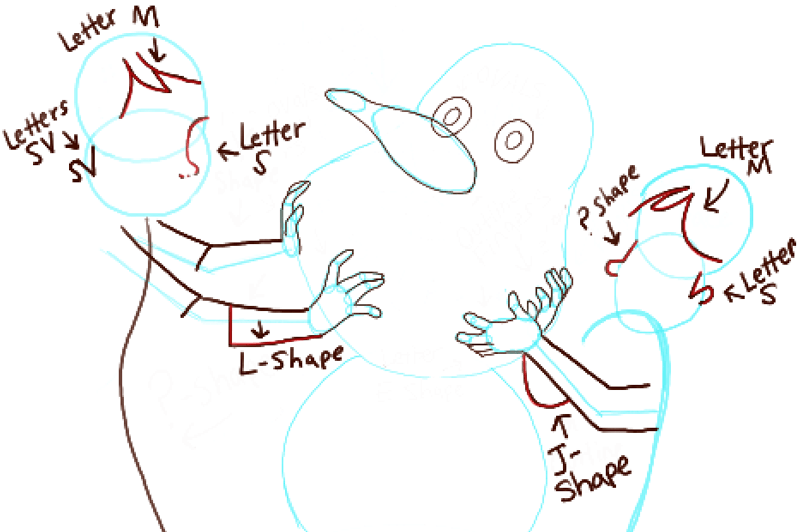
– Draw a letter ‘J’- like shape under the arm on the right side.
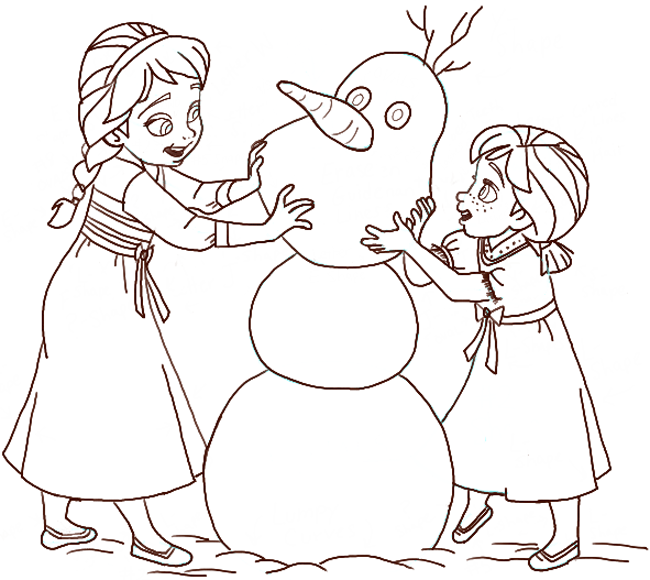
– (girl on the right) Draw a ?-shape for the nose … a letter ‘S’ for her ear … and a letter ‘M’ for her bangs.
– (girl on the left) Draw a letter ‘L’ shape on her sleeve … a letter ‘S’ -like nose … a letter ‘SV’ on the left side of her face … and a letter ‘M’ for her bangs.
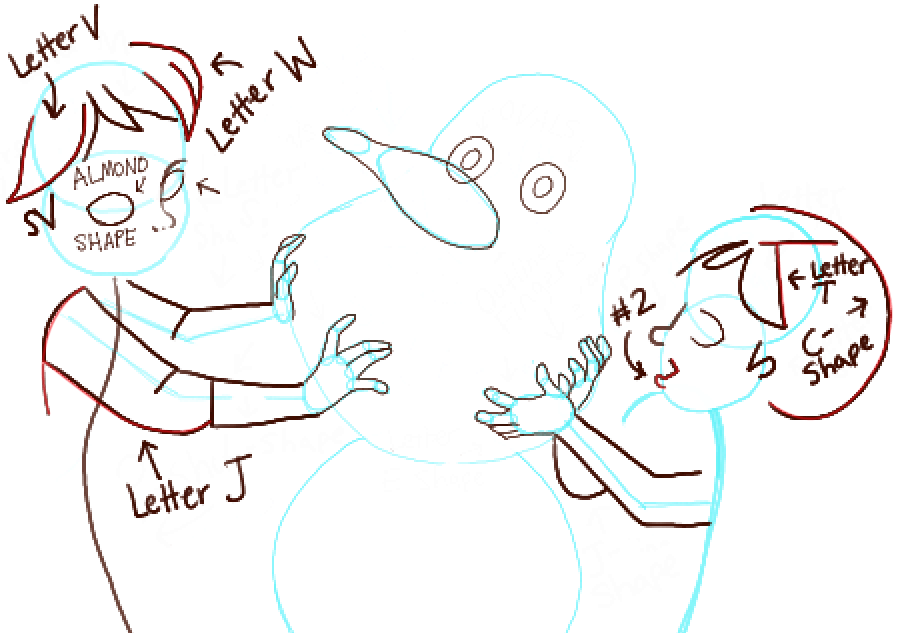
– (girl on right) – Draw an upside down #2 shape for mouth … a sideways letter ‘U’ shape for her eye socket … a letter ‘T’ shape in her hair … and a letter ‘C’ shape for her outer hair line.
– (girl on left) – Draw different shaped almond eyes … a letter ‘V’ and a letter ‘W’ in the hair line … and a letter ‘J’ shape around the shoulder area.
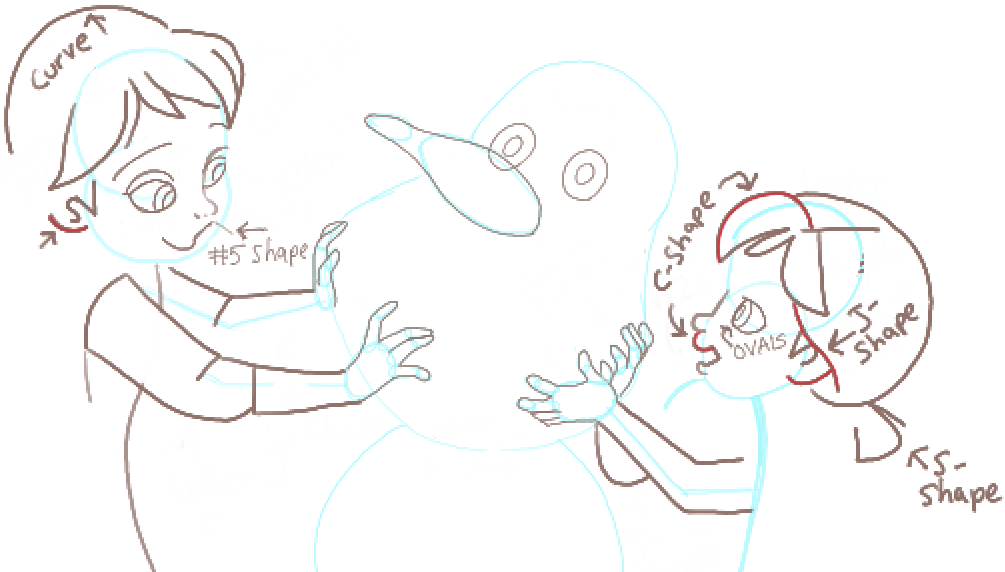
– (girl on right) -Draw a letter ‘C’ shape at the top of her mouth and her hair … ovals in her eyes … a letter ‘J’ shape in the hair … and draw a letter ‘S’ shape for her pony tail.
– (girl on left ) – Draw a #5 shape for her mouth … Draw curves inside her eyes and for her ear … and start drawing her eye brows with curved lines.
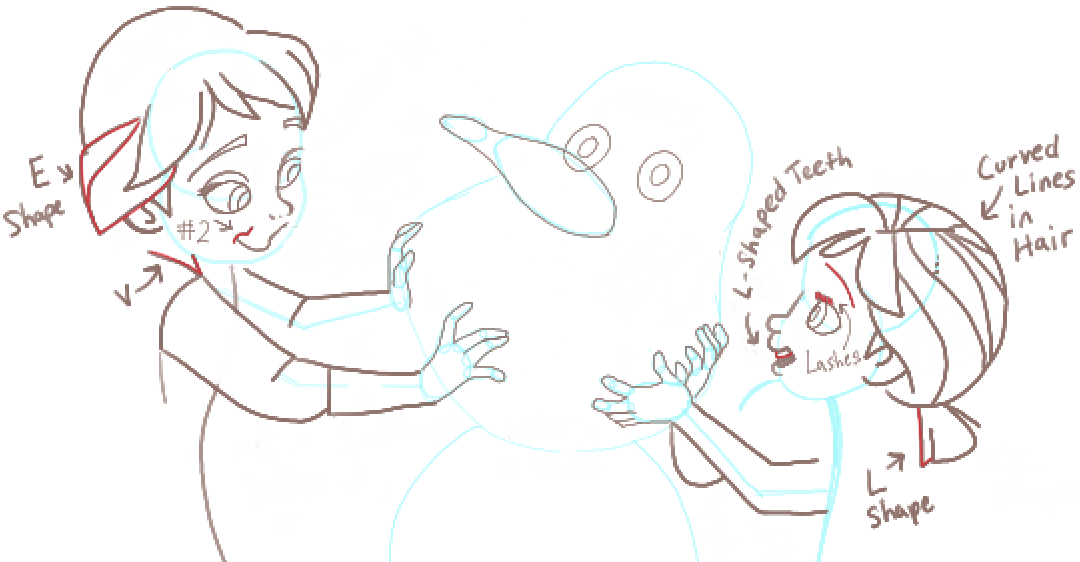
– (girl on right) – Draw a letter ‘L’ shape in her pony tail … Draw lashes and a curved line for her brow … draw a letter ‘L’ shape for the teeth … and draw curved lines in the hair.
– (girl on left) – Draw a ?-like shape on the mouth … and a letter ‘E’ shape in the hair … and a letter ‘V’ shape under the face.
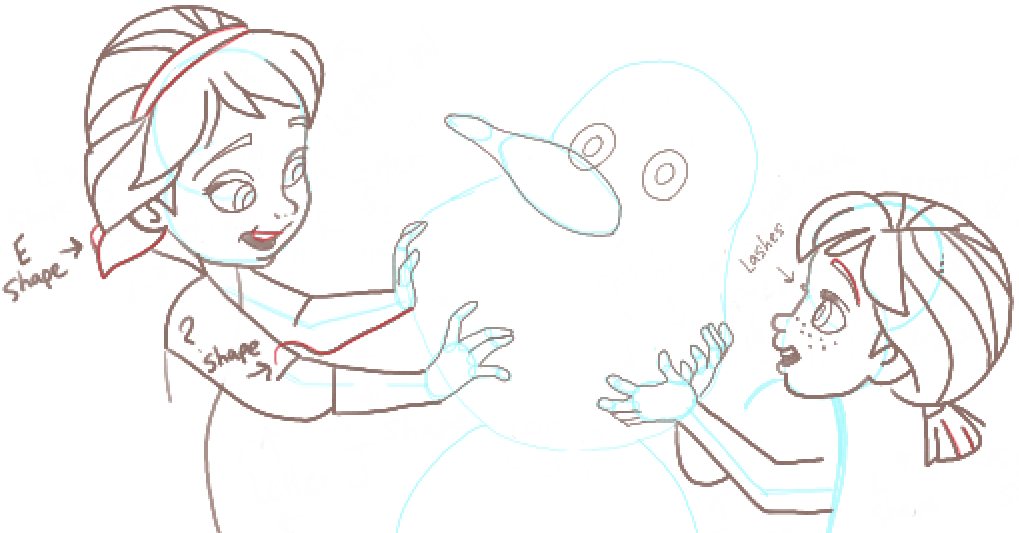
– (girl on right) – Draw a curved line to finish her eye brow…draw a few lines in her pony tail … and draw a few lashes for the back eye that you can’t see.
– (girl on left) – Draw a ?-like shape for the back arm … Draw a letter ‘E’ shape at the bottom of the hair … draw a half circle type shape for the teeth … draw 2 curved lines for the headband.
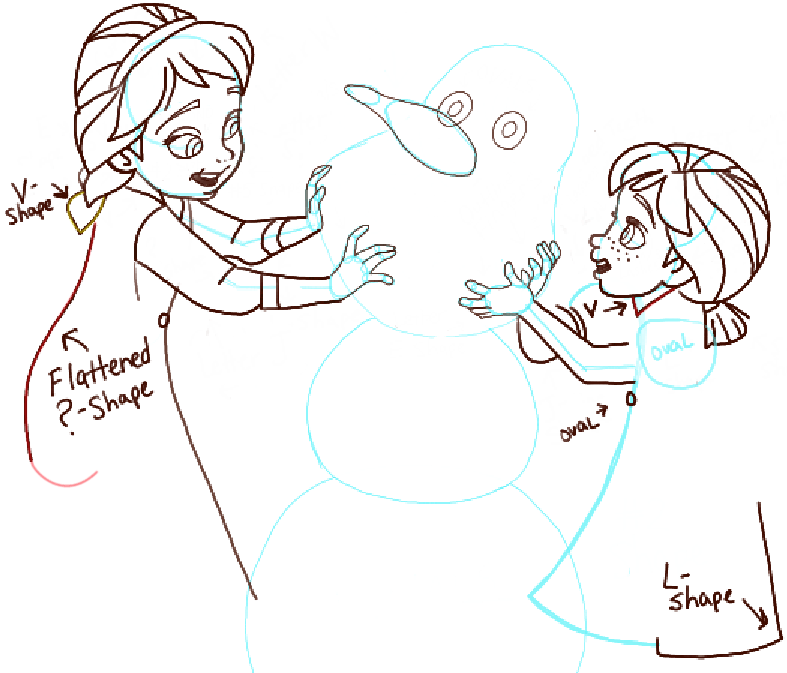
– (girl on right) – Draw a backwards letter ‘L’ shape at the bottom right-side of her dress … draw an oval under her arm … and draw a letter ‘V’ shape under her chin
– (girl on left) – Draw a flattened ?-like shape on the right side of her body … Draw a letter ‘V’ shape at the bottom of her hair …
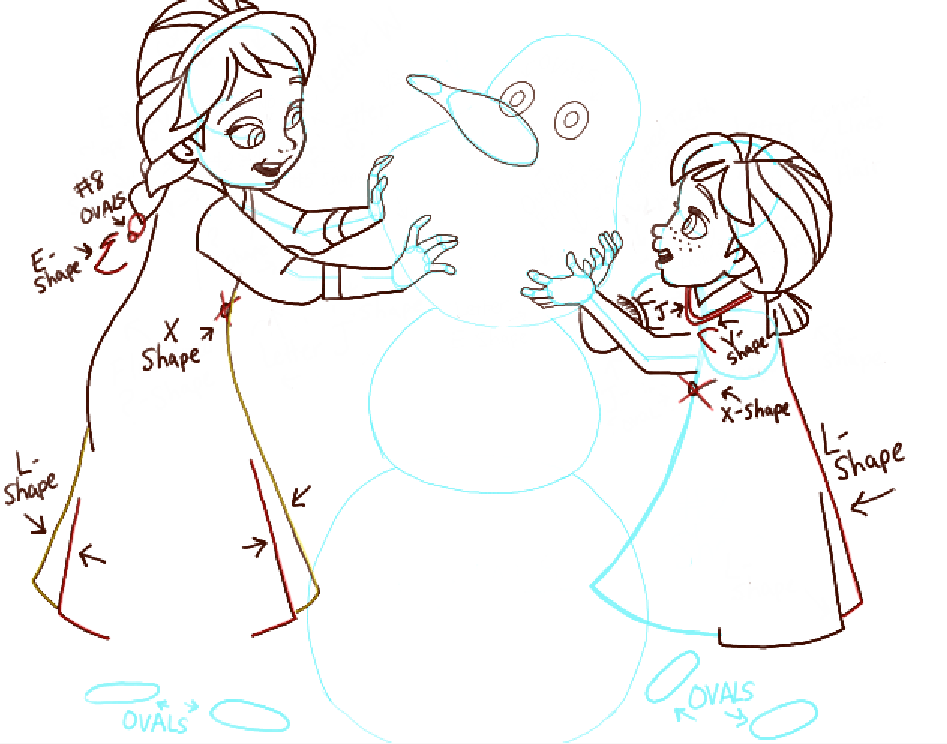
– (girl on right) – Lightly draw ovals below her dress … Draw another letter ‘L’ shape at the right-side of her dress … Lightly draw an ‘x’ shape over the oval … Draw 2 letter ‘J’ shapes … and draw a letter ‘v’ shape.
– (girl on left) -Lightly draw ovals below her dress … Draw 4 letter ‘L’ shapes at the bottom of the dress … Lightly draw an ‘x’ shape over the oval … draw 2 ovals in the shape of a #8 at the bottom of the hair … also draw a letter ‘E’ shape below the braid.
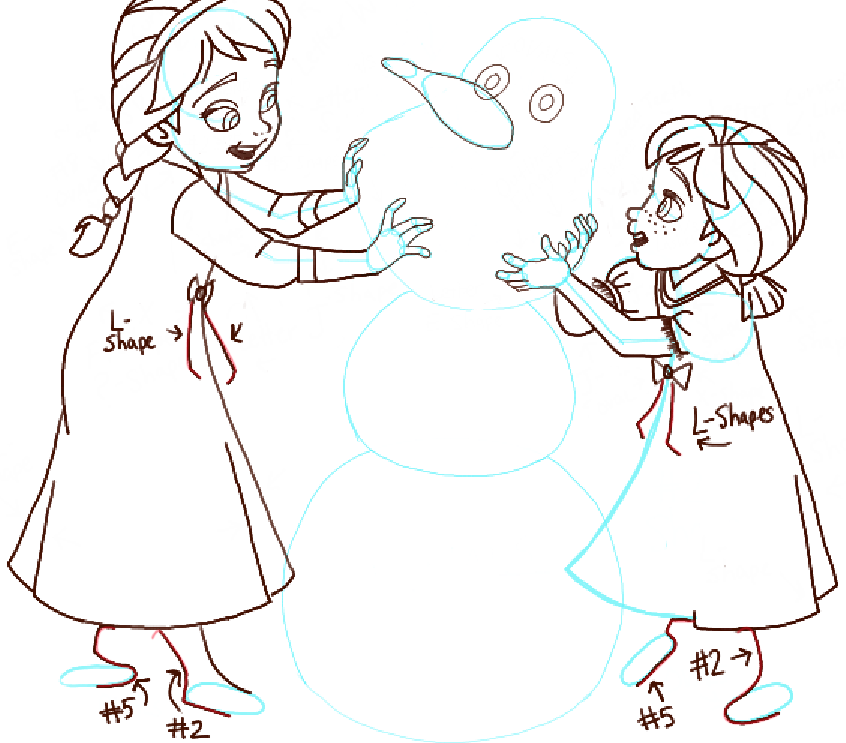
– (girl on right) – Draw a #5 and a #2 shape on the ovals … Draw a line on both sides of letter ‘x’ shape for bow … and draw 2 letter ‘L’ shapes for the ribbon.
– (girl on left) – Draw a #5 and a #2 shape on the ovals … Draw a curved line on both sides of letter ‘x’ shape for bow … and draw 2 letter ‘L’ shapes for the ribbon.
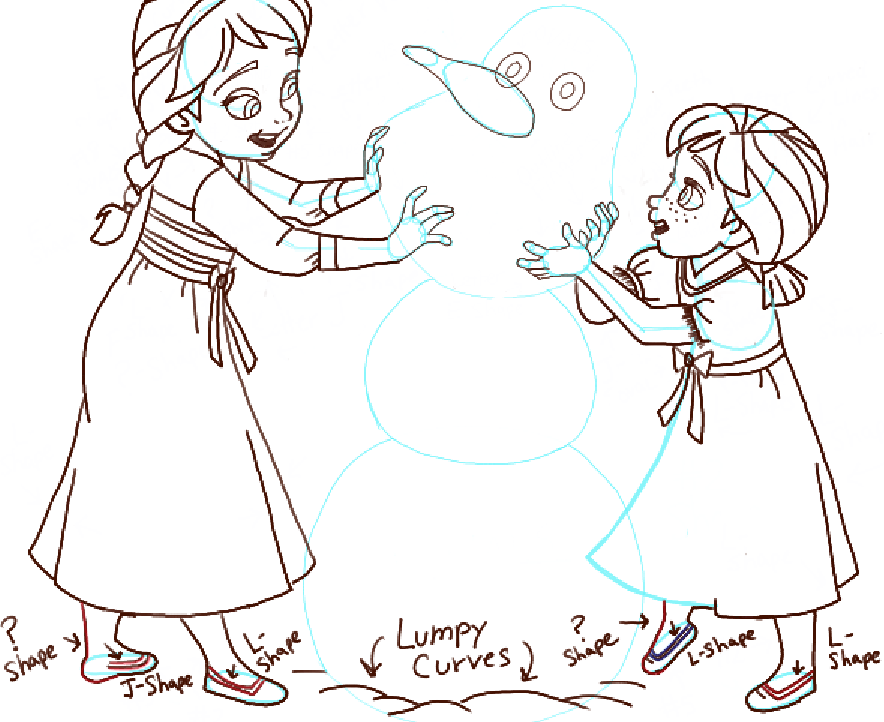
– (girl on right) – Draw an upside down ?-like shape on the left shoe…as well as a letter ‘J’ shape in the left shoe … draw a letter ‘L’ shape in the right show.
– (girl on left) – Draw an upside down ?-like shape on the left shoe … draw a letter ‘J’ shape inside the left show and a letter ‘L’ shape inside the right shoe.
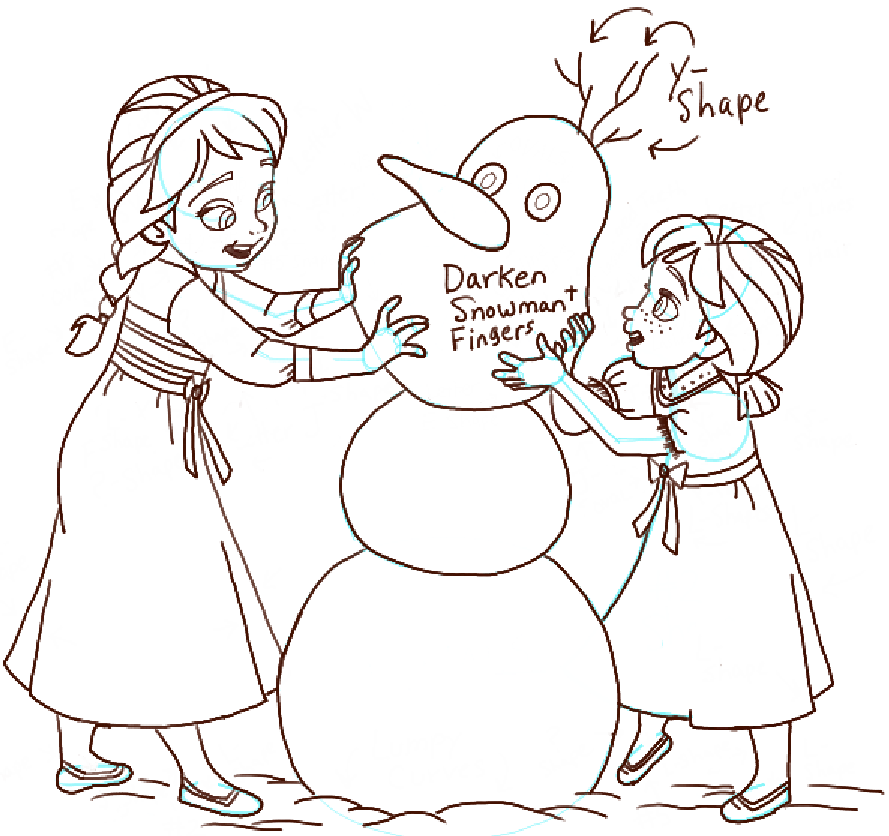
– Draw letter ‘Y’-like shapes on top of the snowman.
– Darken the lines.
– Erase guidelines and color in your beautiful picture. I hope this wasn’t too hard to draw…I tried to make the instructions as easy as possible.
Here are Our Other Disney Frozen Tutorials
Technorati Tags: elsa and anna, princess elsa and anna, snowman, olaf, disneys frozen, anna and elsa building a snowman, princess elsa, princess anna, how to draw frozen
Today I'll show you how to draw Rick from the Rick and Morty cartoon tv…
Today I'll show you how to draw Morty from the Rick and Morty cartoon tv…
Today I'll show you how to draw the spunky little rabbit, Kuromi, from My Melody…
Today I'll show you how to draw this cute "bean duck" that I found on…
Today I'll show you how to draw Sosuke and Ponyo in a bubble (chibi /kawaii…
Today I'll show you how to draw a Boo from Super Mario Bros in Kawaii…
View Comments
It was pretty easy to draw cause sometimes when it comes to drawing people like that it's hard but I am a pretty good artist in drawing other things well that what people say
This was soooo hard! But it got done.
I tweaked it a little, so it doesn't look like all of it, I'm soooo tired right now
You just helped me with a huge bet! Thanks a million! :D
Thats awesome!
Oof, that one took me a while....but I got it, thanks to your steps! I'm really proud of it and all of the drawings I've done with this website! Draw on!
Thank you so much! This was very helpful! Mine isn't perfect,(Anna's head is too big and Olaf is too small) but I'm sure that I'll get it with practice. The complex drawing was surprisingly easy thanks to your simple steps. Again, thank you so much, it's really amazing!
I'm glad that the tutorial helped you!!!
Thank you so much, mine looks almost exactly the same.
THANK YOU for sharing your inovative way of tutoring. Iam pleased to say that I am impressed with my own drawing! X
I'm glad it helped you!!!
You weren't kidding when you said this was hard it took me almost 2 hours to draw it and I messed up on Elsa's eyes she came out looking like an ailen
Sorry that it didn't turn out great for you. :-(