Everybody loves Elsa from Disney’s Frozen…Even though I have already posted a few Elsa tutorials, I keep getting more requests for more lessons FOR ELSA!!! Today I will show you how to draw Elsa the Snow Queen. I hope that you like this picture of her and that you will be happy with the results. I will guide you to drawing Elsa by bringing you thru the drawing process in this step by step drawing tutorial. I hope that I make this easy for you! Have Fun!
You Might Also Enjoy Our Other Disney’s Frozen Tutorials
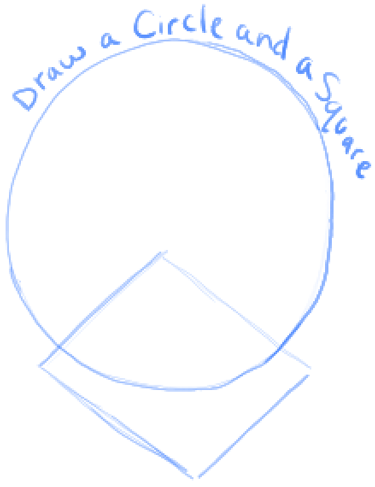
Draw a circle and a rectangle on an angle.
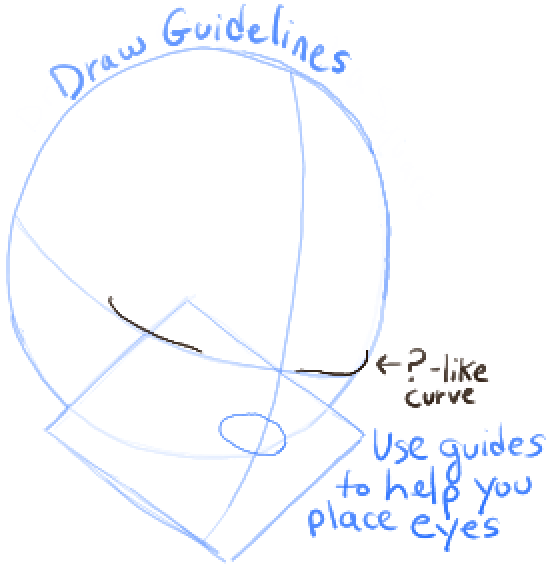
– Lightly draw guidelines thru the circle and rectangle…as seen above.
– Use the guidelines to help you place the facial features.
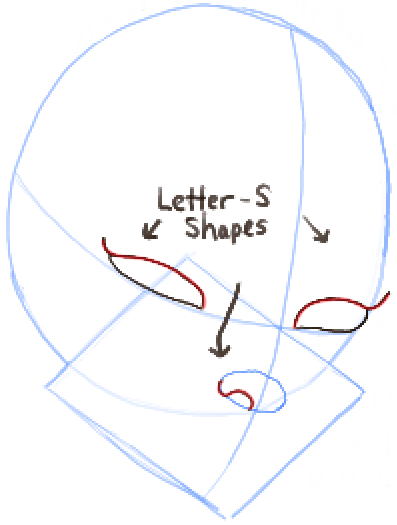
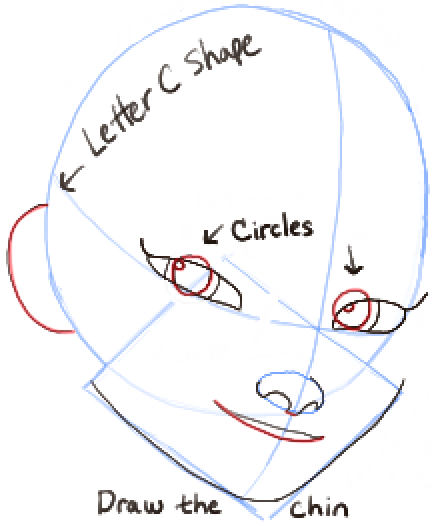
– Draw parts of the eyes.
– Draw an oval as the guide for the nose.
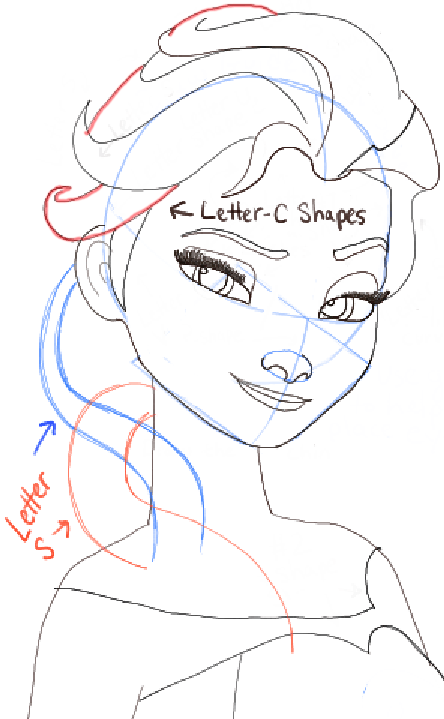
– Draw a few letter ‘s’ shapes.
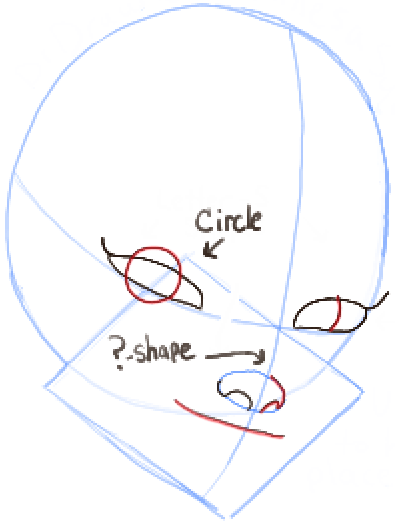
– Draw a circle in the left eye and a curved line in the right eye.
– Draw a ?-like shape for the right nostril.
– Draw the top of the mouth.
– Draw a letter ‘C’ shape for the ear.
– Draw circles in the eyes.
– Draw the bottom curve of the nose.
– Draw the bottom of the top lip.
– Use the guideline-rectangle to help you draw the chin.
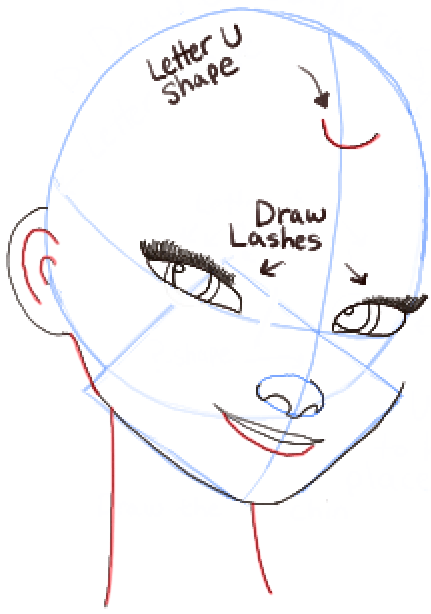
– Draw 2 letter ‘c’ curved lines in the ear.
– Draw a curved line for the b0tt0m lip.
– Draw a letter ‘u’ shape for the middle of the hair.
– Draw curved lines for the neck.
– Draw the lashes
– Draw two sideways ‘?’-like shapes for the bangs.
– Draw curved lines for the eye lids.
– Draw upside down letter ‘J’ shapes for the shoulders/arms.
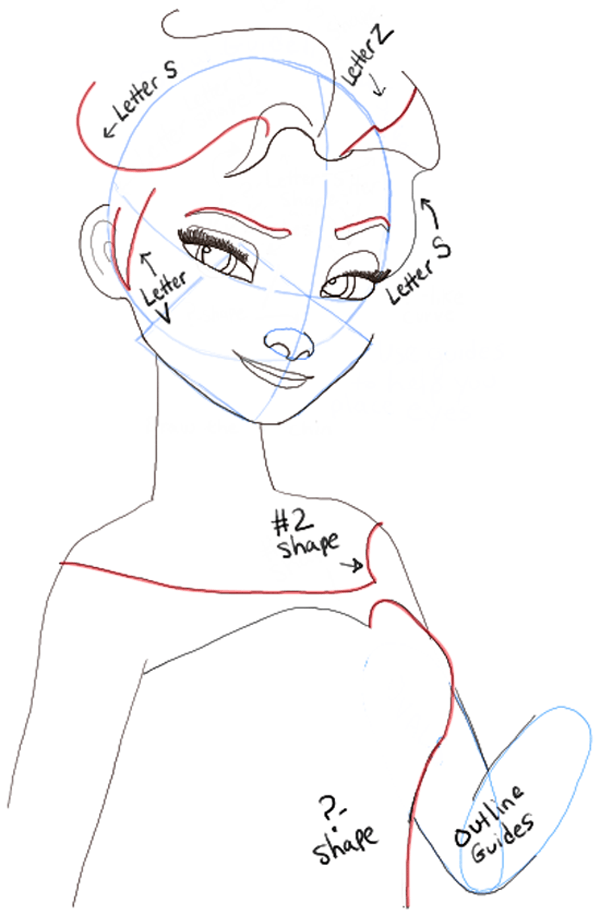
– Draw letter ‘s’ shapes for the eye brows and for some of the hair.
– Draw 2 ovals for the guidelines of the right arm.
– Draw a sideways #3-like shape for the top of the dress.
– Draw a letter ‘s’ and letter ‘z’ and letter ‘v’ shape in the hair.
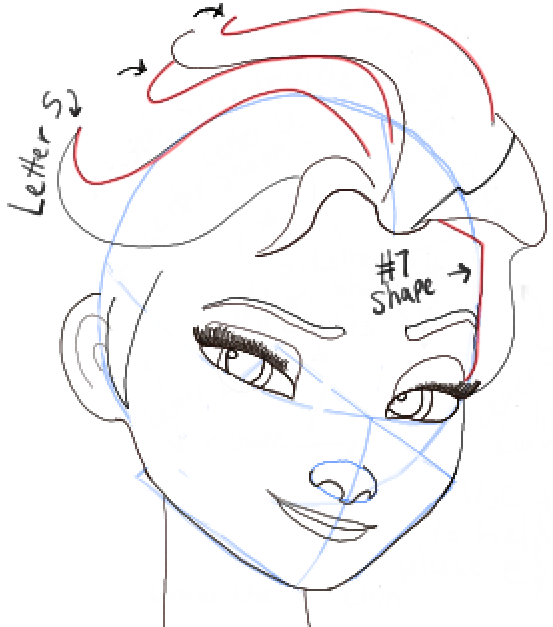
– Finish the eye brows.
– Draw a backwards #2-like shape for the top of the dress.
– Draw a ?-like shape for the right-side of the dress.
– Outline the arm ovals for the actual lines of the arm.
– Draw letter ‘s’ shapes in the hair.
– Draw a backwards #7-like shape for the forehead.
– Finish up the shapes in the hair.
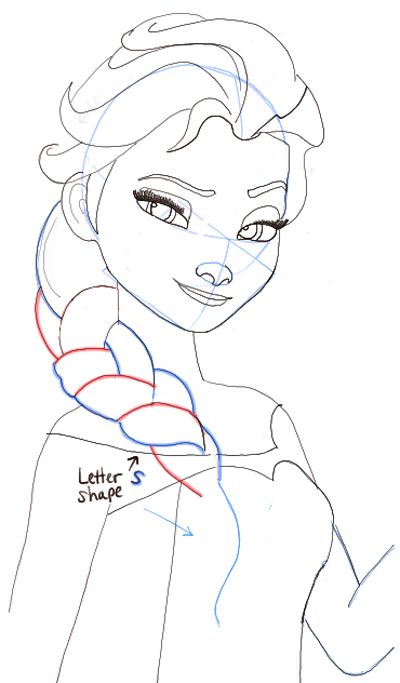
– Draw some guidelines for the braid…by lightly drawing letter ‘s’ shapes.
– Use the letter ‘s’ shapes to guide you to drawing the other shapes…as highlighted above.
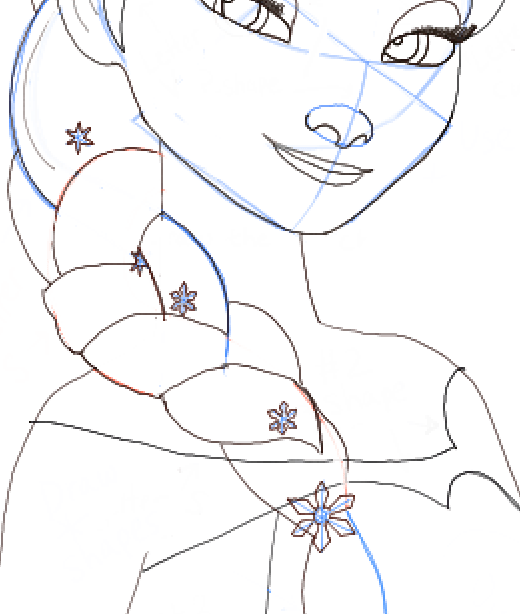
– Lightly draw asterisk-like shapes to guide you to drawing the snowflakes in the hair.
– Draw letter ‘s’ and #3-like shapes at the bottom of the hair.
– Outline the asterisk shapes – with a circle in the center and then diamond shapes on each line that you drew.
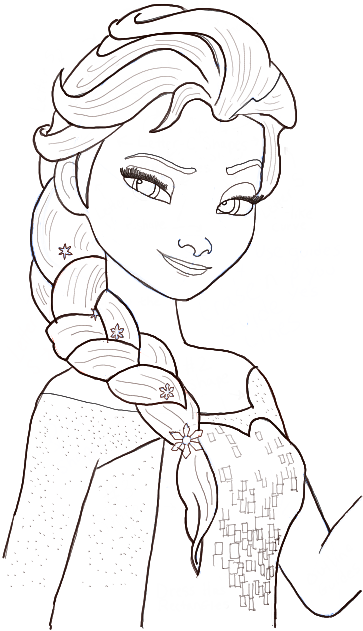
– Thicken the important lines.
– Lightly draw rectangles in the chest part of the dress….draw tiny circles on the other parts of the dress.
– Erase the guidelines (blue in this tutorial). Fix any last minute things. You now have a beautiful picture of Elsa as The Snow Queen. I hope that your picture turned out fabulously well! Come back for more drawing tutorials and especially Disney’s Frozen Drawing Lessons.
You Might Also Enjoy Our Other Disney’s Frozen Tutorials
Technorati Tags: elsa, elsa the snow queen, princess elsa, elsa from frozen, how to draw elsa, how to draw elsa from frozen
Today, I'll show you how to draw a cartoon girl pointing at herself with step-by-step…
Today, I'll show you how to draw a crying cute little cartoon guy who is…
Today, I'll show you how to draw an adorably super-cute cartoon owl on a witch's…
Today I will show you how to draw a super cute baby-version of Winnie The…
Today I'll show you how to draw the famous Pusheen cat from social media, such…
Today I'll show you how to draw this super cute chibi version of Deadpool from…
View Comments
Omg!!!!!!! My elsa turned out GREAT! The face is not so similar but when I take a glance at it- it looks so perfect! THANK YOUU!!!
some steps are unclear .. not mentioned. especially the braid. some steps appear in the next image but not mentioned above. :(
I want to draw her hand also! Pls add that to the drawing
What paints do I use to make this in color?
You can use any sort of paint, but if you have it available, probably acrylics would work best.
Noooooooooooooooooooooooooooo! It didn't show how to draw the hand and the snowflake! But that's ok. I found a picture and drew it myself. The rest of my Elsa turned out great!!! It looks just like the real thing!
This is a great tourtial! I'm stuck. The instructions on the hair braid are a little unclear to me, anyone got any advice?
Just a request to make--can you tell me at the beginning of the tutorial how big your paper is and what side of the page I should start on? Because when I drew my Elsa, I had to cut off her arm in order to fit everything. Now she looks perfect, but I would still have liked to see the arm more.
Hi there Jackie. Thanks for your comment. I drew this one on my computer with a drawing tablet. However, when I do draw on paper, a lot of times I get a drawing pad out - which is usually 14x17 .... maybe you could pick up one of those for when you are drawing detailed faces. I find that those are hard to draw small. I hope this helped you.
Thanks . i love my drawing very very
I'm only up to the guide lines and my friend said help me I can't draw HAHAHAHA
Ps Happy Halloween.
I love Elsa but you have ruined my dreams.
( I CANT DRAW!!!!!!)
I'm sorry that I ruined your dreams!!! I still know you can do it if you keep trying!!!
Great tutorial! I loved it. could you maybe do a drawing tutorial on Jack Frost? Thanx!!! :-P