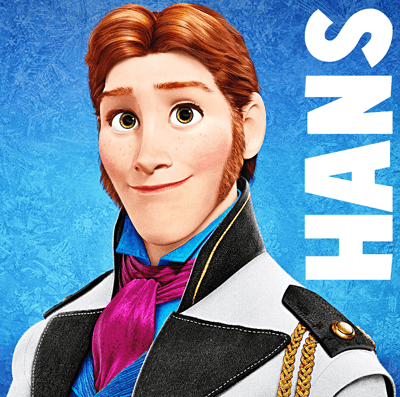
Today I will show you how to draw Prince Hans from Disney’s Frozen. He is the horrible Prince who betrays Princess Anna at the end of the movie. I will guide you thru the drawing steps in as simple a way as I can..using geometric shapes, alphabet letters, and numbers. Find out with the following lesson.
You Might Also Enjoy Our Other Frozen Drawing Lessons
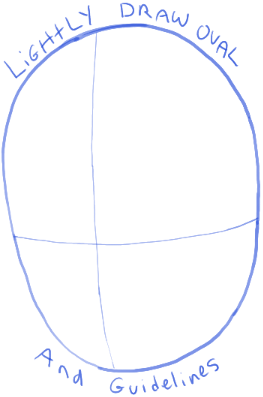
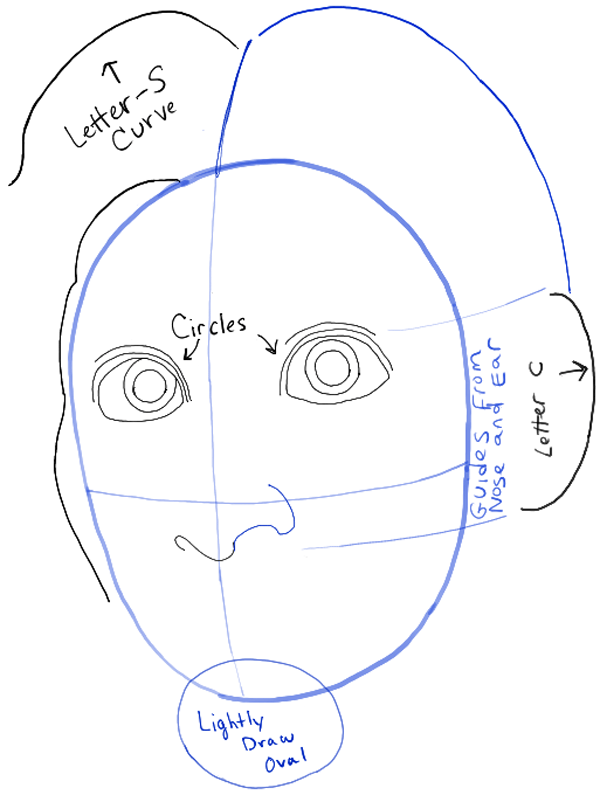
Lightly draw an oval. Then draw guidelines within the oval to help place facial features.
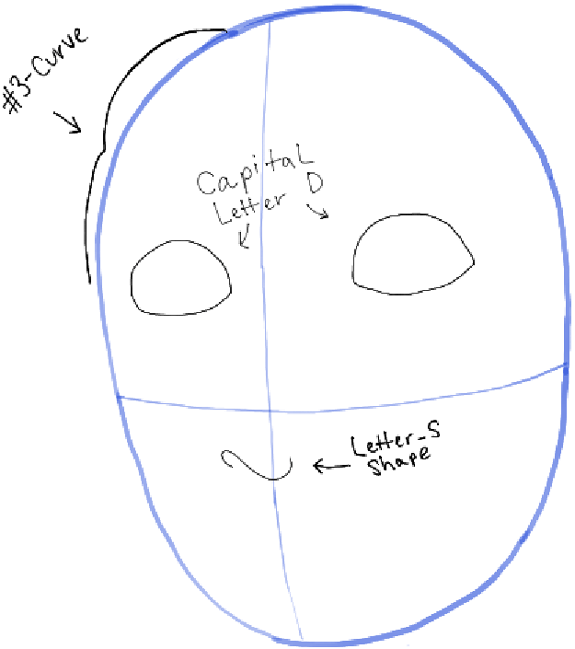
– Draw a flattened #3-like shape on the upper left side of the head.
– Draw sideways capital letter ‘D’ shapes for eyes.
– Draw a sideways letter ‘s’ shape for the nose.
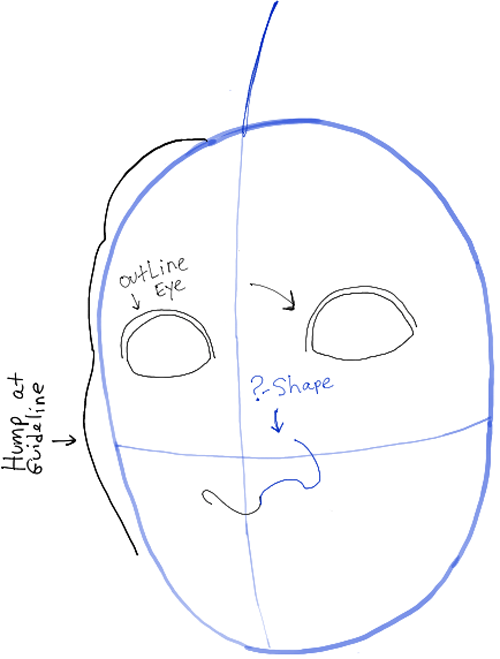
– Draw a curved line at the left side of the head…the lump is at the middle guideline.
– Draw lids on the eyes.
– Draw a sideways ?-like shape for the right-side of the nose.
– Elongate the top of the middle guide for the center of the hair line.
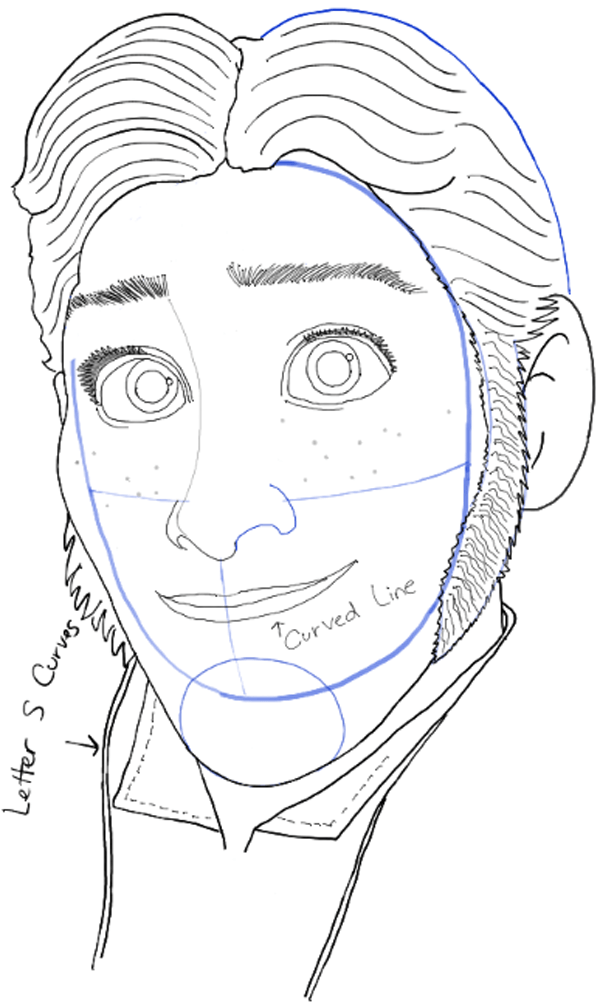
– Draw a letter ‘S’ shaped curve on the upper left hand side of the head.
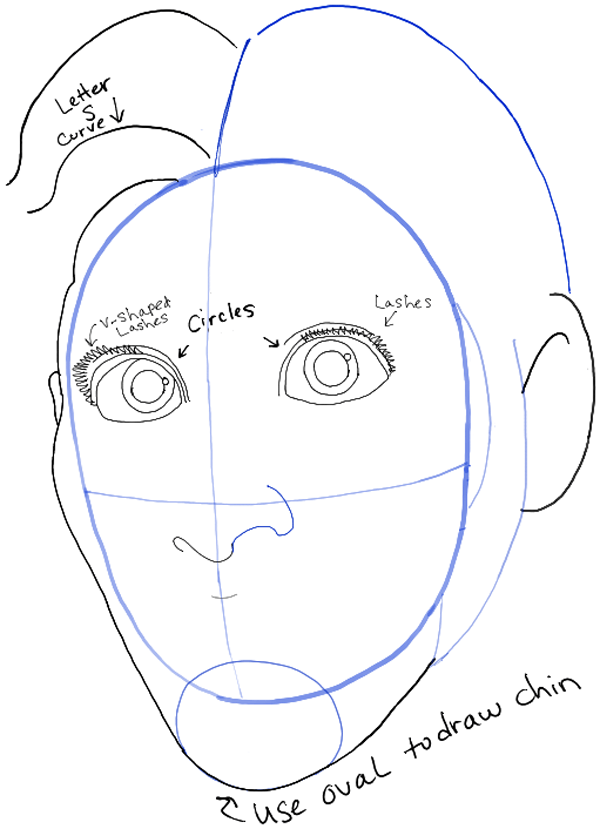
– Draw circles within the eyes.
– Lightly draw guidelines from the bottom of the nose and the top of the eye – over to the right. This will be where you need to draw the ear…which is shaped like a letter ‘C’.
– Lightly draw an oval guide for the chin.
– Draw another letter ‘s’-like curve in the hair.
– Use the oval chin guideline to help you draw the real outline of his chin/jaw.
– Draw letter ‘v’ shaped eye lashes.
– Draw a curved line for the middle of the lip.
– Draw circle highlights in the eyes.
– Draw a curved line in the ear.
– Draw curved lines for the right-side sideburn.
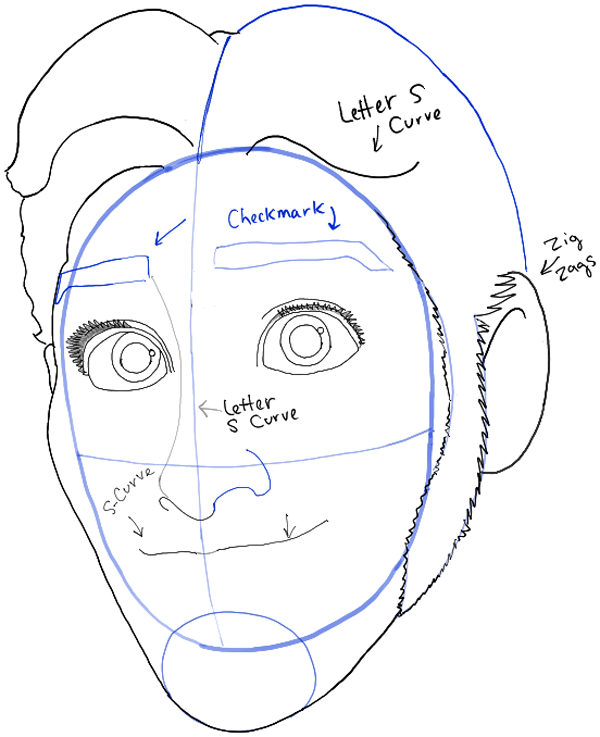
– Draw a very flattened letter ‘S’ curves on both sides of the middle of the lip.
– Draw a letter ‘s’ curve for the bridge of the nose.
– Draw checkmark guidelines for the eye brows.
– Draw a letter ‘s’ curve in the hair as well as a few other lines.
– Draw zig-zaggy lines over the side burn guideline that you drew in the last step.
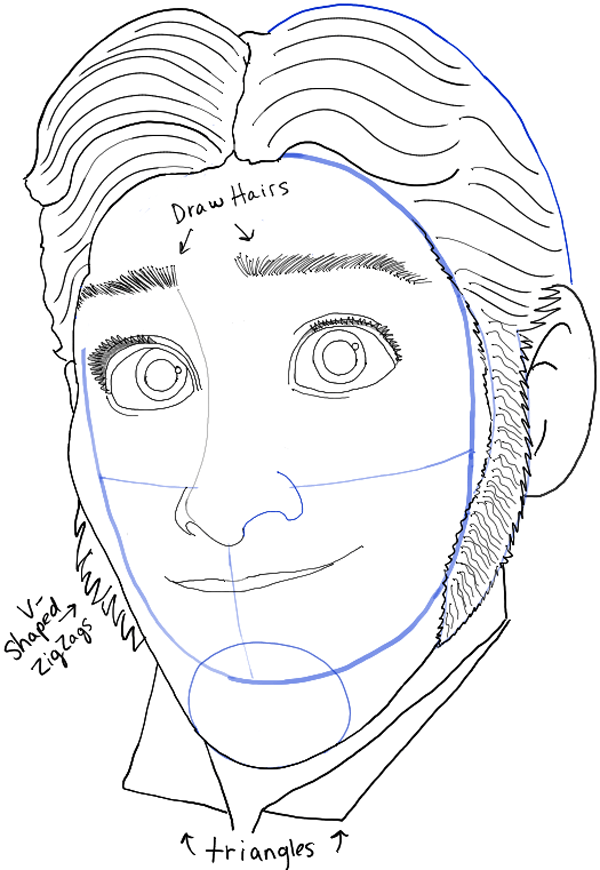
– Draw curvy lines for hairs.
– Draw a curved line for the bottom of the top lip.
– Draw hairs in the eye brow guidelines.
– Draw zig-zags for the hair on the left side of his face.
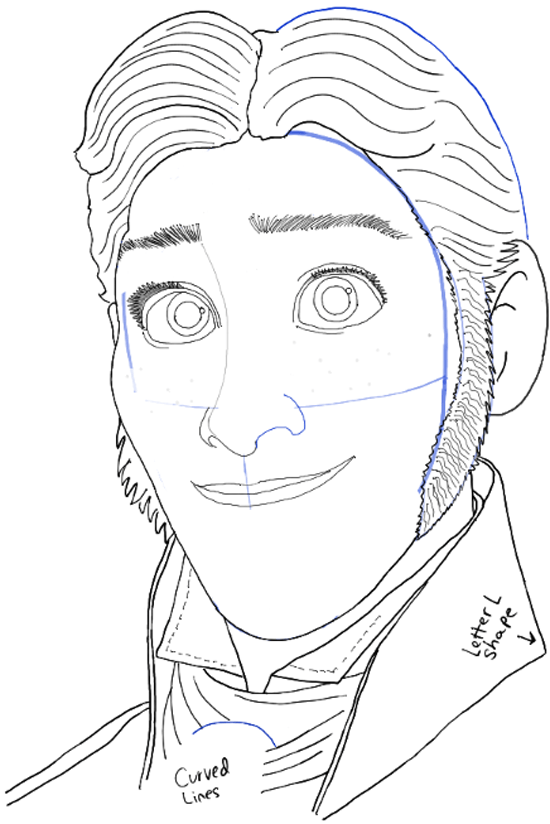
– Draw triangle-like shapes for the collar.
– Draw a curved line for the bottom lip.
– Draw little dashed lines inside the collar for stitches.
– Draw 2 letter ‘s’ shaped curves on both sides of the shirt.
– Draw a letter ‘L’ shape on the right side of the shirt.
– Draw some curved lines under the collar.
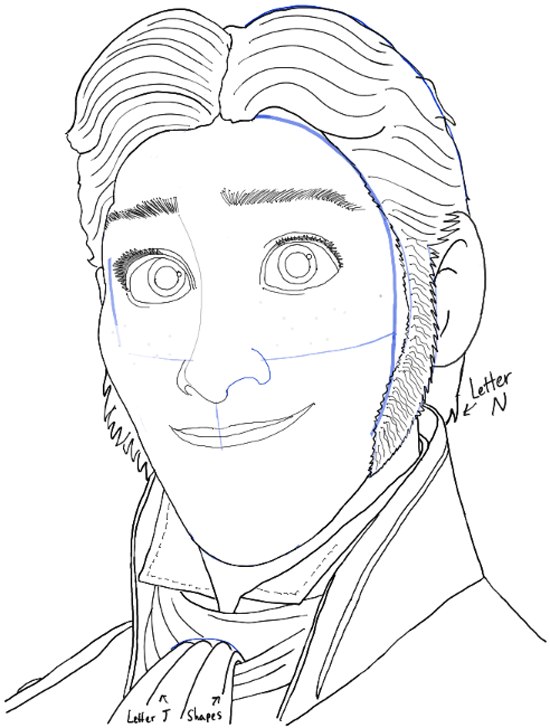
– Draw letter ‘J’ shapes within the blue curved line.
– Draw a curved line for the button on the left side of the shirt.
– Draw a few more lines.
– Draw a letter ‘N’ shape under the ear.
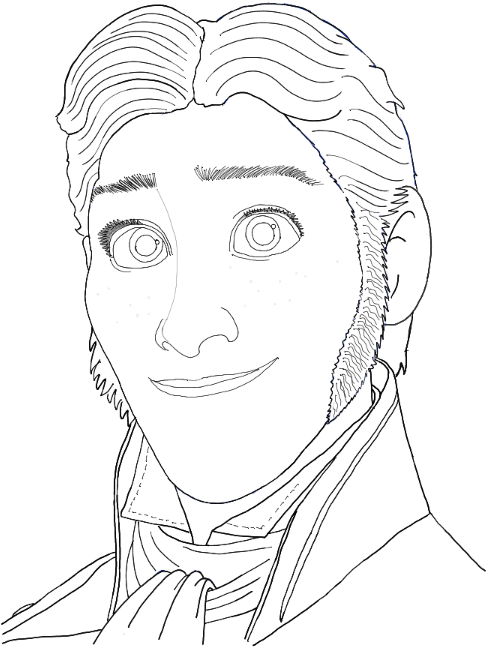
– Erase the guidelines and then darken or thicken any lines that need some work. Come back for more Frozen tutorials as well as other types of drawing lessons.
You Might Also Enjoy Our Other Frozen Drawing Lessons
Technorati Tags: prince hans, hans, prince hans from frozen, hans from frozen, frozen, disneys frozen
Today, I'll show you how to draw a cartoon girl pointing at herself with step-by-step…
Today, I'll show you how to draw a crying cute little cartoon guy who is…
Today, I'll show you how to draw an adorably super-cute cartoon owl on a witch's…
Today I will show you how to draw a super cute baby-version of Winnie The…
Today I'll show you how to draw the famous Pusheen cat from social media, such…
Today I'll show you how to draw this super cute chibi version of Deadpool from…
View Comments
wow cool but not yet colored
Wow it is amazing I am stunned at how brilliant it is xxx
Wow it looks amazing
thanks it was fun but it was also hard work to get it right but i liked doing it thanks agian
Awesome! Did so well on it and it was easy for me! Thanks for making this!!!
I tried ariel and it came put superb. Great website
Cool drawing. It was fun and I liked it.