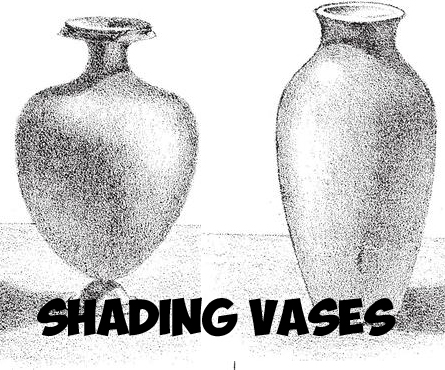
Shading is a tricky subject…let the follow tutorial guide you through the process of shading vases. Vases are a combination of different shapes that you might already know how to shade, such as the cylinder and the sphere. This drawing lesson from an old textbook might bring clarity to the subject for you. Happy shading!
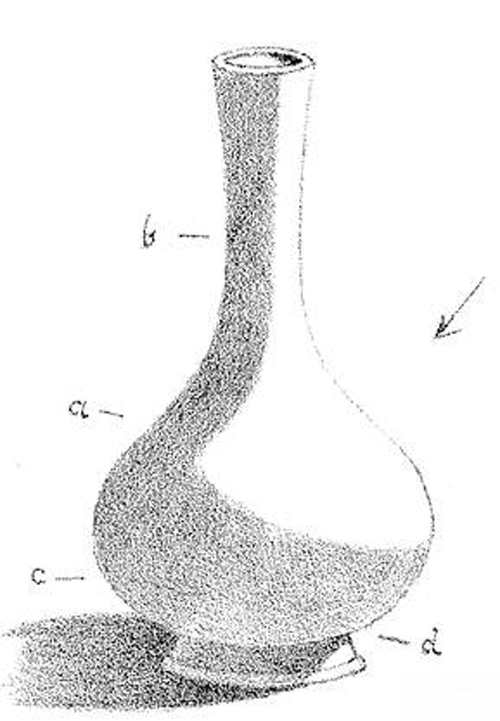
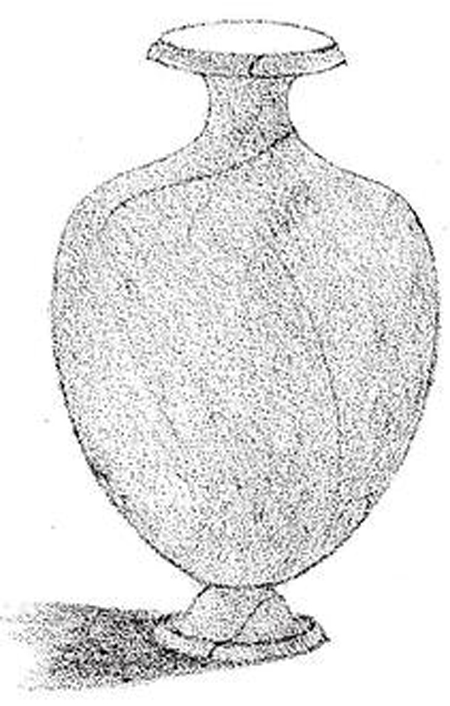
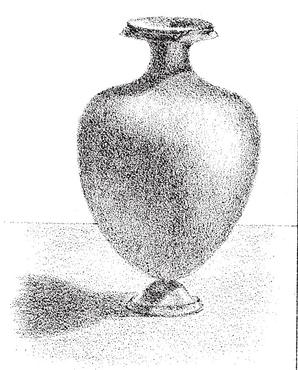
The Long-necked Vase may be looked upon as consisting of three parts—neck bulb, and foot ; the first of which (as seen in the picture above), b, is a cylinder; the second, c, a sphere ; and the last, d, part of a cone. The light falls from above and from the right.
Draw the vase very carefully, and then mark the cast-shadow of the bulb cast on the foot and along the ground-plane. Sketch very lightly with charcoal the outline of the shade on the neck and bulb, and shade it and the cast- shadow of a depth equal to their lightest tone.
The neck is cylindrical.. its darkest portion will therefore lie away from the edge. Its high light will run in a line down the neck. The bulb is a sphere, and the edge of its shade will run at right angles to the direction of the rays of light. Its high light will be centered in a spot. Mark these high lights and add the darkest portion to the shades. These will be near the right edge, whence they will gradate to the left. Reflection will lighten the lower right-hand portion of the bulb, while that on the left will be dark, turned away as it is from the reflected light.
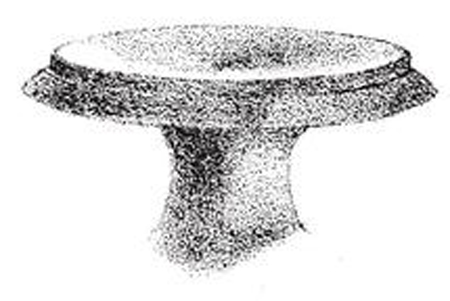
The portion marked a will be found to be dark and to have a clear-cut edge; for this is the shadow cast by the neck along the bulb. For the same reason the shadow of the bulb on the foot will show a clean edge. (see picture below where picture is enlarged)
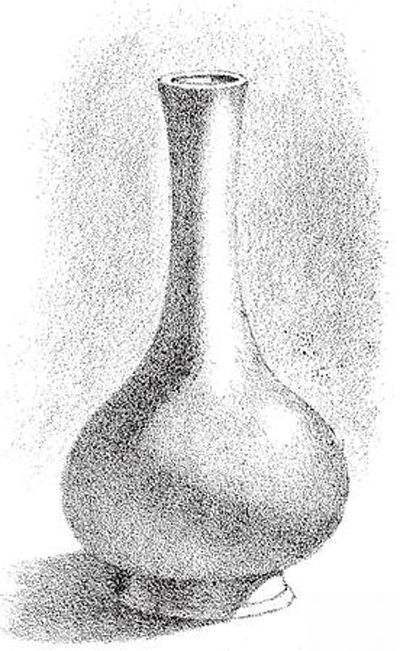
The foot is part of a cone, and if there were no cast-shadow overlying it, the darkest portion would appear removed some little distance from the left edge, whence there would be a gradual gradation to the high light on the right. Now, although the greater portion is overlaid with shadow, these differences are maintained, though in a darker key. The foot as a whole appears darker than either bulb or neck. The highlight runs in a line.
Gradate the half tones on neck and bulb towards the high light.
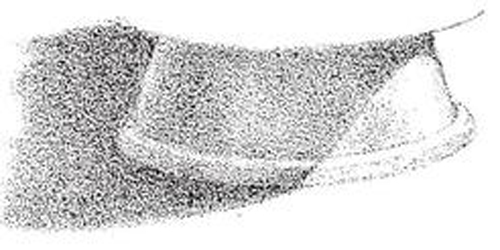
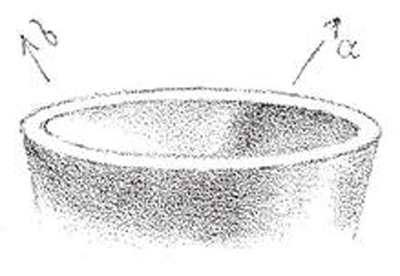
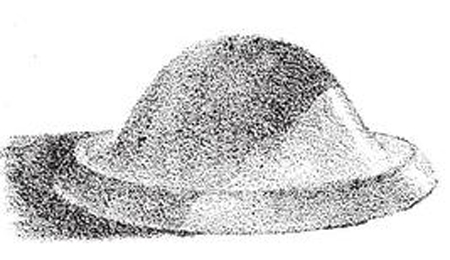
The lip and inside of the neck are shown enlarged. Within, as we might expect, the point b, immediately opposite the light, will be brightest. The shadow thrown by the rim should be clearly drawn. Its darkest portion will be found nearest the edge of this shadow at a, for the other part is lit up by reflected light. (This gives the shading of the inside of hollow hemispheres, such as bowls.) In showing such minute detail it will be found advisable to use smaller stumps. The darkest portions may be inserted with the crayon.
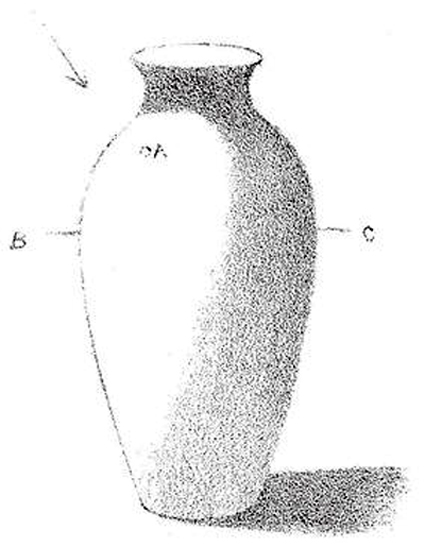
The Long-bulbed Vase consists of three portions—neck, shoulder, and bulb; the first a curved cylinder, the second a hemisphere (as far as B C), and the last a cylinder. The light falls from the left.
The rim casts a shadow on the neck. Its outline gradually becomes less defined as the shade sweeps down the vase. Draw this and the cast-shadow along the ground, and indicate lightly the edge of the shade on the vase. The high lights will be a spot on the shoulder and a curved line along the bulb. Mark the position of both. Shade the cast-shadows, noticing that the darkest of all is under the lip. Then lay the shades on the vase all of their lightest depth.
Darken the shades near the left edge, and gradate towards the right. Notice how these follow the forms of the sphere and the cylinder.
Gradate the shades towards the high lights. The neck, being cylindrical, will appear darkest away from the light, but not quite on the edge; and overlaid as it is with a shadow, these differences will still obtain, as we saw with the foot of the last vase .
The whole tone will simply be darker throughout. Add the necessary gradations in this shadow, and darken especially the right hand of the shadow. The inside of the lip will require care.
Deepen the cast-shadow along the ground-plane where necessary.
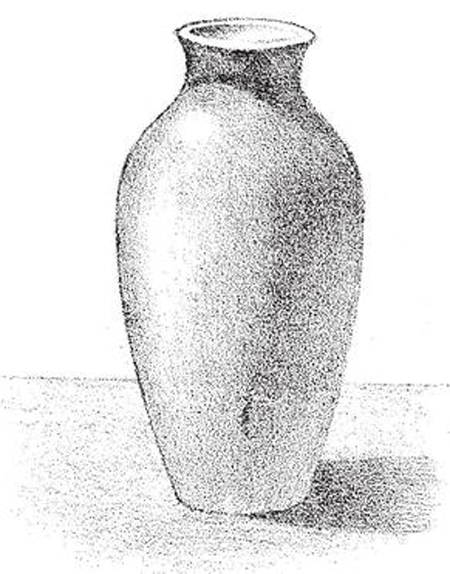
We have been dealing with white surfaces, which show minute differences of light and shade that are partly lost on dull colored objects. Yet, if we were to color any of the geometrical models, we should still find its masses of shades and lights distributed as before, though the gradations would be less marked, and the effects of reflection not so pronounced. Now, common objects are seldom white, so it is well to see how the presence of color modifies their tones. The vase selected for illustration was colored a dull red. If you take two rectangles—one white, the other red—and place them on a sheet of light brown paper, it must be evident that to express the tone of both, without using color, you must shade the whole of the red darker than the white rectangle. There would, therefore, be three tones : the darkest to represent the red rectangle, the next in tone for the ground-plane, and the lightest for the white rectangle.
Among several colored objects you will at first find it difficult to decide which is lightest and which darkest in tone. You should first select those whose colors are strongly marked, until you are able to appreciate finer differences. But to the vase in hand. As it is colored, its whole tone must be dark. Its cast-shadow, however, will be scarcely darker than that thrown by a white vase. In the latter, a slight reflection from the body of the vase may partly lighten the cast-shadow, but very slightly. Broadly speaking, cast-shadows do not depend for their intensity upon the color of the objects that cast them. Hence, since the whole shading of this red vase will be in a dark key throughout, there will be less difference between the depths of its shades and its shadows along the ground.
Cover the whole vase with a tone equal in depth to the apparent lightest part of its surface. Draw the cast-shadows on the ground and on the vase. There are three: that from the rim along the neck, a second from the, bulb along the foot, and the third of the whole vase along the ground.
Mark the outline of the shade. Shade the cast- shadows, of which the darkest will be that thrown by the rim.
The neck is cylindrical, the bulb egg-shaped, the foot a cone. There is no need to recapitulate the principles of light and shade that apply to these bodies. Mark the high light on the bulb, and lay in the shade of an even tint.
Gradate the half-tones on the bulb, rim, and foot, towards the high lights, which, of course, will not be white. (You must remember, however, that if the vase were glazed its high lights would then be quite white.) Darken the cast-shadow where required—under the rim to the right, under the bulb to the right, and on the ground near, the vase.
The picture above gives an enlarged drawing of the neck, and (below) of the foot.
Careful consideration of the vase with these in hand should make the method of shading clear. Vases are difficult; objects, and should be placed in all possible positions. If you mentally analyse them into the geometrical forms to which they approximate, you should be able to account for all lights and shades upon them.
Technorati Tags: shading vases, vases, shadows, shading, how to shade a vase, how to shade vases
Today I'll show you how to draw Rick from the Rick and Morty cartoon tv…
Today I'll show you how to draw Morty from the Rick and Morty cartoon tv…
Today I'll show you how to draw the spunky little rabbit, Kuromi, from My Melody…
Today I'll show you how to draw this cute "bean duck" that I found on…
Today I'll show you how to draw Sosuke and Ponyo in a bubble (chibi /kawaii…
Today I'll show you how to draw a Boo from Super Mario Bros in Kawaii…
View Comments
Do you have one with a "u" shape on this subject?