We will show you each step to be taken in shading a cube in this tutorial, for this solid is a representative of all prisms, and, indirectly, of the cylinder. Place the cube on a sheet of light brown paper, and pin against the wall behind it a similar sheet to serve for background. Let the light fall from the right and from above the cube. The top face will be the brightest of those seen, and the darkest will necessarily be that next the cast-shadow.
How To Add Shadows to a 3D Cube (Shading Cubes) Step by Step Drawing Tutorial
STEP 1
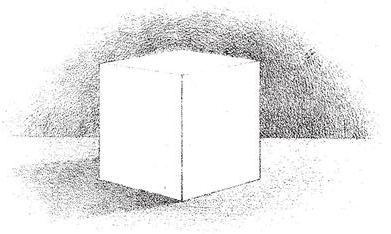
Draw the cube carefully (reference this cube drawing tutorial here)and lightly in charcoal. Incorrect lines may be removed by dusting with the tinder. Do not draw with black-lead, as it is greasy, and will afterwards appear white in your shading.
Step 2
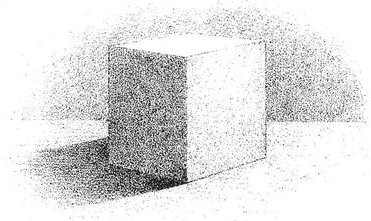
The two perpendicular faces seen differ in depth of tone. Decide the tone of the darker in relation to the cast-shadow and the background, and of the lighter in relation to all three. Shade each of an even tint, equal in depth to the lightest part of each.
Step 3
Partly owing to reflected light from the ground-plane and partly to the effect of contrast,¹ a light gradation appears on each perpendicular face, working from the upper right-hand corner and along the right edge towards the left. Lay on each carefully (see Fig. 18), being careful not to get them too dark. (The lowest part of the side next the cast-shadow receives little reflected light, and should be slightly shaded.)
Step 4
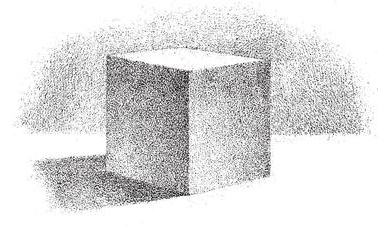
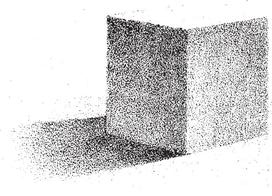
The cast-shadow is darkest nearest the cube, and its outline is most clear in the same part (Fig. 4). Add this gradation to the shadow. The upper face, although light, is not white. A slight tone will be noticed gra- dating from the back edges to the front, where the effect of contrast with the darker perpendicular faces will help to make it lighter still. Lay this gradation very lightly. It may be necessary to free the stump almost entirely of chalk. The background may now be darkened along the edge of the top face (again the effect of contrast), and the drawing is complete. Fig. 24 shows the same cube without a background. In this case it may be necessary to faintly mark with a crayon the further edges of the top face.
The brightest part is near the front edge. You will notice that the brightest light and the deepest dark are small in quantity; this is so on every object. “White should be regarded as the jewels of your picture, and used with great discretion.
So To Repeat The Tutorial in a Shorter Way:
(Method for all models.)
1. Draw carefully the model and its shadows.
2. Shade—of their lightest depth—the cast – shadow, background, and ground- plane.
3. Lay the shades on the model evenly, beginning with the darkest and proceeding to the next lighter—in all cases making them throughout equal in depth to their lightest part.
4. Gradate the tones on the model.
5. Darken the cast-shadow where required.
6. Add slight tones to the background near the edges of the model, to show the effect of contrast. Leaving the cube as it stands, you would find it useful practice to alter your position, and make drawings from all points of view.
Technorati Tags: shadows, shading, shading cubes, shading cubes, how to shade cubes