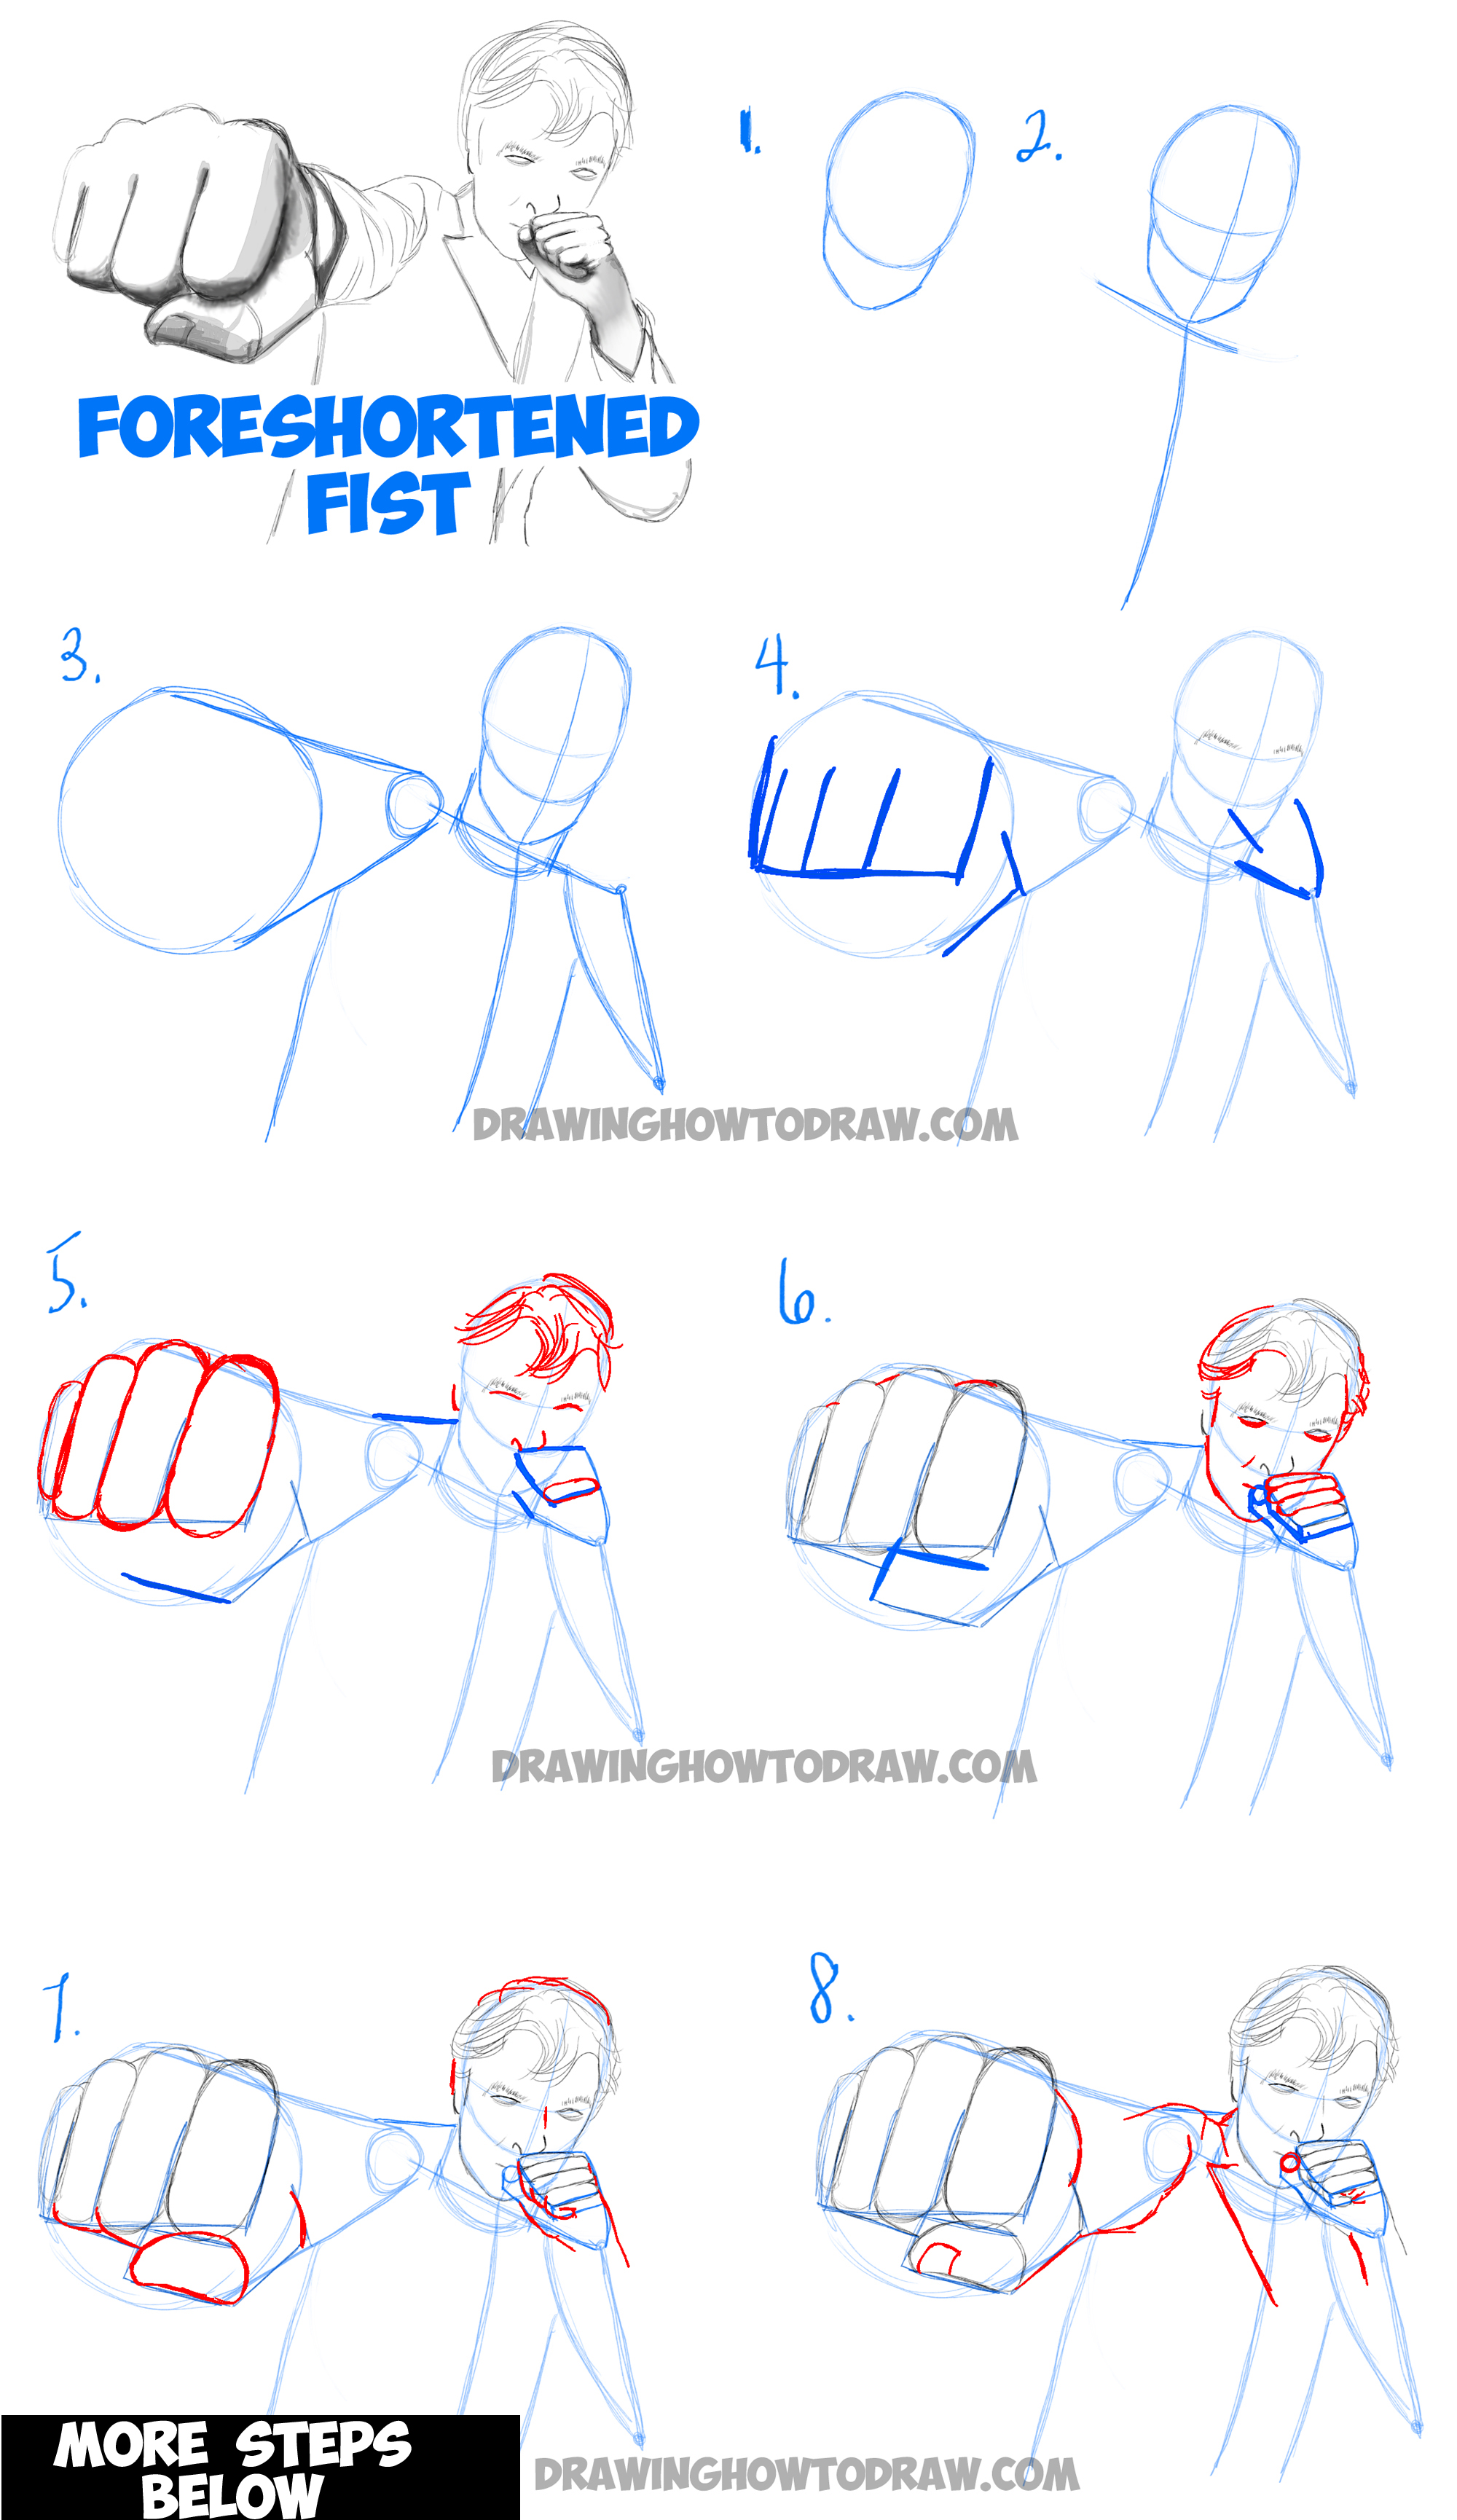
It is very difficult to draw things, people, and figures that are foreshortened. What is foreshortening? Well in simple terms, it is when a part of an object or figure appears to be much larger than the rest of it because that part of the object or figure is coming out towards the viewer. So, in other words, an object or figure is in a position that is extended towards you (the viewer), where you see all of it, yet not its entire length. In this tutorial, I will show you how to draw a man punching a fist towards you, the viewer. The extended arm and fist are in a foreshortened view, as you can see. I will guide you through the many steps it takes to draw this man. Happy Drawing!
Here are More Perspective Drawing Tutorials
(Step 1) Lightly draw the basic shape of the head.
(Step 2) Draw guidelines through the head. Draw a line for shoulders and body.
(Step 3) Draw lines for the neck. Draw a ‘v’ shape for the right arm – which is bent at the elbow. Draw lines for sides of body. Start drawing the left arm. We are going to draw a cylinder to help you see the perspective of it. Draw a small oval for the back of the arm and a much larger one for the front of it.
(Step 4) Draw lines for the eye brows. Draw some more guidelines. In the left hand…draw some lines.
(Step 5) Start drawing some hair…draw some of the other facial features. Draw some of the parts of the right hand. On the left hand, draw some ovals for fingers.
(Step 6) Draw more facial features. Lightly sketch out the guidelines for the thumb on the left hand. Draw some lines to the left of the knuckles. Draw ovals for the right hand’s fingers. Draw more guidelines on the hand as well.
(Step 7) Use the guidelines to continue drawing the hands.
(Step 8) Draw the nail on the thumb. Draw the rest of the details of the hands. Draw some of the shirt and folds on the clothing.
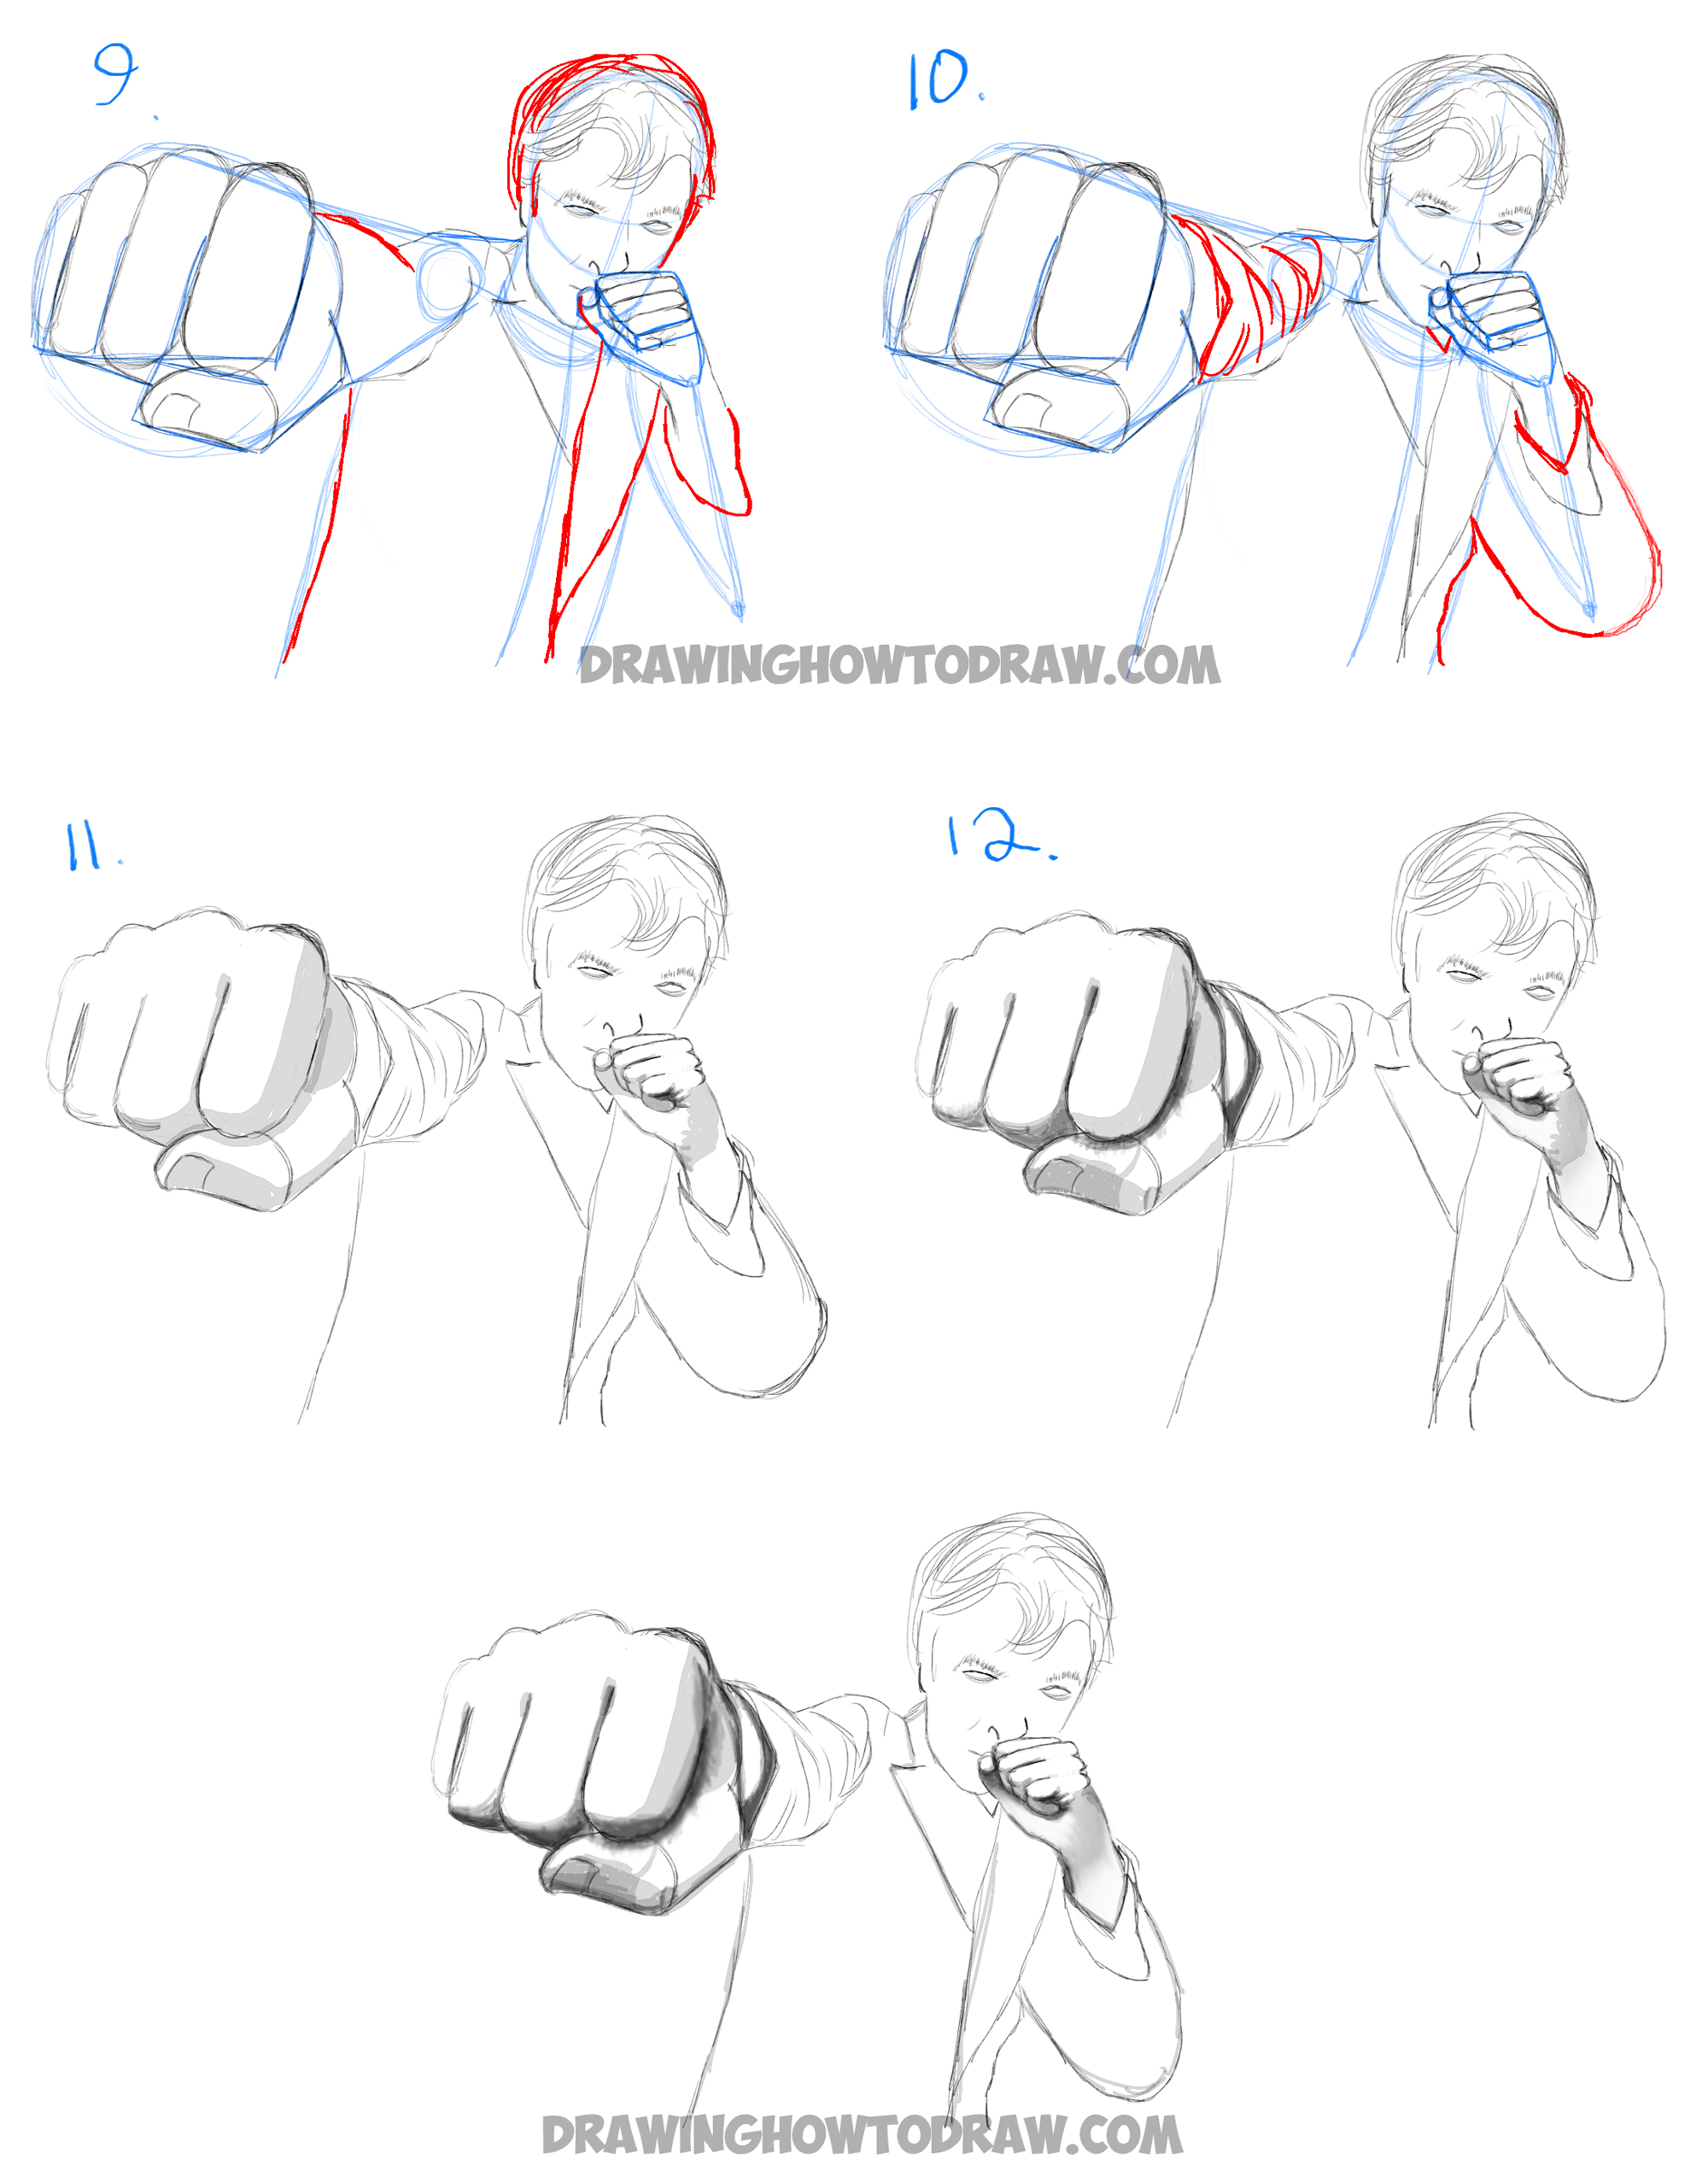
(Step 9) Draw more hair. Draw more of the shirt.
(Step 10) Draw a bunch of random lines for wrinkles on the left arm. Draw the right arm’s sleeve.
(Step 11-13) Add shadows to the hands/arms. I’m not showing you how to do the rest of the body and face because this tutorial is for the arms/hands.
Here are More Perspective Drawing Tutorials
Technorati Tags: foreshortening, foreshortened, how to draw fists, how to draw hands, how to draw foreshortened hands, how to draw foreshortened fists
Today I'll show you how to draw Rick from the Rick and Morty cartoon tv…
Today I'll show you how to draw Morty from the Rick and Morty cartoon tv…
Today I'll show you how to draw the spunky little rabbit, Kuromi, from My Melody…
Today I'll show you how to draw this cute "bean duck" that I found on…
Today I'll show you how to draw Sosuke and Ponyo in a bubble (chibi /kawaii…
Today I'll show you how to draw a Boo from Super Mario Bros in Kawaii…