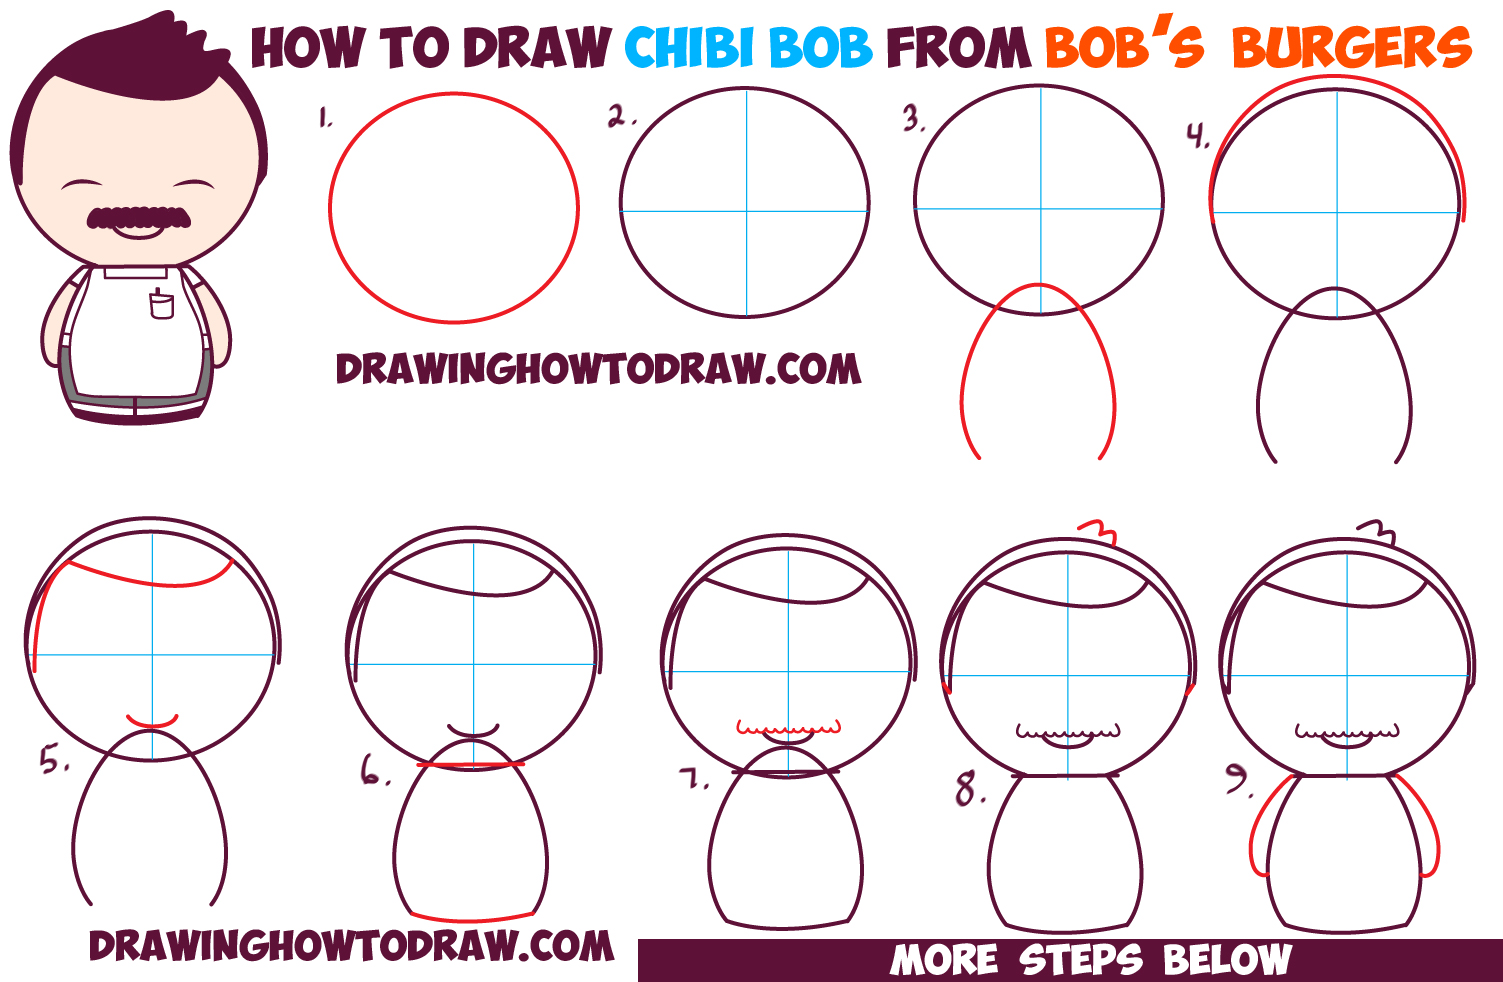
Today I will show you how to draw a cute, baby, kawaii, chibi Bob (the dad) from Bob’s Burgers. Bob is the one who cooks and wears gray pants, an apron, and has a mustache. I have based this chibi Bob of of the Funko / Dorbz Bob Action Figure on Amazon
We will guide you through the steps with easy to follow illustrations. We broke this tutorial down into almost 20 steps to make sure it was easy to follow along with…good luck and happy drawing!
————————————————————–
—————————————————————-
(Step 1) Draw an oval for the head.
(Step 2) Lightly draw guidelines thru the center.
(Step 3) Draw an upside down letter ‘U’ shape for the body.
(Step 4) Draw a curved line at the top of the head for hair.
(Step 5) Draw Bob’s bangs by drawing a backwards #7-like shape. Also draw a curved line for Bob’s smile.
(Step 6) Draw a curved line at the bottom of Bob’s body. Draw a line at bottom of the face.
(Step 7) Draw Bob’s mustache…draw curved humps or sideways #3 shapes.
(Step 8) Draw a line at either side of the face to close off Bob’s hair. Draw a letter ‘m’ shape at the top of the hair.
(Step 9) Draw a letter ‘j’ shape for each arm.
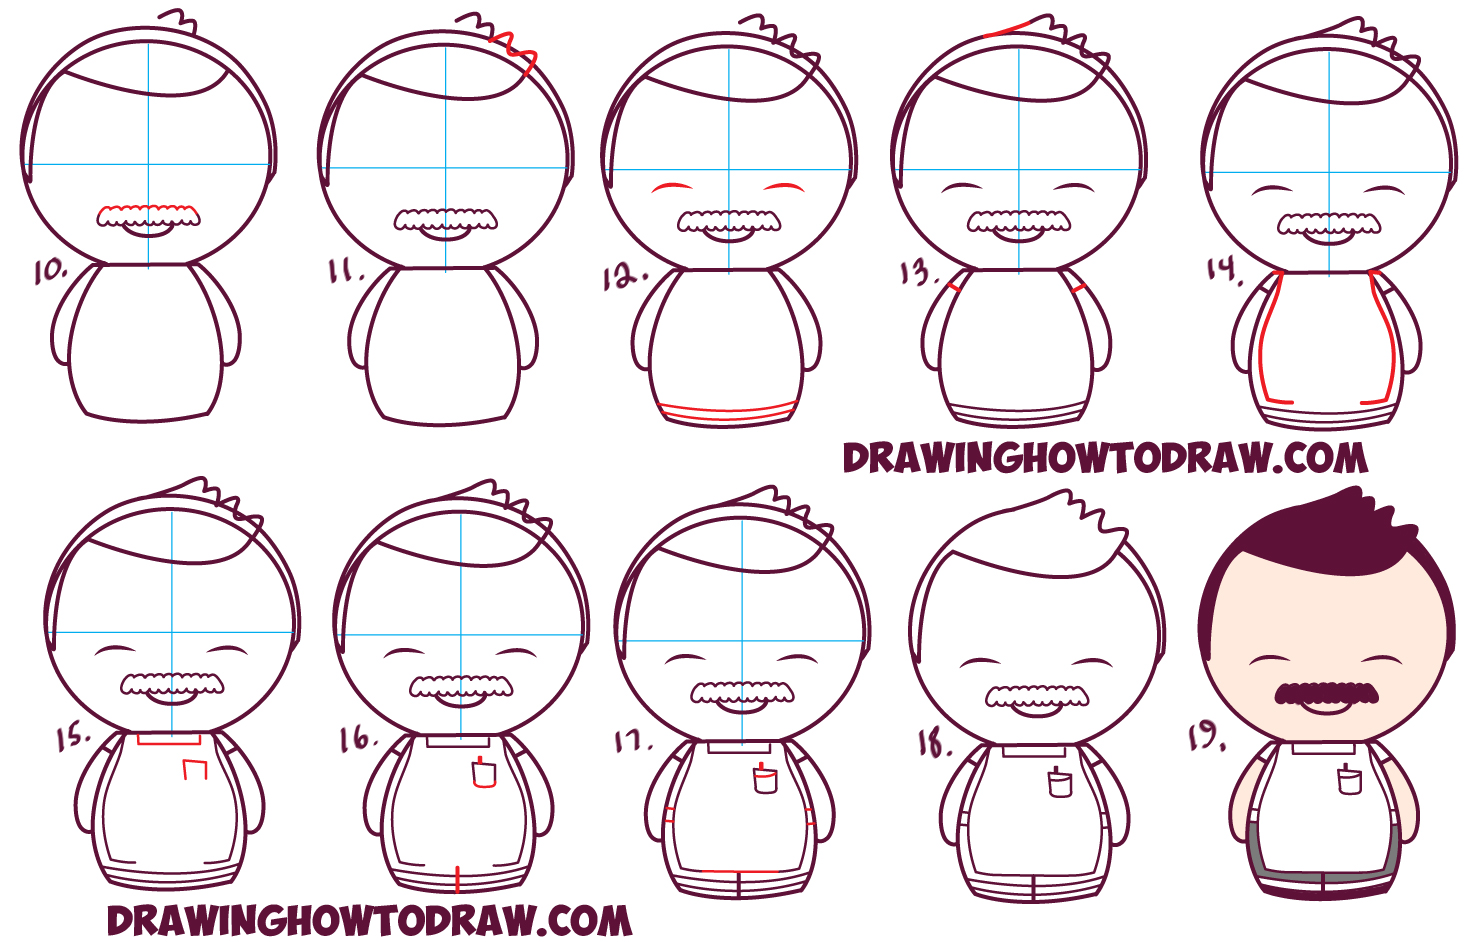
(Step 10) Draw humps at the top of the mustache too…also sideways #3 shapes.
(Step 11) Draw another letter ‘m’ shape at the top of Bob’s hair.
(Step 12) Draw 2 curved lines for eyes. Draw 2 curved lines at the bottom of his body as well.
(Step 13) Connect the ‘m’ shapes to the rest of the hair. Draw a line for each sleeve.
(Step 14) Draw a #2 and a #5 for the sides of the apron.
(Step 15) Draw bottom of a rectangle for top of the apron. Also draw the top of another rectangle for Bob’s apron’s pocket.
(Step 16) Draw a line for the center of Bob’s legs. Draw a curved line for the bottom of the pocket. Draw a rectangle for the pen that is in the pocket.
(Step 17) Woops, accidentally highlighted the pen again…just ignore that. Draw a curved line in the pocket. Draw 2 lines for the straps of the apron. Draw a line for the bottom of the apron.
(Step 18) Erase any guide-lines and any lines that you don’t need any more.
(Step 19) Color in Bob if you have the time. I hope that you enjoyed this tutorial.
Technorati Tags: chibi bob, kawaii bob, how to draw bob, bobs burgers, bob’s burgers, chibi bob’s burgers, How to draw bob from bob’s burgers, drawing bob from bob’s burgers
Today I'll show you how to draw Rick from the Rick and Morty cartoon tv…
Today I'll show you how to draw Morty from the Rick and Morty cartoon tv…
Today I'll show you how to draw the spunky little rabbit, Kuromi, from My Melody…
Today I'll show you how to draw this cute "bean duck" that I found on…
Today I'll show you how to draw Sosuke and Ponyo in a bubble (chibi /kawaii…
Today I'll show you how to draw a Boo from Super Mario Bros in Kawaii…