Today I will show you how to draw a really cool farm scene made from using perspective drawing techniques. It is the easiest way to draw buildings that look realistic and 3-dimensional. This fall / spring scene is really easy to draw and I’ll show you how to draw it right now in simple steps.
If you want a more detailed guide to perspective, we have a few of them here.
You Might Also Like Our Other Perspective Drawing Tutorials
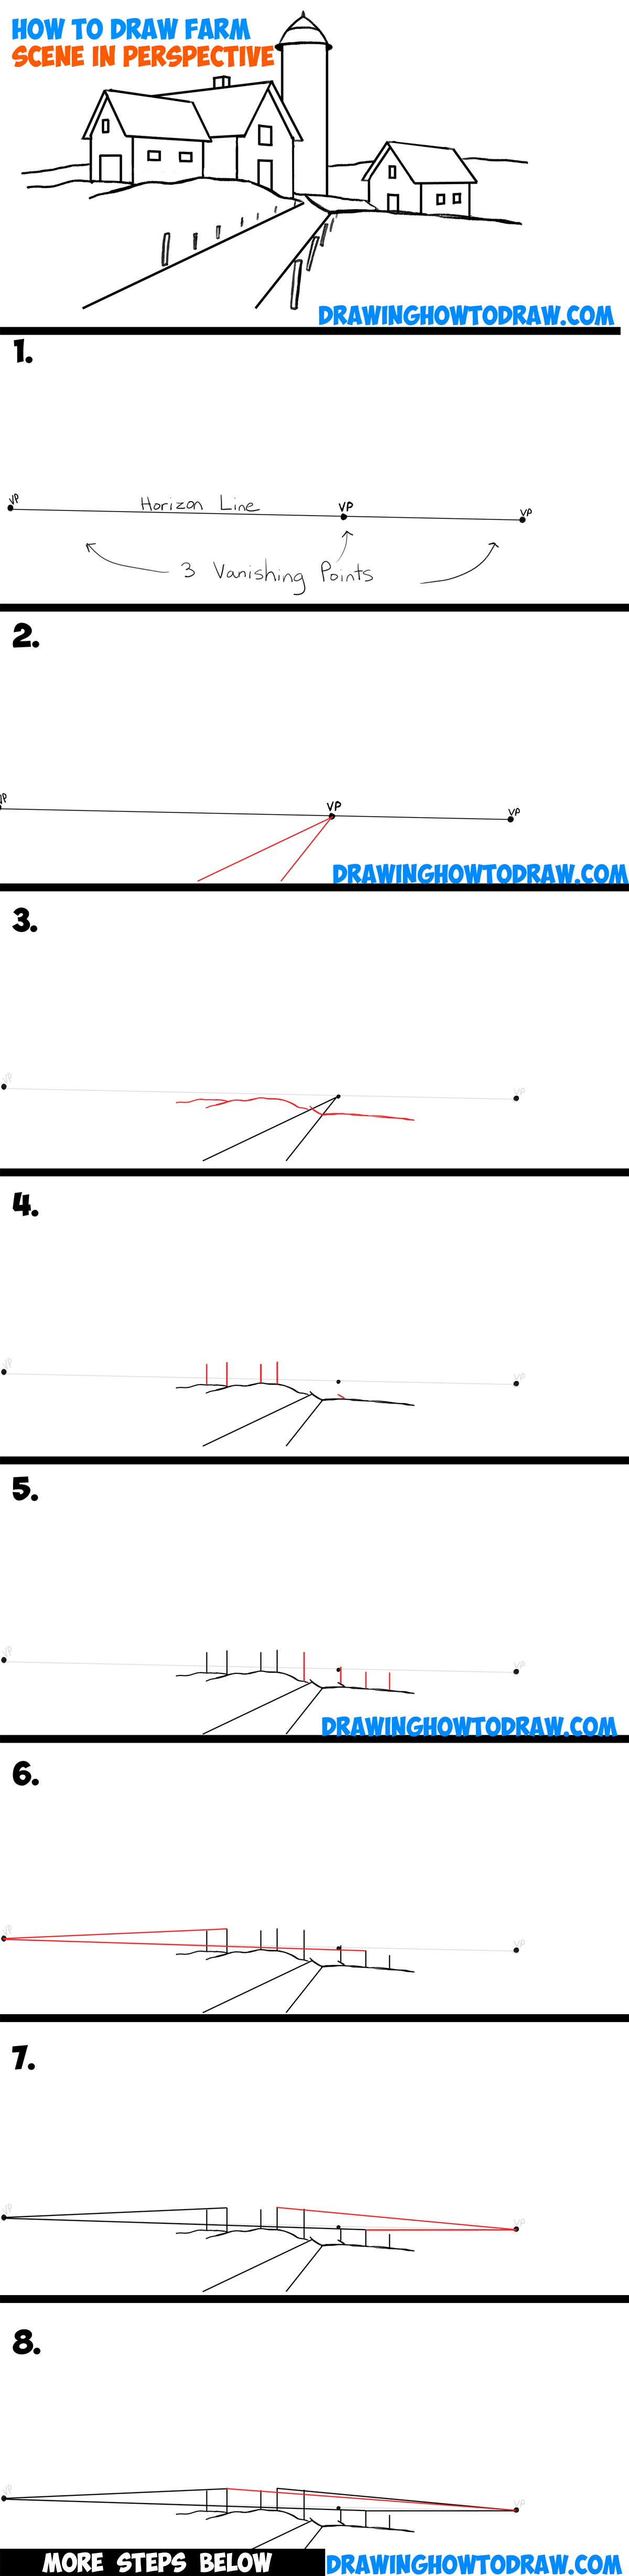
(Step 1) Lightly draw a line … this will be your horizon line. Then Draw 3 points on it. These are your vanishing points.
(Step 2) Then … to draw the dirt pathway – draw 2 lines to the middle vanishing point (vp).
(Step 3) Draw some hilly lines – they don’t have to be perfect – it is just some of the ground.
(Step 4-5) Erase some of the dirt pathway – the draw a slanted line for where the pathway turns. Draw 2 vertical lines for one of the houses.
(Step 6) Draw some lines to the left vanishing point.
(Step 7-8) Draw some lines to the right vanishing point.
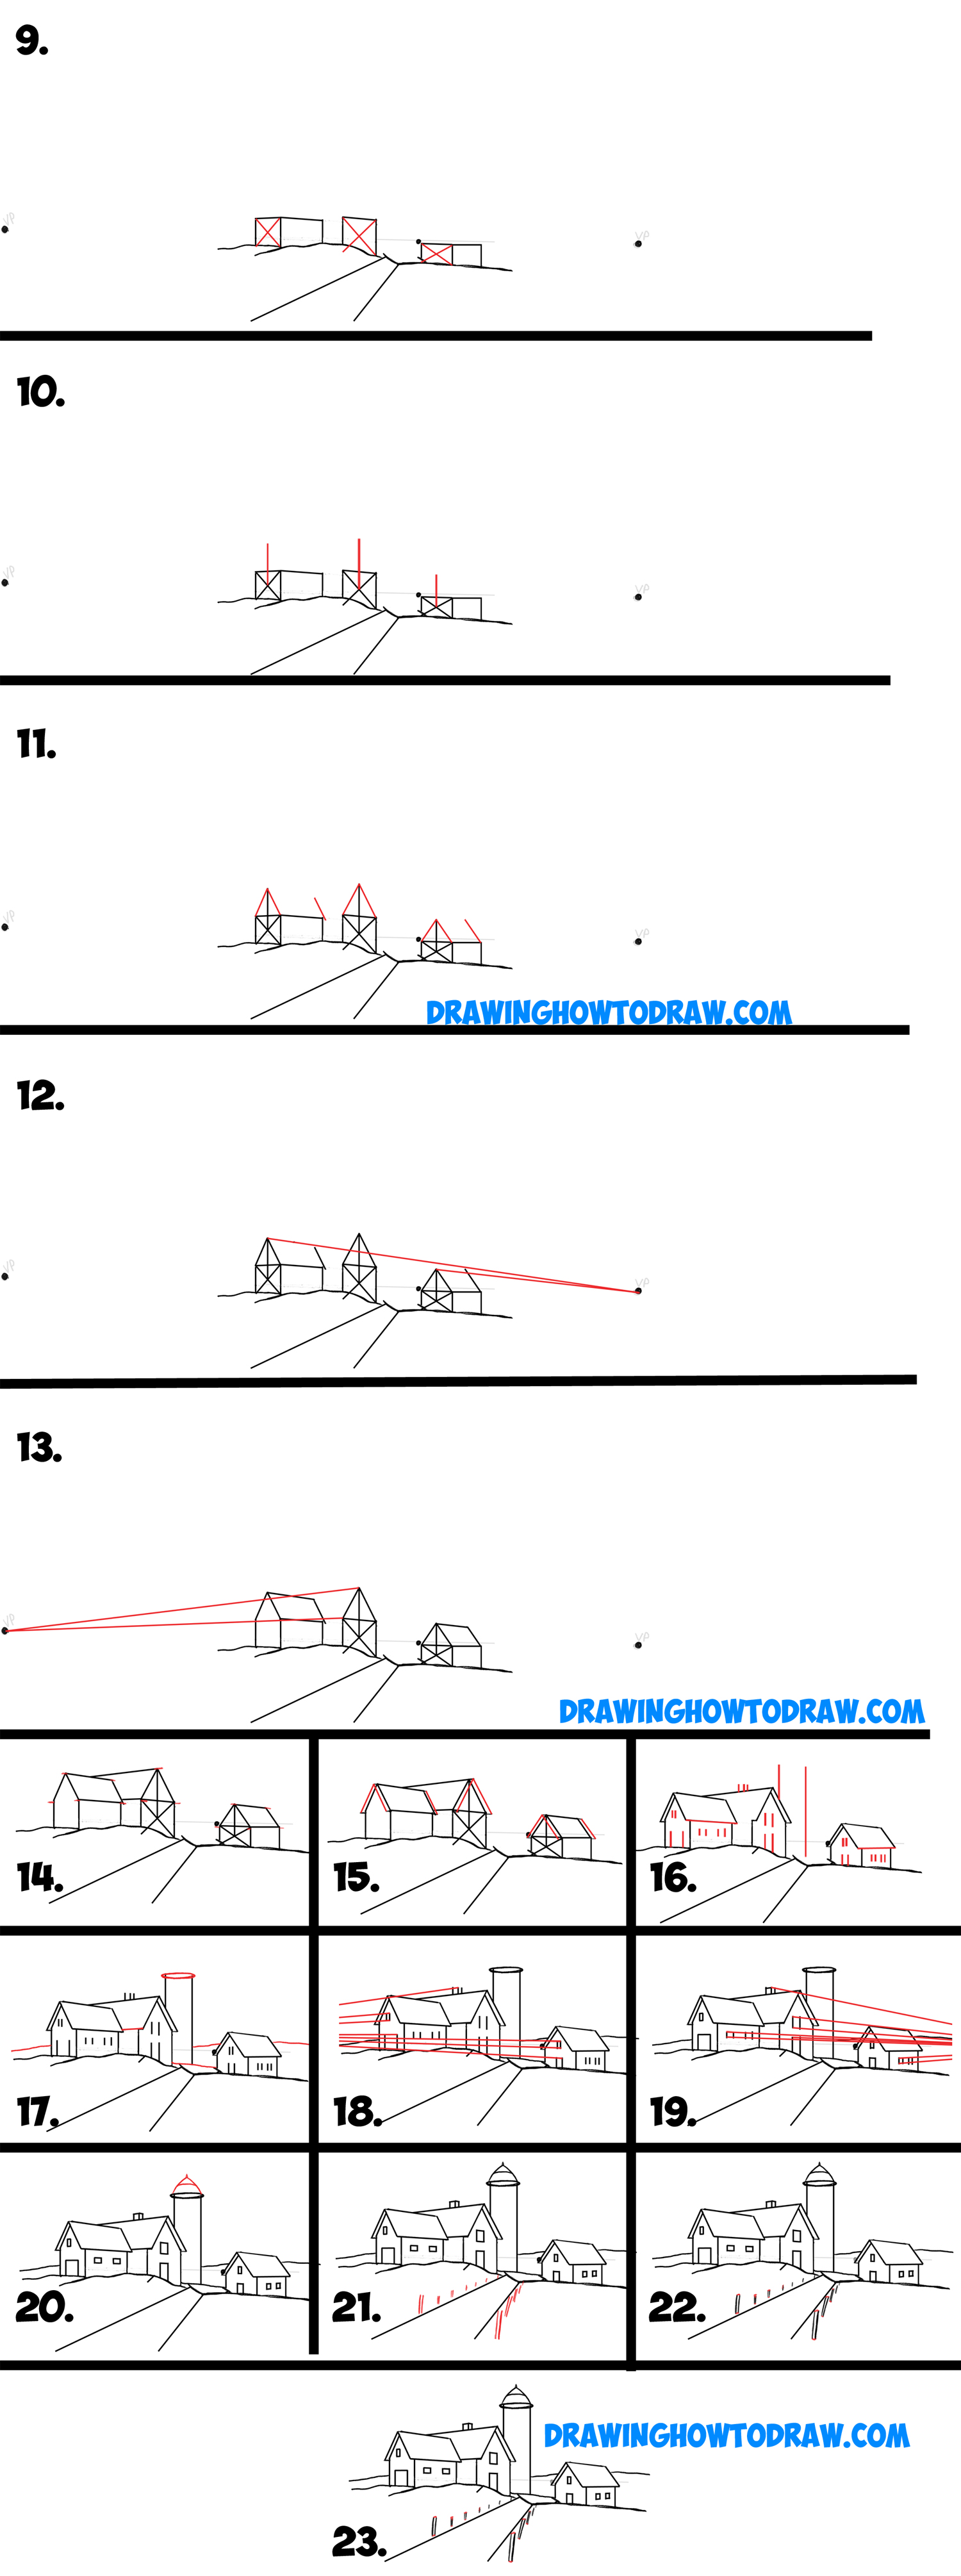
(Step 9) Draw letter x shapes from the corners of the sides of the building – we will use these to find the center for the roof.
(Step 10) Draw a line up from the centers – draw the line as high as you want the roof.
(Step 11) Draw the roof on each building by drawing a triangle shape from the points on the buildings to the top of the line you just draw. Mimic the slant on the back of the building like I did.
(Step 12) Draw lines to the right vanishing point.
(Step 13) Draw lines to the left vanishing point.
(Step 14) Elongate some lines to make it so the roof overhangs the building.
(Step 15) Draw lines for the overhanging roof.
(Step 16) Draw a line on two of the roofs and then also draw lines for the silo, chimney, windows, and doors.
(Step 17) Draw an oval on the top of the silo. Draw a line on one of the roofs that I forgot about. Draw hills in the background.
(Step 18) Draw lines to the left vanishing point.
(Step 19) Draw lines to the right vanishing point.
(Step 20) Draw a 2 curved lines on the top of the silo. Also draw a line at the top of it.
(Step 21) Draw lines along the dirt pathway – for wood stakes – draw them smaller as you go back.
(Step 22) Draw some lines on the stakes.
If you want a more detailed guide to perspective, we have a few of them here.
You Might Also Like Our Other Perspective Drawing Tutorials
Technorati Tags: farm scene, autumn scene, fall scene, spring scene, 3 point perspective, three point perspective, drawing scenery, scene
Today I'll show you how to draw Rick from the Rick and Morty cartoon tv…
Today I'll show you how to draw Morty from the Rick and Morty cartoon tv…
Today I'll show you how to draw the spunky little rabbit, Kuromi, from My Melody…
Today I'll show you how to draw this cute "bean duck" that I found on…
Today I'll show you how to draw Sosuke and Ponyo in a bubble (chibi /kawaii…
Today I'll show you how to draw a Boo from Super Mario Bros in Kawaii…
View Comments
Awesome learning to draw at 61. Ty