Today I will show you how to draw the cute little chubby boy from Disney Pixar’s Up. His name is Russell and we are going to show you how to draw him in a cute / kawaii / chibi style that is super simple to learn how to draw. We have based this cute Russell character on the little toy Russell Keychain
We have broken down this tutorial into more than 20 steps to make sure that each step was really simple – basic shapes, letters, and numbers. You can do it – have fun and happy drawing!
You might like our other Pixar Up tutorials
————————————————————–
—————————————————————-
(Step 1) Lightly draw an oval. All blue lines in the tutorial are guide lines. This means they will be erased at the end and are only drawn to help guide you.
(Step 2) Lightly draw guidelines thru the oval.
(Step 3) Draw sideways letter ‘D’ shapes for eyes.
(Step 4) Draw letter ‘c’ shaped ears.
(Step 5) Draw a circle in each eye and draw a sideways #3 shape for hair.
(Step 6) Draw another #3 shape for hair…also draw oval cheeks.
(Step 7) Draw a sideways letter ‘D’ shape for the mouth. Also draw a pizza-slice-triangle and a rectangle for part of his shirt.
(Step 8) Draw a curved line for part of Russell’s hair. Also draw ? shapes int he ears.
(Step 9) Draw part of a triangle and a check-mark shape for part of his shirt.
(Step 10) Draw more curved lines for hair and his shirt.
(Step 11) Draw 2 lines and 2 curved lines.
(Step 12) Draw more lines.
(Step 13) Draw a sideways letter ‘C’ shape for his cap…draw a letter ‘j’ and ‘U’ shape for arms.
(Step 14) Draw some lines.
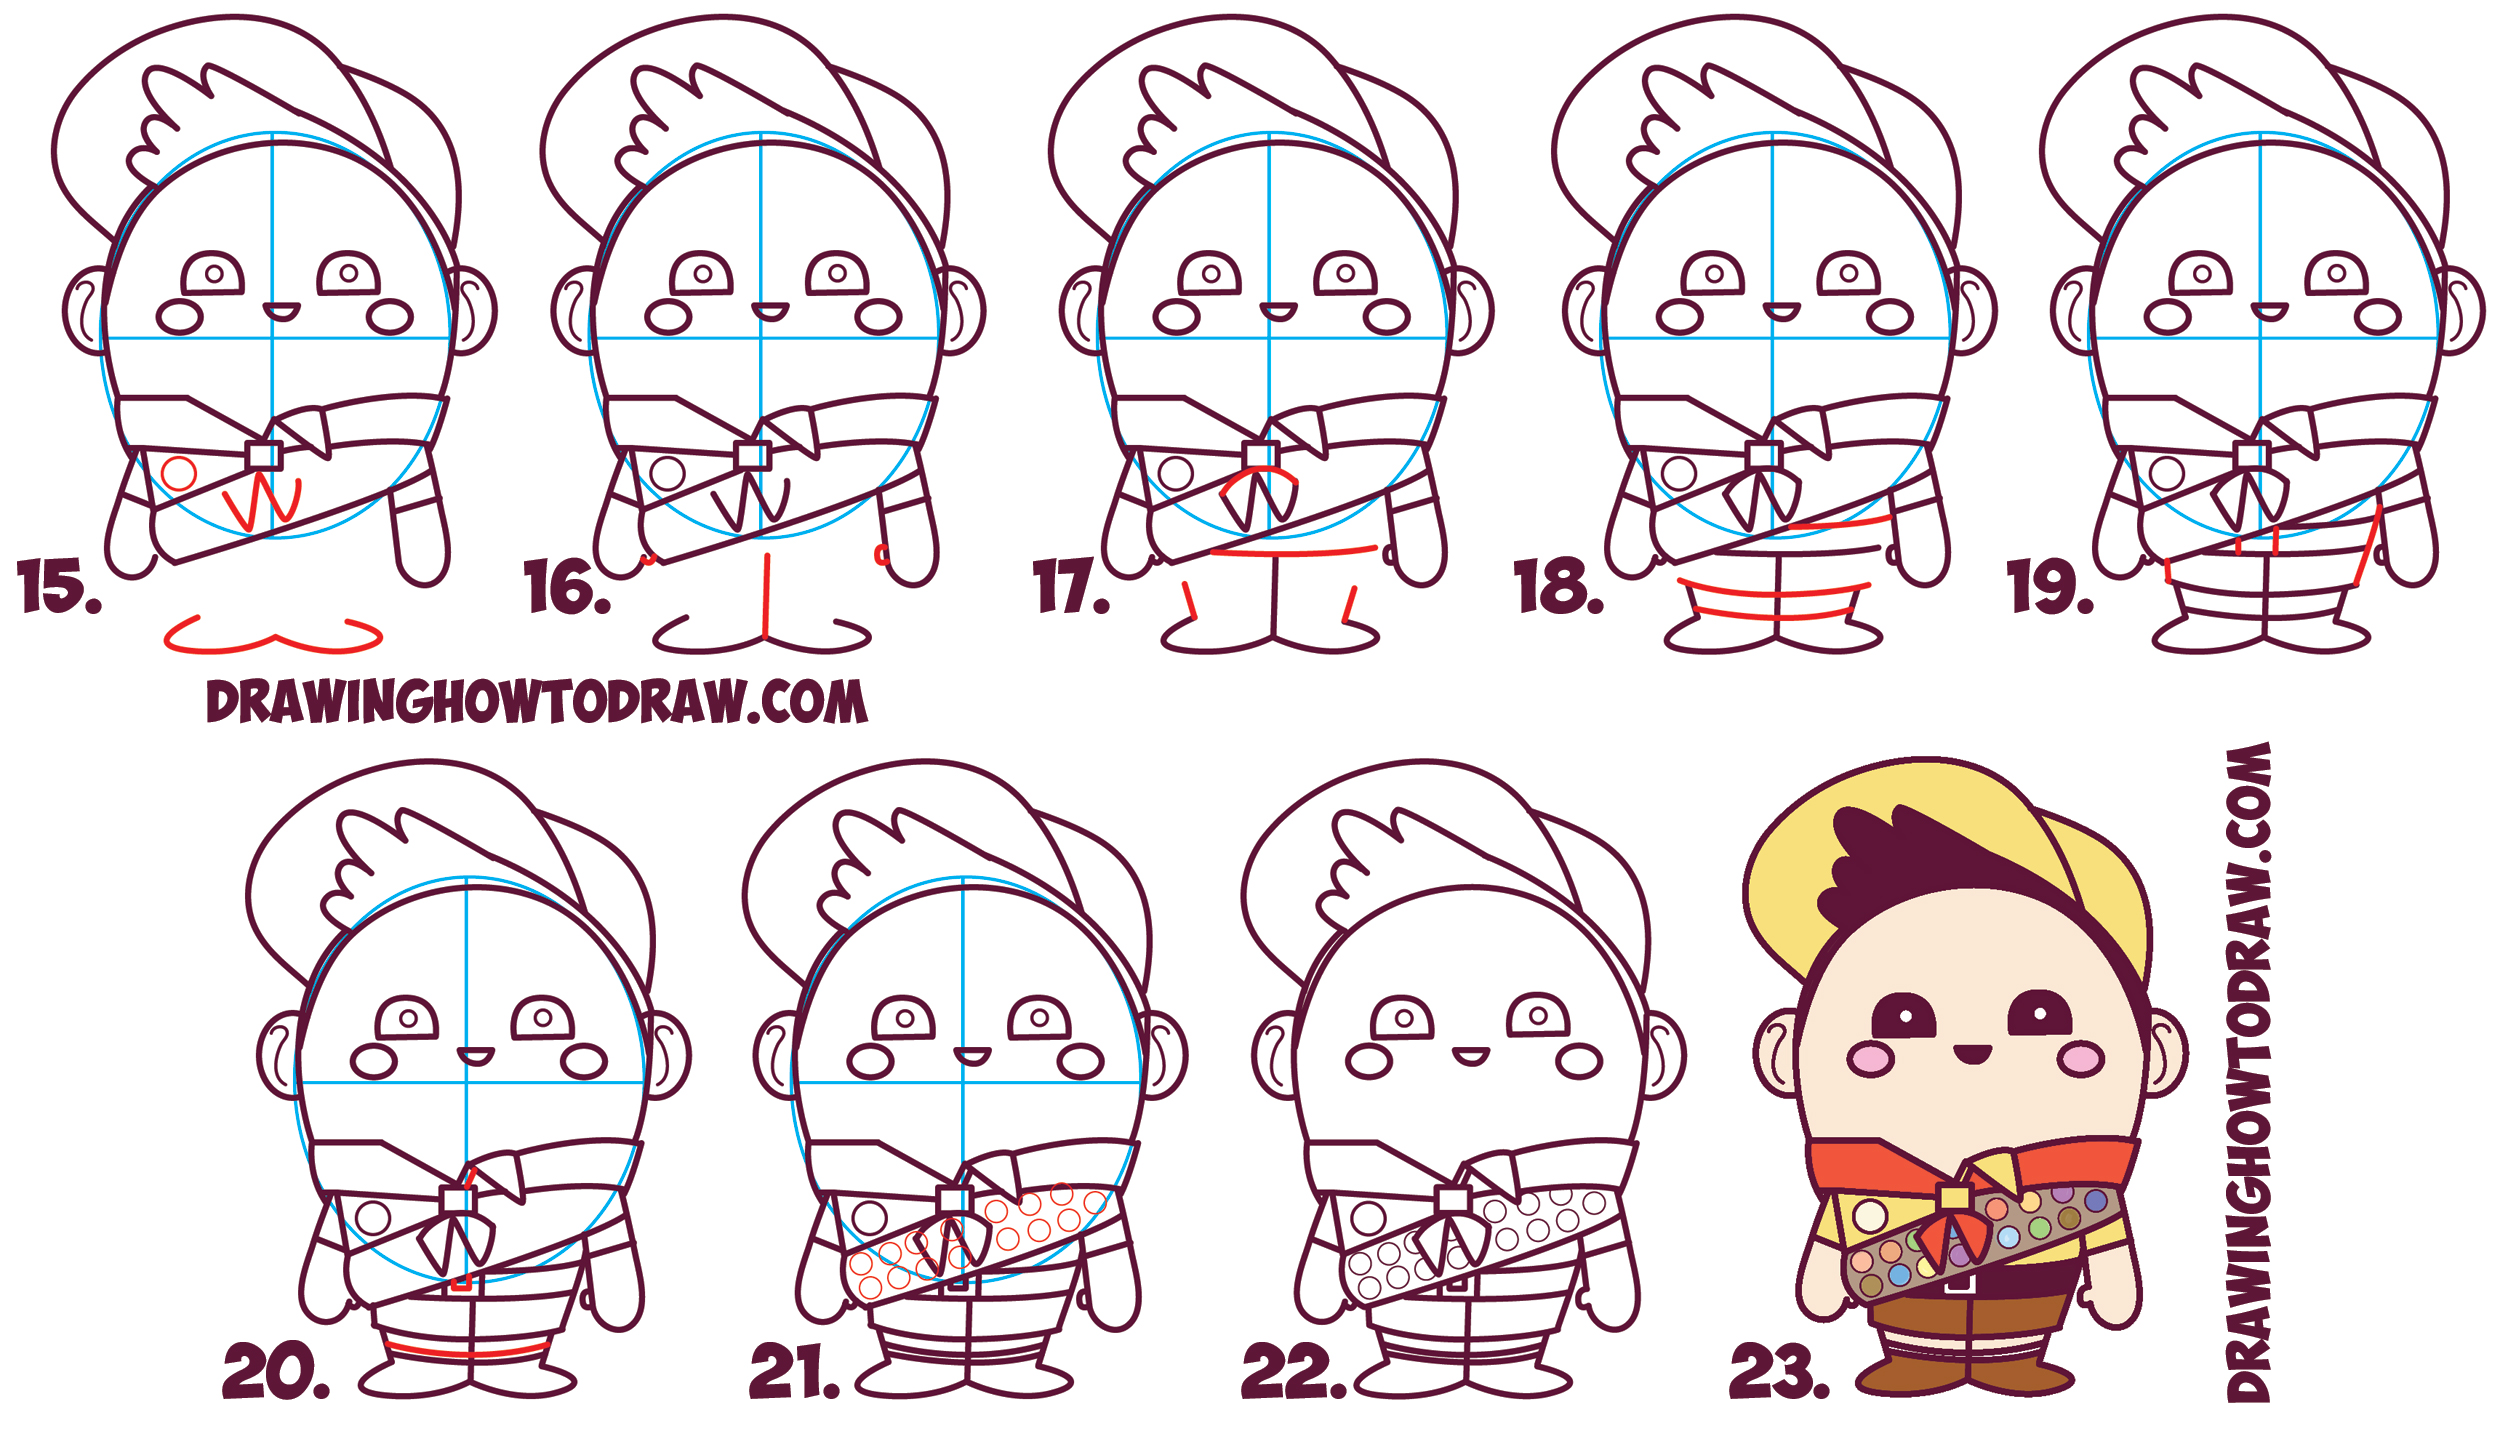
(Step 15) Draw sideways #3 shape for shoes…a circle on his shirt…and a letter ‘W’ shape for part of his bow tie.
(Step 16) Draw a curved line for each thumb and a line between his legs.
(Step 17) Draw 2 curved lines and 2 lines.
(Step 18) Draw 3 curved lines.
(Step 19) Draw 4 lines.
(Step 20) Draw a line, a curved line, and part of a rectangle.
(Step 21) Draw circles for his badges.
(Step 22) Erase guide lines and other lines you no longer need.
(Step 23) Color him in if you have the time.
You might like our other Pixar Up tutorials
Technorati Tags: russell from up, boy from up, chibi russell from up, cute russell from up, disney pixar’s up, pixar’s up, disney’s up, chibi up, cute up, chibi, kawaii, cute
Today I'll show you how to draw Rick from the Rick and Morty cartoon tv…
Today I'll show you how to draw Morty from the Rick and Morty cartoon tv…
Today I'll show you how to draw the spunky little rabbit, Kuromi, from My Melody…
Today I'll show you how to draw this cute "bean duck" that I found on…
Today I'll show you how to draw Sosuke and Ponyo in a bubble (chibi /kawaii…
Today I'll show you how to draw a Boo from Super Mario Bros in Kawaii…