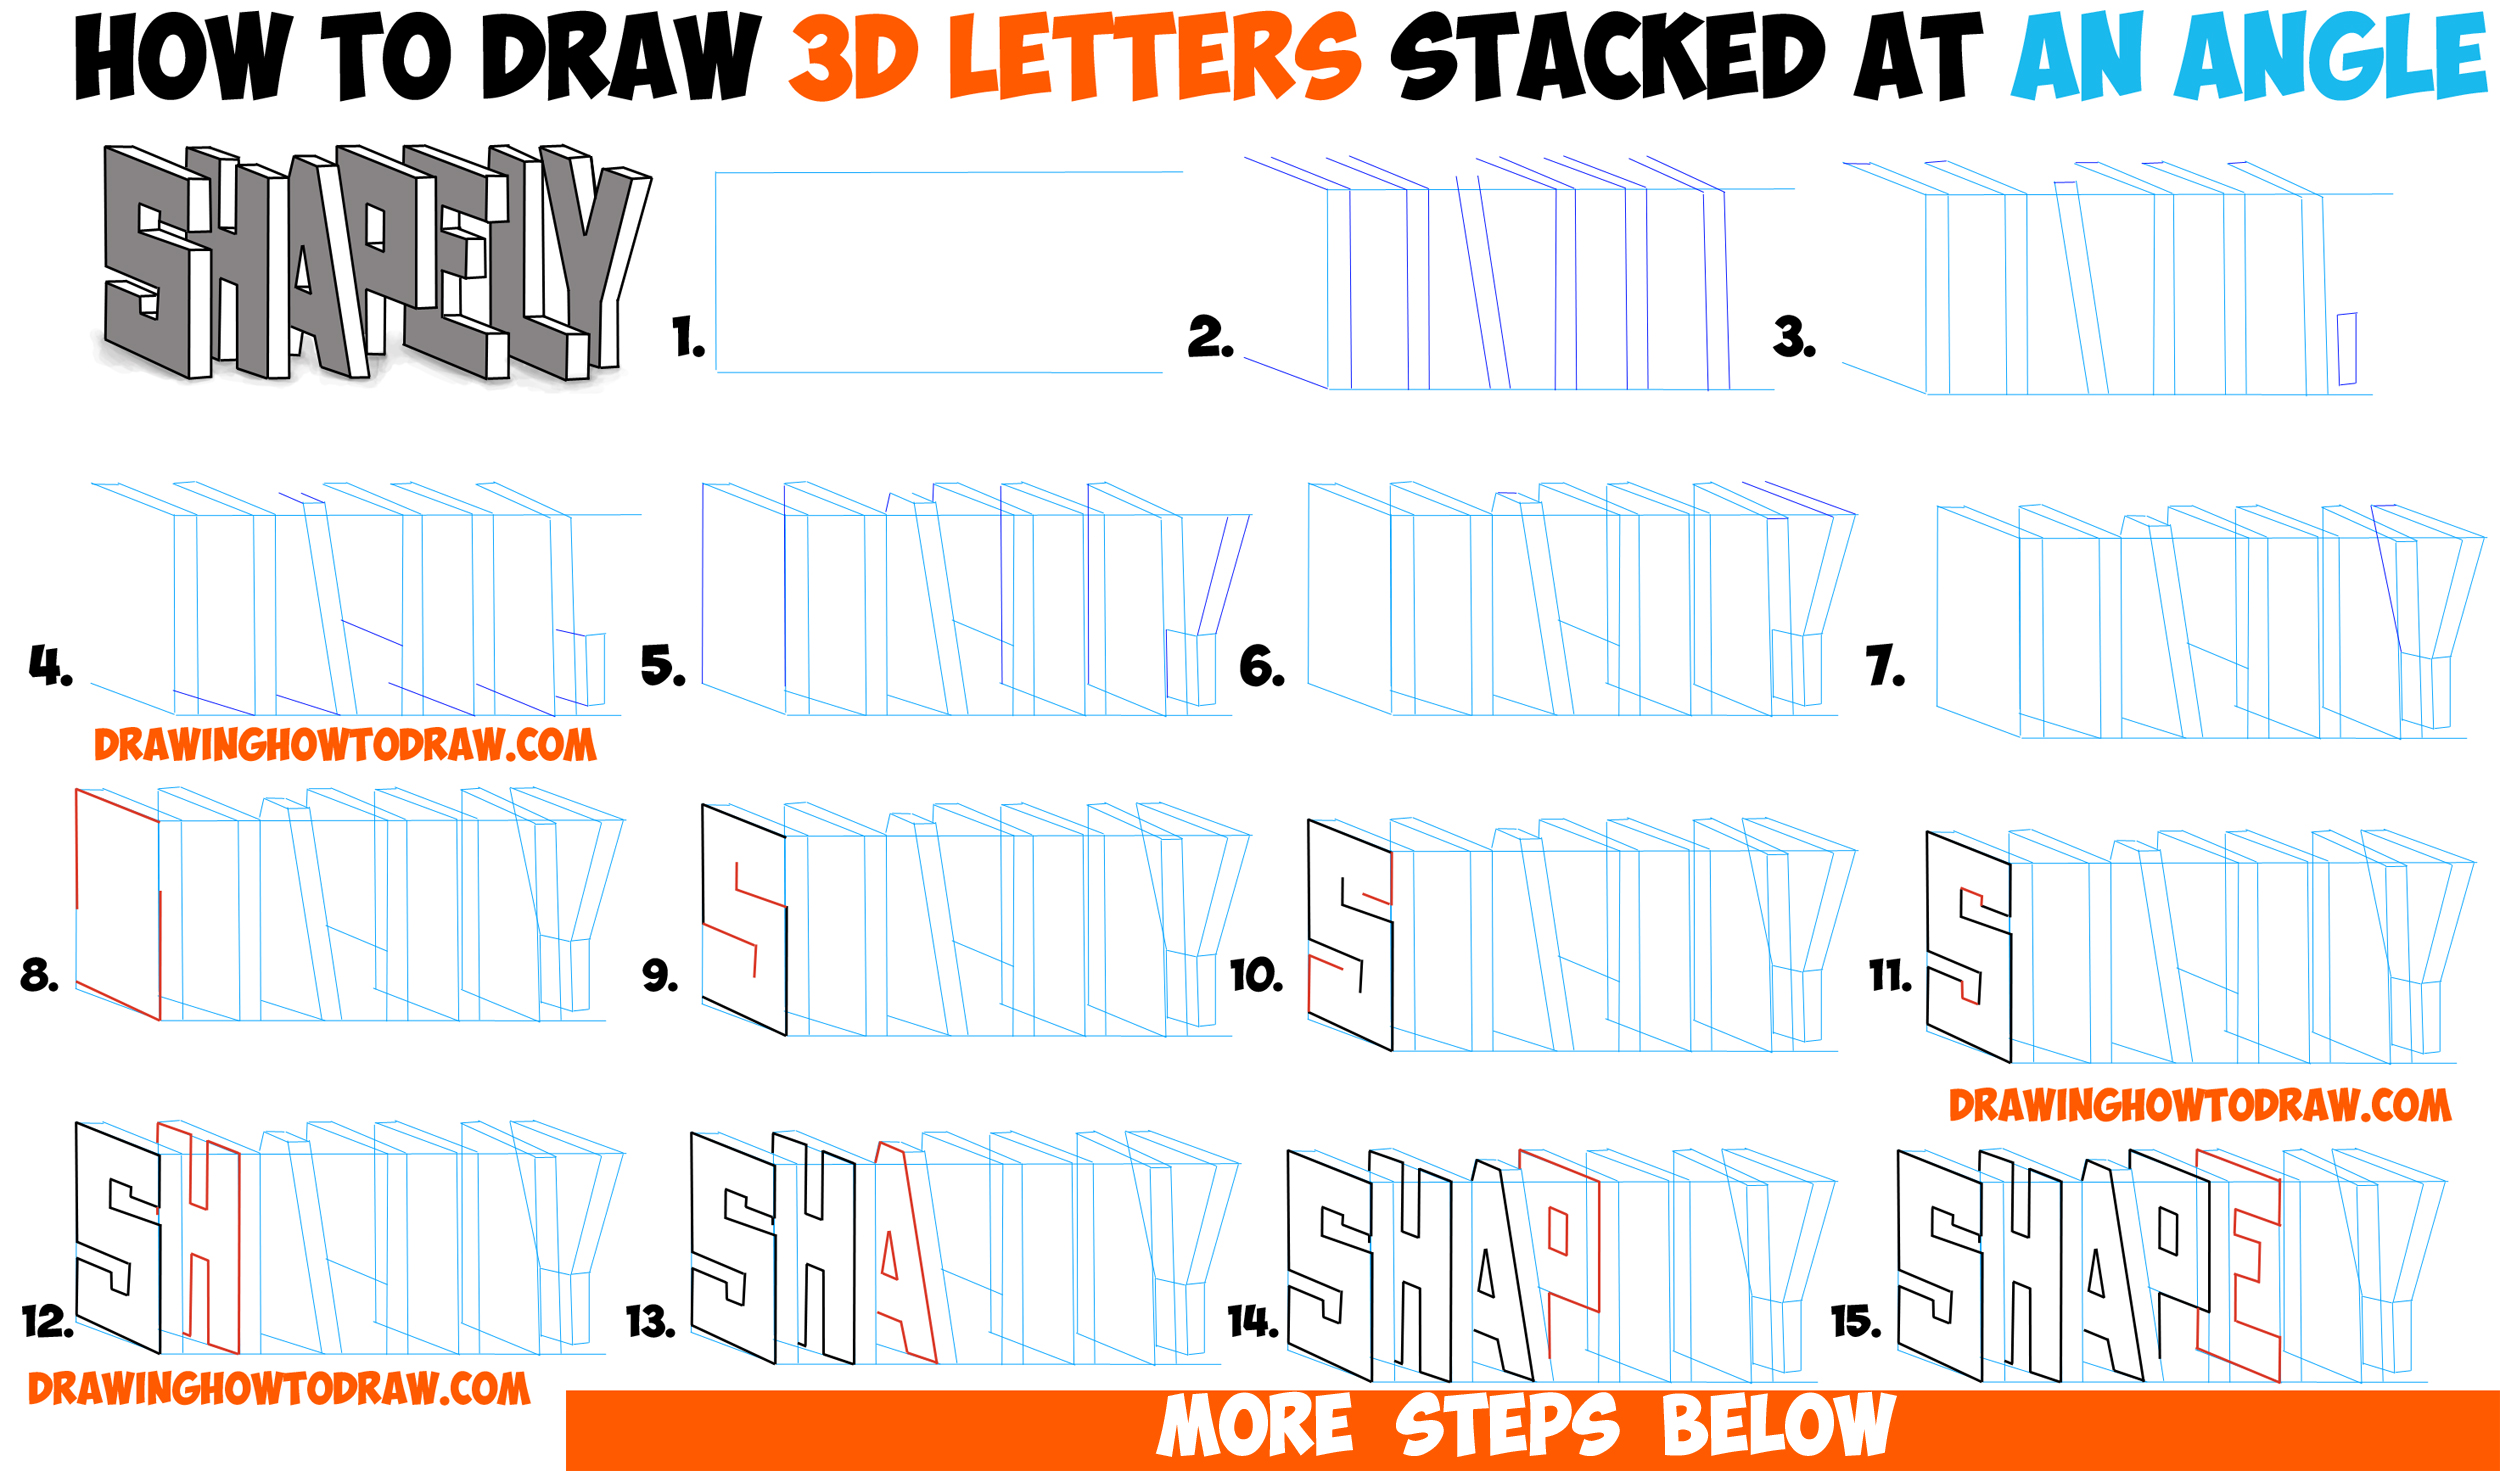
Today I’ll show you how to draw cool 3D letters that are turned at a sharp angle (45 degrees towards the viewer) and stacked. We will guide you through the steps so that it is easy for you to learn how to draw. We will also show you how to cast a shadow. The following easy step by step drawing instructions can be found below. Happy Drawing!
You Might Be Interested in Our Other Cool Lettering Tutorials
You Might Also Like Our Other Cool Drawing Lessons
Learn How to Draw 3D Letters, Stacked and at an Angle – Simple Steps Drawing Lesson for Beginners
[ad#draw]
Written-Out Step by Step Drawing Instructions
(Steps 1-7) Lightly draw the guidelines that will help you draw the actual shapes of the letters. These guide lines will be erased at the very end.
(Steps 8-11) The letter ‘S’ is the trickiest letter to draw so we have broken it down into many steps. In each of these steps draw letter ‘L’ shapes until you form the letter ‘S’ shape.
(Step 12) Draw the letter ‘H’.
(Step 13) Draw the letter ‘A’.
(Step 14) Draw the letter ‘P’.
(Step 15) Draw the letter ‘E’.
(Step 16) Draw the letter ‘L’.
(Step 17) Draw the letter ‘Y’ and the line on top of the ‘L’ (I forgot to do it in the last step).
(Step 18) Draw the small horizontal lines.
(Step 19) Now draw vertical lines.
(Step 20) Connect the lines now.
(Step 21) Erase the guide lines.
(Step 22) use your pencil to draw in the shadow that the letters have cast.
(Step 23) Color in the fronts of the letters with a dark gray.
You Might Be Interested in Our Other Cool Lettering Tutorials
You Might Also Like Our Other Cool Drawing Lessons
Technorati Tags: how to draw 3d letters, drawing 3d letters, draw 3d letters, 3-dimensional letters, how to draw letters at an angle, letters at an angle, stacked letters


