Today I’ll show you how to draw a cool optical illusion that will melt your eyes as you are drawing it. Once you add the black and the gray, the picture will make more sense. We will guide you through the steps of drawing this cool optical illusion with the following cool drawing trick. Have fun and Happy Drawing!
You Might Also Like Our Other Cool Stuff Tutorials
[ad#draw]
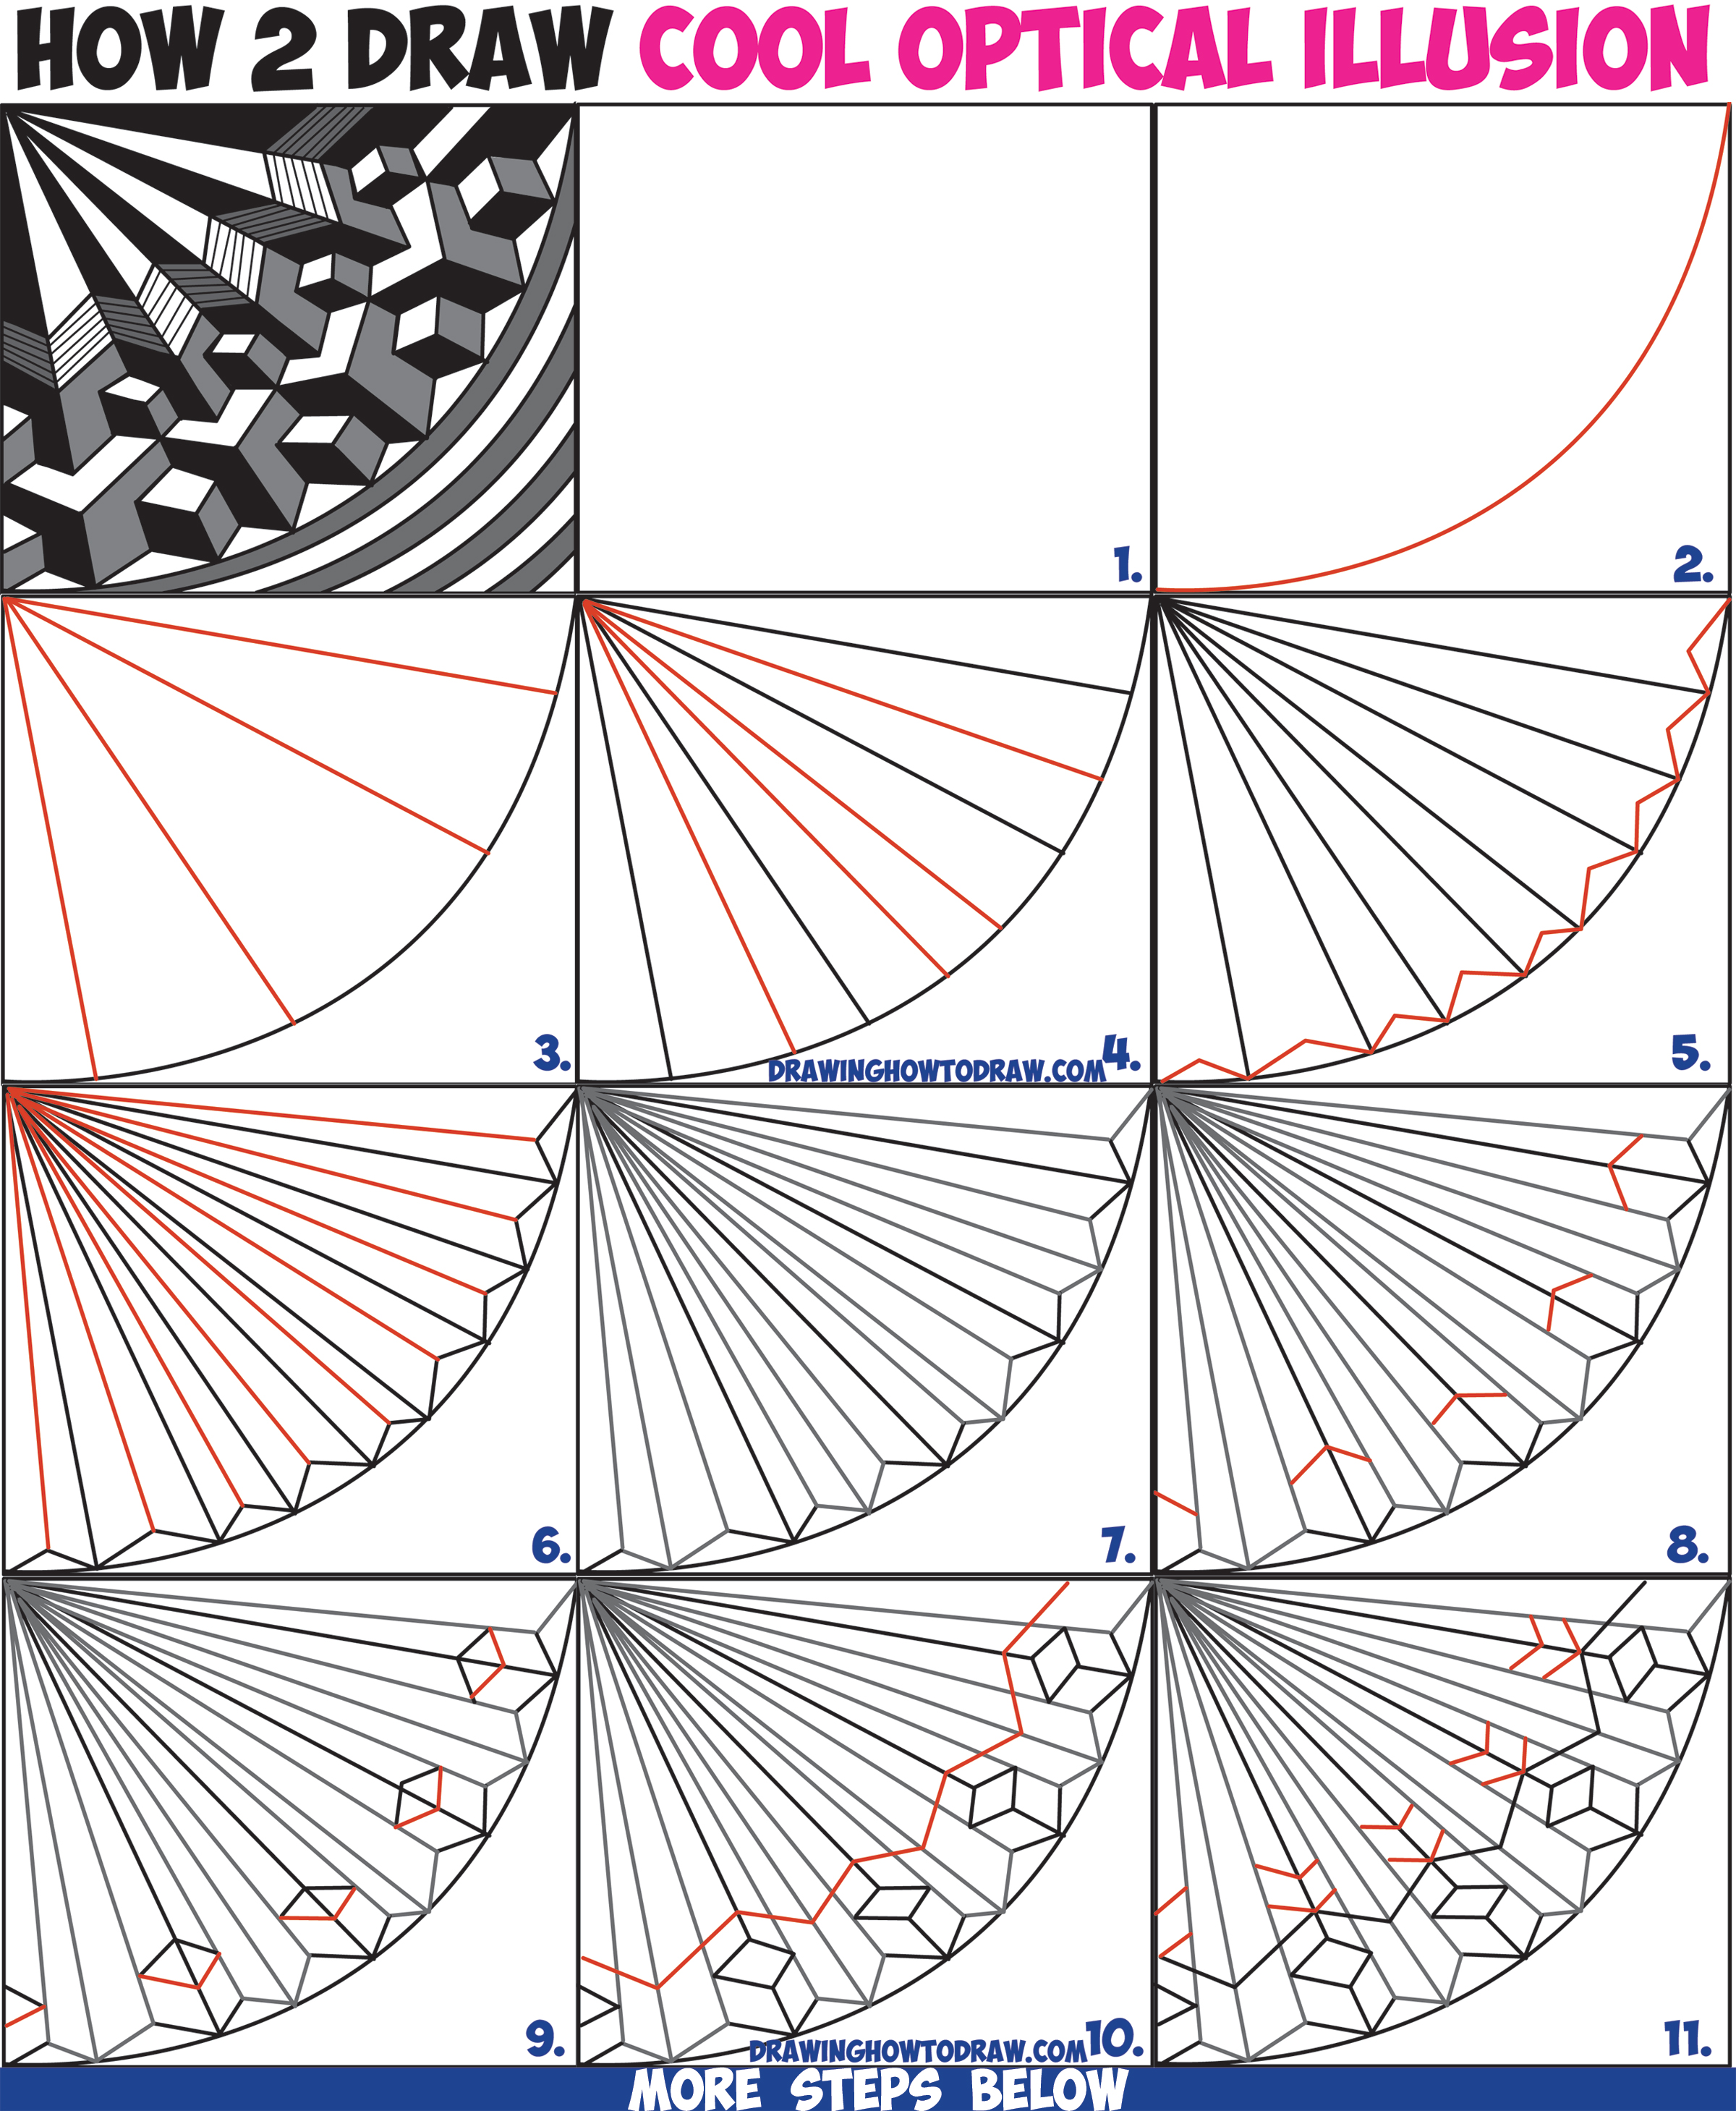
(Step 1) Draw a rectangle.
(Step 2) Draw a curved line from the bottom left corner to the top right corner of the rectangle.
(Steps 3 and 4) Draw lines inside the curve. Space them out any way that you like.
(Step 5) Draw zig-zag, using the bottoms of the lines that you drew in Steps 3 and 4 and the bottom points of the zig-zag.
(Step 6) Draw lines from the left-top corner of the rectangle down to the tops of the zig-zag.
(Step 7) I grayed some of the lines to differentiate the lines to make the next steps easier. You don’t do anything in this step.
(Step 8) Draw upside down letter ‘v’ shapes in some places.
(Step 9) Draw letter ‘v’ shapes to form diamond shapes.
(Step 10) Erase the line inside each diamond. Then draw a zig-zag again, but this time the high point of the zig-zag is above each diamond that you drew. The low point rests on the low point of the previous zig-zag in between each diamond.
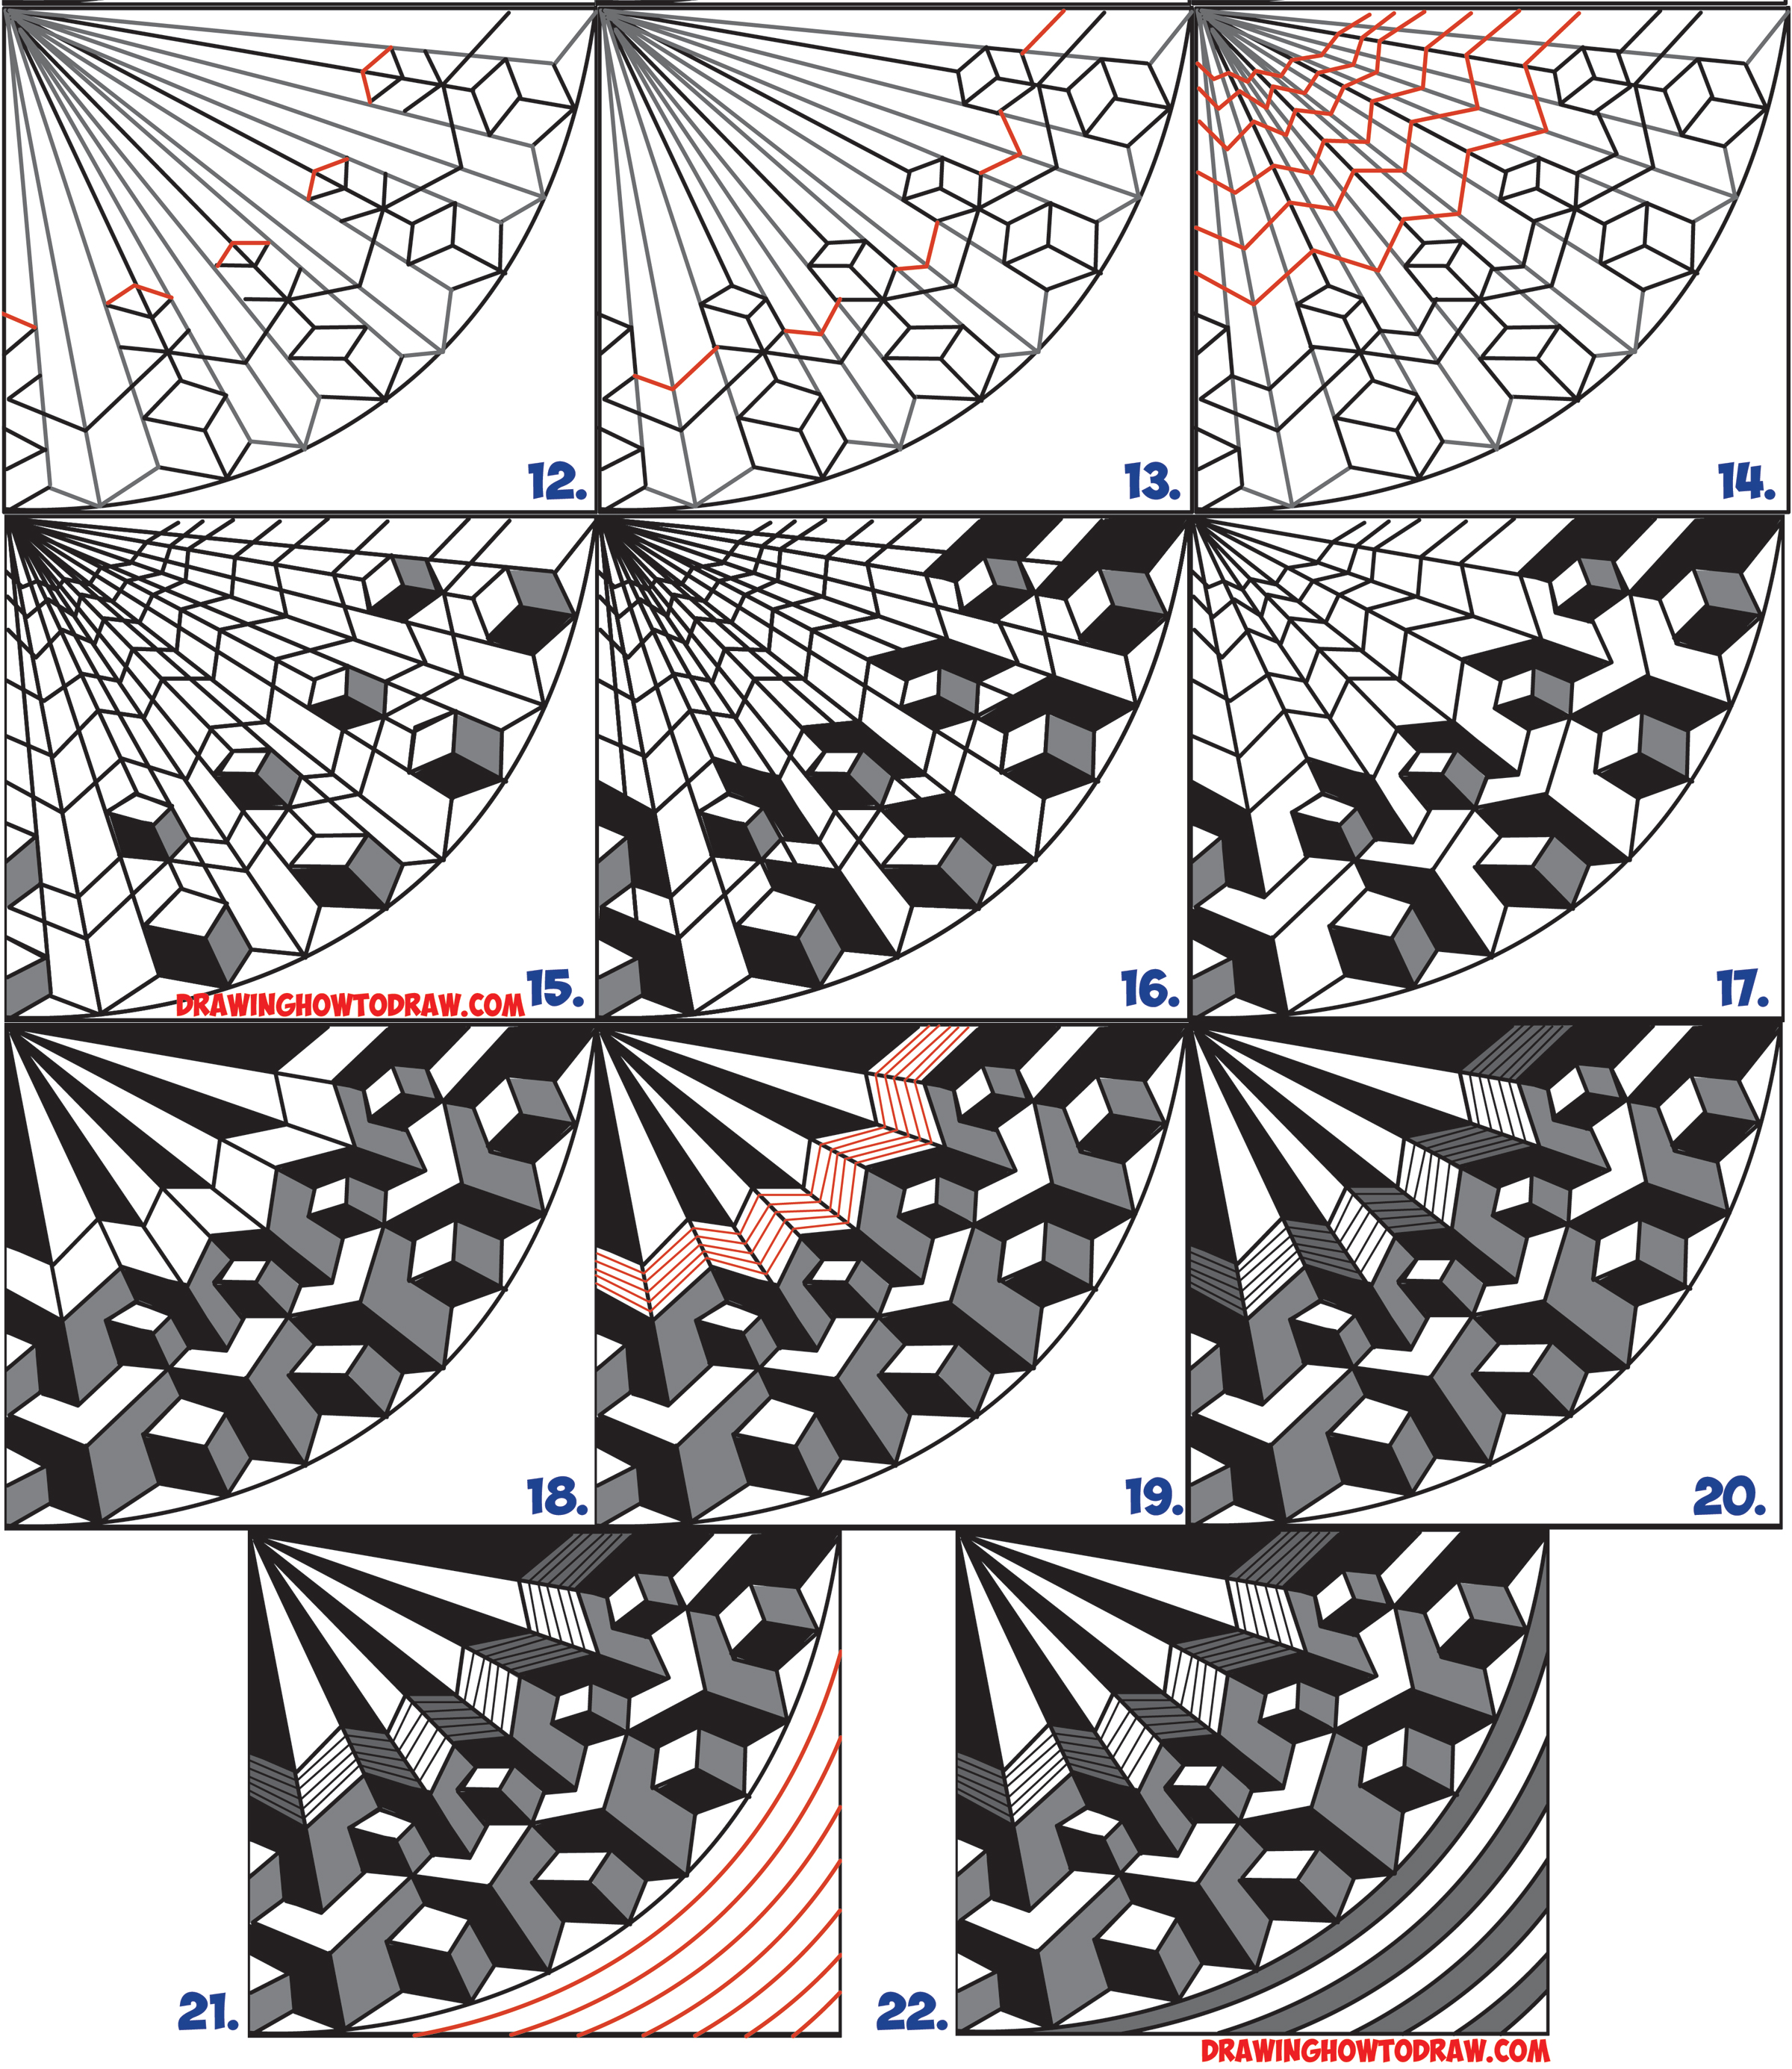
(Step 11) Draw two letter ‘v’ shapes above the previous diamond shape.
(Step 12) Draw an upside down letter ‘v’ shape to form another diamond.
(Step 13) Draw letter ‘v’ shapes in between the bottom letter ‘v’ shapes from step #12.
(Step 14) Draw zig-zag shapes. The high point of the zig-zag is above each of the diamonds that you drew. The low point rests on the low point of the previous zig-zags in between each diamond.
(Step 15) Now color in some parts gray and other parts black to form cubes.
(Step 16) Color in the rectangle and square next to each cube black.
(Step 17) Erase some of the diagonal lines from steps #3 and #4.
(Step 18) Color in some parts black and some gray.
(Step 19) Draw more zig-zag lines.
(Step 20) Color over some of the white parts with gray.
(Step 21) Draw curved lines in the bottom right corner. You can use a bowl or lid to get the roundness perfect.
(Step 22) Color in some parts of the curved gray to make it look like steps.
Come back soon for more tutorials.
You Might Also Like Our Other Cool Stuff Tutorials
Technorati Tags: optical illusion, optical illusions, how to draw optical illusions, cool drawing, cool drawing tricks, how to draw an optical illusion
Today, I'll show you how to draw a cartoon girl pointing at herself with step-by-step…
Today, I'll show you how to draw a crying cute little cartoon guy who is…
Today, I'll show you how to draw an adorably super-cute cartoon owl on a witch's…
Today I will show you how to draw a super cute baby-version of Winnie The…
Today I'll show you how to draw the famous Pusheen cat from social media, such…
Today I'll show you how to draw this super cute chibi version of Deadpool from…
View Comments
It's awesome ...want to learn more