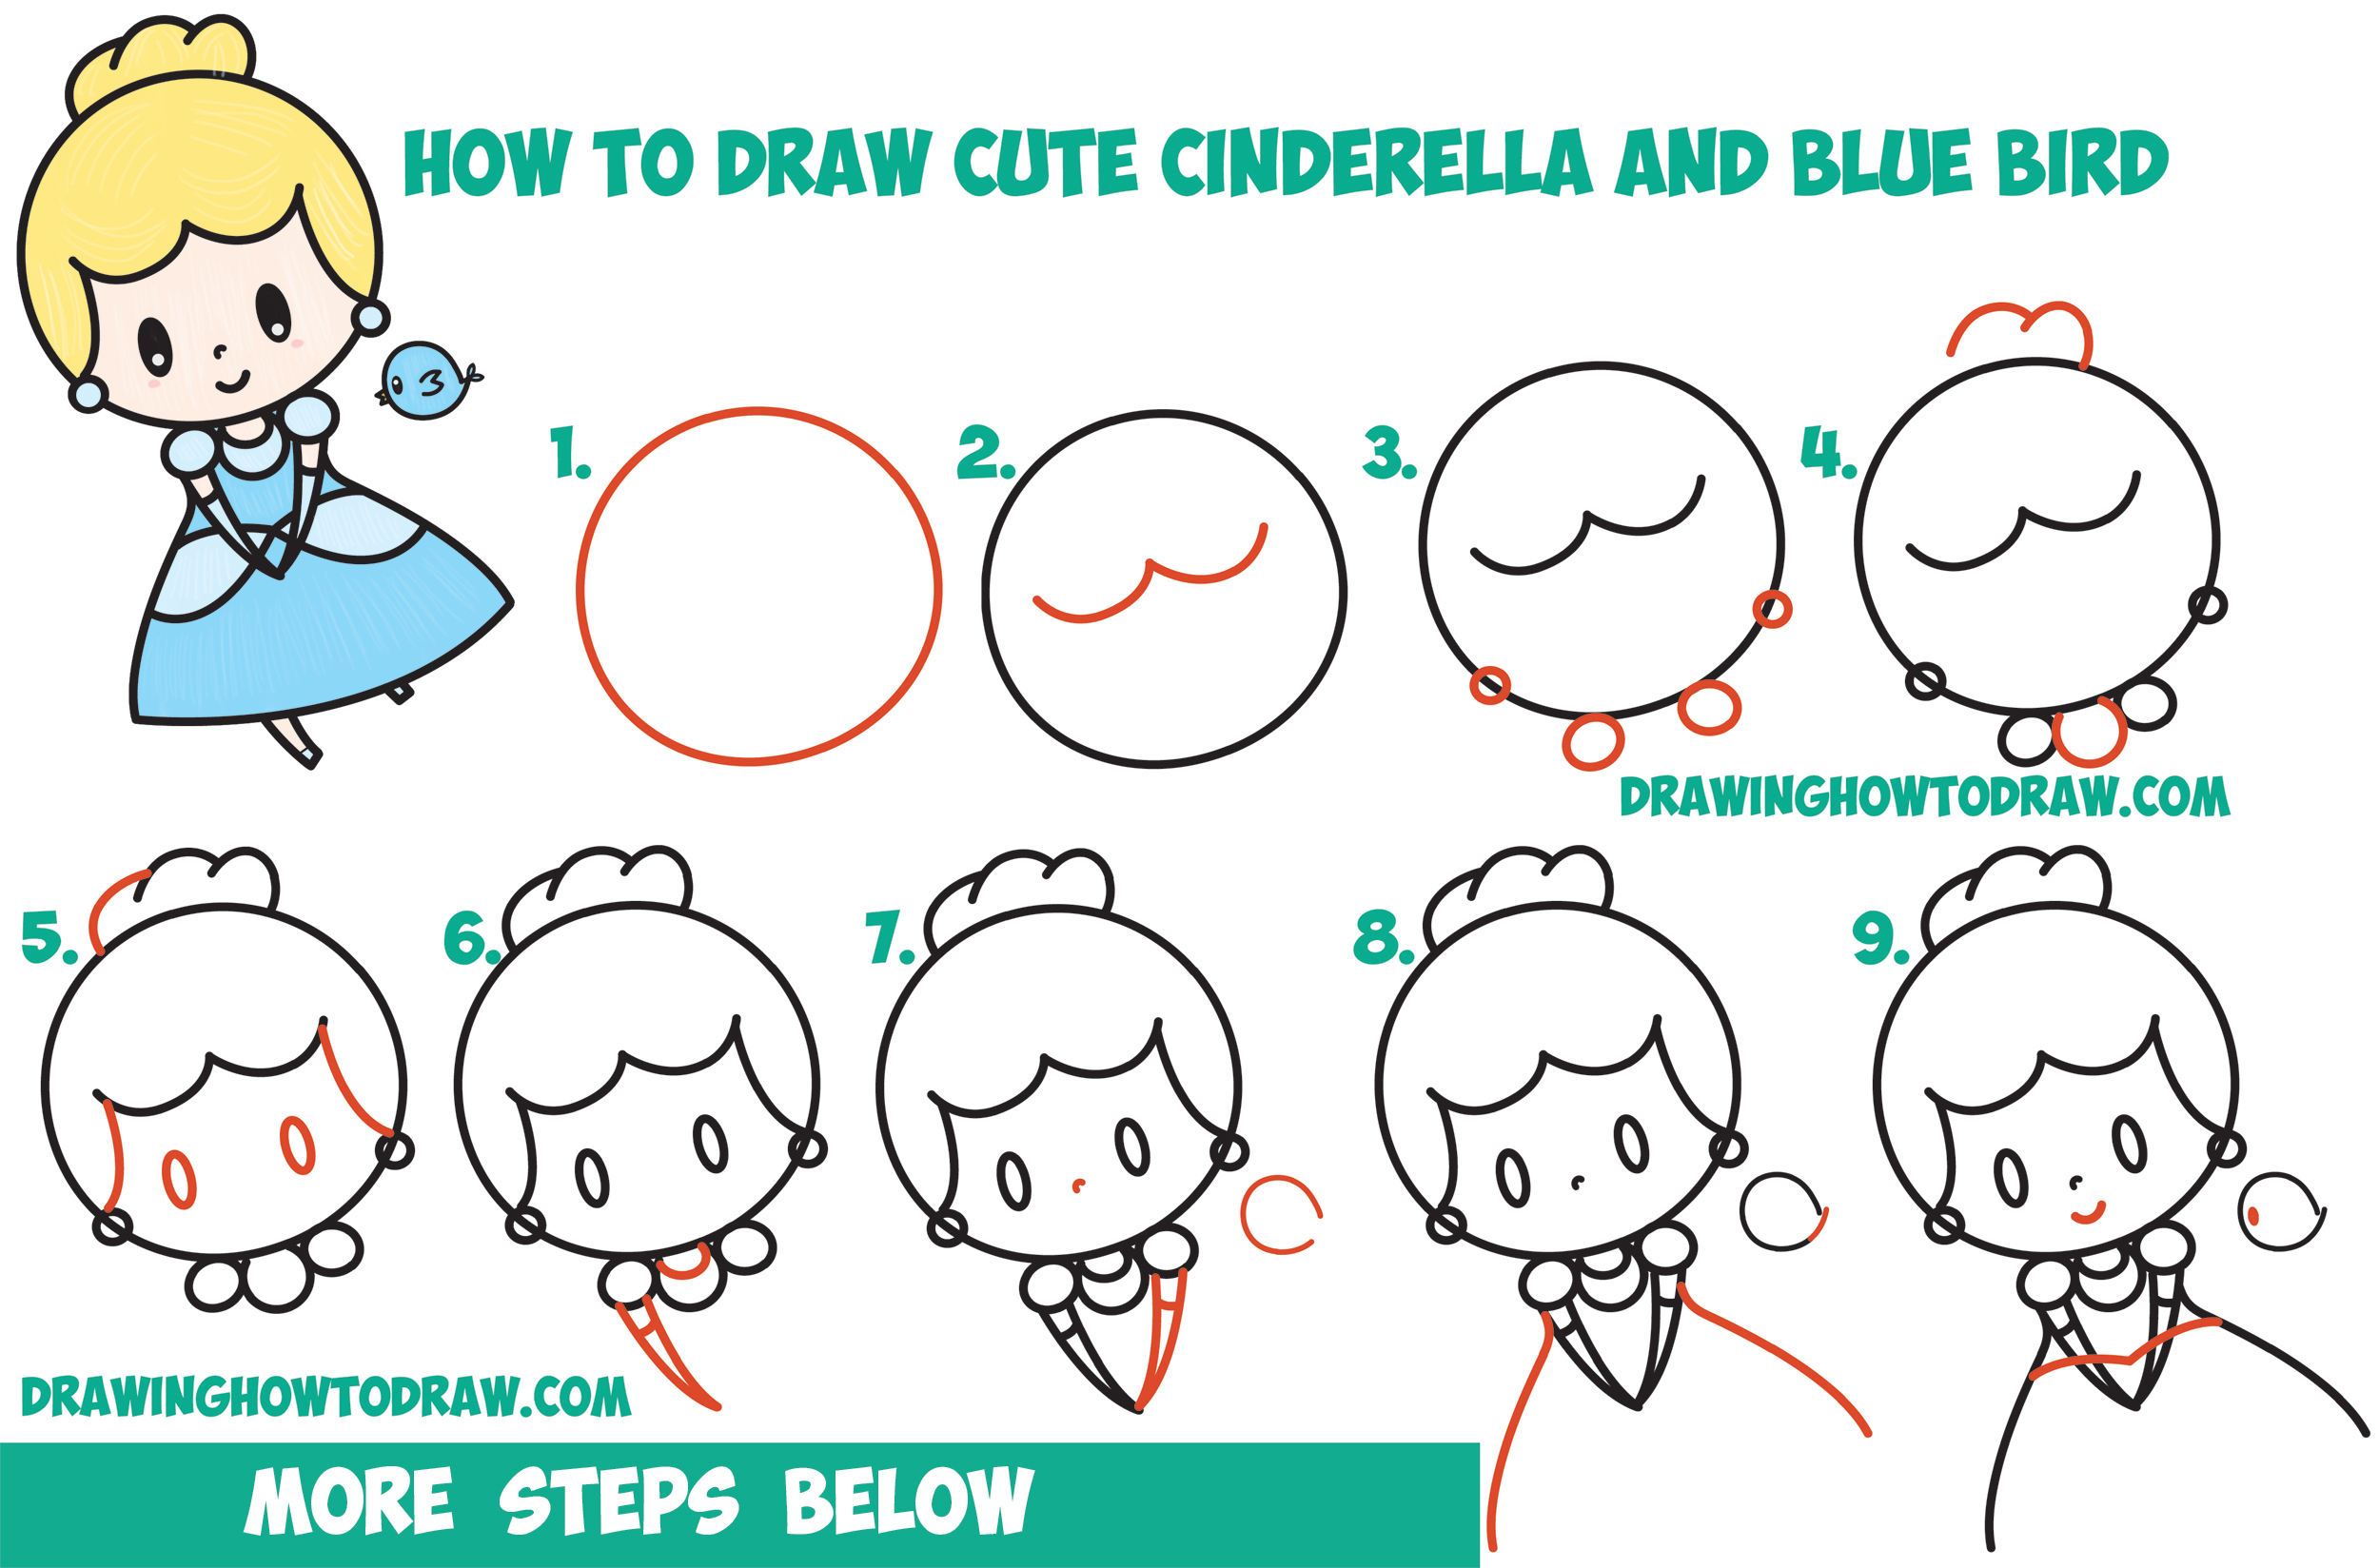
Today I’ll show you how to draw an adorable Cinderella and Blue Bird with easy to follow, simple step by step drawing instructions. The following tutorial will guide you through the steps with easy geometric shapes, letters, and numbers. I got the idea for this drawing from this cute Cinderella doll on Amazon. Happy Drawing!
You Might Also Like Our Other Kawaii / Chibi Lessons
Learn How to Draw Cute Chibi / Kawaii Cinderella & Blue Bird Simple Steps Drawing Lesson for Children
[ad#draw]
Written Out Step by Step Drawing Instructions
(Step 1) Draw a circle.
(Step 2) Draw a sideways #3 shape.
(Step 3) Draw some ovals.
(Step 4) Draw a sideways #3 shape for her bun. Draw a sideways letter “C” shape at neck.
(Step 5) Draw a few curved lines and 2 ovals.
(Step 6) Draw another sideways letter “C” at neck. Draw an upside down letter “A”-like shape for one of the arms.
(Step 7) Draw another upside down letter “A”-like shape for one of the arms. Draw 2 letter “C”-like shapes. The bigger “C” is the blue bird.
(Step 8) Draw 2 “?”-like curves for the sides of the dress. Continue the curve of the blue bird.
(Step 9) Draw a curved line for Cinderella’s smile. Draw 2 curved lines on her dress. Draw an oval for the bird’s eye.
(Step 10) Draw a partial sideways #3-like shape on the dress. Draw a curved line for the bottom of the dress. Draw 2 sideways letter “M” shapes on the blue bird. Draw a leaf shape for one of the back feathers.
(Step 11) Draw lines on the legs of Cinderella. Draw another leaf shape for one of the back feathers. Draw a line as well.
(Step 13) Erase un-needed lines.
(Step 14) Color them in.
You Might Also Like Our Other Kawaii / Chibi Lessons
Technorati Tags: cinderella, blue bird, how to draw cinderella, cute cinderella, kawaii cinderella, chibi cinderella


