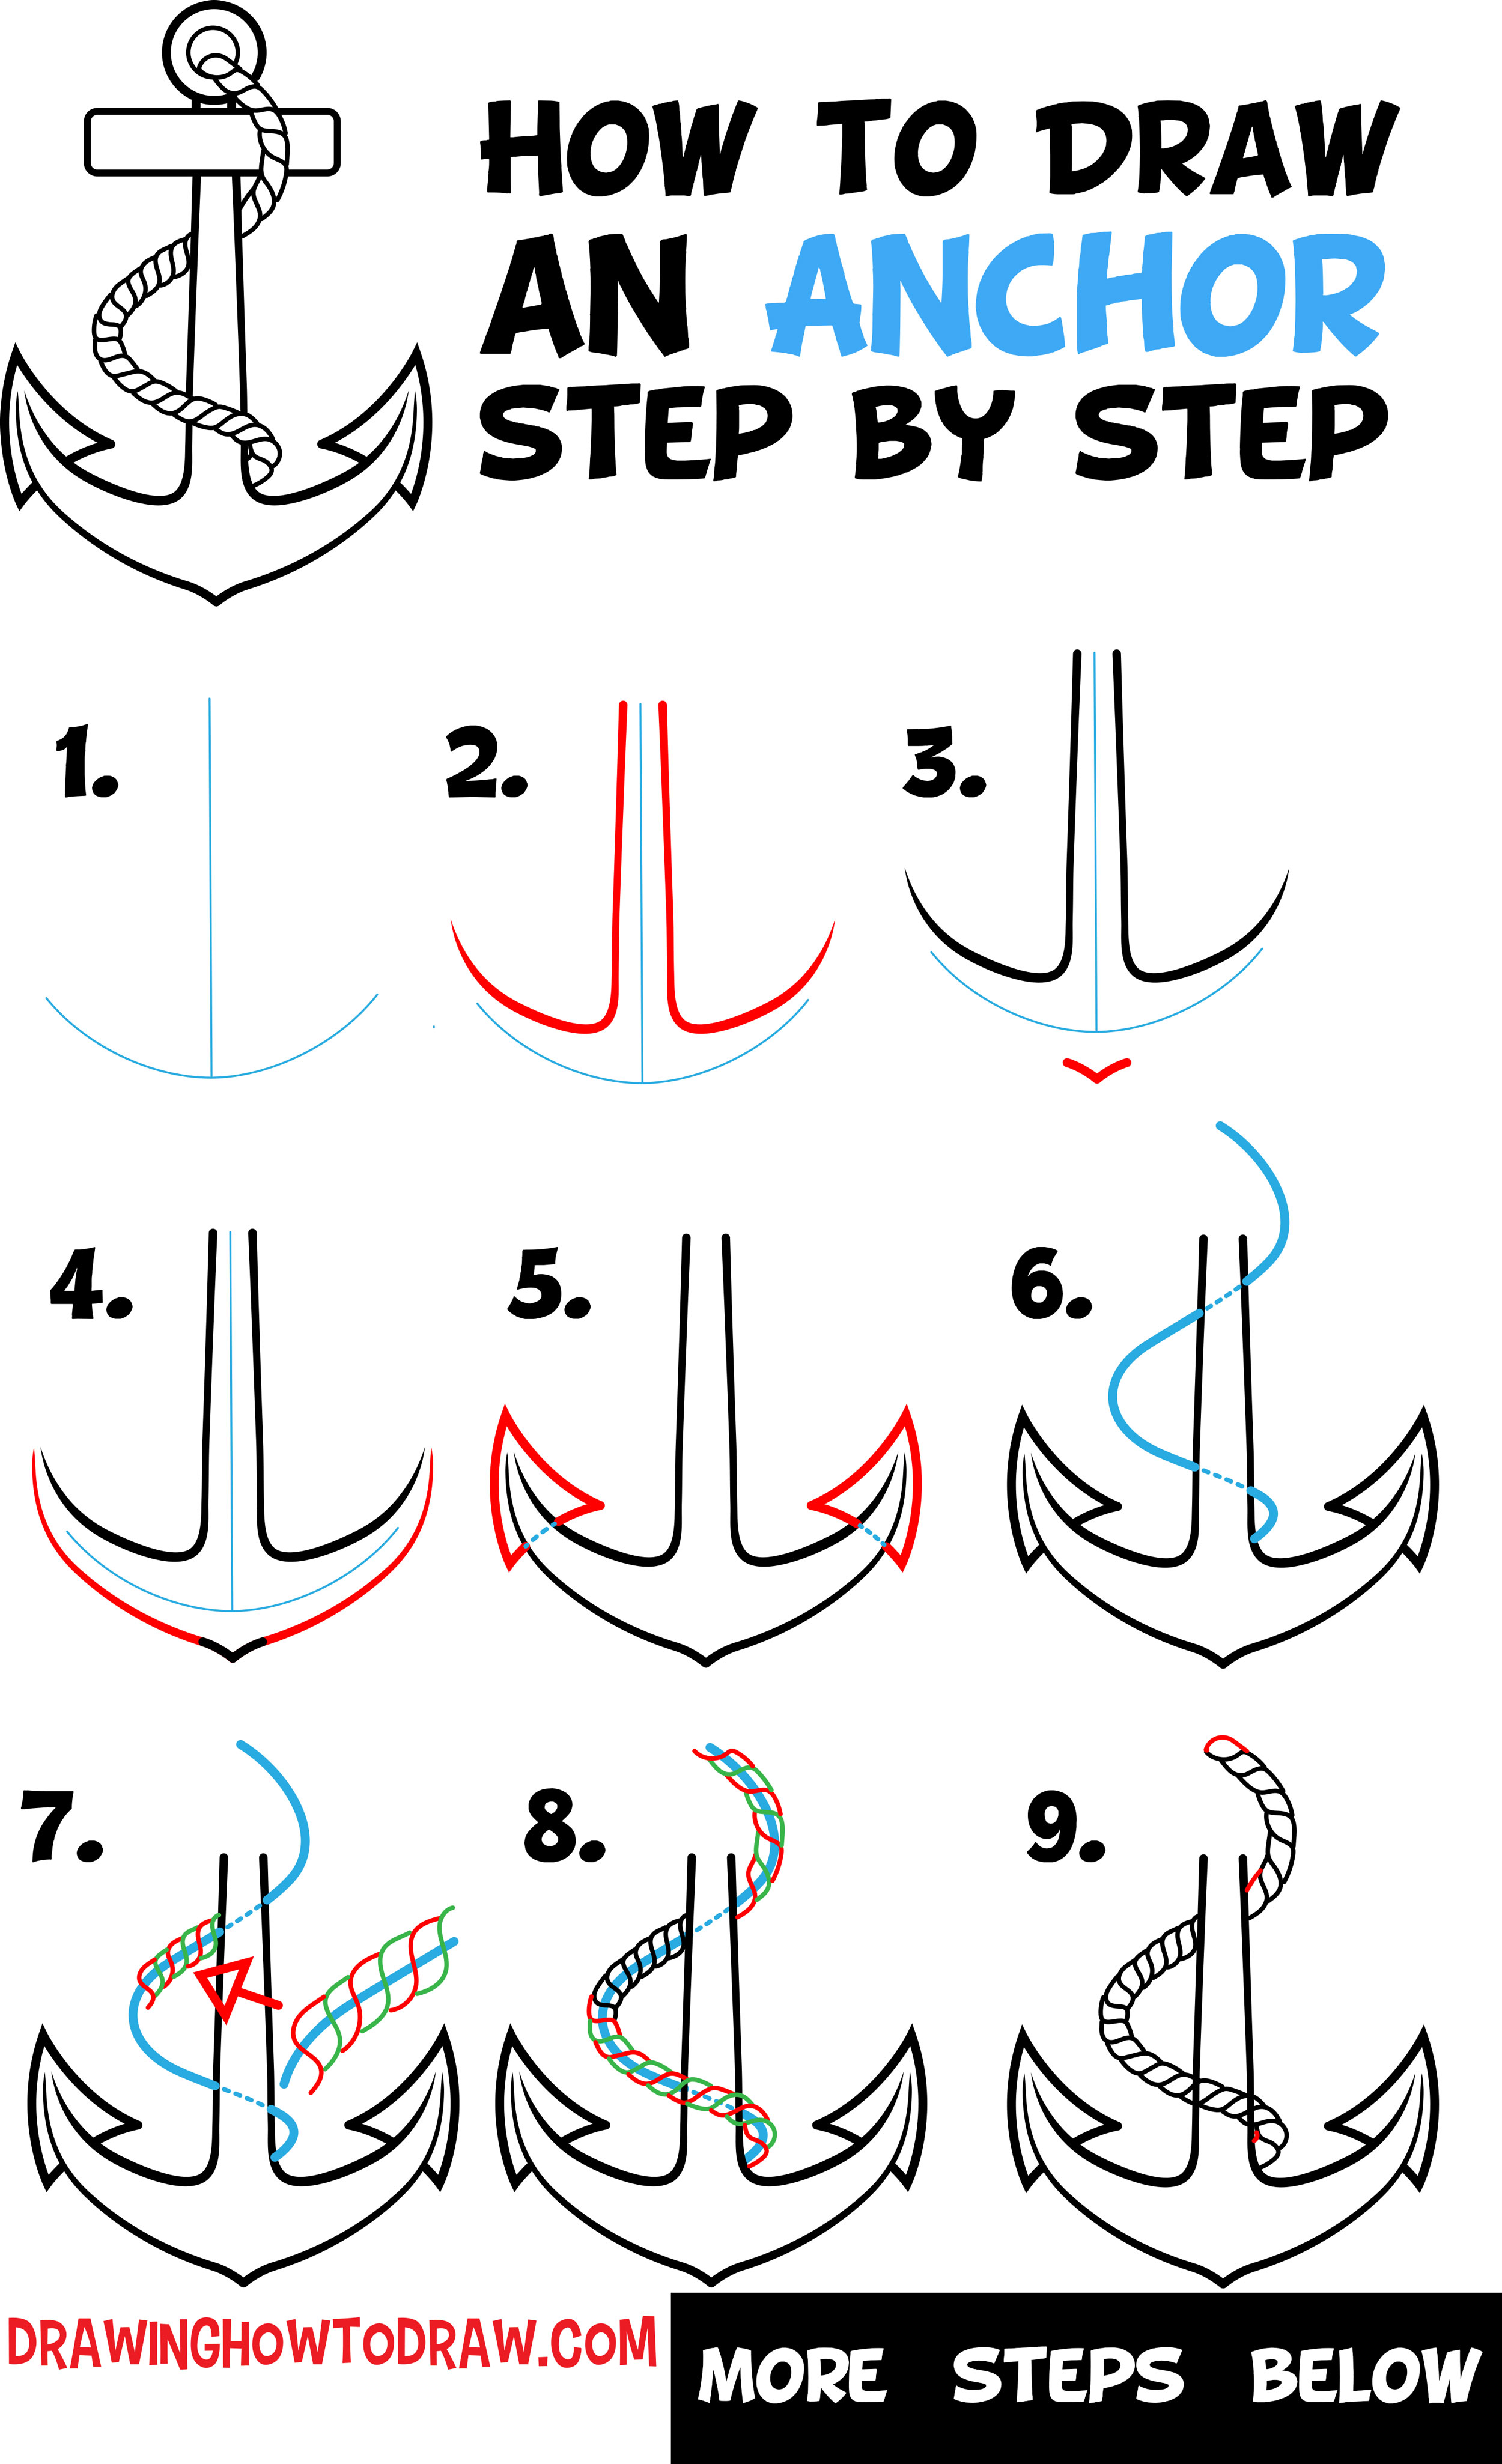
Today I’ll show you how to draw a boat / ship anchor with easy to follow, step by step, illustrated instructions. We will guide you thru the steps using basic geometric shapes and other simple shapes. Find the lesson below. Happy Drawing!
Learn How to Draw an Anchor Easy Step by Step Drawing Tutorial for Beginners
[ad#draw]
Written-Out Step by Step Drawing Instructions
(Step 1) Lightly draw guide lines for the anchor. These lines will be erased later on.
(Step 2) Use the guide lines from step #1 to help you draw these L-like shapes.
(Step 3) Draw a “V”-like shape below the blue guide lines. Try to get them right in the center.
(Step 4) Draw curved lines up towards the lines from step #2.
(Step 5) Draw triangle-like shapes…more curved.
(Step 6) Lightly draw guide lines for the rope that goes around the anchor. It looks like a backwards “S” with an extra hump at the bottom. The dotted line parts represent the part of the rope that will be behind the anchor, so therefore, unseen.
(Step 7) Now we are drawing the actual rope. I drew them in different colors so you can see that the rope is made up of letter “S”-like shapes. I blew it up on the right, to show you more details.
(Step 8) Continue to draw the rope.
(Step 9) Finish up the rope.
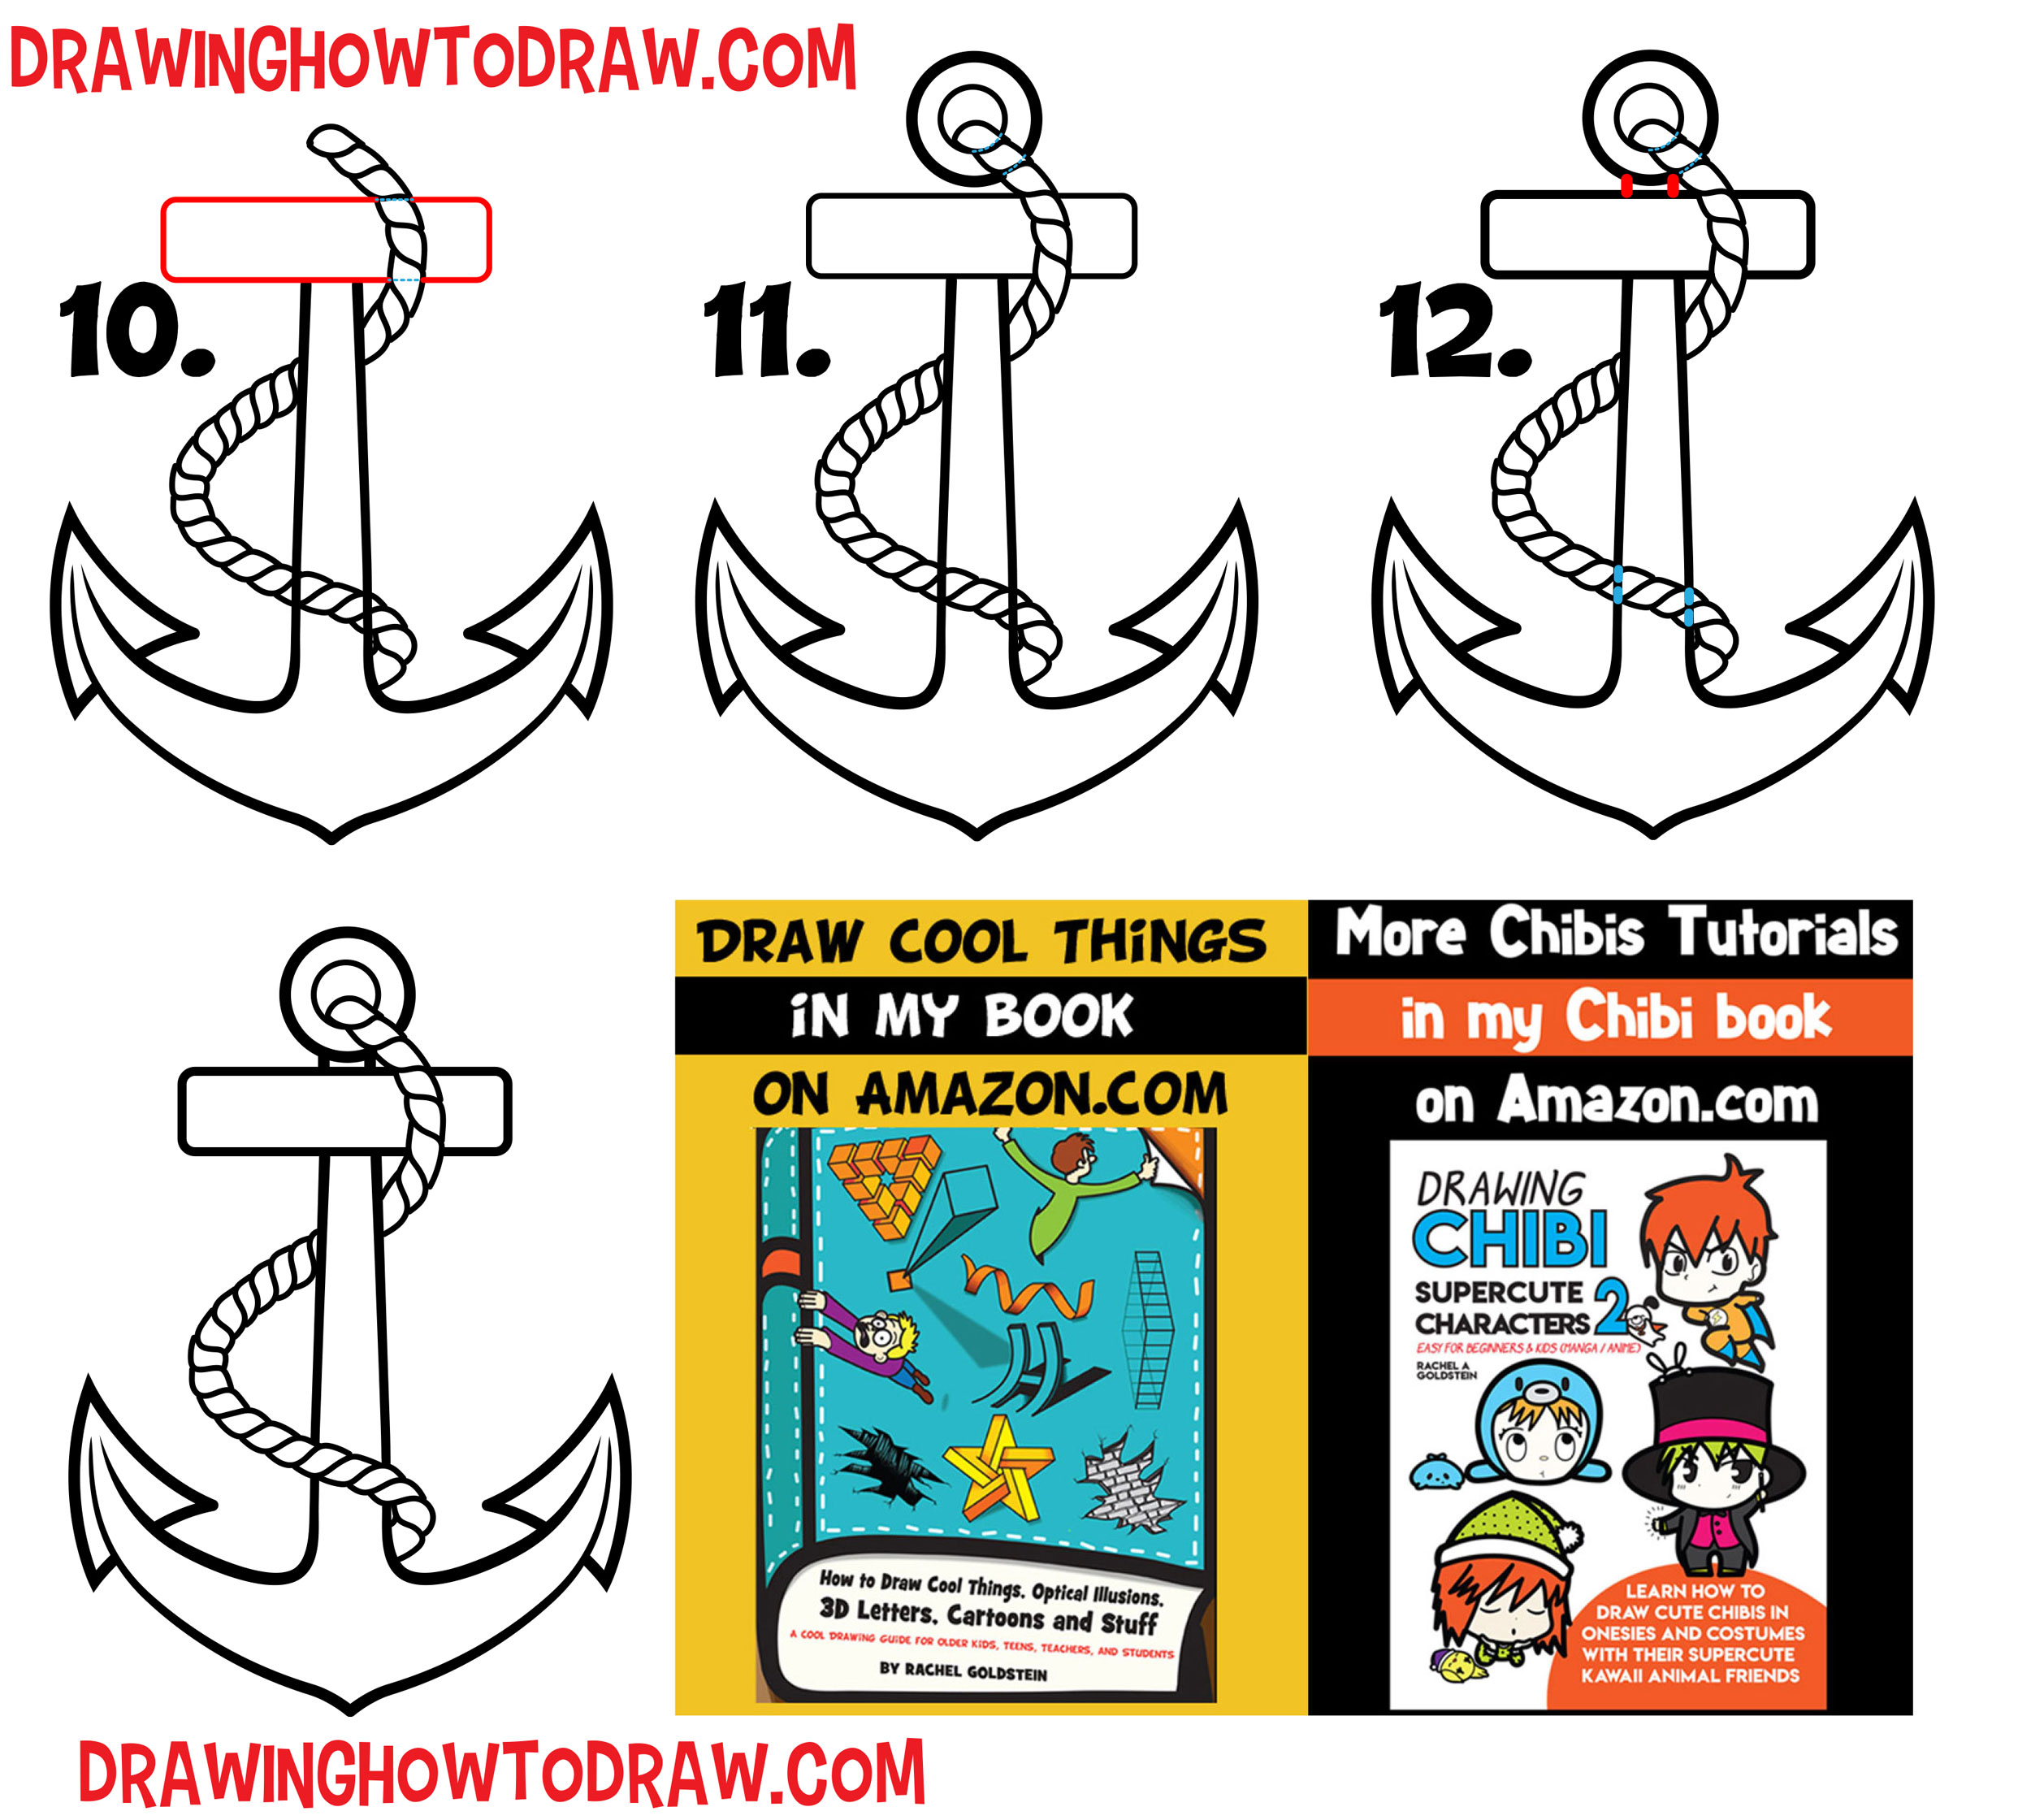
(Step 10) Draw a rectangle with rounded corners. Don’t draw the dotted lines.
(Step 11) Draw 2 circles at the top (sorry, I forgot to put it in red for you).
(Step 12) Erase on the blue lines. Draw 2 lines at the top.
Now, here is the finished anchor. I hope yours turned out as good as mine.
Check Out Our New Chibi Drawing Book on Amazon
Technorati Tags: anchor, anchors, how to draw an anchor
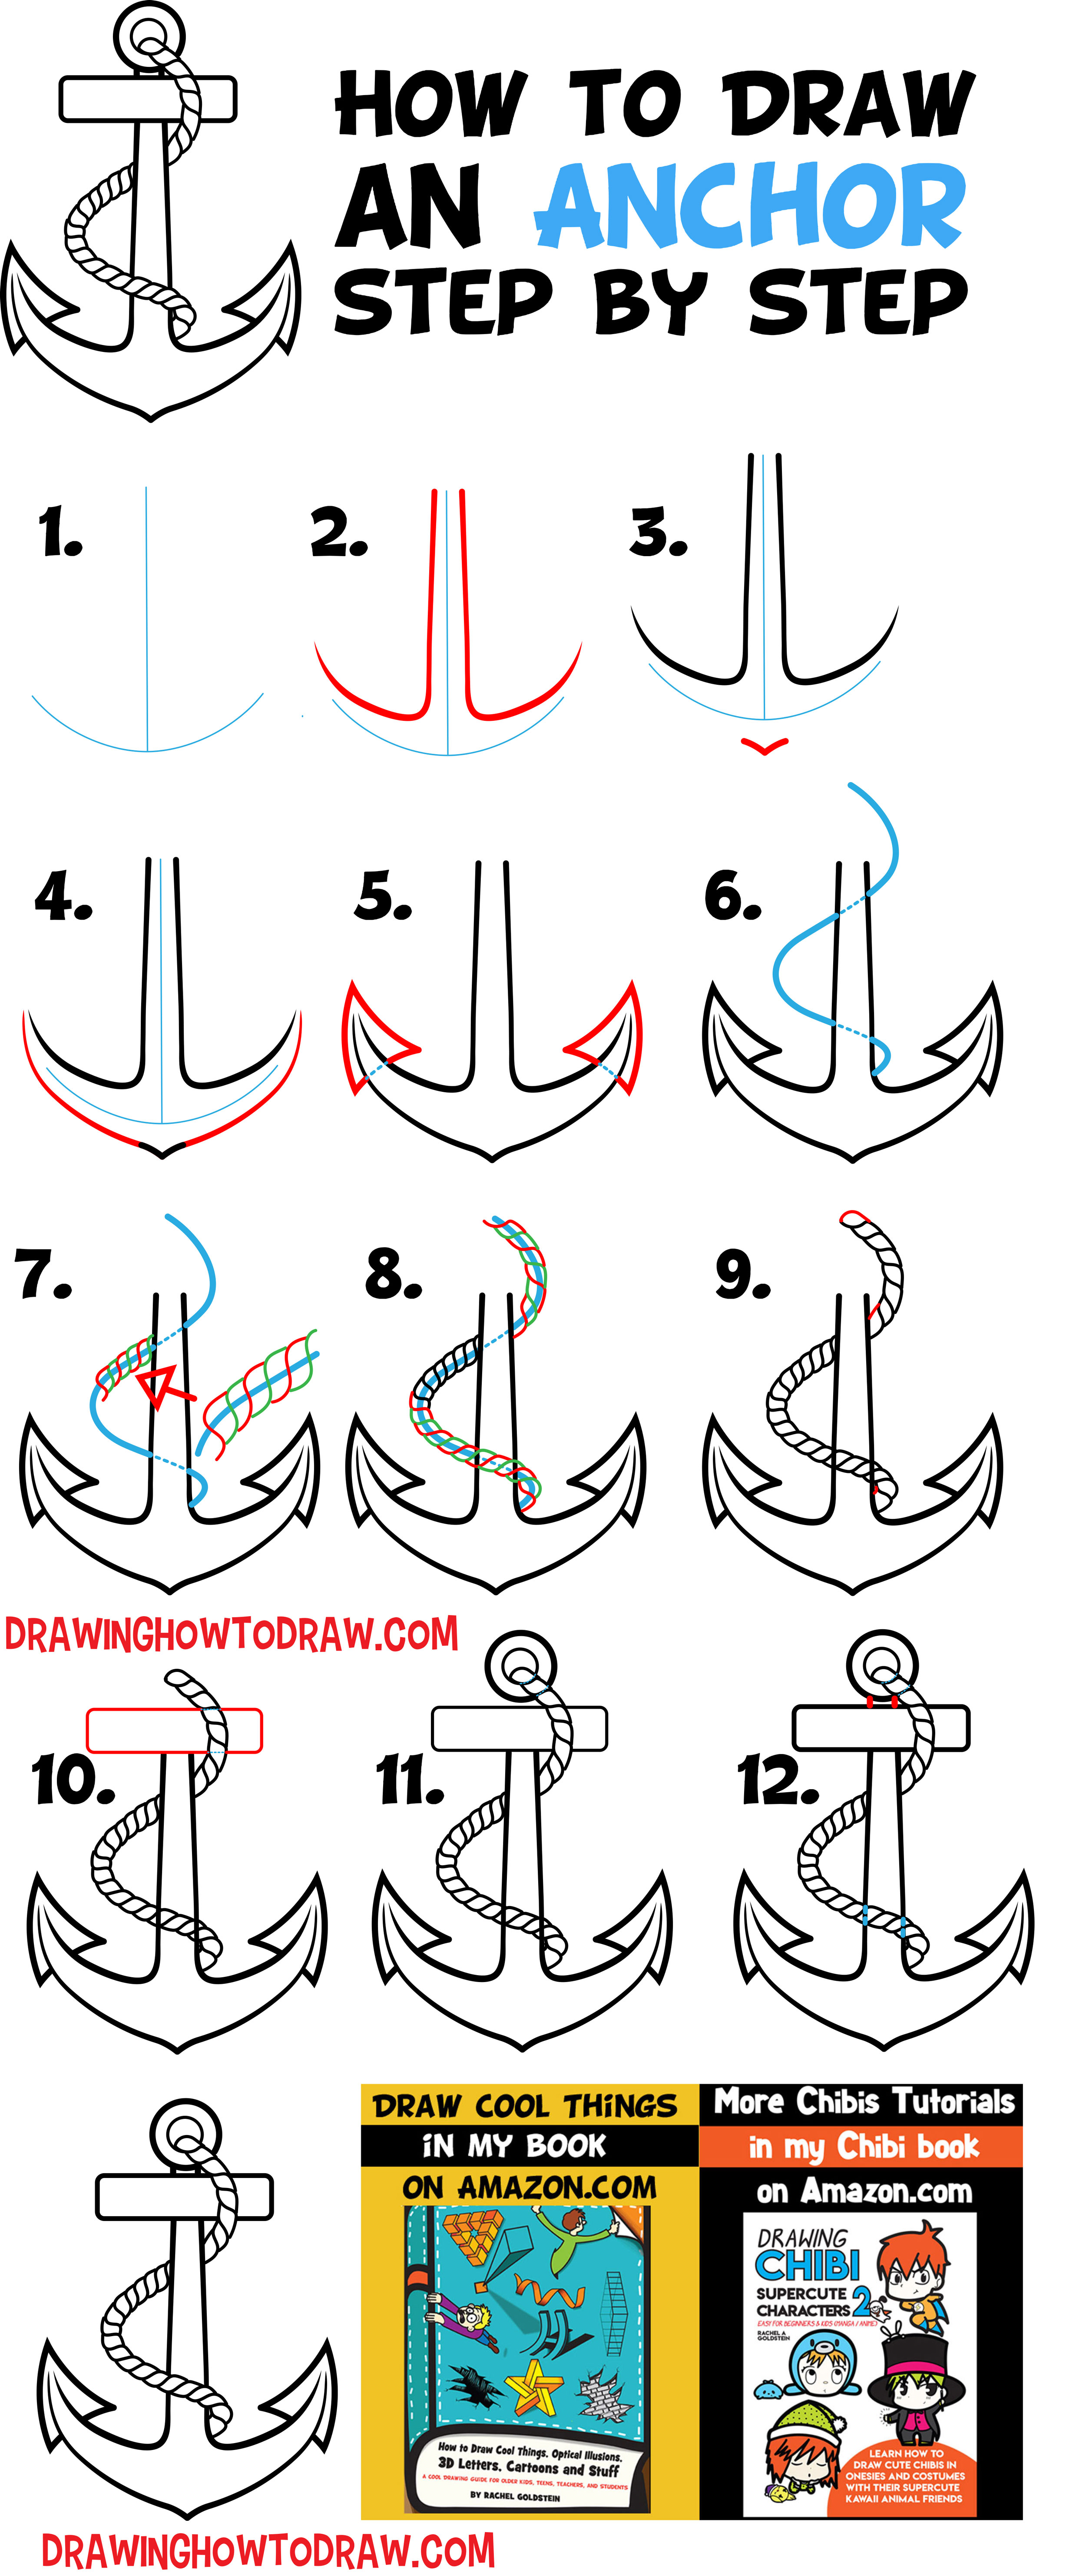
If you like all of your steps in one picture, find it below


