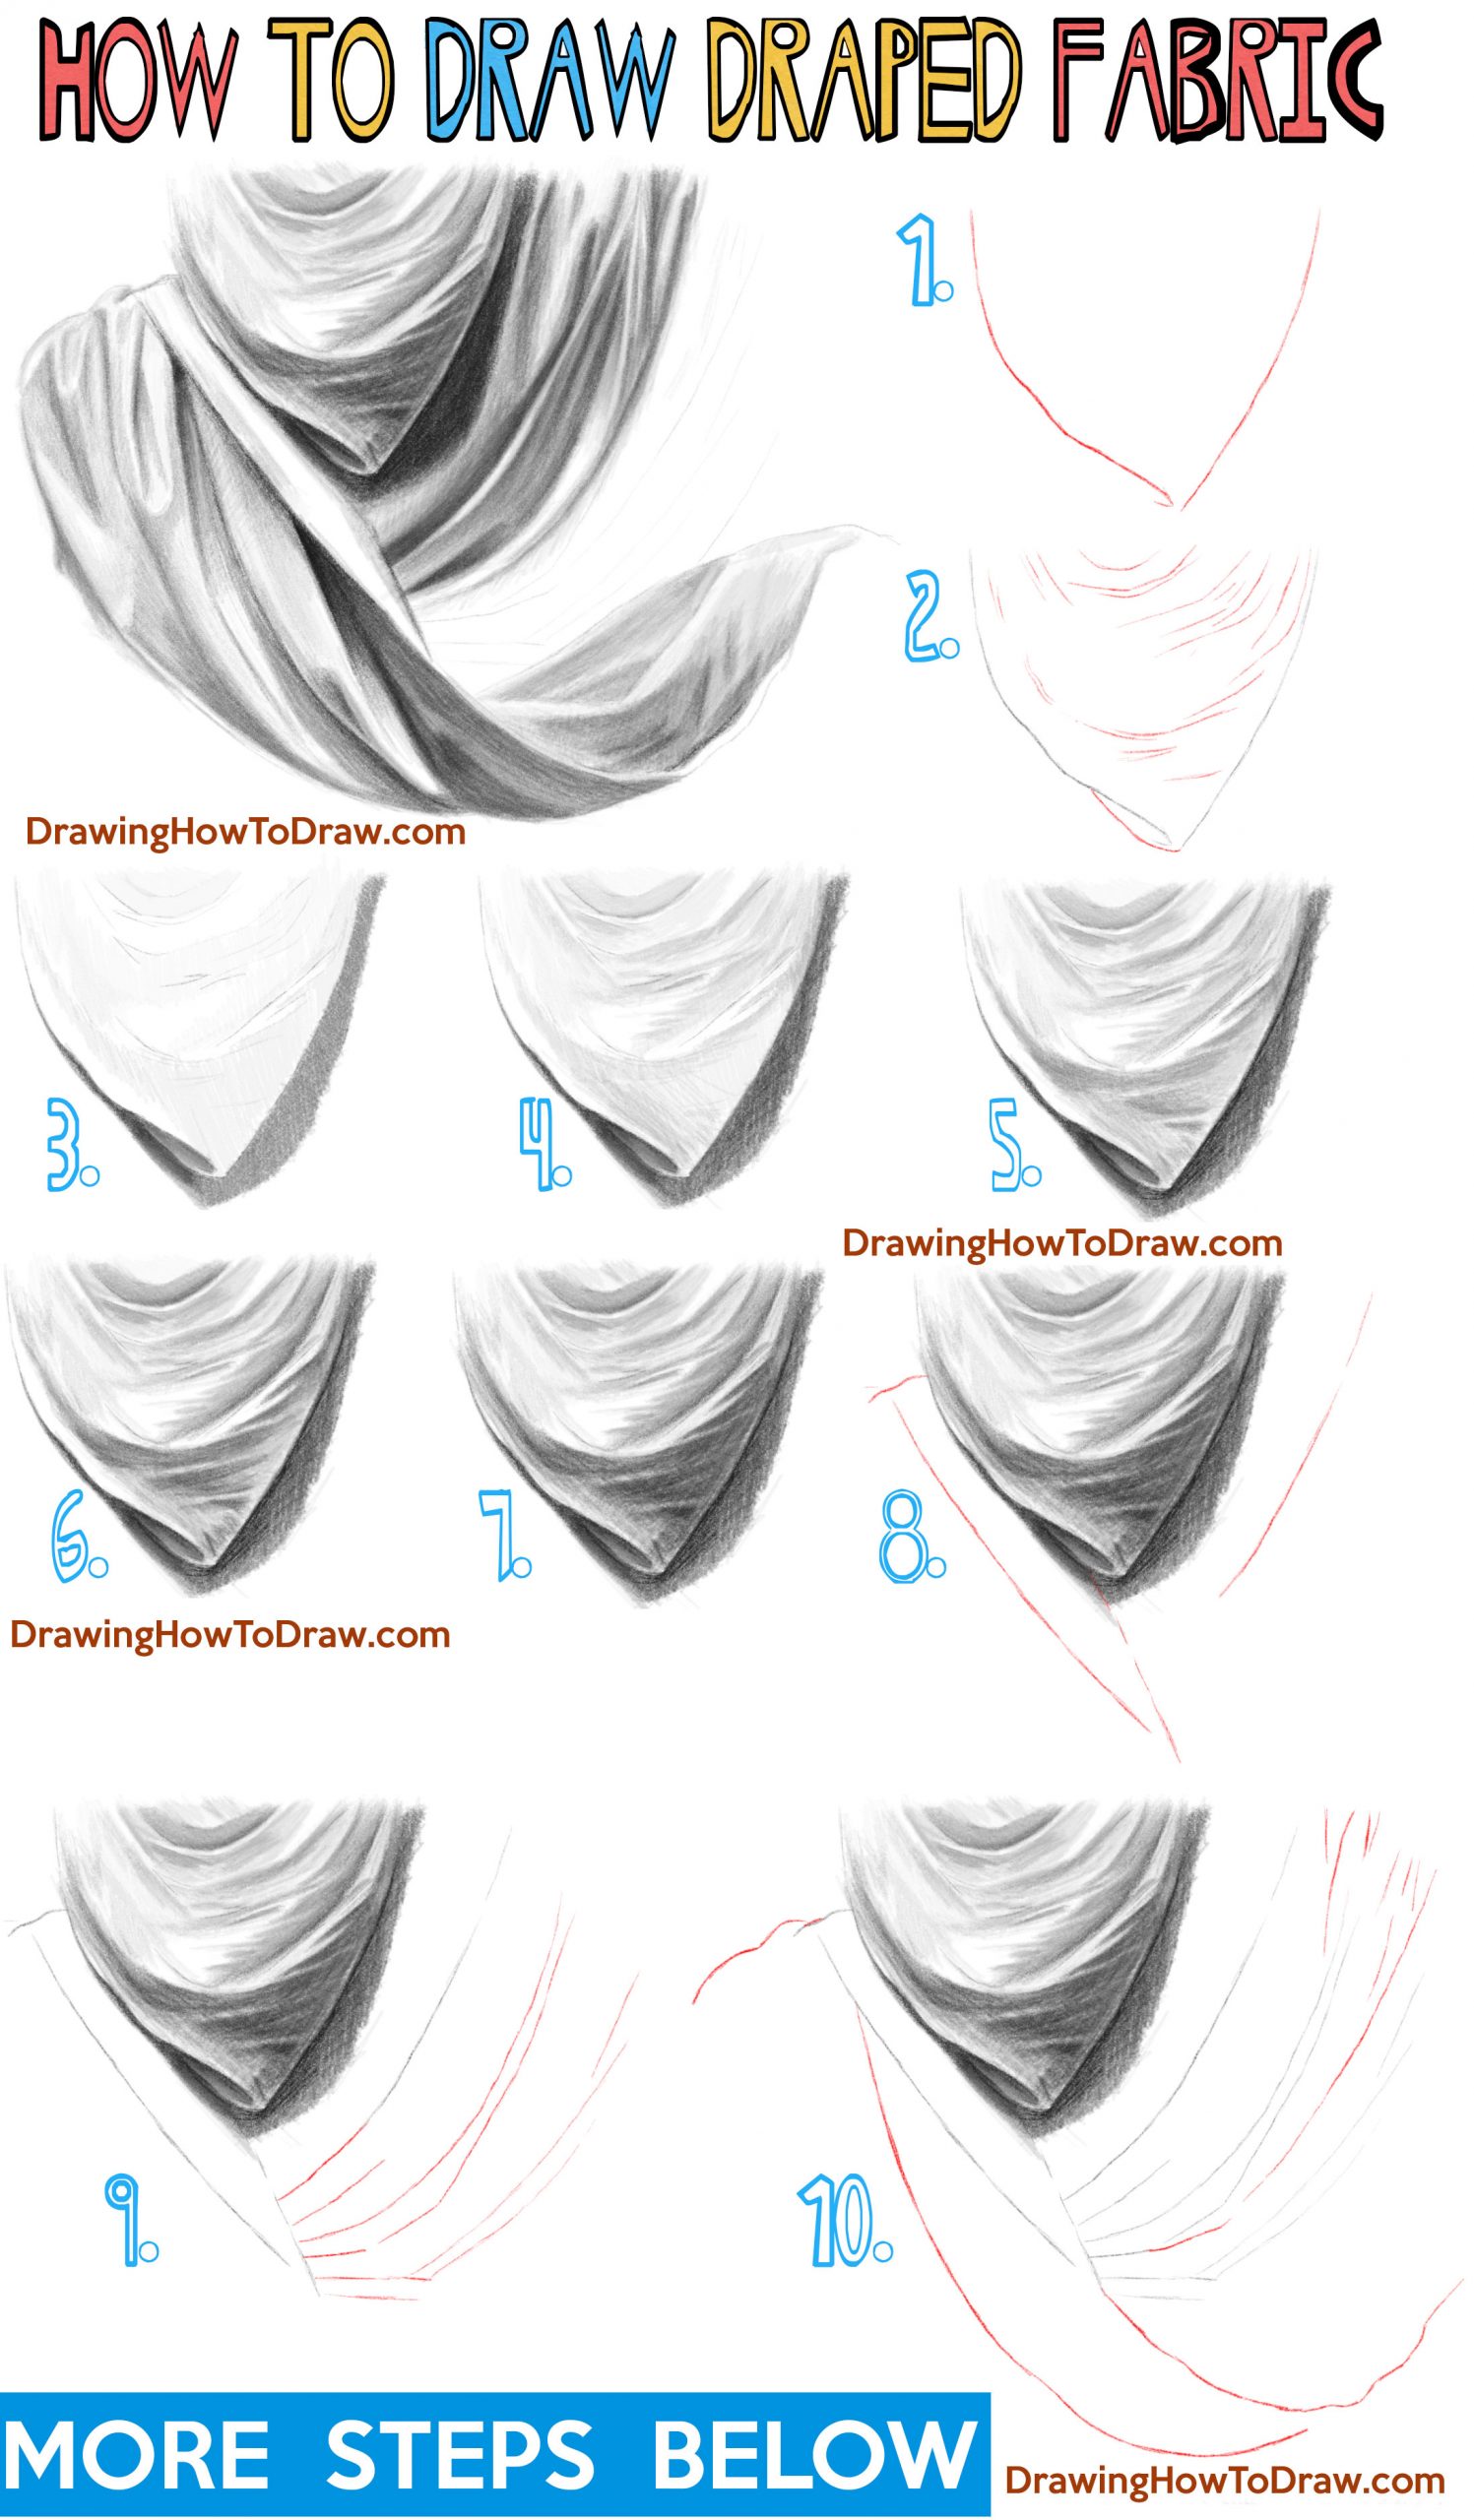
I’ve always thought that one of the most difficult things to draw was drawing the folds in fabric clothing and drapery. For that reason, I decided to show you how to draw fabric that is draped over itself. There are a lot of wrinkles, folds, and creases to show you how to go about shading and drawing them. Happy Drawing!
(STEP 01) Start drawing the draped fabric. One side is just a curved line and the other side sort of looks like a “J” that curves into a #5 shape (if that makes sense).
(STEP 02) Draw a curved line to attach the 2 lines together. Then lightly draw curved lines inside the drape. The drapery is being pulled out, so the lines definitely reflect that.
(STEP 03) Add some dark shading to the right and to the left of the draping fabric. Also, very lightly shade some parts of the fabric.
(STEP 04) Add in some darker tones. The bottom side of the folds on this fabric are darker.
(STEP 05) Continue to add darker tones.
(STEP 06) As you draw in the darker shadows, make sure that you try to gradate the shading out gradually to the next tone.
(STEP 07) Now draw in the very darkest of the shadows.
(STEP 08) Draw some more of the lines of the fabric.
(STEP 09) Continue drawing the fabric.
(STEP 10) Draw the curved lines that make up the draping fabric. Also, draw some of the smaller wrinkles as well.
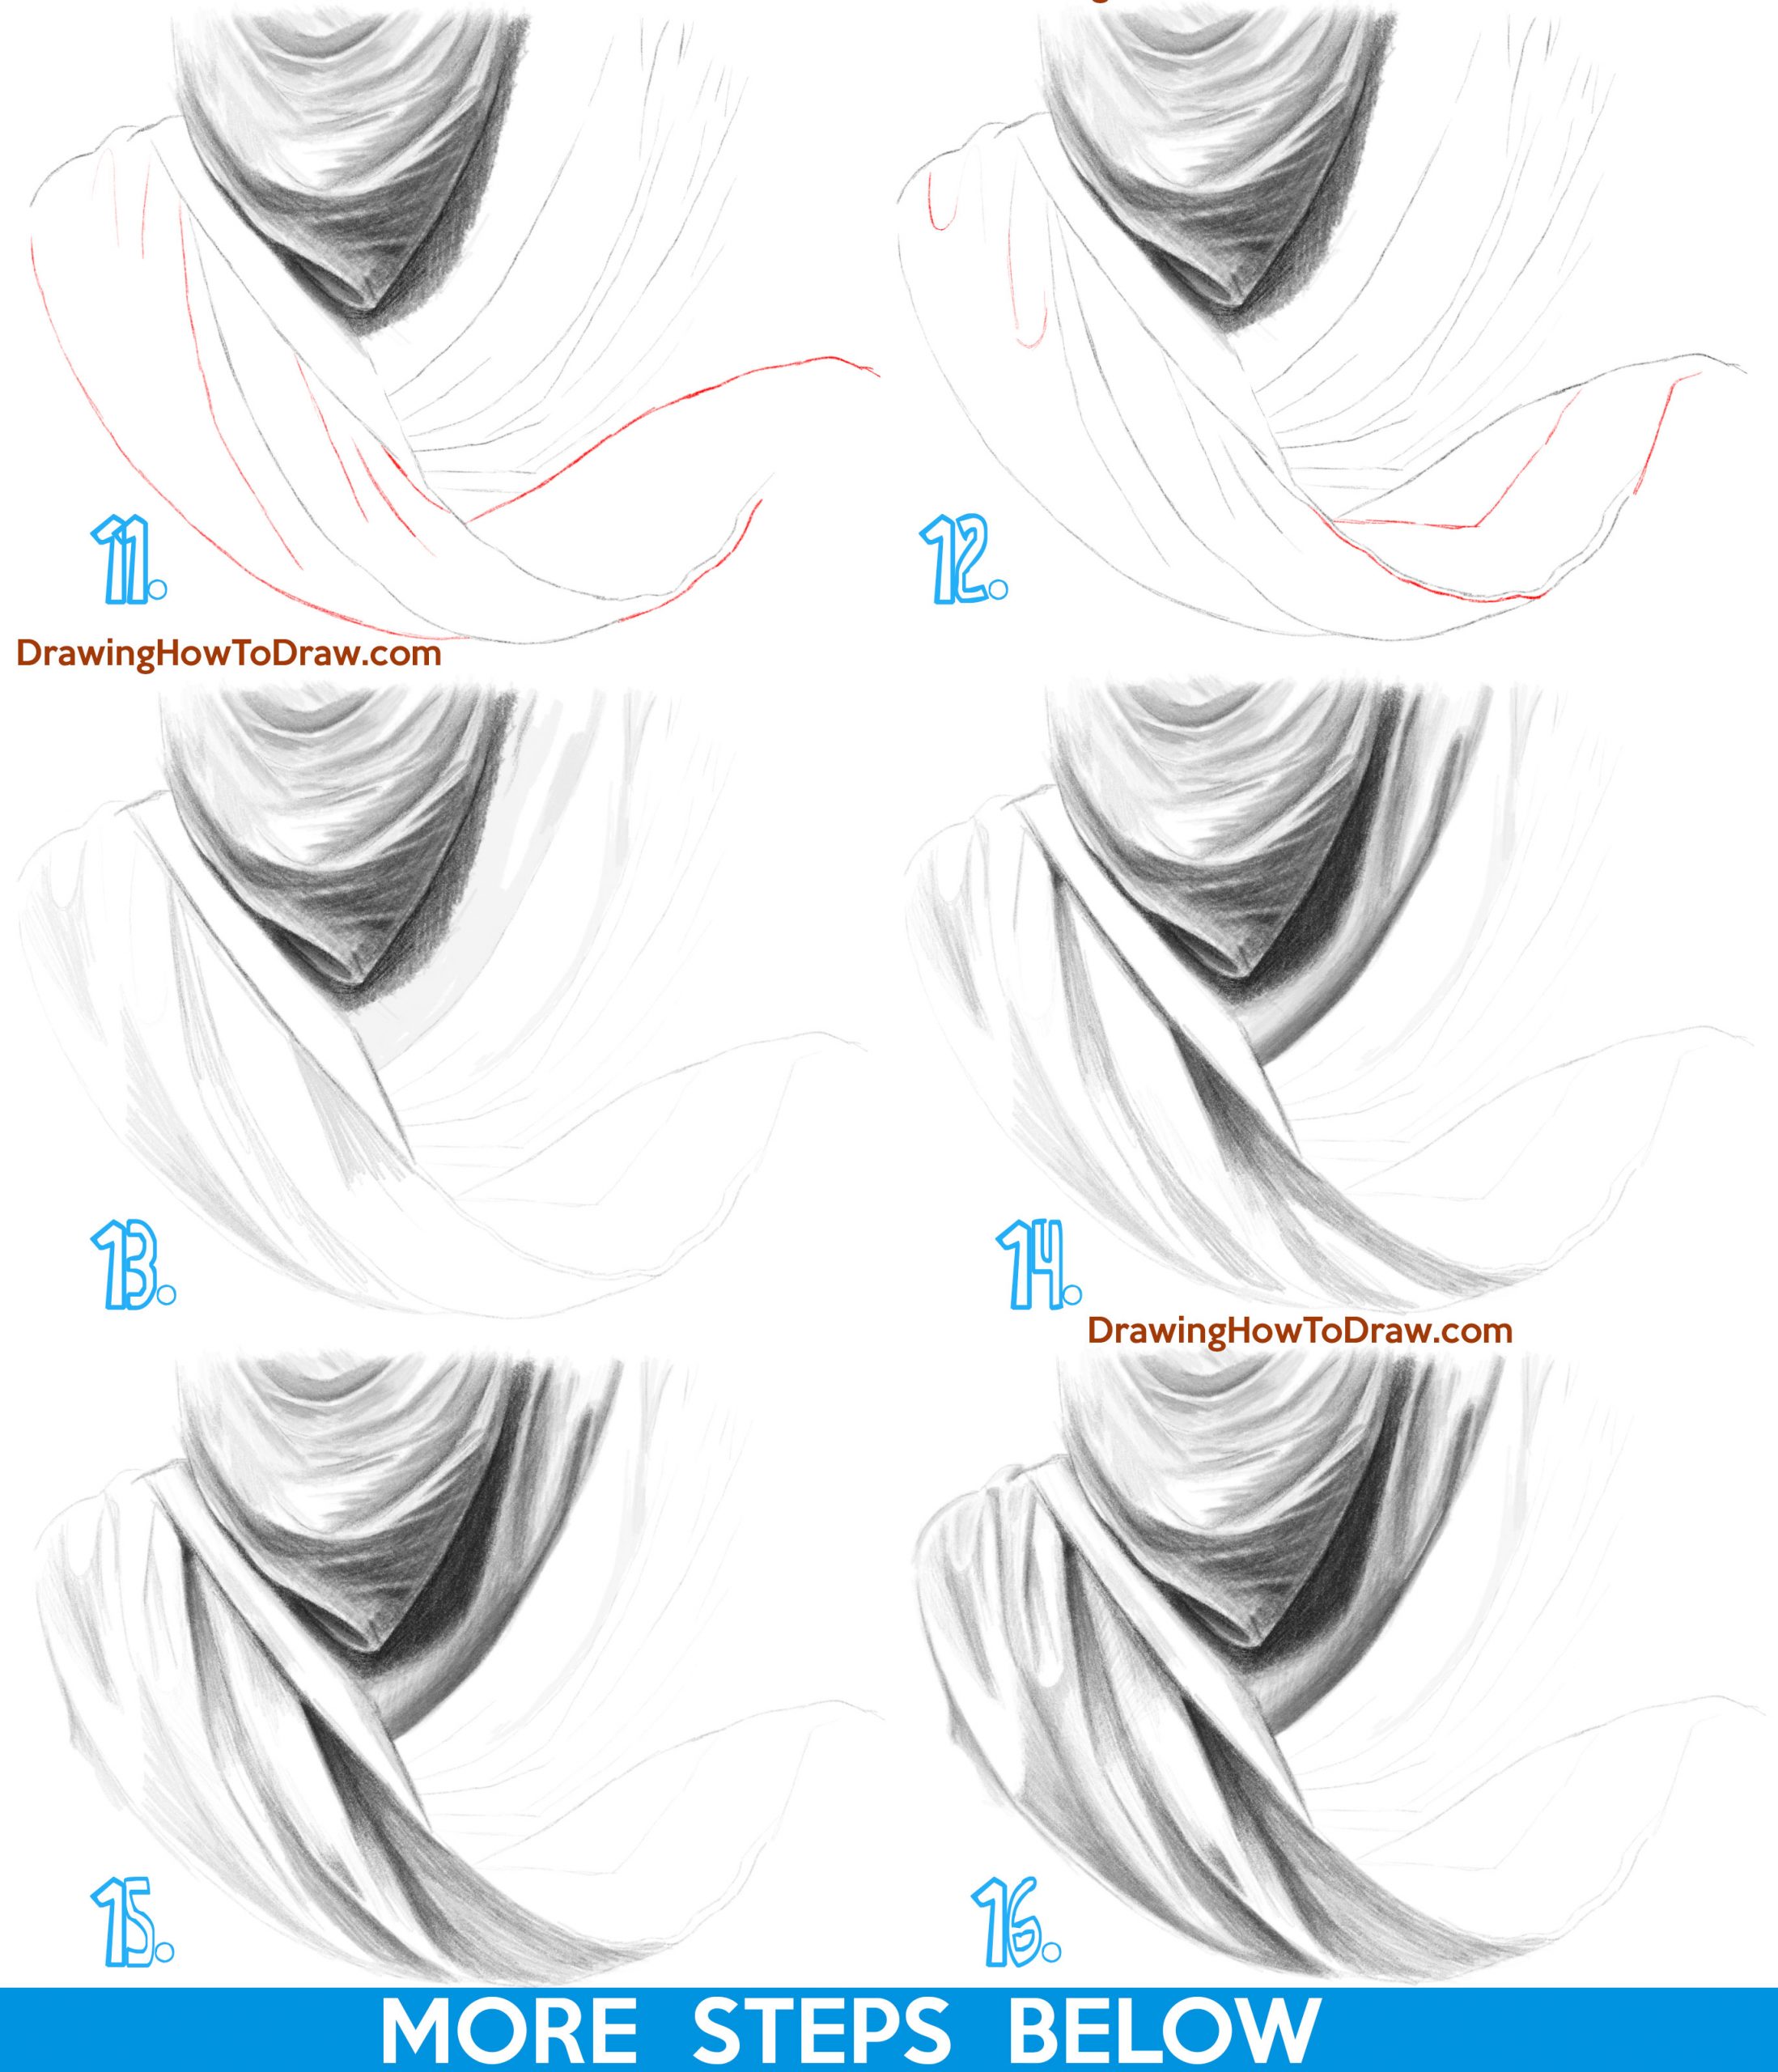
(STEP 11) Draw some more curved lines. It’s not so bad when you do a little at a time. I hope that you are following along.
(STEP 12) Draw the finishing touches on the outer lines.
(STEP 12B) Lighten the lines so that you can just see them. Do this by tapping the lines with a kneaded eraser.
(STEP 13) Start shading some of the lighter tones.
(STEP 14) Darken some of the shadows.
(STEP 15) Deepen the shadows. They should be darker, the further you get into a crease or fold. The less light that reaches that area,
the darker it becomes.
(STEP 16) Work a bit on the folds/creases at the top left of the drawing. Notice where the shadows and highlights hit. Also, work on the shading right below that area as well.
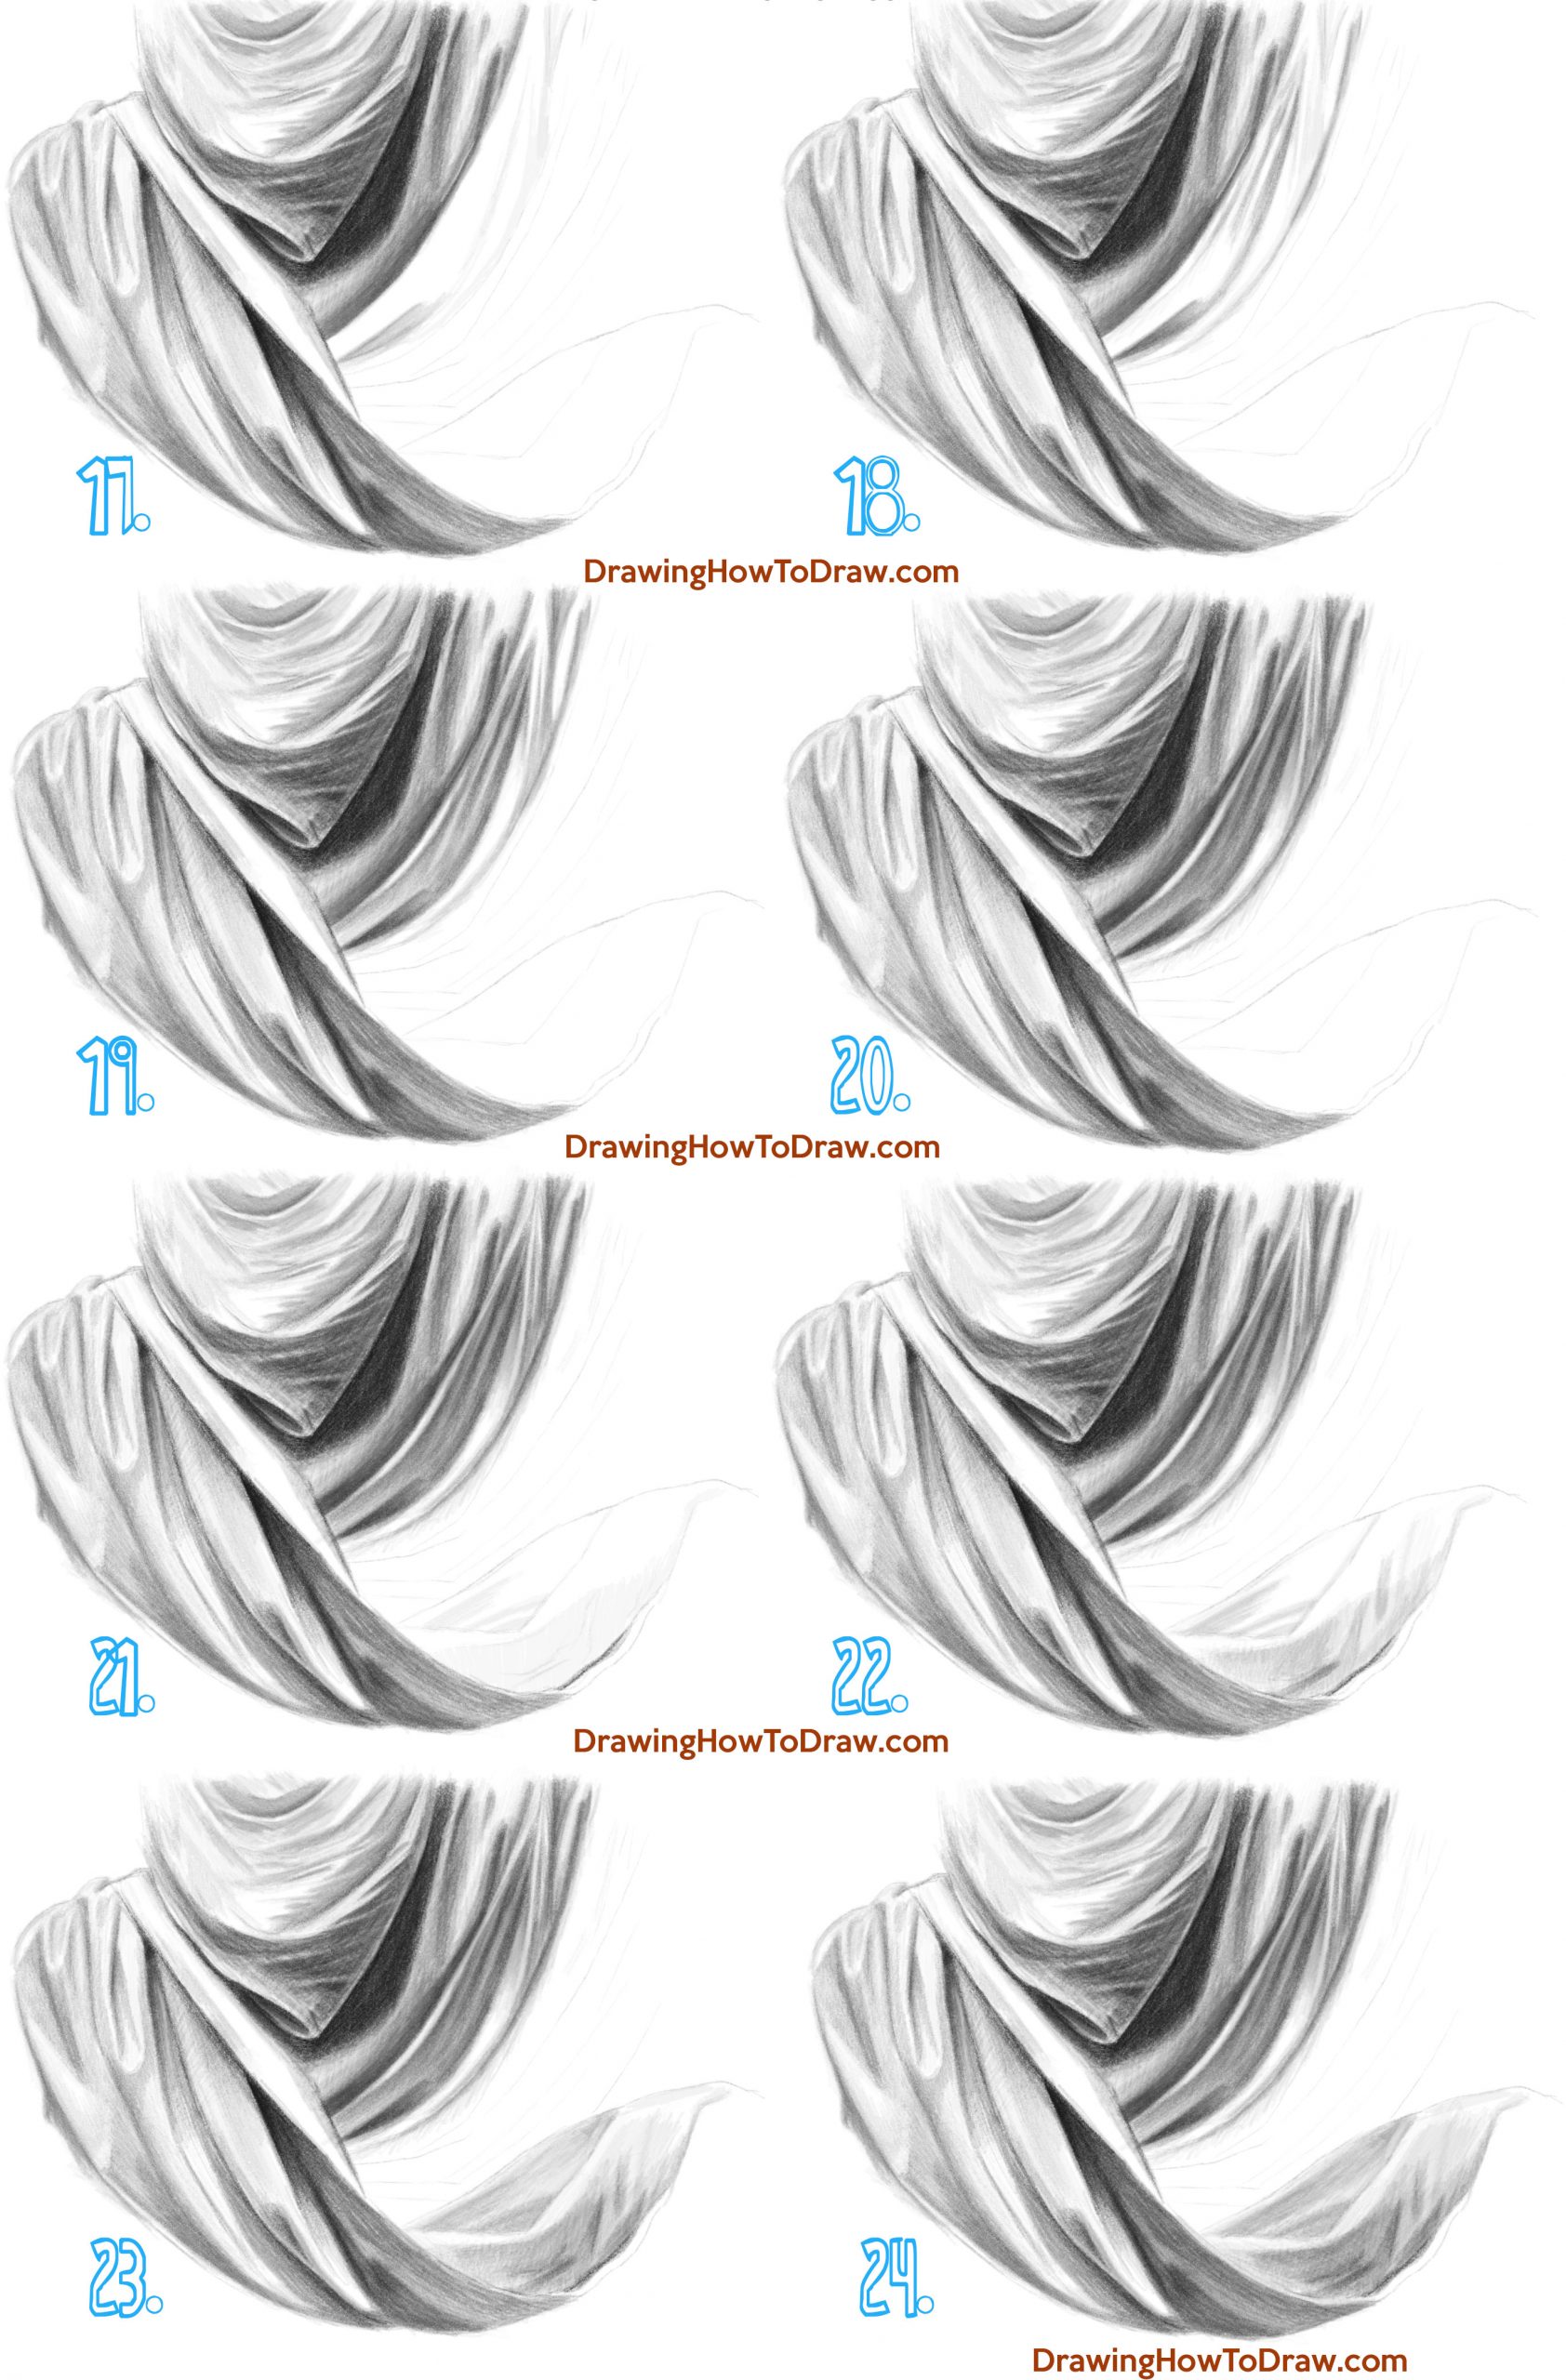
(STEP 17) Lightly shade everywhere other than where the highlights are supposed to be. Also, add some darker shading to the part at the bottom right side of the picture.
(STEP 18) Start shading in where the next folds and wrinkles are.
(STEP 19) Add darker shading as you get deeper into a crease. Gradually shade out towards lighter shading.
(STEP 20) Continue shading.
(STEP 21) Draw some wrinkle lines and start some shading.
(STEP 22) Darken some of the shadows.
(STEPS 23-24) Just add slightly darker shading in a few places
Technorati Tags: fabric, drapery, draped, curtains, clothing, clothes, fabric, draped fabric, creases, creased, folds, folded, wrinkles, wrinkled
Today I'll show you how to draw Rick from the Rick and Morty cartoon tv…
Today I'll show you how to draw Morty from the Rick and Morty cartoon tv…
Today I'll show you how to draw the spunky little rabbit, Kuromi, from My Melody…
Today I'll show you how to draw this cute "bean duck" that I found on…
Today I'll show you how to draw Sosuke and Ponyo in a bubble (chibi /kawaii…
Today I'll show you how to draw a Boo from Super Mario Bros in Kawaii…