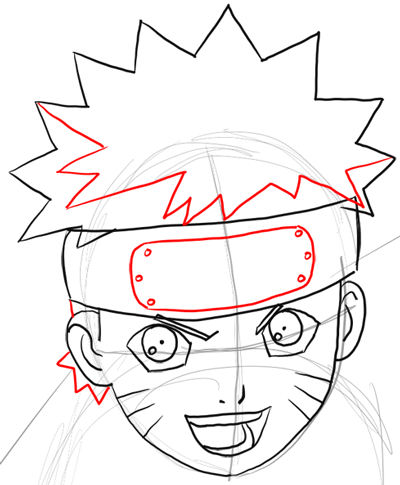
Now draw zig-zaggy’s within the head, as pictured above. Draw zig-zaggy lines below the ear as well. Also draw a rectangle with curved outer corners within the headband. Draw 6 small circles at either end of this rectangle.
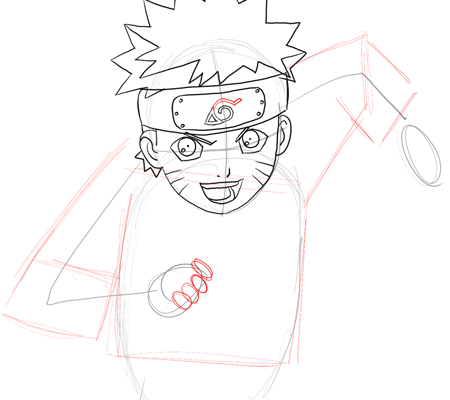
Draw the basic shapes that make up the Naruto symbol / logo – such as the triangle-ish shape … a backwards letter ‘c’ shape … and a curved letter ‘L’ like shape.
Now draw the basic shapes that make up his shirt … with rectangle / square like shapes. Draw 4 ovals on the left hand.
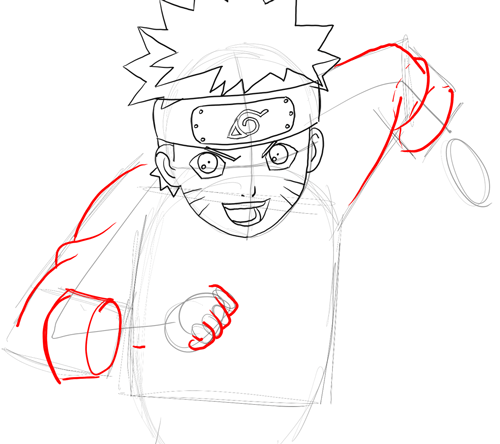
Now that you have the basic shapes of the shirt, draw the outlines of the shirt, and wrinkles. For the sleeves, make 2 ovals and then connect them, as you see on the right arm. For the left hand, draw the fingers over the ovals you drew in the last step.
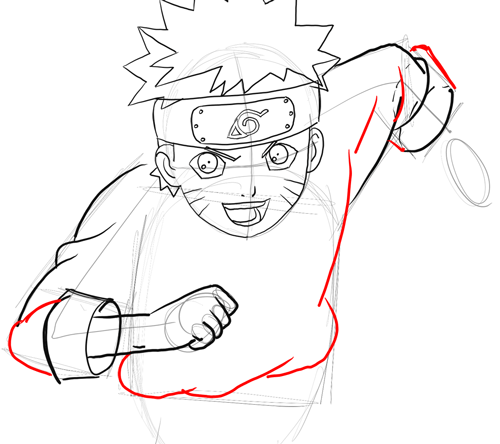
Draw more of the shirt.
Here is a close up of the right hand…I made it in different colors so that you can see smaller shapes that make up the whole. In purple, do you see a capital letter ‘G’. In purple, do you see a backwards letter ‘y’ shape. In green, do you see a capital letter ‘T’? Then make 2 line for the arms that connect it to the hands.
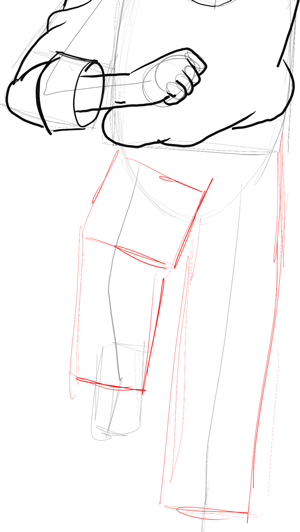
Now draw the basic shapes that make up the pants legs…rectangles / squares.
Today I'll show you how to draw a super cute Vault Boy from Fallout. Vault…
Today I'll show you how to draw a cute chibi / kawaii bunny rabbit named…
Today I will show you how to draw a Banana Duck from the plush Peach…
Today I'll show you how to draw a cute cartoon monster that is super easy…
Today I'll show you how to draw an adorable kawaii-style dumpster fire with the following…
Today I'll show you how to draw a cute cartoon alien in his UFO. This…
View Comments
Omg this is the most amazing website my children love it
It was nice and I did everything
Love this did everything else right but I couldnt get the placement of the head just right, but over all my drawing ca,e close
Thanks I like it but it's hard to draw it sometimes
>:(
HOLY CRAP!!!!!! Its awesome BUT i cant draw it :(
wow i love this
thanks i draw it
How to practice while you learning when this stupid paper for draw is moving too fast?!
The drawing app is supposed to only move when you scroll down. Is the paper moving while you draw? If so, what browser are you using?
This Is Epic And I Also Drew My Ever Part Of This Besides The Mouth Cause I Made My Own!xDD Post More!!!
i could draw but i like drawing people can carttoons so if u need help let me know
lol thnx bra will need u