This is a huge guide to drawing the human head in the correct proportions…not only is this a guide to draw the ideal woman and man’s figure in correct proportions and measurements, but you will also learn how to draw the human face in the proper ratio & measurements from the side/profile view, frontal view, as well as the three quarters view. You will also learn about how to exaggerate facial features to make drawings of people that deviate from the normal measurement, as well as how to draw caricatures and cartoon-like faces.
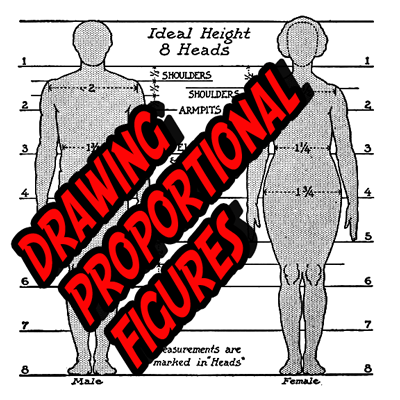
Guide to Drawing Proportional Human Figures Without Using Models
IF YOU NEED TO COPY TEXT OF THIS ARTICLE…THE DIALOGUE OF THE DRAWING TUTORIAL IS BELOW
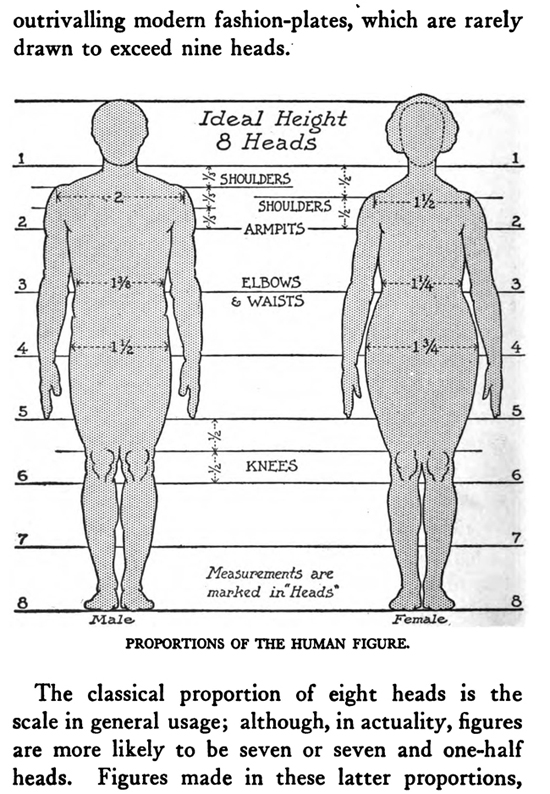
For practical work from models, or drawing the figure without their use, the artist keeps in mind some sort of proportional division of the figure for guidance in getting an agreement in his drawing. The proportional quantities of the artistic scale of the human figure are given in “heads,” established by taking the height of the head as a unit and seeing how many times it goes into the whole height of the figure. Opinions have differed as to the number of heads to reckon for the perfectly constructed figure. Vitruvius has given the scale of eight heads; while Vasari and Filarete both said that a harmonious accord of the human form is attained by building it on a scale of nine heads.
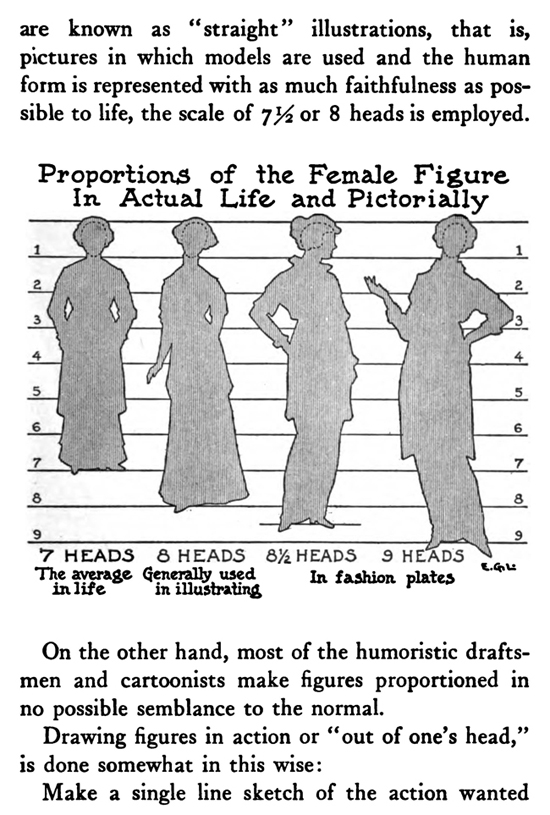
Some old engravings by Aldegrever show figures that are drawn nearly ten heads high, actually outrivalling modern fashion-plates, which are rarely drawn to exceed nine heads. The classical proportion of eight heads is the scale in general usage; although, in actuality, figures are more likely to be seven or seven and one-half heads. Figures made in these latter proportions, in ordinary picturing, look correct; but in idealistic compositions and in drawings in which dignity, grandeur, or the heroic are to be expressed, the classical canon of eight heads is better.
Very careful measurements for an ideal human form have been worked out—widths such as those of the calf, the knee, thigh, neck, and so on; but as a rule it is not necessary for drawing that the artist should burden his memory with such details. To do so is more likely to lead to confusion than to aid. Trying to remember and to work by the minor measurements may prevent the exercise of good judgment and the aesthetic sense. Even if what are thought to be accurate measurements could be taken, the words “approximate” and “about” would always have to be tagged on anyway. For the lack of hard fixed points and the flabby nature of the muscle and skin make it impossible to get dependable points from which to measure.
It is only essential to remember a few general ideas of symmetry, such as: When the arm is hanging by the side the elbow is on a level with the waist, and the tips of the fingers reach to about the middle of the thigh. The vertical measurements for the female figure are usually calculated as above; the proportions across varying—generally smaller, excepting the hips. Such minor matters as relative thickness of neck and sizes of hands or feet depend on the subject, type, or character to be depicted.
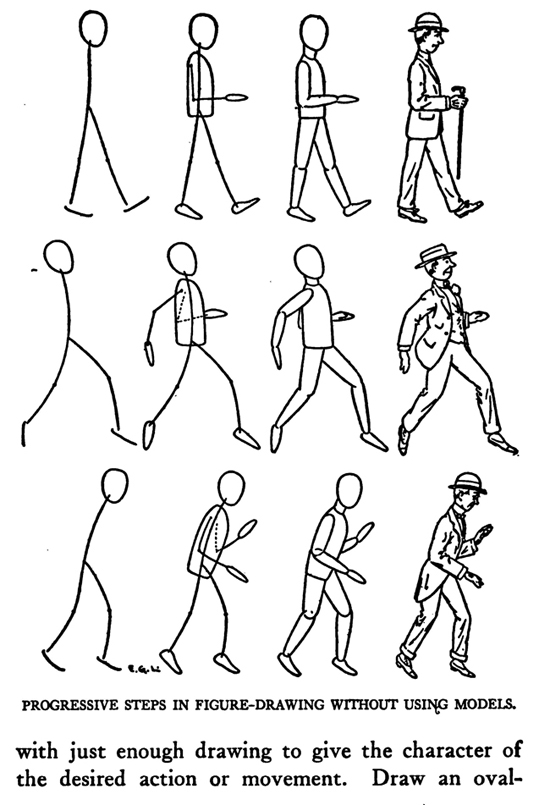
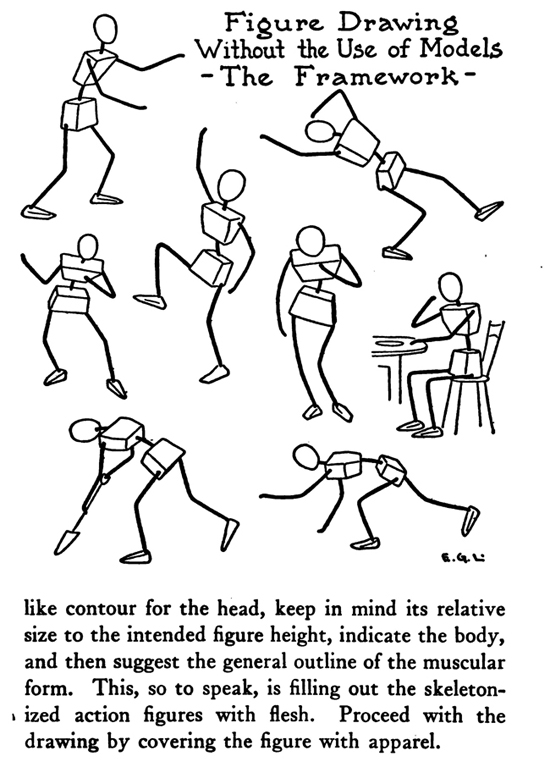
Some sort of a relative proportion of head to entire figure should be kept in view when the artist is drawing without models. When making what height are equal. In an ideal figure the span of the extended arms and the artistic judgment. On the other hand, most of the humoristic draftsmen and cartoonists make figures proportioned in no possible semblance to the normal. Drawing figures in action or “out of one’s head,” is done somewhat in this wise:
With just enough drawing to give the character of the desired action or movement. Draw an oval-like contour for the head, keep in mind its relative size to the intended figure height, indicate the body, and then suggest the general outline of the muscular form. This, so to speak, is filling out the skeletonized action figures with flesh. Proceed with the drawing by covering the figure with apparel.
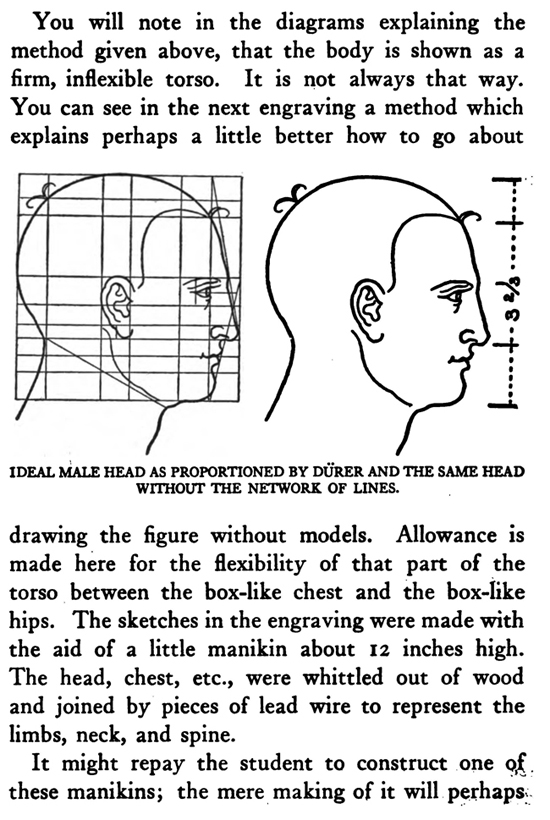
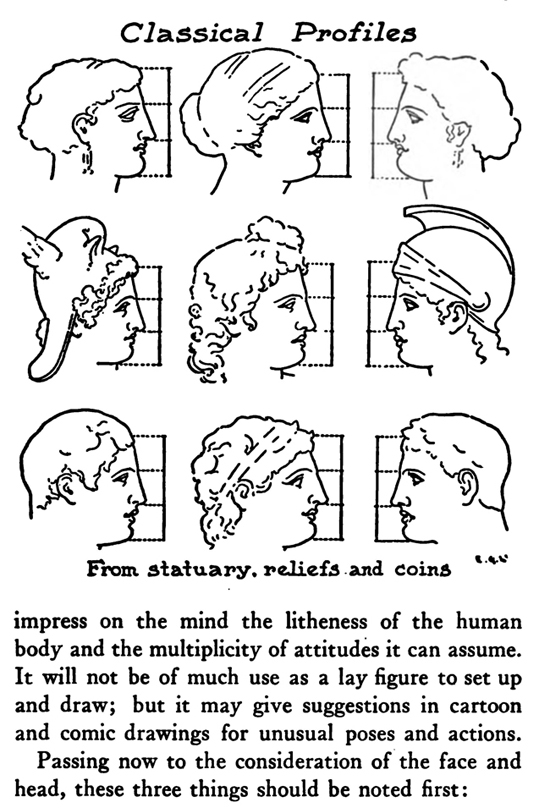
You will note in the diagrams explaining the method given above, that the body is shown as a firm, inflexible torso. It is not always that way. You can see in the next engraving a method which explains perhaps a little better how to go about drawing the figure without models. Allowance is made here for the flexibility of that part of the torso between the box-like chest and the box-like hips. The sketches in the engraving were made with the aid of a little manikin about n inches high. The head, chest, etc., were whittled out of wood and joined by pieces of lead wire to represent the limbs, neck, and spine. It might repay the student to construct one og these manikins; the mere making of it will perhaps, reliefs and coins impress on the mind the litheness of the human body and the multiplicity of attitudes it can assume. It will not be of much use as a lay figure to set up and draw; but it may give suggestions in cartoon and comic drawings for unusual poses and actions.
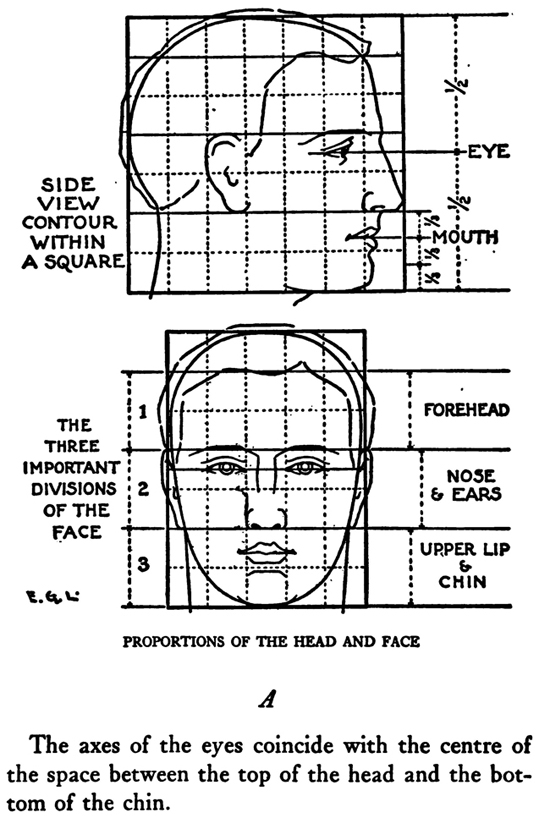
Passing now to the consideration of the face and head, these three things should be noted first:
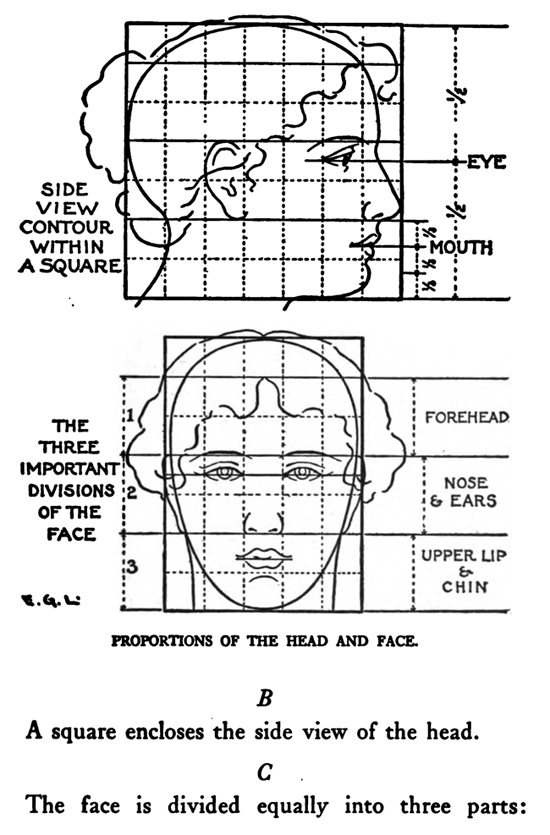
The axes of the eyes coincide with the centre of the space between the top of the head and the bottom of the chin. A square encloses the side view of the head.
The face is divided equally into three parts:
(I) From the roots of the hair to the eyebrows.
(2) From the eyebrows to the base of the nose. This division is referred to as the length of the nose, and is sometimes used as a unit of measurement.No matter what type of face you draw, keep in mind the ideal division of the face into three equal parts.
(3) From the base of the nose to the bottom of the chin.
The above points, A, B, C, with that important matter of getting the ears properly placed with relation to the middle division of the face, are the things to be especially remembered in drawing faces.
Other details are the following:
If the lower division of the face is divided equally into three, the middle of the mouth comes at the line of the first division, or one-third down. Note this in both front and profile views.
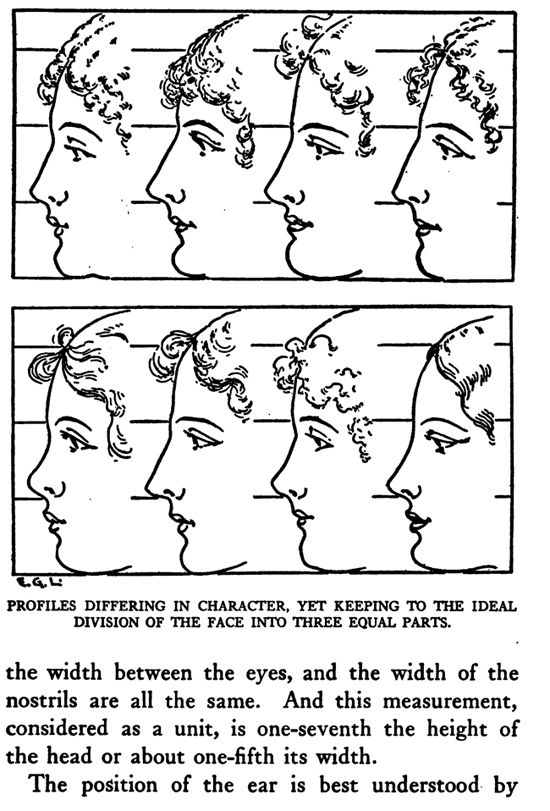
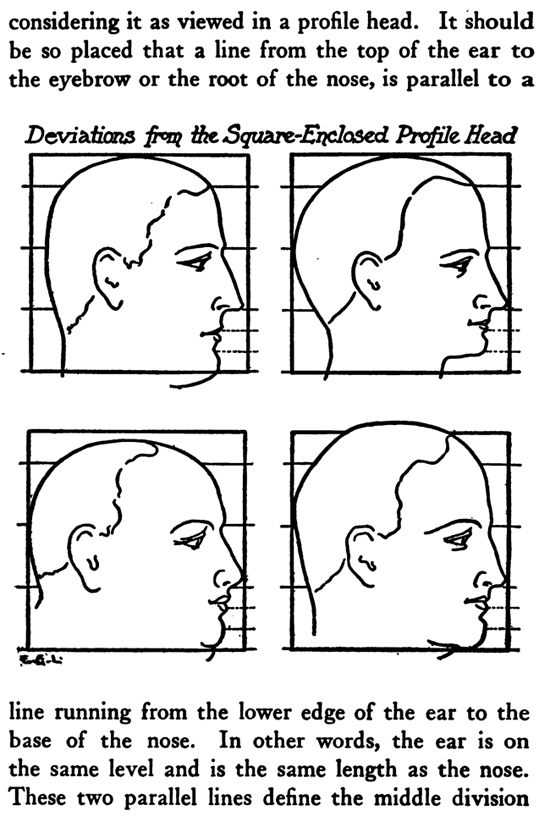
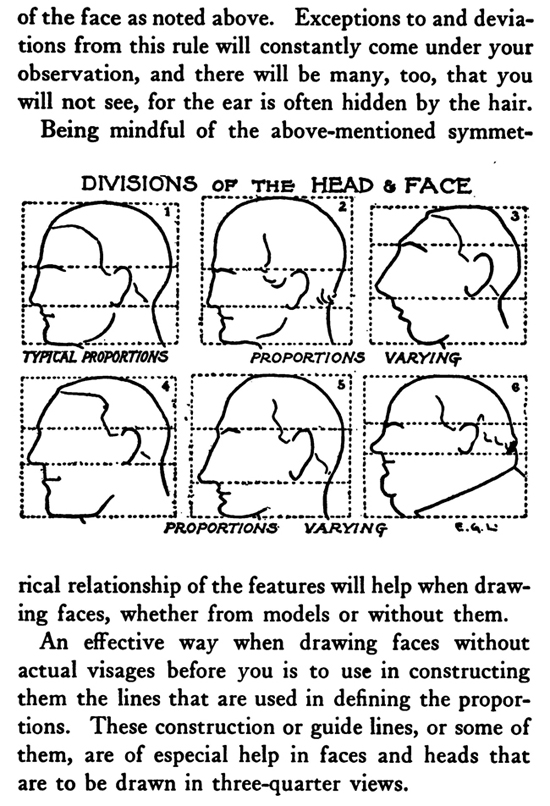
Looked at from the front, the width of an eye, the width between the eyes, and the width of the nostrils are all the same. And this measurement, considered as a unit, is one-seventh the height of the head or about one-fifth its width. The position of the ear is best understood by considering it as viewed in a profile head. It should be so placed that a line from the top of the ear to the eyebrow or the root of the nose, is parallel to a Deviations from line running from the lower edge of the ear to the base of the nose. In other words, the ear is on the same level and is the same length as the nose. These two parallel lines define the middle division of the face as noted above. Exceptions to and deviations from this rule will constantly come under your observation, and there will be many, too, that you will not see, for the ear is often hidden by the hair.
Being mindful of the above-mentioned symmetrical relationship of the features will help when drawing faces, whether from models or without them.
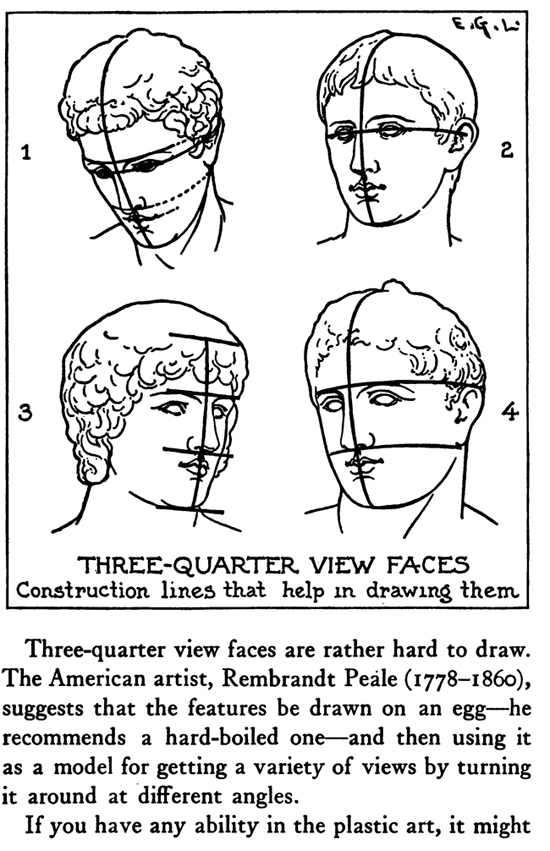
An effective way when drawing faces without actual visages before you is to use in constructing them the lines that are used in defining the proportions. These construction or guide lines, or some of them, are of especial help in faces and heads that are to be drawn in three-quarter views.
Three-quarter view faces are rather hard to draw. The American artist, Rembrandt Peale (1778-186o), suggests that the features be drawn on an egg—he recommends a hard-boiled one—and then using it as a model for getting a variety of views by turning it around at different angles.
If you have any ability in the plastic art, it might be a good plan to model a little head for use as a copy. Such a head would be a great aid if you were making a series of illustrations (not using models) in which the same character appeared throughout the series.
Technorati Tags: figure drawing, drawing figures, proportional figures, human proportions, human measurements, draw people in measurements, draw faces, drawing faces, how to draw proportional faces, measurements of human faces, how to draw, drawing lessons, drawing tutorials
Today I'll show you how to draw Rick from the Rick and Morty cartoon tv…
Today I'll show you how to draw Morty from the Rick and Morty cartoon tv…
Today I'll show you how to draw the spunky little rabbit, Kuromi, from My Melody…
Today I'll show you how to draw this cute "bean duck" that I found on…
Today I'll show you how to draw Sosuke and Ponyo in a bubble (chibi /kawaii…
Today I'll show you how to draw a Boo from Super Mario Bros in Kawaii…
View Comments
Great help. I have never tried to sculpt a human figure before and am now attempting to make a number of puppets as part of an animatronic. So here goes!
Joe Lockyer