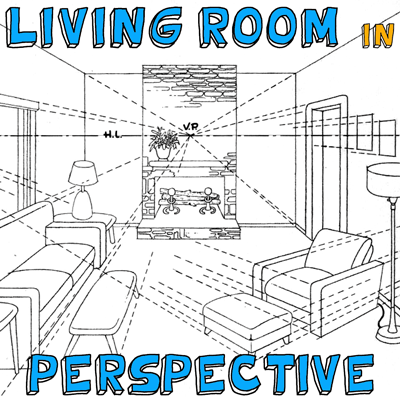
This is a semi-complicated drawing tutorial for a 3 point perspective drawing of the inside of a living room. If you want a more detailed guide to perspective, we have a few of them here. That is a good place to start for beginners perspective drawing lessons. If you already know a little bit about perspective drawing, you can just enjoy the drawing lesson below.
First of all, I’d like to apologize for how shaky my hands are today. I’m not feeling too hot today.
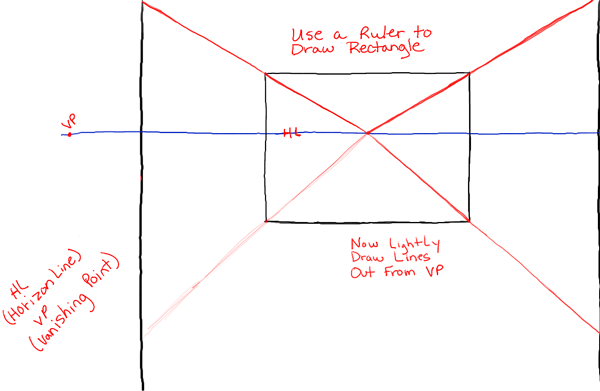
– Get a piece of paper out and put it on its side, the long way.
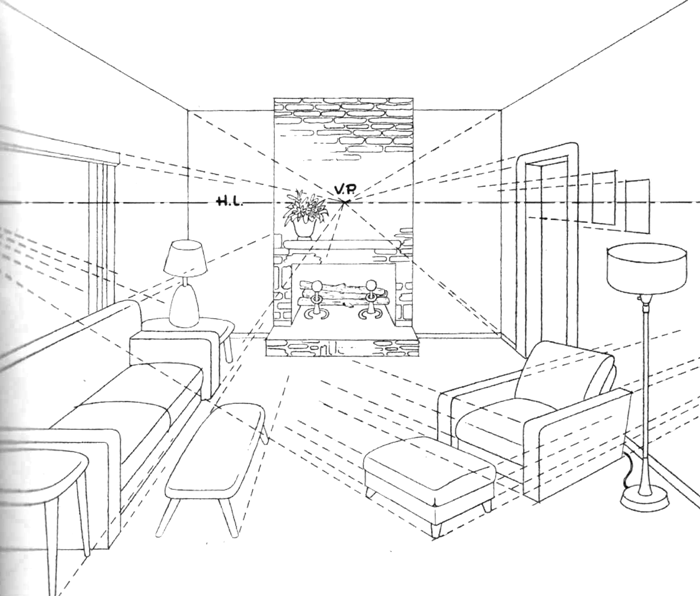
– Use a ruler to draw a straight line across the top. This will be the horizon line.
– Draw a dot in the center. This will be your vanishing point. This is where many of the lines will be drawn to.
– There is also a vanishing point to the left, off of the paper (There is also a vanishing point to the right off of the paper). If you tape your piece of paper down to the table, this will keep your piece of paper in one spot so that you can either draw a dot on the table or use tape to mark off where that 2nd vanishing point is. You can wait to figure out the right-side vanishing point.
– Now draw a rectangle that is mostly below the horizon line.
– Use a ruler or straight edge to draw lines from the center vanishing point outwards…each one going thru one of the corners of the rectangle.
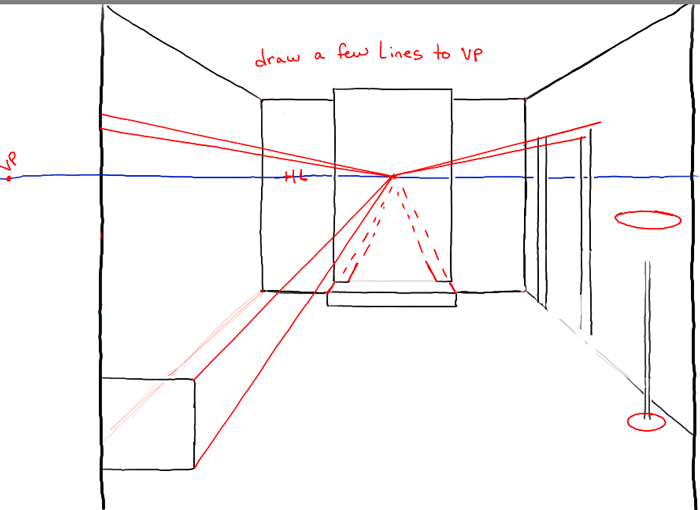
– Erase the parts of the lines that we erased. You now have the outlines of the room in correct perspective.
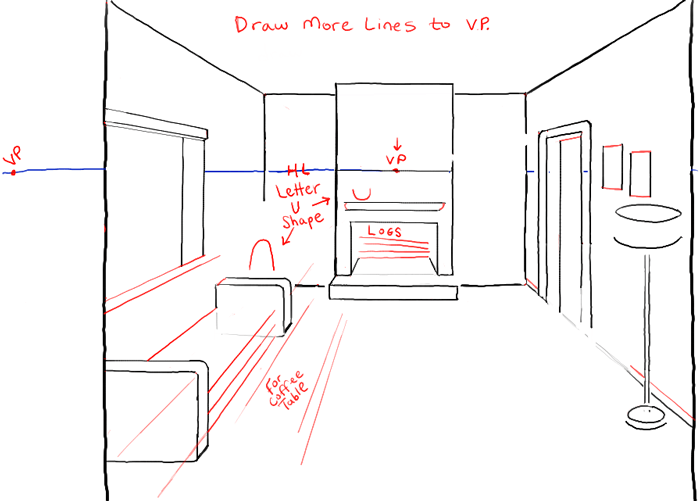
– Now draw a few rectangles as well as some vertical lines (lines that go up and down).
– Use a ruler to again draw some lines drawn towards the center vanishing point.
– Also draw ovals for the lamp.
– Again, erase parts of the vanishing point lines that we don’t need any more.
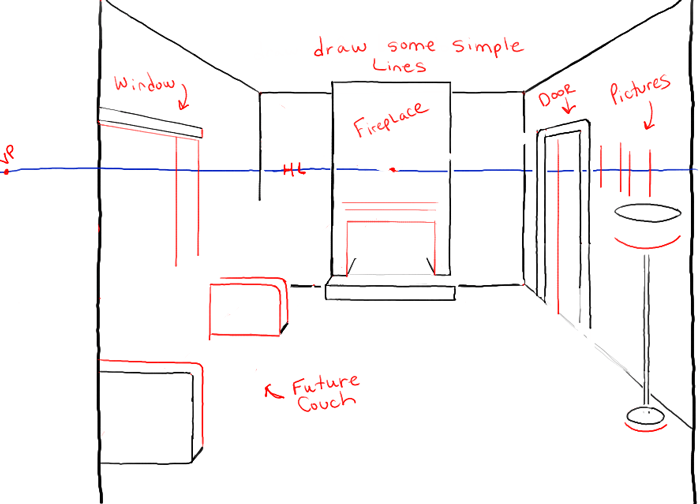
– Now draw some vertical lines, rectangle-ish shapes, and curved lines.
– Notice where the future couch, fireplace, lamp, pictures, doorway, and window will be.
– Again draw some lines to the center vanishing points to form parts of the couch, window, doorway, pictures, and baseboard.
– Also draw two letter ‘U’ shapes…one for the table lamp and the other for the bottom of the vase.
– Draw some lines for future logs.
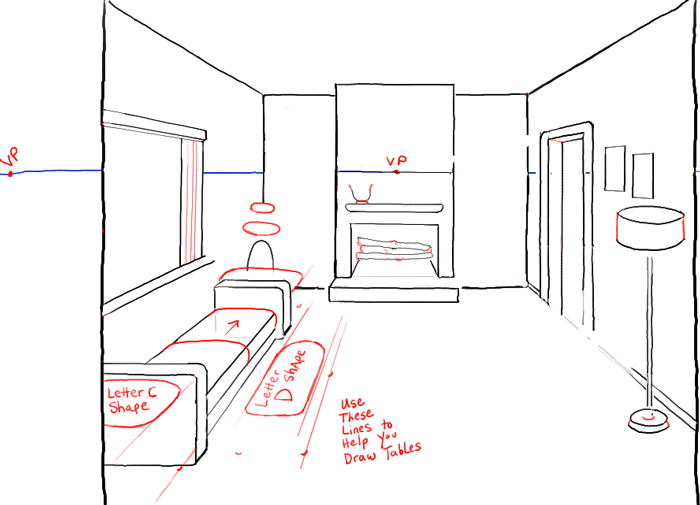
– Add some details to the logs, vase, and lamps.
– Draw some letter ‘C’ like shapes to the tables and couch.
– Draw a very long shaped, capital letter ‘D’ shape within the lines we drew in the last step. This way we are keeping the correct perspective as we draw it.
– Continue to add details.
– Draw legs on the coffee table.
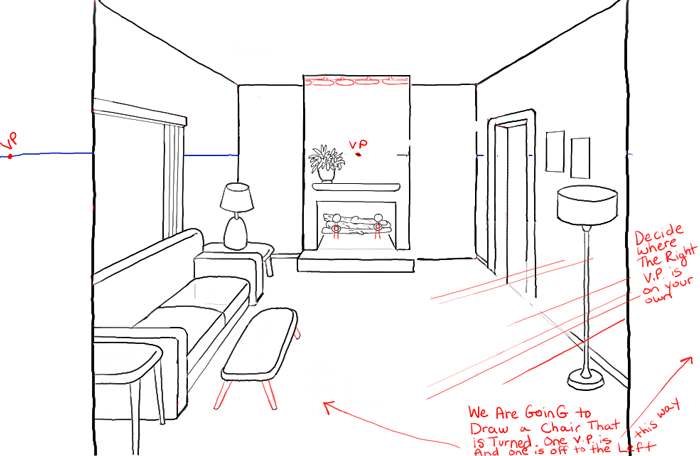
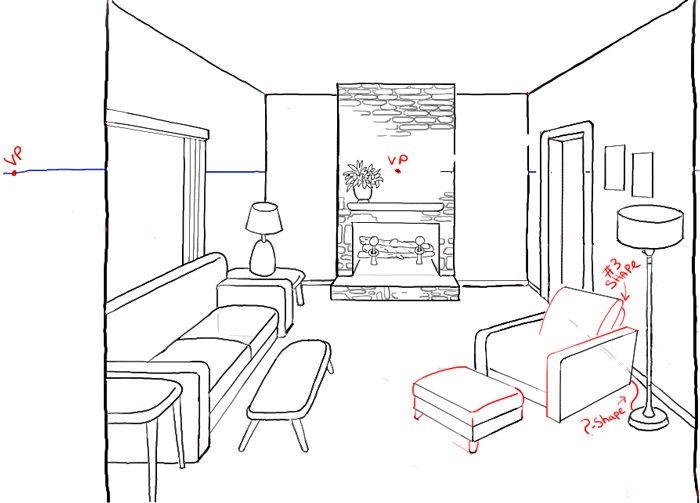
– We are now going to draw a chair that won’t use the center vanishing point. This chair is turned on its side and uses 2 separate vanishing points. However both vanishing points are off of the page. One of the vanishing points, we already drew (on the left). Choose a vanishing point for the right side…either drawing a dot or a using a piece of tape to mark it.
– Draw some lines going towards the right vanishing point.
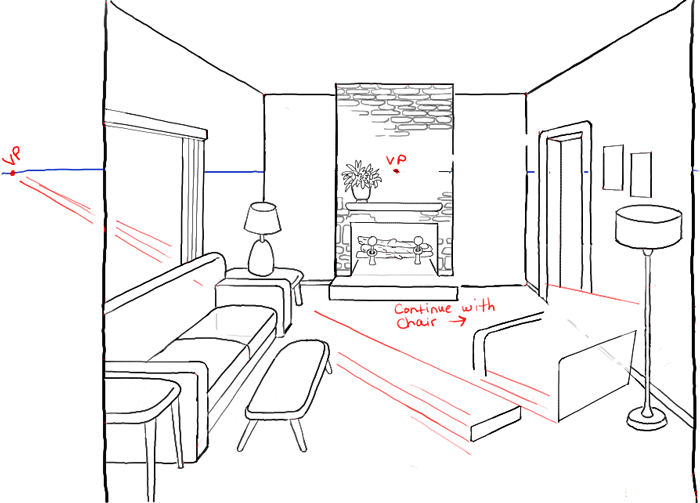
– Start drawing bricks on the fireplace.
– Now draw some lines going towards the left vanishing point.
– Continue drawing bricks on the fireplace.
– Continue drawing the chair and ottoman using the lines you drew. Draw a #3 – shape for the cushion’s side view.
– Draw a ?- shape for the wire coming out of the lamp.
– Draw some more bricks on the bottom of the fireplace.
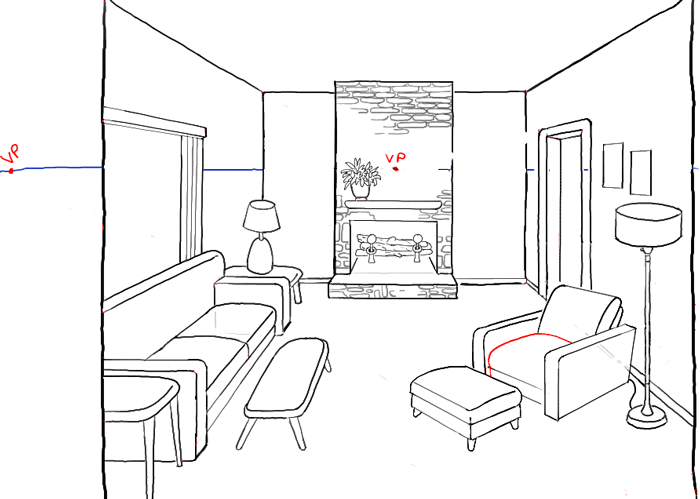
– Finish up the chair and any other details that need work.
– Erase any lines that you don’t need any longer.
You can add more details to the picture but you have the basic shapes in correct perspective. This tutorial was done in 3 point perspective and you did an awesome job. This isn’t an easy task.
If you want a more detailed guide to perspective, we have a few of them here.
Technorati Tags: 3 point perspective, perspective, perspective drawing, room perspective, living room, couch, chairs, tables, lamps, fireplace
Today I'll show you how to draw Rick from the Rick and Morty cartoon tv…
Today I'll show you how to draw Morty from the Rick and Morty cartoon tv…
Today I'll show you how to draw the spunky little rabbit, Kuromi, from My Melody…
Today I'll show you how to draw this cute "bean duck" that I found on…
Today I'll show you how to draw Sosuke and Ponyo in a bubble (chibi /kawaii…
Today I'll show you how to draw a Boo from Super Mario Bros in Kawaii…
View Comments
Sir, I do not understand one bit. Are you a mathematic teacher? I do not see the reason why you are putting marks everywhere. I may sound rude to you by asking this question but are you a mathematic teacher
Cool drawing I copied this and it looked cool. Thanks
I am having a lot of trouble with vanishing points and perspectives. How do you get 3 vanishing points in a supposidely 1 point perspective drawing?
the chair on the right side of the picture was drawn with two point perspective because it is placed at an angle to the rest of the room...the other items are drawn using one point perspective because they are lined up with the room's walls and you are looking at them head on rather than at an angle.
.
Thank you very much for this, it has really helped me in the understanding of how to line draw! This is suppa fantastic, thanks :)