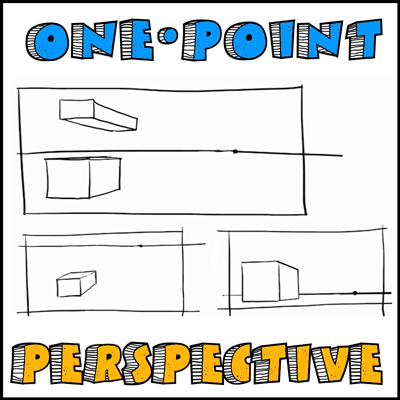
Hi. My name is Shawn Hawkins and I am going to teach you guys about one point perspective today. I don’t know if you guys have already learned about Perspective before but today I’m going to teach you how to do it. If you already know about drawing in correct perspective, than you can think of this as a review. Is is important to know about drawing in 1 point perspective, so take the time to either watch my video or go thru this static tutorial. Let me know how I did…just let me know in the comments.
Perspective in general is very important. Perspective techniques helps you create depth into your art pieces, and in fact into any of your flat work (anything on paper). If you have never learned about Perspective, you are jumping into a world of new possibilities…follow along below or go to our video.
Go to Part 2 of my Series : Drawing in Two Point Perspective
You might also like our other perspective drawing tutorials
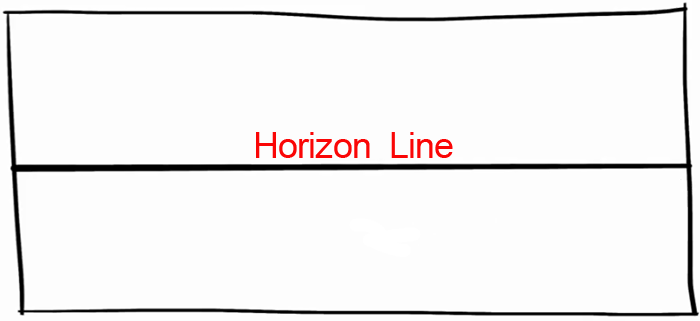
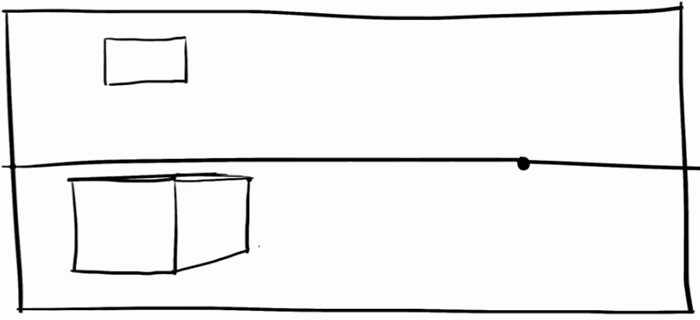
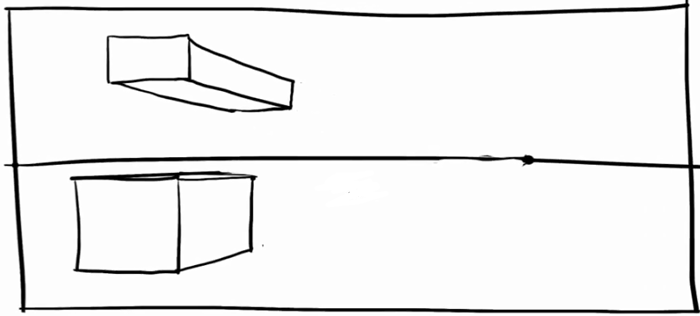
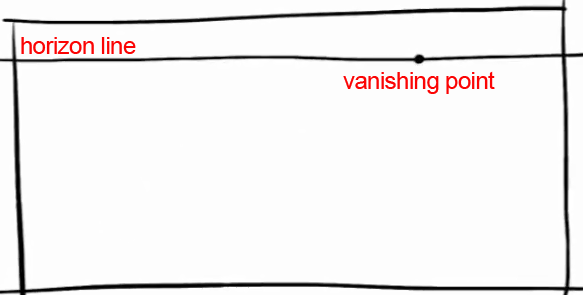
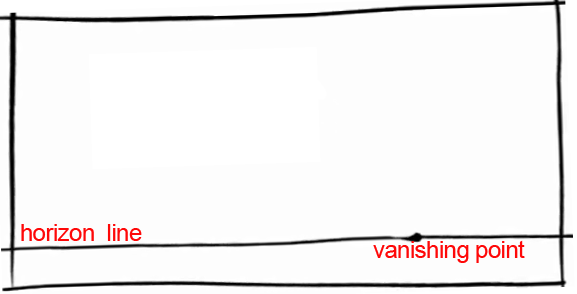
This is our picture plane (this box right above). Perspective is very important for showing depth, size-comparison. You see it in everything, everywhere around us and in the world we live in. Its all perspective and 3-dimensional. It is a way for you to create 3 dimensional work. We are showing you 1 perspective today. Use a ruler to make a line go from one side to the other (Use a ruler so yours will be straighter than mine.)
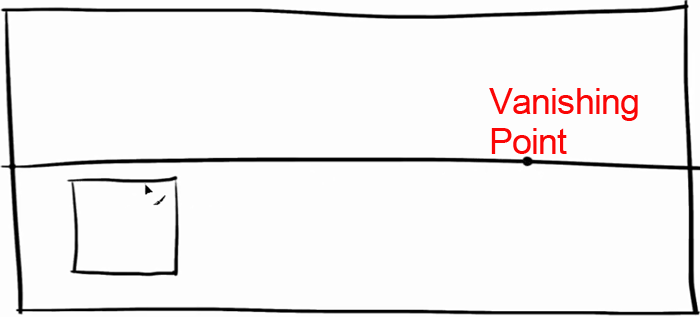
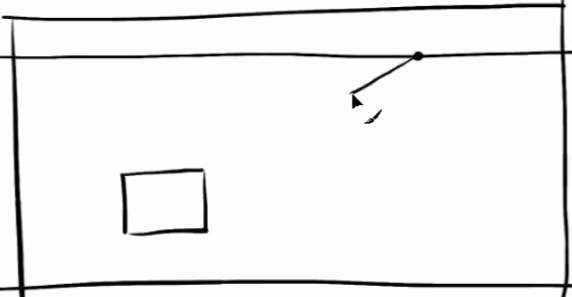
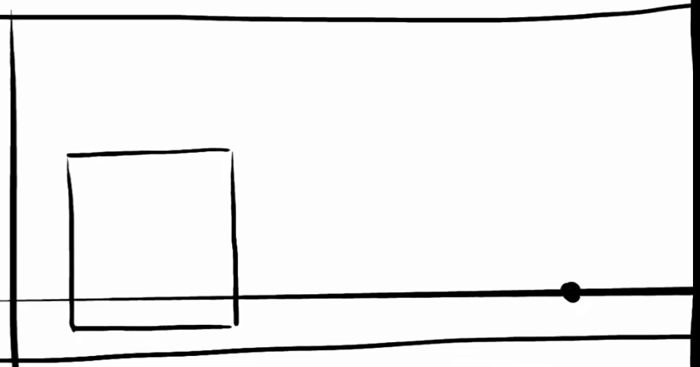
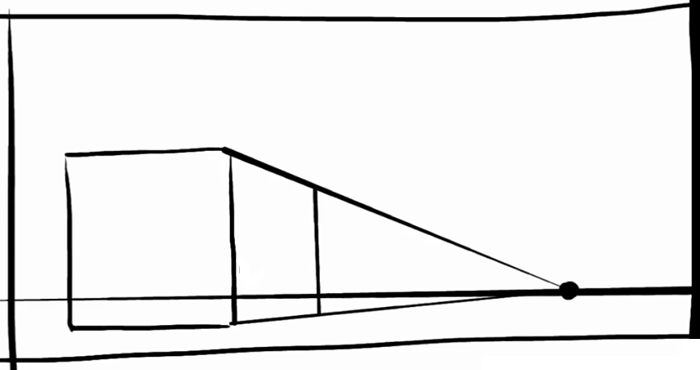
Anywhere on the line, we are going to place our vanishing point. I am going to place it to the side here (the circle dot that you see). Choose any spot that you want, and draw a square (use a ruler so they will be way straighter than mine).
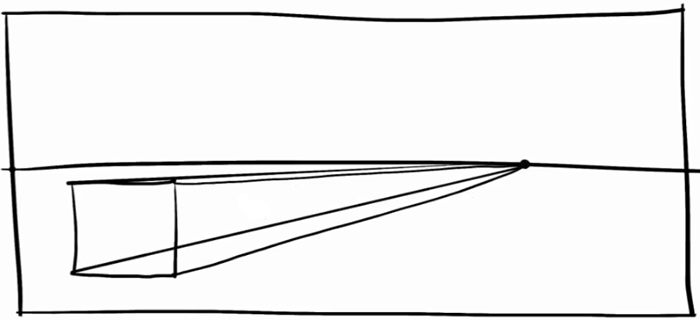
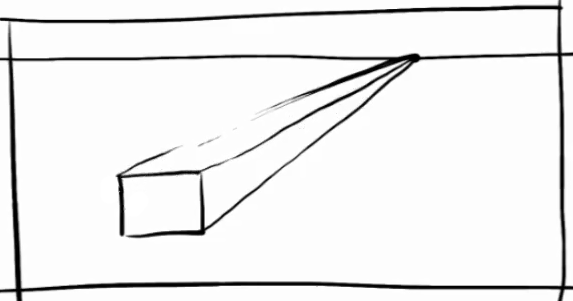
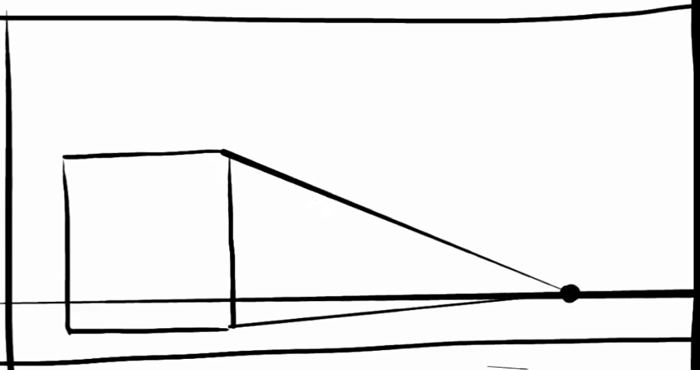
Now connect the vanishing point to the corners of our square. Now the name of the game is to connect the vanishing point to the corners of our square.Use your ruler so the lines will be accurate.
– Draw a vertical line…make sure this line is touching both the bottom and top lines (the ones that are headed towards the vanishing point).
– Then draw a straight line across (as highlighted in red). Make sure that it is parallel to the one in front of it.
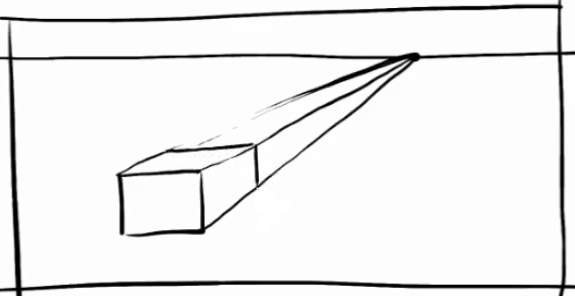
– You can start erasing the lines that are going towards the vanishing points.
And there you guy, we have a cube. Pretty simple.
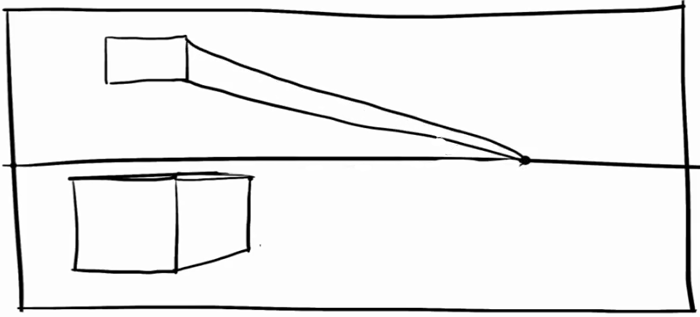
We are now going to draw a rectangle above the horizon line.
Use a ruler to draw lines from the vanishing point up to the rectangle (so that the lines are straighter than mine).
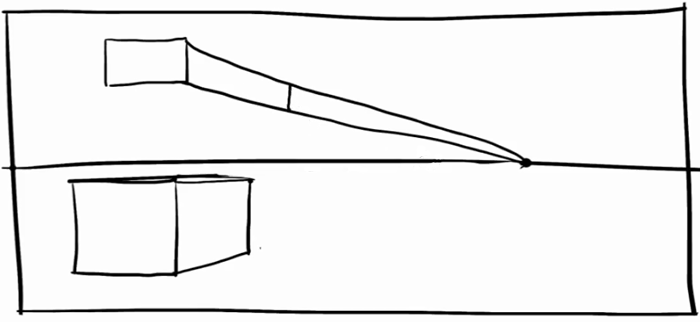
Pick any 2 spots between the rectangle and the vanishing point and draw a vertical line (as seen above).
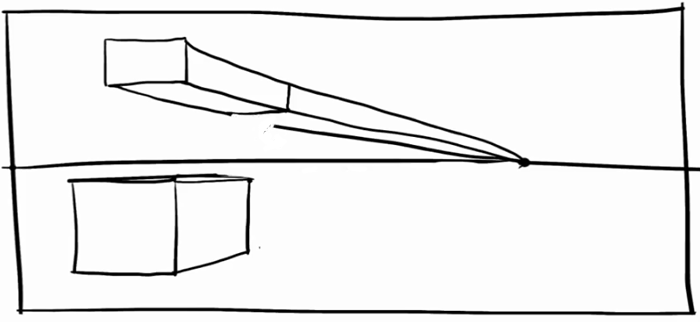
Now draw one more line from the vanishing point. Pick the corner at the far right and draw a straight line across (as seen above).
Now erase the lines going towards the vanishing point. Yours will be a bit cleaner since you used a ruler, but I think I did pretty well for not using a ruler.
There are different things that come into play when you are working with perspective. I will show you a few different examples of what might happen when you are trying to draw in 1-pt perspective.
Make another box. Place the horizon line higher up on the page. Then put a vanishing point on the line…We put ours on the right (but you can pick either side that you want to).
Place our square under the horizon line (like last time).
Then connect the corners of the rectangle to the vanishing point.
Then draw a vertical line and a horizontal line to finish the back of the box. The important thing about the lines you place is that you want them to be parallel to whatever line you are placing it near. So right now we are only see the side plane of the cube. So we want this line to be parallel so we can create this cube effect.
Just erase any of the lines that we don’t need (like we did last time). Now we have a 3-dimensional rectangle box. See how easy it is? Now the reason I placed the horizon line up so high on our paper, is so that we could get a bird’s eye view of the box. When I say a bird’s eye view, what I mean is that imagine you are flying around (like a bird), imagine what you would see. You would see a lot of the tops of different buildings and other objects.
Next, we are going to place the horizon line lower on the paper.
So now get another piece of paper out. Draw a straight line across the bottom of the paper. Draw a vanishing point on the line.
Draw a rectangle on the horizon line (as seen above).
Draw a line from the vanishing point from both of the corners on the right side of the rectangle.
Now draw a vertical line anywhere between the rectangle and the vanishing point (as seen above).
The important thing about the lines you place is that you want them to be parallel to whatever line you are placing it near. So right now we are only see the side plane of the cube. So we want this line to be parallel so we can create this cube effect. So now we place the horizon line lower…so now we are looking up at this. It is like we are down here and we are looking up at this.
So, that is a quick and easy way to create one point perspective. The next video will be about two point perspective. And I will tell you what is different between the two of them. It is a bit more complicated, but it is also better at creating even more depth in your artwork. I suggest that you practice this and really just have a good time with this. Create a bunch of boxes on paper and then by the time the next video comes on, you will already be a pro at one point perspective.
If you liked my drawing tutorial, please take a look at my online portfolio. Come back for my next tutorial…see you then!
Go to Part 2 of my Series : Drawing in Two Point Perspective
You might also like our other perspective drawing tutorials
Technorati Tags: perspective drawing, one point perspective, 1 point perspective, 1 pt perspective, draw in 3d
Today I'll show you how to draw Rick from the Rick and Morty cartoon tv…
Today I'll show you how to draw Morty from the Rick and Morty cartoon tv…
Today I'll show you how to draw the spunky little rabbit, Kuromi, from My Melody…
Today I'll show you how to draw this cute "bean duck" that I found on…
Today I'll show you how to draw Sosuke and Ponyo in a bubble (chibi /kawaii…
Today I'll show you how to draw a Boo from Super Mario Bros in Kawaii…