Making these 3 dimensional letters looks like a lot of work, but trust me, drawing these are easy. All you have to do is learn the perspective drawing techniques and you will be able to draw anything with depth and 3-dimensionality. Find out how now.
Perspective in general is very important. Perspective techniques helps you create depth into your art pieces, and in fact into any of your flat work (anything on paper). If you have no idea what perspective drawing is, you might want to take a look at our tutorials on the subject (this is just optional – as you will be able to follow this tutorial without knowing anything on the subject).
You Might Also Like Our Other Lettering Tutorials
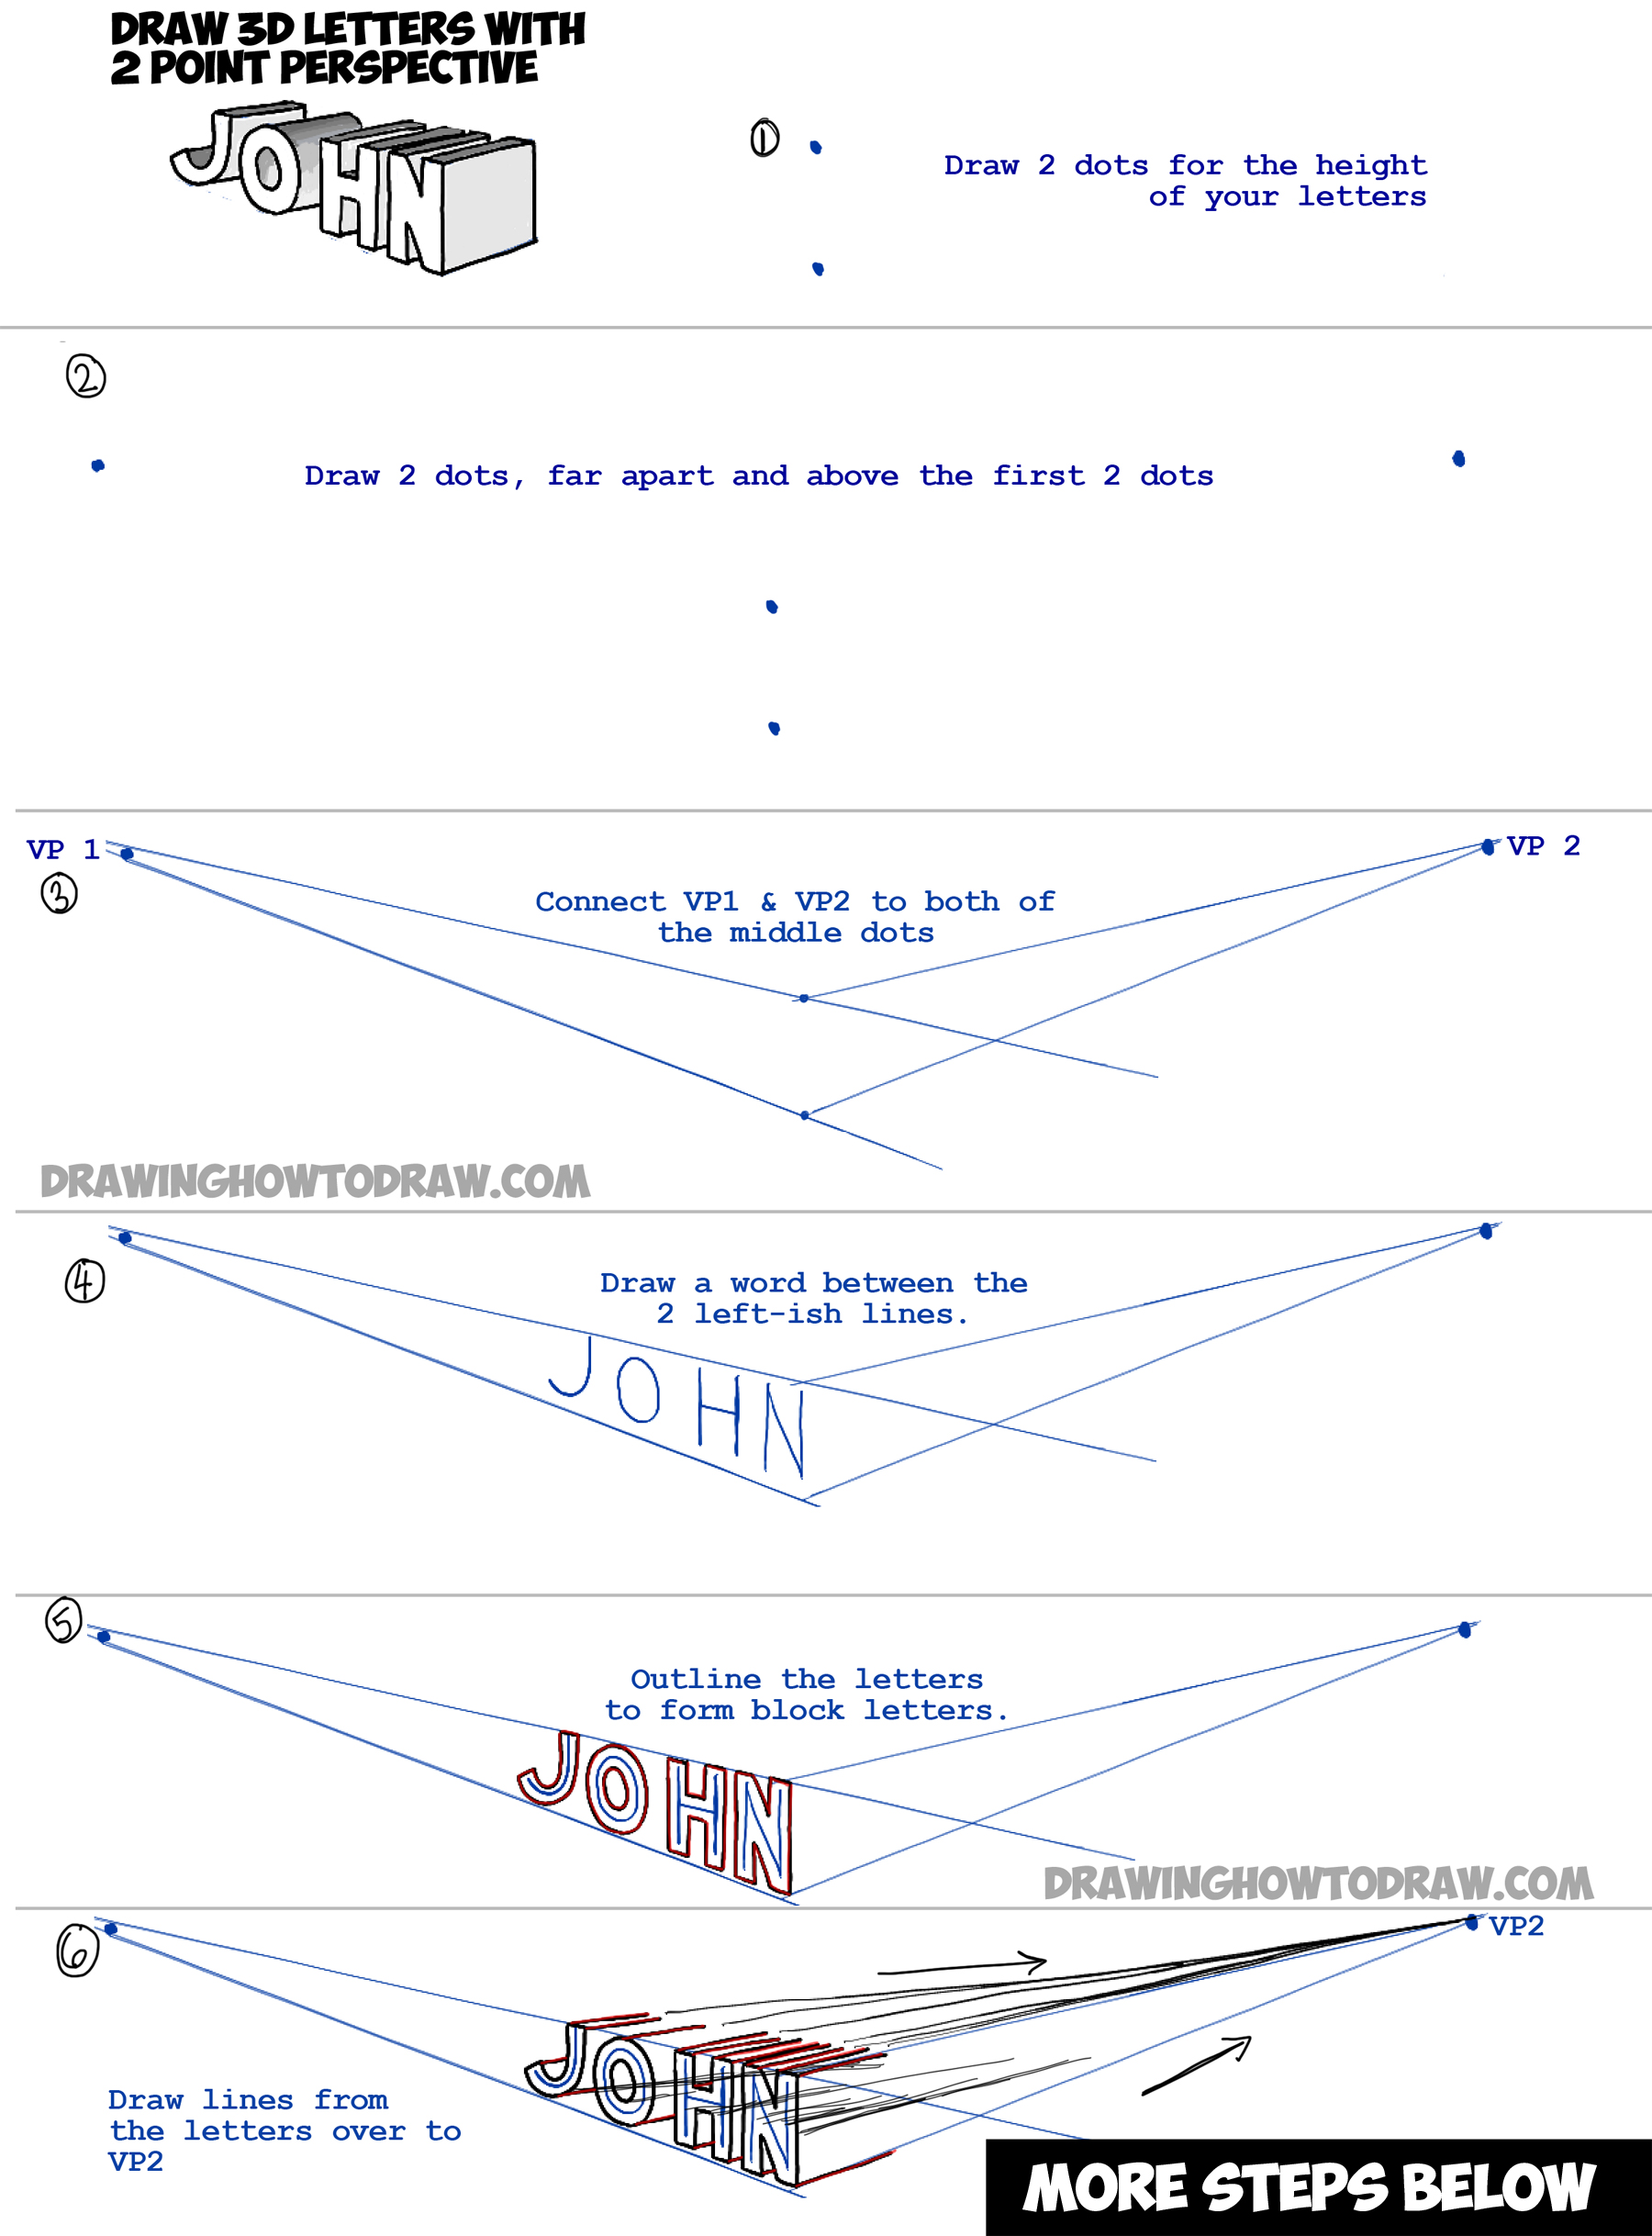
(Step 1) Start off by lightly drawing 2 dots, one on top of the other.
(Step 2) Then draw 2 dots, above, the first 2 dots, and all the way on both edges of the paper.
(Step 3) The 2 last dots that you drew are called vanishing points.
****A vanishing point is the point at which something that has been growing smaller or increasingly faint disappears altogether. So, for example, when you look down a street, with the sidewalks on both ends….eventually both sidewalks and the street look like they all converge together at the end. This would be the vanishing point. We use the vanishing point in perspective drawing to create the illusion of depth on a flat piece of paper.
Now draw lines from the 2 middle points to each of the vanishing points. In all, there should be 4 lines.
(Step 4) Now lightly write a word (I used John, but you can write any word) in between the 2 left lines.
(Step 5) Outline the word to form block letters.
(Step 6) Now use a ruler or straight edge to draw lines from the word to vp2 (the vanishing point on the right).
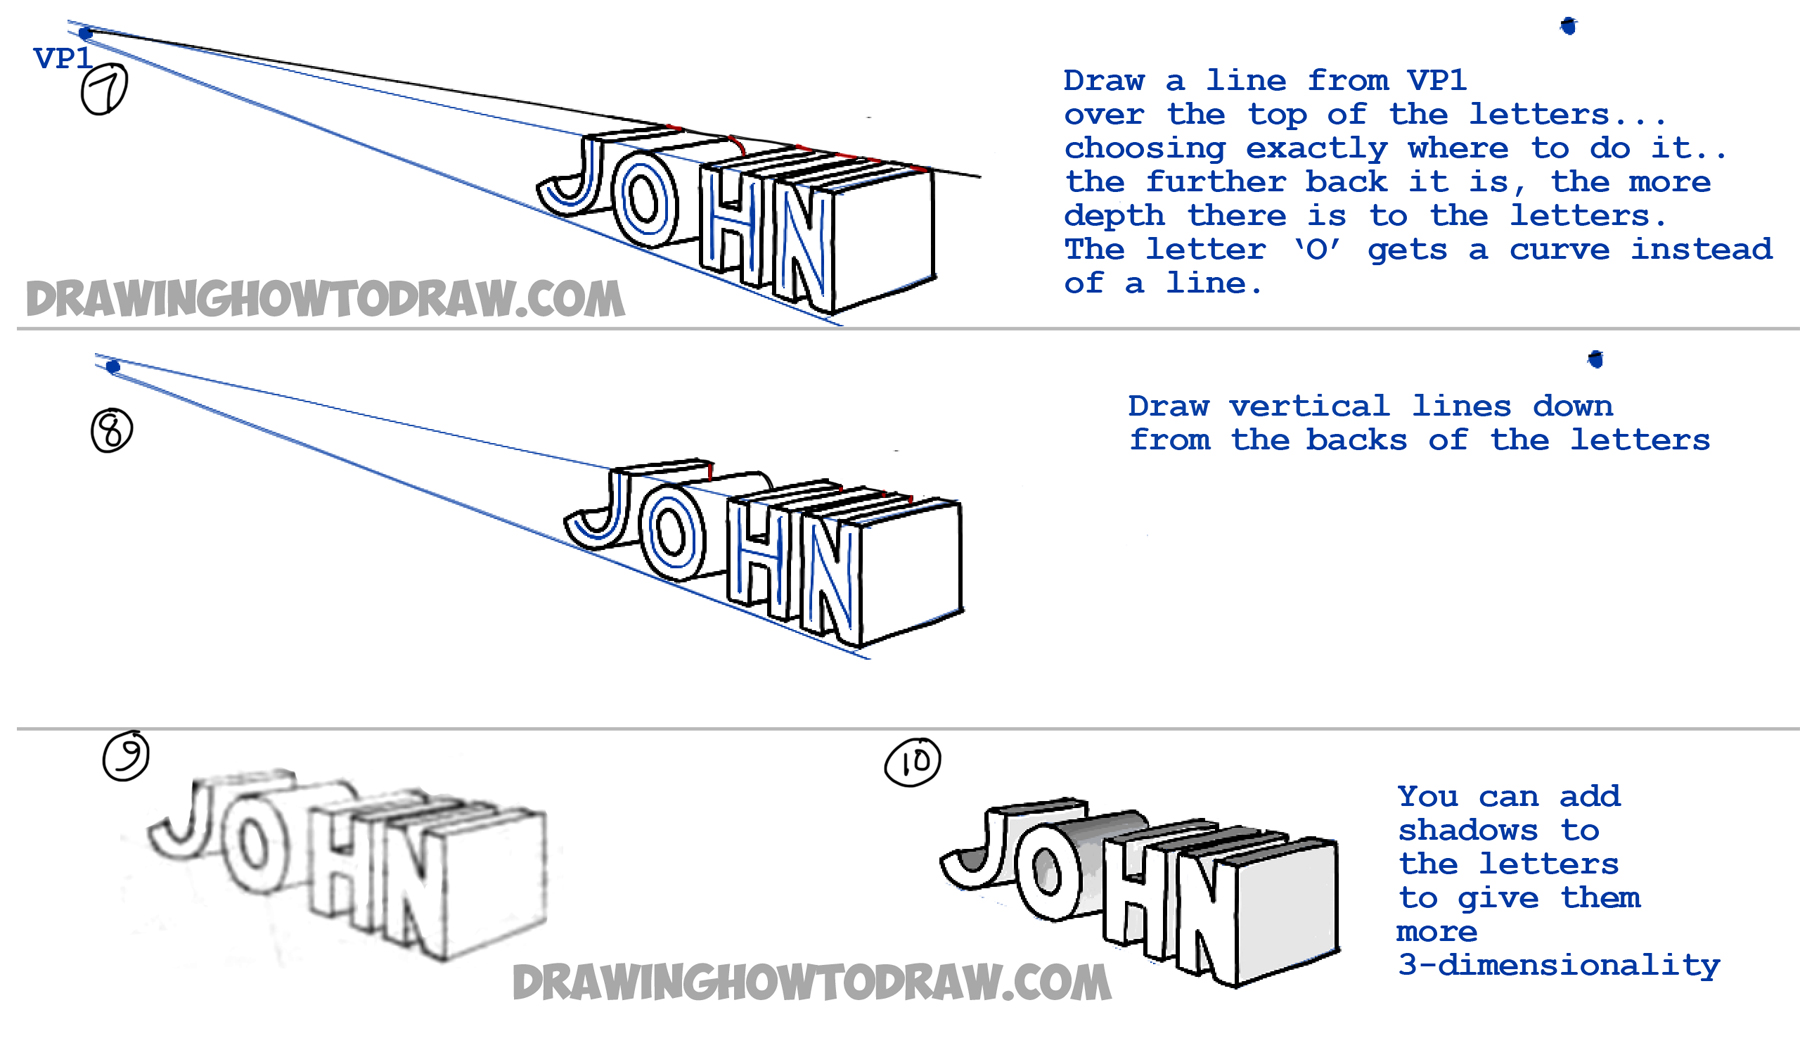
(Step 7) Now draw a line from the left vanishing point (vp1) across the top of the letters….you can make it as high or low as you want it (as long as it is above the block letters). The higher the line is, the more depth the letter will have. Erase lines that are above this line.
(Step 8) Erase Draw lines down in between the letters. Most of the lines are vertical, but if you have an ‘O’, ‘R’, ‘G’, ‘P’, ‘S’, ‘C’, or ‘B’, you will need to draw a curved line, like I did with the ‘O’.
(Step 9) You now have a 3 dimensional word.
(Step 10) If you want to, go ahead and add shading to add even more depth to the word.
You Might Also Like Our Other Lettering Tutorials
Technorati Tags: 3d letters, 3-dimensional letters, 2 point perspective, two point perspective, drawing 3d letters, how to draw 3d letters, letters in perspective, letters in 2 point perspective, angular perspective
Today I'll show you how to draw Rick from the Rick and Morty cartoon tv…
Today I'll show you how to draw Morty from the Rick and Morty cartoon tv…
Today I'll show you how to draw the spunky little rabbit, Kuromi, from My Melody…
Today I'll show you how to draw this cute "bean duck" that I found on…
Today I'll show you how to draw Sosuke and Ponyo in a bubble (chibi /kawaii…
Today I'll show you how to draw a Boo from Super Mario Bros in Kawaii…
View Comments
can you do Gabe please